User Interface Overview

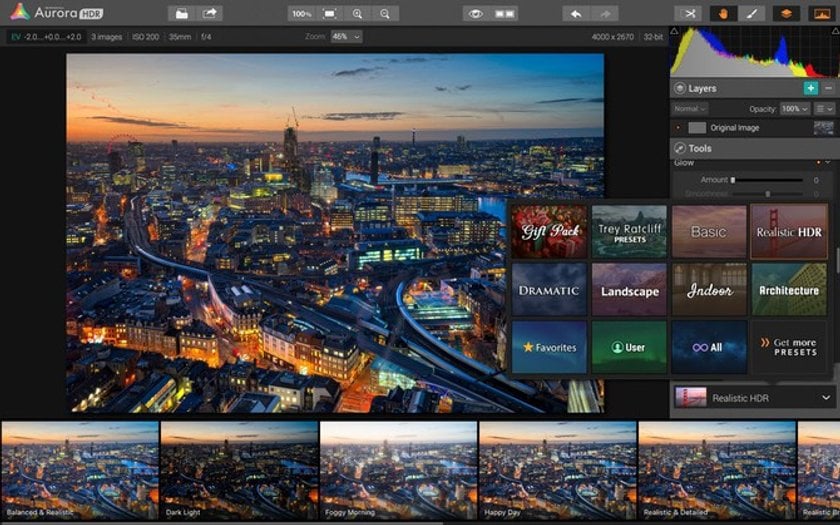
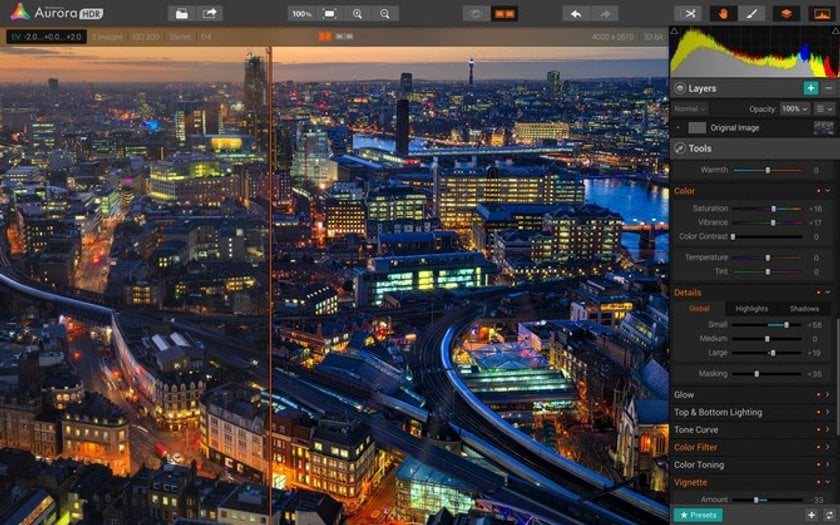
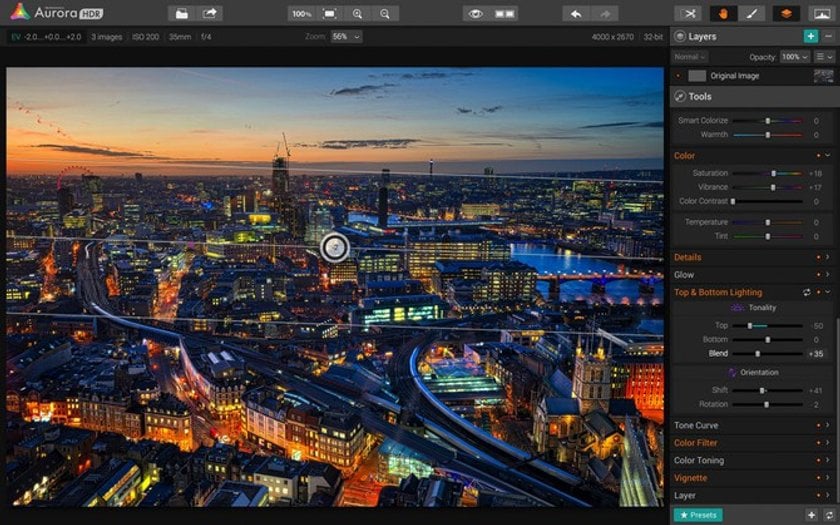
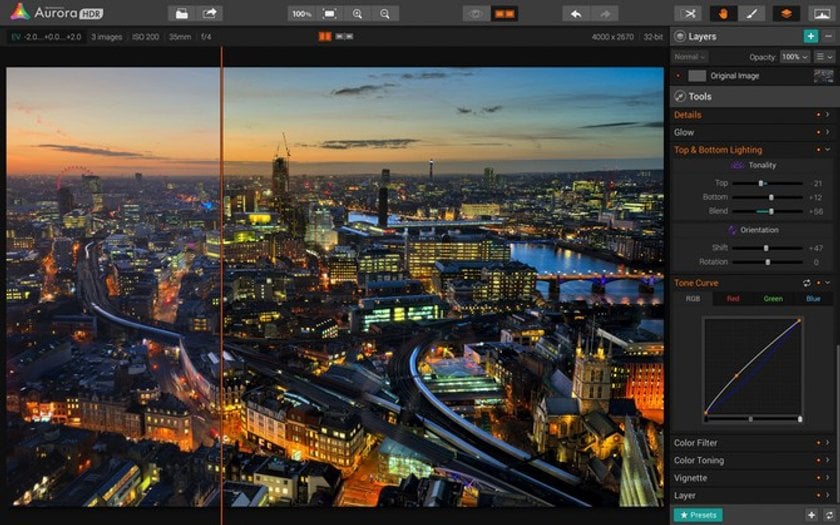
Working with Aurora HDR 2019, you’ll access controls from three primary areas.  The Top Toolbar contains general-purpose and frequently used functions of the software.  The Side Panel is located to the right of the main image display; all adjustment tools, layers and the histogram can be found here. You can also save time with the Aurora HDR Looks Panel which offers one-click Aurora HDR Looks at the bottom of the screen.

User Interface Overview

Top Toolbar

As you work with an image, the top toolbar contains many commands that you’ll frequently use. These are grouped logically for easier use.

Open Images / Batch Processing Button

The first button is a drop-down menu that controls how files are opened. You can choose to open files to process one image or bracket set, or choose the Batch option to process multiple images using similar settings. The batch feature is currently a Mac-only feature but is coming to Windows®️ soon. Click and hold down the button to choose between two options.

User Interface Overview(2)

  • Open – This choice is used to load new images for processing. The shortcut keys are Cmd+O (Mac) or Ctrl+O (PC).
  • Batch Processing – The second option opens up the Batch Processing dialog box. This is a way to process multiple images at one time. The shortcut is Cmd+B (Mac) or Ctrl+B (PC).

Zoom Buttons

These next three buttons are used for changing your view of the image size in the canvas. If you view from left to right, the buttons are the following.

User Interface Overview(3)

  • Zoom Level – Choose from several preset zoom levels or select Fit to Screen to see the entire image at once.
  • Zoom Out –  This option reduces the  view size of the displayed image. The shortcut keys are Cmd+- (minus) (Mac) or Ctrl+- (minus) (PC). You can see the current zoom level at the bottom of the canvas.
  • Zoom In – This option increases the  view size of the displayed image. The shortcut keys are Cmd+= (equals sign).  (Mac) or Ctrl+= (equals sign) (PC).

__________________________________________________
TIP

You can also use keyboard shortcuts to control  the display of an image on-screen.  To view an image at its original size, press Cmd+1 (Mac) or Ctrl+1 (PC).  This sets the image to a 100% magnification showing the pixels in actual size.  To see the entire image in the canvas at once, try the Fit to Screen command.  Press Cmd+0 (Mac) or Ctrl+0 (PC) to automatically scale a photo to fit the canvas.
__________________________________________________

Comparison Buttons

These buttons allow you to compare your enhanced image with the original default image, so you can easily compare how your enhancements change the original image.

User Interface Overview(4)

  • Quick Preview – The eyeball icon can quickly toggle between the original image and the current version.  Another way to see this change is to use the keyboard shortcut \ (backslash).  This allows you to quickly compare the current image with the original. This is the fastest and most convenient mode of comparison.
  • Compare Button – This button activates a comparison where the image is divided by a vertical strip or “curtain”. The original image (Before) is displayed on the left, and the current result (After) is on the right. This vertical strip can be dragged left or right, so you can view the differences in the picture. Another way to see this view is to use the keyboard shortcut ; (semicolon).  

Undo / History Buttons

The next two buttons control the Undo command as well as let you view an image’s history.  These two buttons give you complete control over reverting to an earlier state of an image.

User Interface Overview(5)


  • Undo – The Undo Button (left arrow) cancels the last action (for example, changing the slider). You can hold down the Option/Alt key and click the Undo button to revert an image to its original state.
  • History Panel – The History panel will quickly become an essential part of your workflow. It’s here that Aurora HDR 2019 keeps a list of what you have done to the image since you opened it. There are multiple undos which provide an easy way to go back in time.  

Simply click an earlier  History State to revert the photo back to that state..  History states are also saved with an image when you store it in the native Aurora HDR 2019 (.mpaur2) file format.  This allows for a nondestructive editing workflow and let’s you revert to an earlier version of the image. Saving the history with your document preserves future editing and undos, but can increase the file size.
    User Interface Overview(6)
    User Interface Overview(7)

Crop Button

The next button activates the crop tool.  This makes it easy to change the composition of your image as well as a viewer’s perception of an image. You can choose to tighten the area of interest which allows you to de-emphasize (or even eliminate) parts of a photo and improve the image by better framing the subject. An additional benefit is that the crop tool can also be used to align (straighten) the horizon in an image it is not horizontal. We’ll discuss cropping again in a later chapter.

User Interface Overview(8)

View Aurora HDR Looks Panel/Side Panel Buttons

The next two buttons affect which controls are visible.  You can choose to hide options like the Preset Panel and Side Panel to make a larger preview image.

User Interface Overview(9)

  • Show/Hide Aurora HDR Looks Panel – The Preset Panel on the bottom of the Aurora HDR 2019 workspace is where you’ll find all of your Aurora HDR Looks.  These include those created by the Aurora HDR 2019 team as well as your own custom Aurora HDR Looks.  To hide the Preset Panel, just click the button to toggle visibility or press the Tab key to hide both the Side and Aurora HDR Looks Panels.
  • Show/Hide Side Panel – The Side Panel on the right side of the Aurora HDR 2019 workspace is where you’ll find the Histogram, Layers, and Filters controls.  This area is a fixed width and is always displayed on the right.  To hide the Side Panel, just click the button to toggle visibility or press the Tab key to hide both the Side and Preset Panels.


Share/Export Button

The last button in the top Toolbar is used to export an image from the application and save it as a graphic file. The same image can also be shared with other editing software from Skylum (and others) or shared via email.

User Interface Overview(10)

Side Panel

The Side panel gives you access to three important sets of controls.  The Histogram is a useful tool for judging exposure and details. Layers lets you work with multiple objects to create a composite image or to isolate effects or textures to their own place.  The Filters section gives you precise control over each filter applied to a layer.

User Interface Overview(11)

Histogram /Layers / Info Buttons

At the top of the side panel are three buttons that provide advanced controls over your images.  If you are just getting started with Aurora HDR 2019, you might leave these three options inactive.  However, as you grow more comfortable with editing tasks or are looking for maximum flexibility  and control, be sure to explore them.

Histogram

While color correcting or adjusting exposure, the histogram can be a great help. A histogram is a graphical representation of the tonal values of your image. This graph illustrates how the pixels in the image are distributed across brightness levels. In other words, it shows the amount of tones of a particular brightness found in your photograph, ranging from black (0% brightness) to white (100% brightness). Ideally, well balanced images will have tonal values across the entire range of the histogram.

User Interface Overview(12)

To read a histogram, start at the left edge, which shows the shadow regions. The middle shows the midtones (where most adjustments to an image are made), and to the right are the highlights.  

The histogram is able to displays Red, Green and Blue channels separately or by default shows all of them at once.  Click on the Histogram to switch between seeing a composite Histogram or just viewing details about the Red, Green, and Blue channels (which can be useful for spotting tint issues and color casts). You can also see a grayscale average for luminance.

User Interface Overview(13)

Additionally, clicking the two small triangles in the upper left  and upper right corners will show cold and hot pixels respectively.  These are pixels that have shifted or exposed to become absolutely black or white pixels.  This is generally undesirable as it causes a loss of detail.

User Interface Overview(14)

  • Cold Pixels – To enable or disable the display mode of absolutely black pixels, click the triangle on the left and the histogram is clipped on the left side. Absolutely black pixels will be displayed in bright blue in the image.  Cold pixels (in blue) indicate areas where black has achieved maximum concentration (a zero value).
  • Hot Pixels –  Clicking the triangle on the upper right will show where your image is completely white, where the histogram is clipped on the right side. Absolutely white pixels are displayed in red.

In both cases this can be problematic (especially for printing) as there is too much ink coverage for cold pixels and no details at all in the hot pixels.  These indicators are a sign that you should adjust the exposure of the image. You may want to leave the Histogram panel open as you work, because it is an easy way to learn to read the graphical details of a digital image.

__________________________________________________
NOTE

The use of the HDR Basic filter is an excellent way to take control of the Black and White points as well as the Shadows and Highlights of an image.  We’ll explore filters more in later chapters. Pressing the J key will also toggle the clipping indicators On or Off if you want to see the pixels underneath.
__________________________________________________

Layers

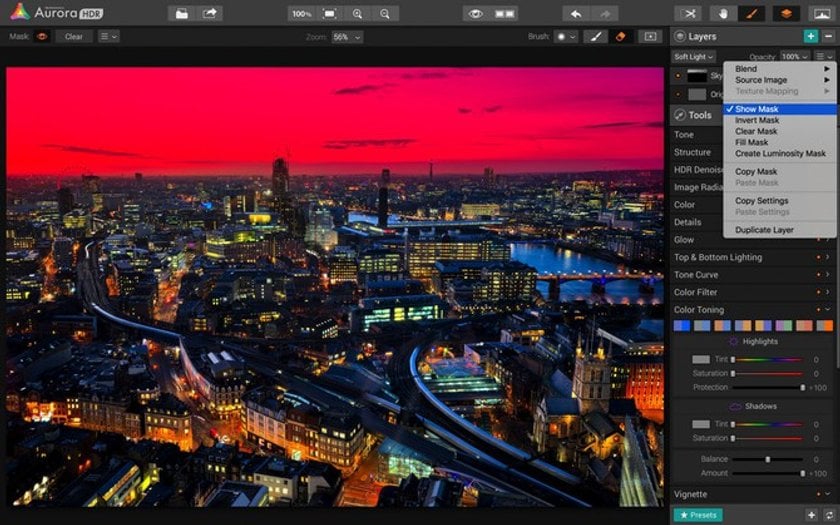
Layers are a powerful way to “build up” your images with different enhancements and use of blending modes and masks on each layer. Using layers, you can apply corrections or enhancements on different layers and experiment until you achieve exactly the look you’d like for your image.

  • To create a new layer, click the + button in the Layers Toolbar header.  A small pop-up menu will appear giving you the option of creating a layer using one of three options.
    User Interface Overview(15)
    • Use an Adjustment Layer to create a layer to which you can apply a Look or any other adjustment in the Filters panel.
    • The Add New Image option will show a standard Open File dialog, allowing you to create a new layer with a texture file or another image that you’ve chosen.
    • Use the Add New Original Image option to place a copy of the merged HDR image onto the layer.  This can be useful for masking in areas or blending two copies of an image together.
  • To remove the layer, select the layer and click — in the Layers Toolbar.
  • To change the blending mode of the layer, set the Layer Blending mode in the drop-down list, (under the word Layers) or in the fly-out menu indicated by the Gear icon (underneath the + icon). You cannot set the blending mode for the first layer because it is not mixed with anything - it is the baseline image. See more on blending modes in the chapter “Working with Layers.”
  • Layer Transparency Setting Click the drop-down menu with percentages near the word Opacity. Drag the slider to customize the opacity for the selected layer.  Opacity controls how opaque a layer is (and is the opposite of transparency).
  • Access Advanced Settings and Functions of a Layer. Click on the Gear icon (below the + icon). A context menu appears with additional features to apply to the layer.
  • Change the Order of Layers. All layers (except the first) are movable. Click and drag a layer to move it to a new location.  Changing the stacking order of layers can affect the order of operations, (how images are developed) which can change its appearance.
  • Show / Hide the Layer. Click the Visibility (eyeball) icon on the left side of a layer to toggle it between visible and hidden.

You’ll learn more about layers in the chapter “Working with Layers.”

INFO

The Info Bar provides basic information about the file and can help you better understand your HDR image, as well as the zoom percentage. This information is divided into several sections and displays the following information (from left to right):

User Interface Overview(16)

  • Resolution The current resolution of the image in pixels.
  • Bit Depth Aurora HDR 2019 operates in 32-bit per pixel mode to provide the highest image quality when working with bracketed sets. Single images are opened in 16-bit mode.
  • Exposure Value The indicator of the current HDR dynamic range. This indicator shows the exposure value (“EV”) of the darkest bracket, then the EV of the middle bracket and finally the EV of the brightest bracket, each separated by an ellipses.
  • Bracket Count The number of images used for the assembly of the HDR.
  • ISO The ISO setting used for the images when captured.
  • Focal Length The focal length of the lens used when shooting.
  • Aperture The ƒ-stop used on the lens when the images were captured by the camera.

Transform & Lens Correction

Aurora HDR 2019 offers powerful corrections to adjust the shape of your photo. There are many reasons why an image can show distortion including the type of lens used and the position of the camera versus the subject.  Compensating for these issues makes it easier to quickly straighten images and remove distractions caused by perspective issues or camera position.

Transform Tool You can easily scale, rotate and shift your image to better fit your vision.  This gives you full control over the position of your photo or any texture layer.
Lens Correction Tool The Lens Correction tool easily fixes all kinds of lens distortion, from barrel and pincushion to chromatic aberration and vignetting.  This can help compensate or totally remove the visual artifacts caused by your lens.

You’ll learn more about the Transform and Lens Correction adjustments in the chapter “Crop & Transform a Photo.”

Filters

Filters are how you can adjust the exposure, color, contrast, and style of your image in Aurora HDR 2019.  The proper use of filters can significantly improve your image.  Each filter is designed to solve specific problems or enhance an image in a particular way. The Filters section of the Side panel contains 15 control groups which allow you to achieve the best possible image results. Each of the groups contain sliders and controls related to the filter.

User Interface Overview(17)

Aurora HDR 2019 contains the following filters:

  • HDR Basic — General settings related to the Tone Mapping and compression of the image for the original image layer
  • Color — Color settings such as saturation, temperature and tint
  • HDR Enhance — Adjusts the clarity, structure and micro-contrast of the image, leading to a more “crisp” result
  • HDR Denoise — Reduces noise and artifacts in the image created by the HDR image merge process, as well as making the overall image smoother
  • LUT Mapping — A Lookup Table (LUT) allows you to apply preset color recipes to aesthetically adjust your image or to apply technical color calibration.
  • Image Radiance — Provides for an overall “dreamy” look to your image by softening image luminescence, and increasing contrast & saturation
  • Polarizing Filter — Provides more color depth and cuts atmospheric haze, resulting in richer, bluer skies
  • HDR Detail Boost — Increases image detail globally or in highlights and shadows.
  • Glow — Provides a glow effect to the image, primarily in highlights
  • Adjustable Gradient — Permits separate adjustments of exposure, shadows, highlights, contrast and vibrance in the upper and lower areas of the image.
  • Tone Curve — Represents the tonal range of the image along a diagonal line which can be adjusted by clicking and dragging May be adjusted globally or by RGB channels
  • HSL — Adjusts the hue, saturation and luminance of a particular color channel
  • Color Toning — Shadows and highlights color tinting for stylized visual effects.
  • Dodge & Burn — Selectively lighten or darken areas of your image with brush strokes.
  • Vignette — Provides a vignette effect for finishing images to a professional level

You’ll learn more about each filter in the chapter “Using Filters.”

Aurora HDR Looks Panel

The Aurora HDR Looks panel contains all of the one-click Aurora HDR Looks available in Aurora HDR 2019. These Aurora HDR Looks can be applied to any open image or to a new Adjustment layer.  To apply a Look, simply click on its thumbnail.  To adjust the intensity of an effect, use the Amount slider to lower the Opacity of the adjustment. We’ll explore Aurora HDR Looks in depth in the next chapter.

User Interface Overview(18)

Luminar support.

Ask on Twitter.
Email the Team.

More ways to connect

Amplify Your Images
with State-of-the-Art HDR

+ an exclusive US $300 OFF a multi-day (3+ day) Iceland Photo Tours

User Interface Overview(28)