Tips on getting the best results from your Raw files in Aurora
 © Matt Suess
In this article, we are going to take a look at using Raw files in Aurora HDR 2018 and I will provide you with some tips on getting the best results from your Raw files in Aurora.
Raw File Basics First
If you are not already photographing with your camera’s Raw file format, you definitely should be, especially with HDR photography.
By shooting JPEG’s you are losing tons of information that your camera can capture in a Raw format. The JPEG files are only 8-bit files that have been processed and compressed in-camera prior to writing the file to your memory card. An 8-bit image limits the amount of information it carries, providing you with only 256 levels of color and tone to work with per color channel. For example, an 8-bit file only supports millions of colors across all three color channels, which may seem like a lot, but often leads to banding and posterization.
 Raw files used in this article are from a Sony a7R camera
Most of today’s Raw files, on the other hand, contain 12 or 14-bits of information. A 12-bit image provides you with 4,096 levels of color and tone per channel while a 14-bit image gives you 16,384 levels of color and tone to work with per channel. This extra bit depth over an 8-bit image means that you have much more room to push and pull color and tone before negative results happen such as banding appear in your photos.
What does all of this mean?
When using Raw files you can expect much better highlight and shadow recovery, much better color control, more dynamic range, and less potential for noise which HDR processing can be sensitive to. You may even find yourself needing fewer source brackets when shooting Raw compared to JPEG with the larger dynamic range available in the Raw file.
Raw Files in Aurora HDR 2018
Aurora HDR 2018 has been fully optimized to take advantage of today’s Raw files, providing you with maximum control over all the data your camera can record at the time of capture.
And Aurora’s use of the Raw file begins right away when you start to merge your brackets.

When first merging your photos, if you click on the gear drop-down icon to the left of Alignment you will notice an option that only appears with Raw files: Color Denoise.
While it does slightly increase the processing time of the HDR merge, I highly recommend choosing to use the Color Denoise as it uses the Raw data in your files to remove some color noise that might be available in your photo.
Once you have merged your brackets, your photo opens in Aurora as a 32-bit file, providing you with an amazing 4,294,967,296 levels of tone and color available to you as you process your photo.
 My photo in Aurora after the Merge and before I make any adjustments

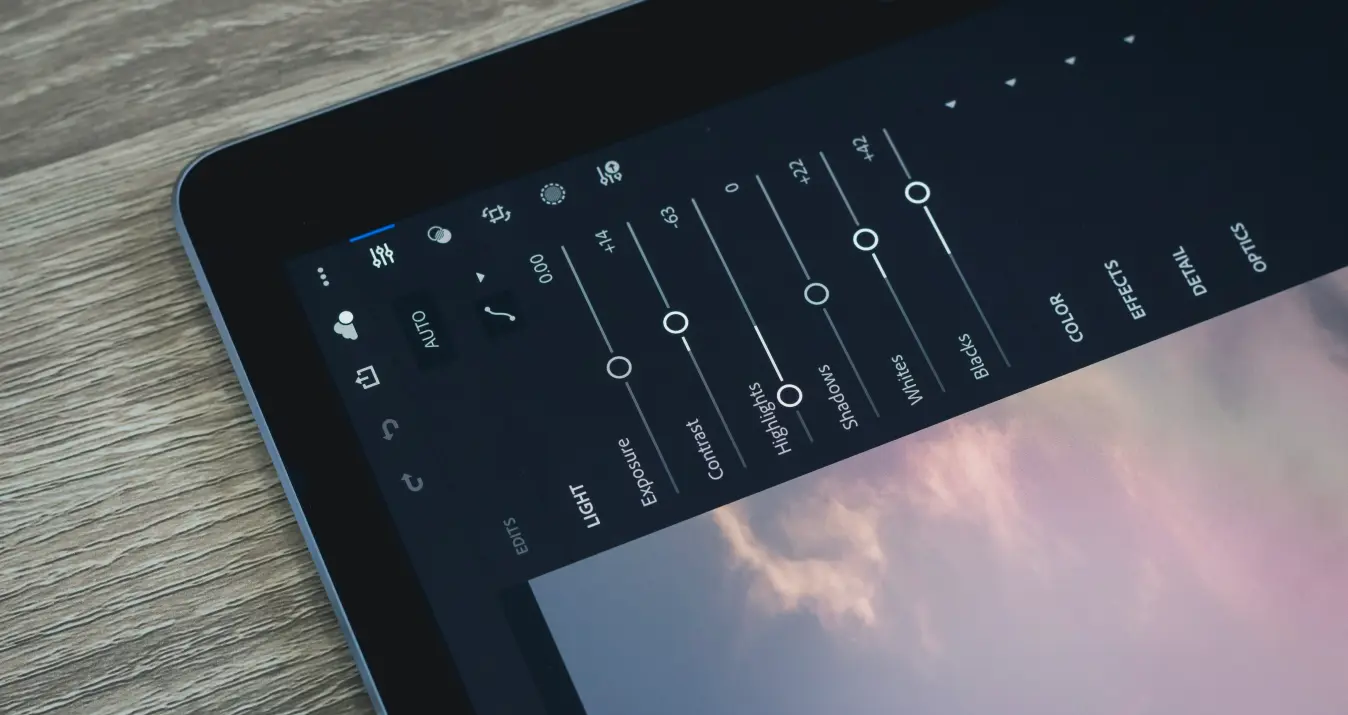
The HDR Basic Filter is the one filter in Aurora that most takes advantage of all of the data in your Raw file and it is where you should begin your post-processing.
The White Balance, Temperature, and Tint are used to adjust the overall color balance of your photo. If you paid attention to setting an accurate white balance when shooting, chances are you won’t have to make a lot of adjustments here. But if your white balance was off, these slider controls will allow you to get an accurate white balance while taking advantage of the original Raw data in your file.
I usually find I don’t have to adjust the exposure much because I am careful with my exposure settings while in the field, and you can see here in this example I made only a slight exposure adjustment to brighten the image just a little.
You will notice I did use a bit of contrast. This was because I adjusted the Shadows slider to its maximum adjustment of 100 to bring in all the detail in the shadows in my photo. When increasing the Shadows slider, it is often at the expense of contrast and you will find your photo lacking contrast, lacking punch. A contrast setting in the 20’s is not uncommon for me when coming close to maximizing the Shadows slider.
You will also note that I lowered my Highlights to -39. This was to bring back detail in the brightest areas of the sky where the HDR merge first appeared to have lost such detail. Again the benefits of shooting in Raw are in effect here too, allowing me greater highlight recovery.
I made a slight adjustment to the HDR Enhance slider. This filter does a great job with adding clarity to your photo, but you do have to pay attention when using it. If you are too aggressive with it, it can create halos in your photo that can often be easily seen in skies.
 Halos from moving the HDR Enhance slider to 100
If you find halos in your photo, a good place to start looking is in your use of the HDR Enhance slider. Note the halo, the dark blue sky, just around the clouds in the above example where I brought the HDR Enhance slider up to 100.
I used the Smart Tone to help with the overall tone of this photo. Increasing it to 22 helped bring up more shadow detail than what I was able to do alone with the Shadows slider.
You can see that I didn’t need to adjust the Whites in my photo but I did increase the Blacks slider just a little to help out with the overall contrast and black point so the photo wouldn’t be so flat.
Color Filter

Once I have my overall color balance and tonal adjustments set, I move on to the Color Filter. Saturation is a slider I usually don’t use too much in Aurora HDR as it can be a little too intense. I prefer the more subtle Vibrance slider to improve the color, and giving the Color Contrast slider a little nudge can also help color saturation and contrast throughout the photo.
Top & Bottom Tuning Filter
Lastly, for this photo I used the Top & Bottom Tuning Filter to further bring out shadow detail throughout the bottom portion of my photo that happened to be in shade when I photographed it.

You can see that I had to be fairly aggressive with the Exposure slider to fully brighten the image, and adding contrast helped to remove the flatness that appeared after the Exposure slider was adjusted. I gave the photo some warmth too because the entire bottom of this photo was photographed in the shade which has a cooler color balance than areas in the sun.
Saving Your Progress
If you want to save your progress, choose File/Save… and you can save your file in a proprietary .mpaur2 file format. Be sure to also select the checkbox “Save Original Resources to Document”. By doing that, your original Raw files will be saved with the document, allowing you to move the file from computer to computer. All edits, masks, slider adjustments, history, and original files will be there for you when you re-open the photo as if you never left.

Final Comments and Conclusion
The workflow I outlined above is typical when using Raw files in Aurora HDR 2018.

As you can see in the above screenshot my photo is now at the stage where I could consider it done or I may feel that I need to make some more creative enhancements with stylizing filters such as Image Radiance. I may also find I need to use adjustment layers and masking to make localized adjustments to the details in the photo. I could even use a new HDR Bracket Layer to bring back one of the original Rawfiles onto a new layer if I needed it to fix any blown out highlights for example.
But all of those adjustments could be the topic of another blog post....
So for now, try the steps I outlined here to your own Raw files. If you are ambitious try doing the same adjustments to a JPEG bracket and compare the results to the Raw brackets. I am sure you will notice anywhere from a slight improvement to a very noticeable improvement with the Raw files with better dynamic range, better color & tones, and less noise.