While most of us are currently staying home, after everything around home has been cleaned up, and you’ve done your daily tasks, it might be the perfect time to sit in front of your screen, dig into your archives, and find a few of these forgotten shots.
So what are we looking for? There might be a few of these travel photos from a trip you wanted to edit but got too busy with life on return from the trip. Or some family photos that need retouching. Because we’ll be using some of the newest tools in Luminar 4, it will be easier than ever to revisit these and give them a nice touch up. Let’s get started.
Step 1: If you aren’t using Luminar yet (it’s okay to use any other photo editing software, just follow along), download a free trial to get started.
In Luminar, you’d want to click the top menu bar and select File > Add Folder with Images, and point to your archive of photos. Here’s what mine looks like. I’ve got over 170,000 images on hard drive, and earliest I have on that drive are dated 2016:
Instead of going all the way back, I’ll go and select 2017. Seems far enough to pick something from archives that I have missed before. So I’ve identified a few nice photos, and decided to give them a few stars, by tapping on the keyboard — from 1 to 5. I gave 3 stars.
Normally I would start with 1 star, and as I make subsequent selections might “upgrade” photos to 2 or 3 stars. 4 and 5 stars, in my style of photo management, are reserved to already edited photos, although that’s not necessary, because you can choose “Recently Edited” Shortcut in a Library view.
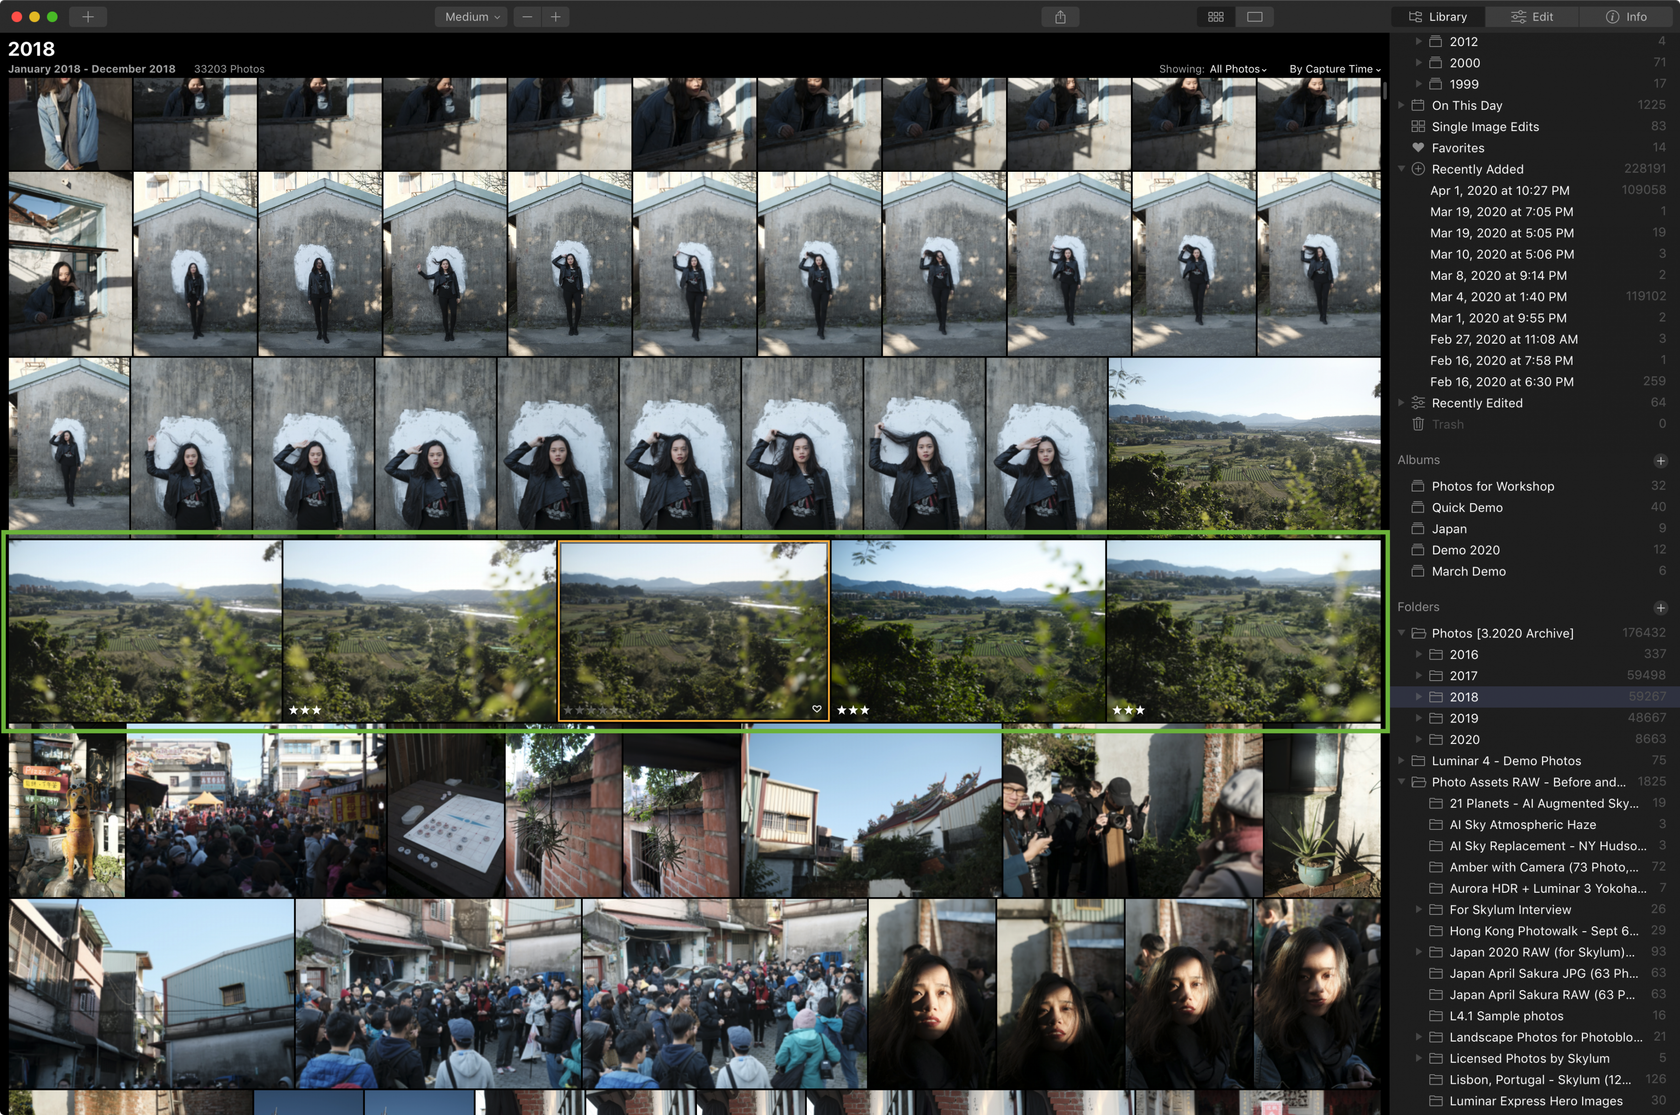
Here’s my selection, a RAW file from Fujifilm X-T2, shot outside of Taipei, Taiwan.

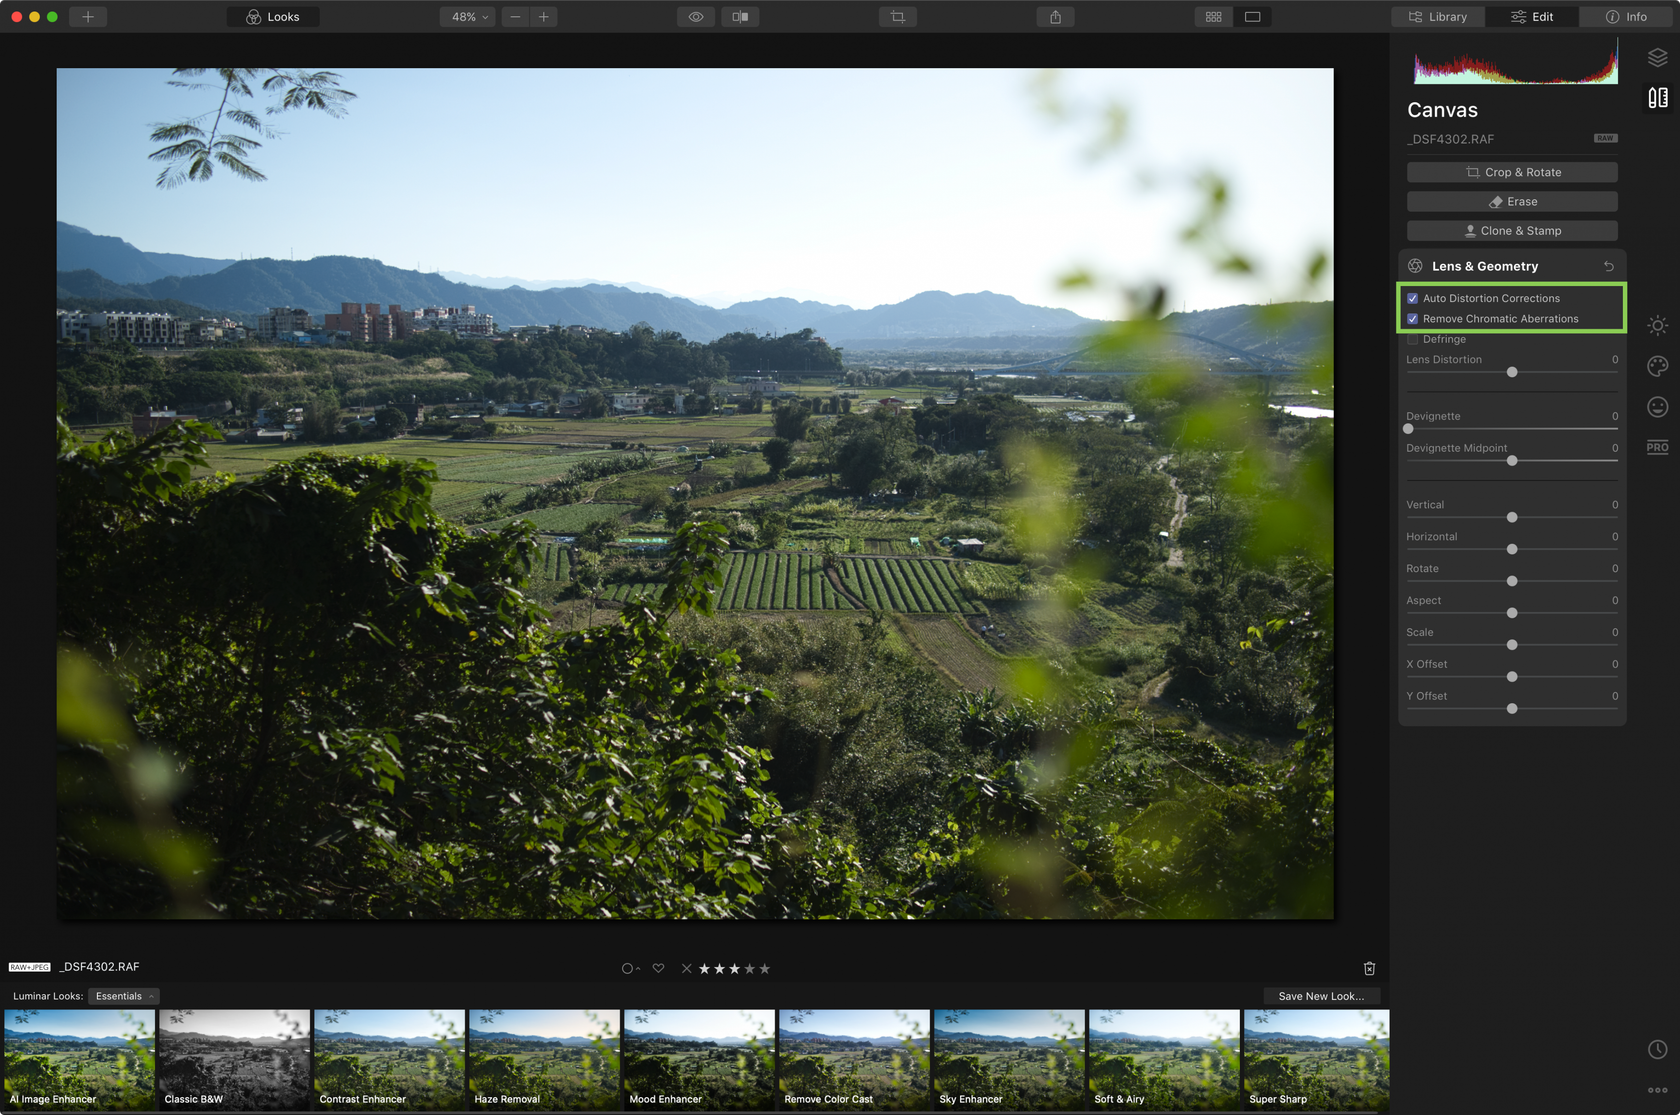
Step 2: I’ll head to Canvas and Lens & Geometry, to just correct for the aberrations. I like to shoot with a wider aperture, such as f/1.4 and often at a wide angle, so corrections would be nice to have.
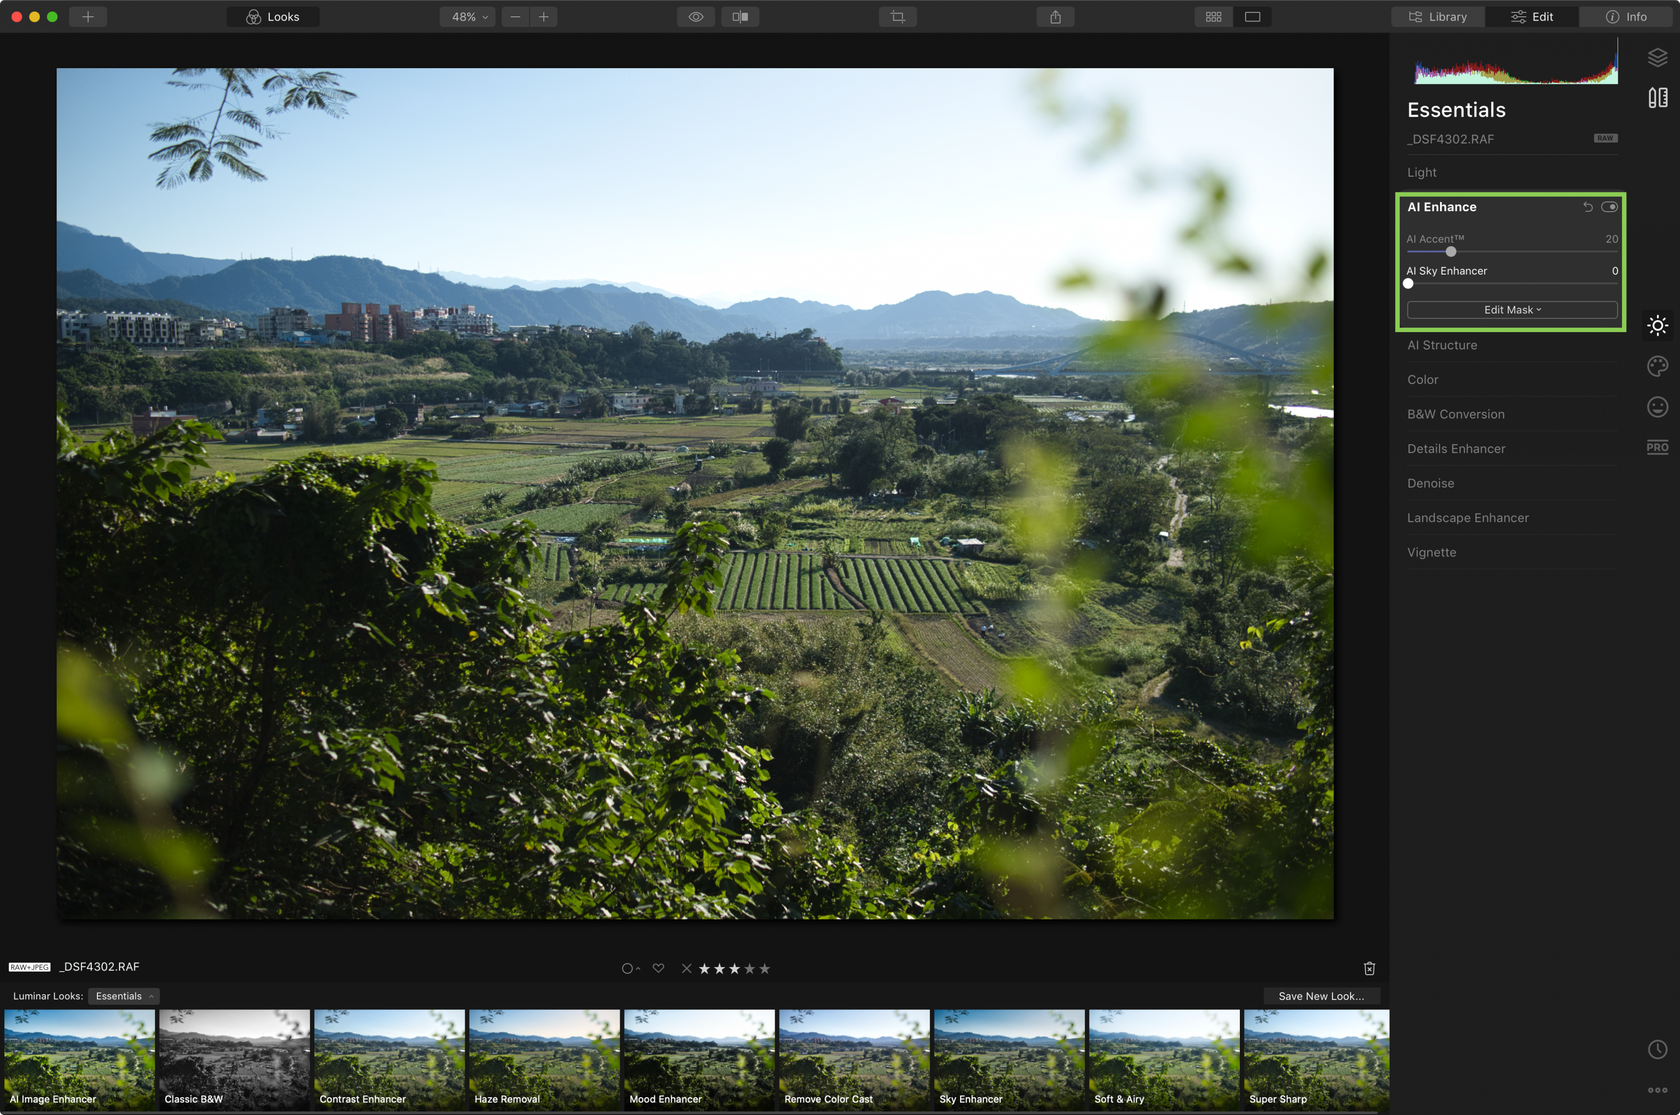
Step 3: a little bit of AI Accent. I’ll correct for the green color in the end when I’ll add some stylish effect to the photo. AI Accent automatically corrects multiple issues — light, contrast, and so on, so it’s a smart technology to start an edit with.
Step 4: Finally, here’s where the fun begins. When I shot this, there were no technologies such as AI Sky Replacement, so it’s nice to bring life back to a photo this way! When I selected Blue Sky 6, it required a few adjustments to get it right. Note the leaves that were extremely out of focus are gone, but I wanted to find a good balance to ensure sky is looking natural.

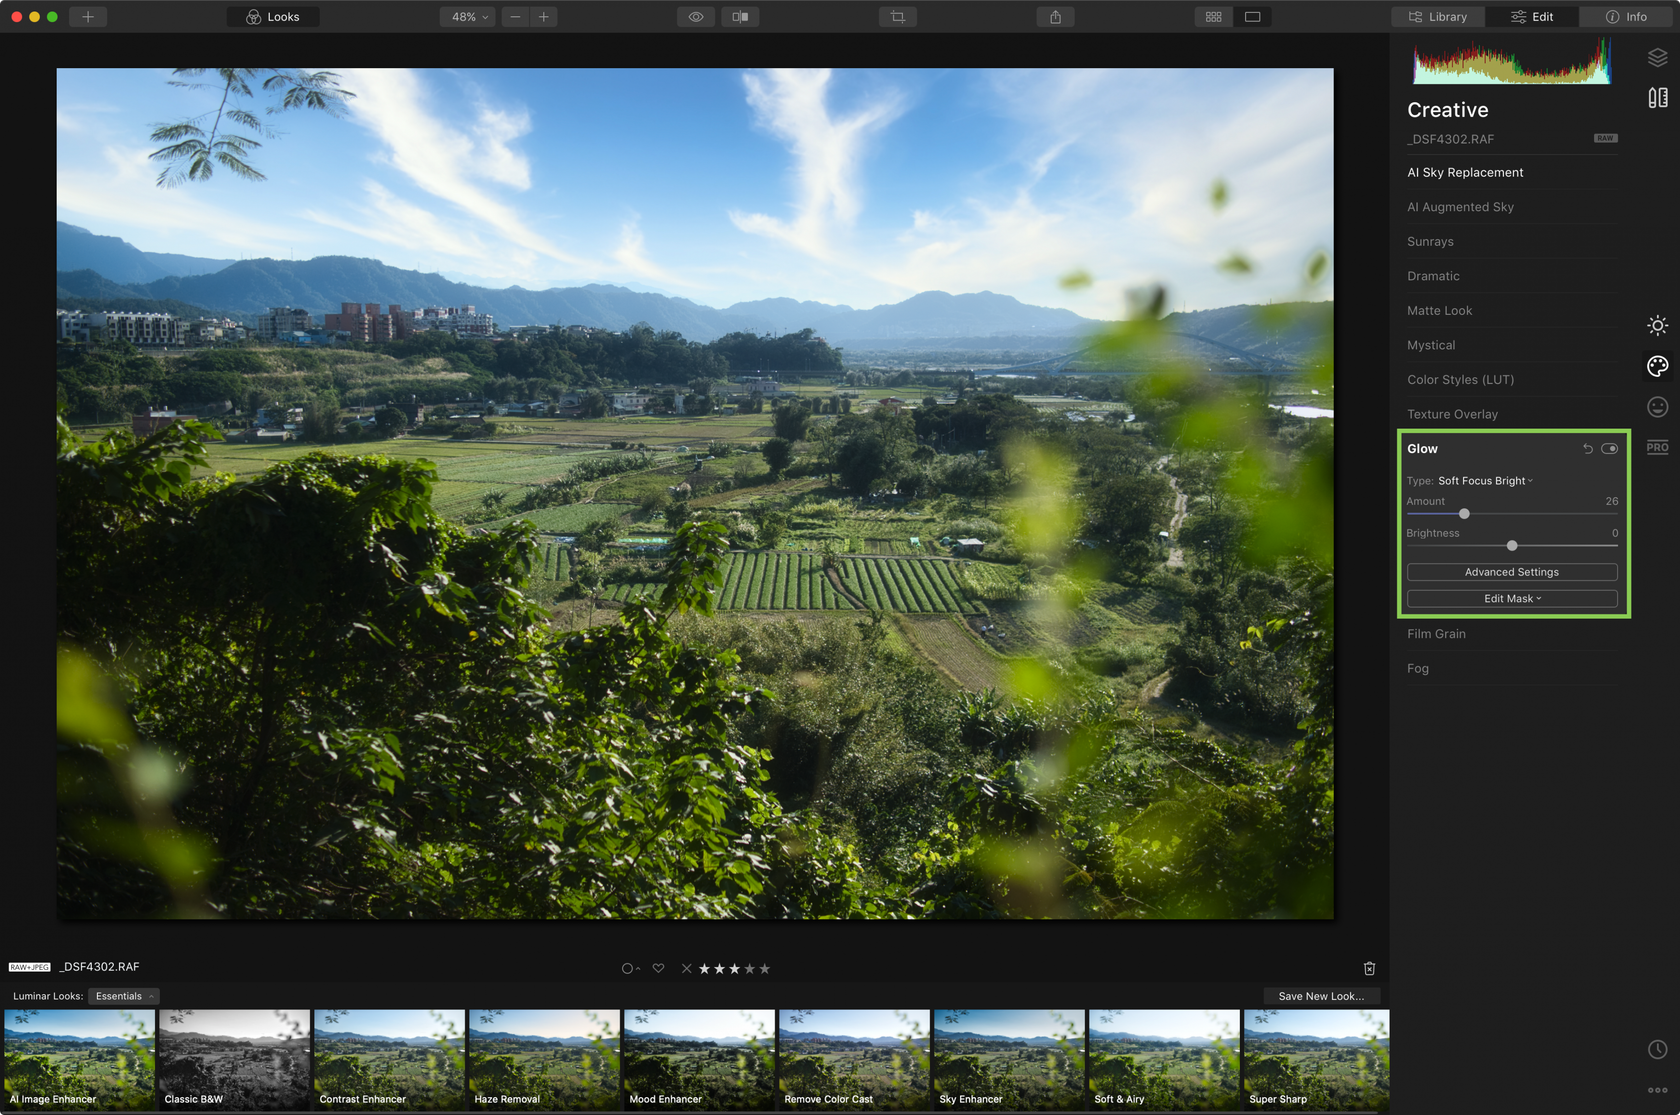
Step 5: Now, I aim to make a slightly more dramatic edit so I need a few more tools to make it happen. I’ll use Glow, Color, and finally Texture Overlay to get it right. First, adding glow.
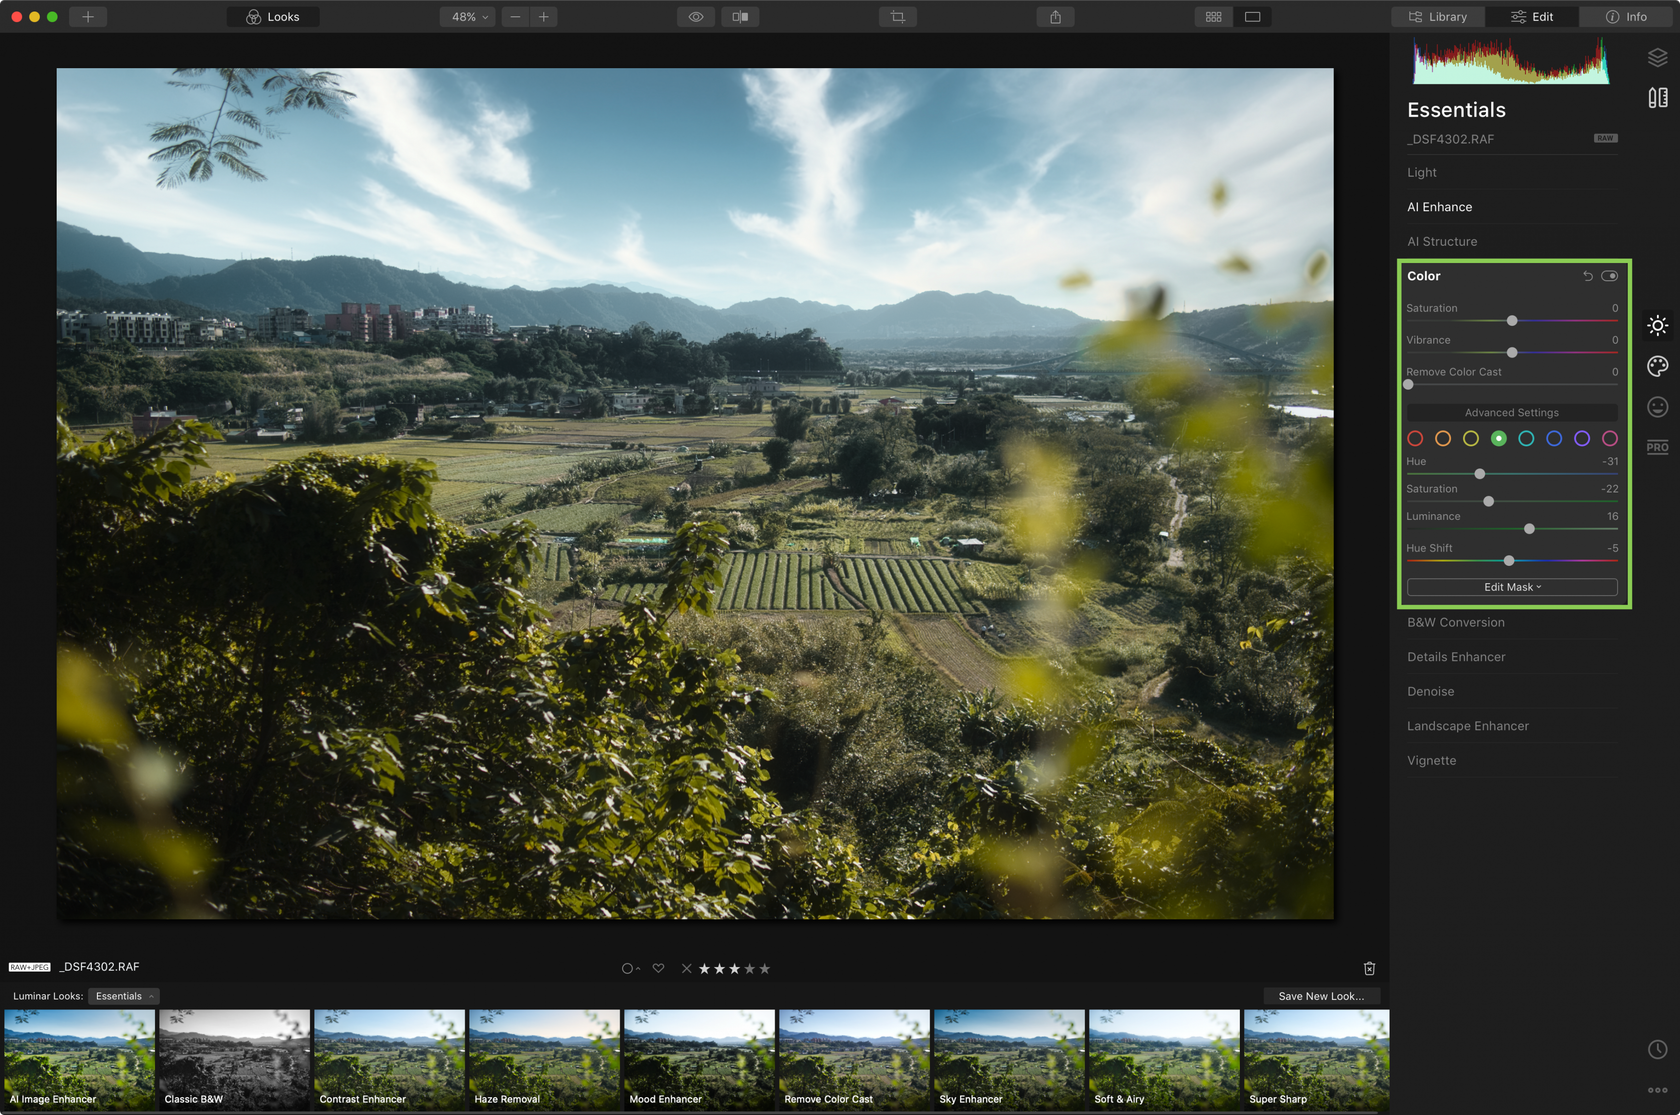
Step 6: Shifting a few colors: changing Hue, Saturation, Luminance for green and blue, I’m able to achieve a more warm look I am going for. I actually really do like Hue Shift, which shifts hue for the whole image, and just nudge it a little for extra effect.
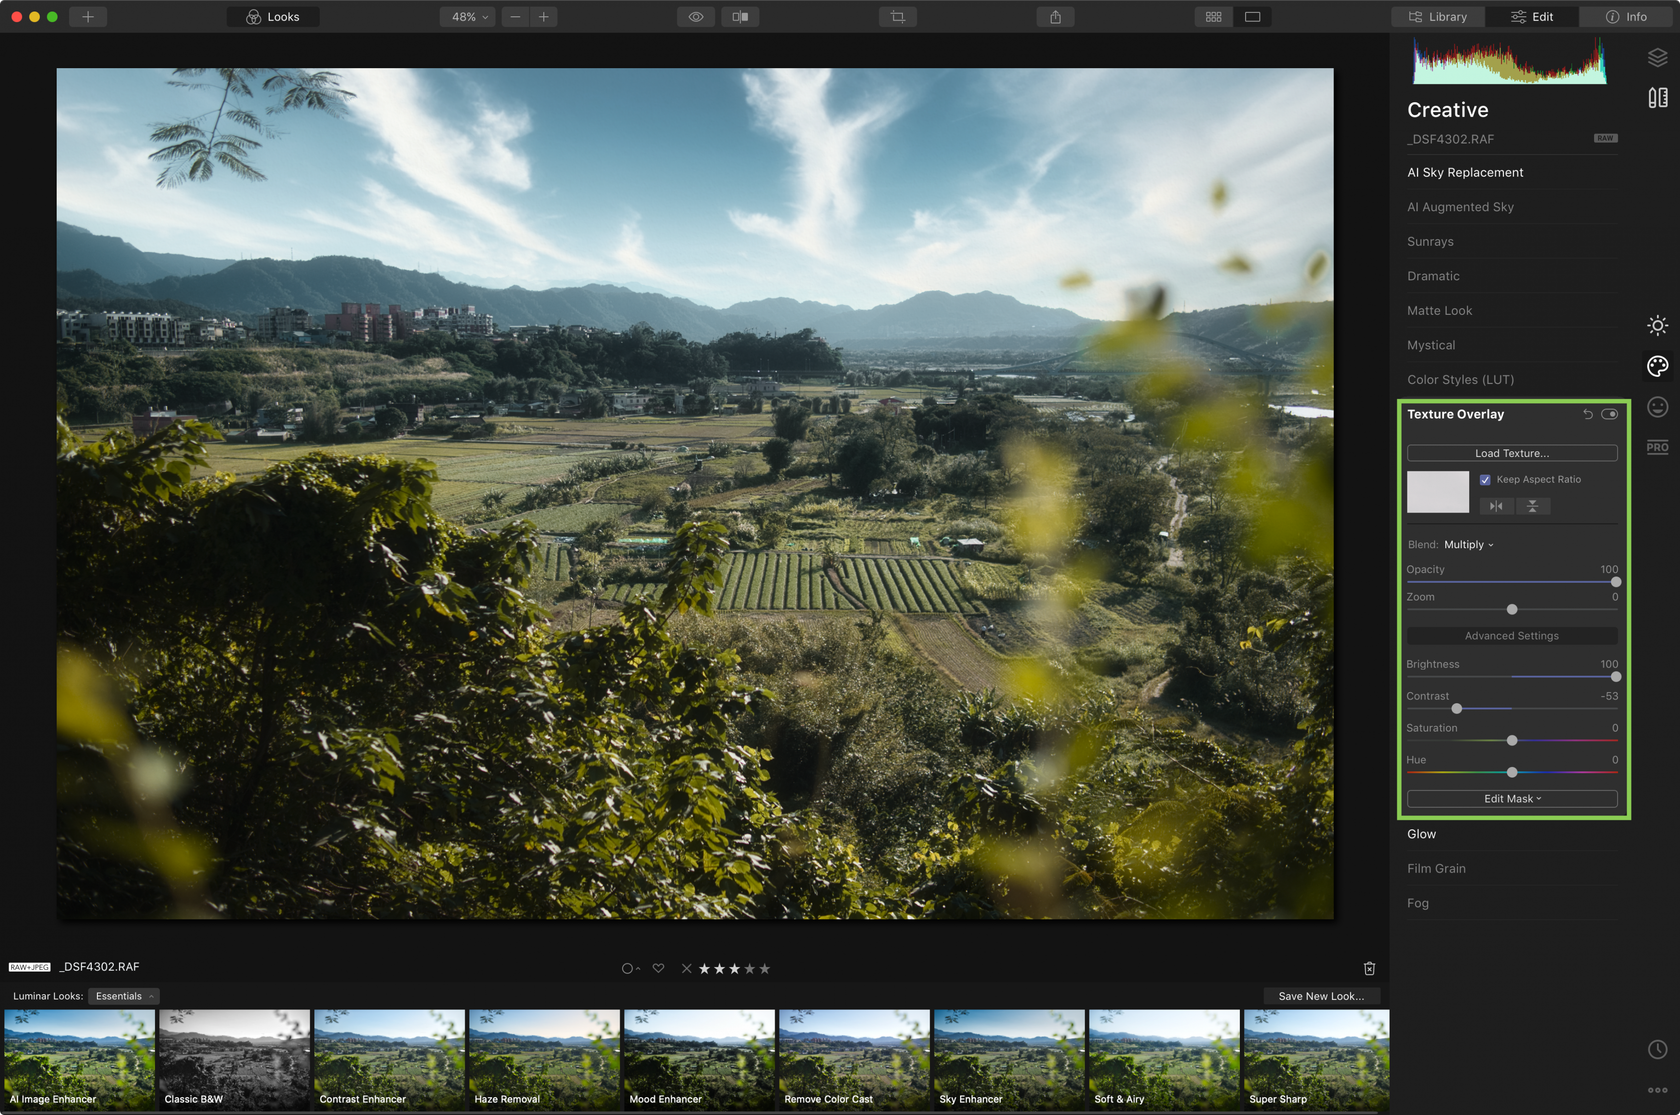
Step 7: And finally in Texture Overlay, I got a photo of a white wall from Pexels Textures pack named “Background - Lorenzo.jpg”. I had to play around with various blending modes and advanced settings. I just wanted the feeling of the texture, without it showing too prominently, so with Opacity at 100%, I also adjusted the blend mode and brightness to make sure my image isn’t changed substantially.
Looks pretty good, right? Alright, let’s add sun rays and call it a day. One of the cool tricks is actually using sun rays beyond the canvas of the photo, so it looks like a realistic sun flare. This way, it looks natural, and after I adjusted so that sun rays wouldn’t be pointy, but rather similar to what you get with an open aperture.

I think it’s nice to give a new life to photos like these. Technologies become smarter over time, so what was not possible a few years back, is possible now.
Let’s recap once again.