Do You Know All the Functions of Your Mac Photo Editor?
June 09, 2023
Editing is easy if you know the tricks. Learn how to use the built-in Mac photo editor to achieve more with your photos.
Apple’s Mac has divided people for as long as it has been around. Some people love the brand and will use nothing but Mac; others absolutely can’t stand it. However, even the opposing team reluctantly agrees that Mac computers have solid performance, especially for tasks like photo and video editing.
Have you ever wondered how to edit photos on Mac? Photo editing software varies from simple to complex and caters to different types of photographers. Think about your needs and choose a program that suits your workflow — but also an image editor Mac users recommend.
If you want to become a professional, Photoshop is probably your friend already. Lightroom is another photo editor Mac users have been using for a long time. However, the default Mac photo editor, Photos, is a built-in piece of software that many take for granted even though it’s suitable both for beginners and for anyone who needs to quickly fix their photos in an image editor Mac provides for free.
In this article, we’ll tell you exactly what you can achieve with Photos, the built-in photo editing software for Mac. If you’re looking for a level-up alternative, consider Luminar Neo, which lets you store, rate, organize, and edit photos quickly and efficiently. Click below to check out Luminar Neo and edit photos on your Mac for free during your trial period.
Advanced yet easy-to-use photo editor
Get Luminar Neo NowMac photo editor tools
What features should a photo editor for Mac have? Let’s look at the Photos image editor and analyze its tools one by one. Let’s delve into how you can access and utilize these tools:
Click on the Photos icon in your Dock or Applications folder to launch the app.
Browse through your library and click on the image you want to edit.
Click on the “Edit” button located in the top-right corner of the screen.
Viewing and storing tools
For Mac users, Photos is a preferred photo editor not just for its compatibility with the system, but also because it embodies the minimalist and user-friendly design characteristic of Apple products. Below is a guide to help you navigate through its viewing and storing tools:
1. Launch Photos: Click on the Photos icon in your Dock or open it from your Applications folder.
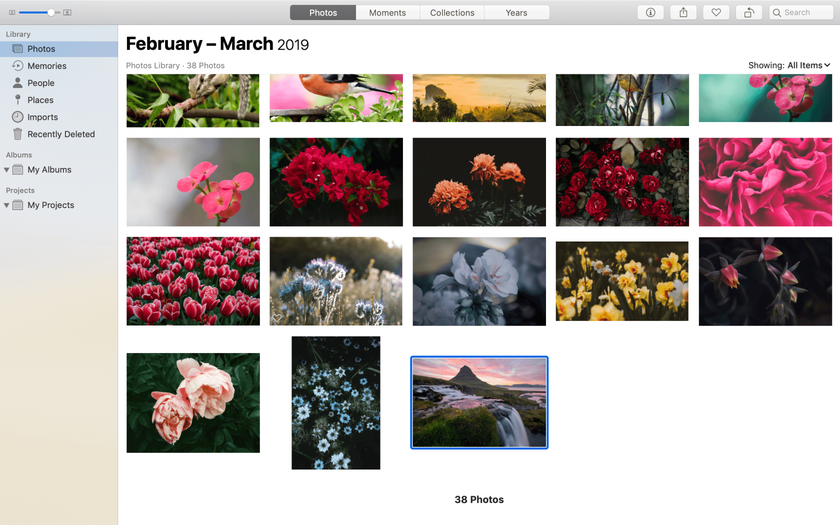
2. View Images:
Your photos are automatically organized in your library. You can browse through them in the “Photos” tab.
Use the “Albums” tab to view specific groups of photos.
3. Rate and Like Images:
To “like” a photo, click on the “heart” icon. This will automatically add the photo to your "Favorites" album.
Use stars or flags (if available) to rate your images and make them easier to find later.
4. Automatically Add to iCloud: Ensure iCloud Photos is enabled in your settings to have your photos and edits automatically uploaded and accessible across all your Apple devices.
5. Group Photos Intelligently:
Photos automatically groups your images based on time and location, helping you find photos from specific trips or dates quickly.
Use the “Search” function to find photos based on their location or date taken.
6. Face Detection: Navigate to the “Albums” tab and select “People” to view and manage the faces that Photos has recognized.
By following this guide, you can effectively utilize the viewing and storing tools available in Photos, ensuring your images are well-organized, easily accessible, and ready to be enjoyed on any Apple device.
Also read: How To Add Stickers To Photos For A Creative Flair
Editing tools
Editing photos is a breeze with Photos for Mac, thanks to its straightforward and user-friendly features. Whether you're looking to adjust the size and overall appearance of your photos, or you want to tweak color details and enhance your portraits, Photos has got you covered.
1. Double-click on the photo you wish to edit.
2. Click on the Edit option located in the top right corner of the app window.
3. To adjust size and appearance, utilize options like crop, flip, rotate, and straighten to tweak your photo’s layout and orientation.
4. To control color details, explore a variety of sliders and tool:
Use the Magic Wand for automatic adjustments.
Manually adjust color, light, and convert to black and white.
Gain full control over exposure, saturation, and intensity for precise edits.
5. Enhance Your Portraits:
Remove red-eye.
Use the retouch tool to clean up blemishes.
Enhance the overall look of your portrait photos.
6. Once you’re satisfied with your adjustments, click Done to save your changes.
With these capabilities, Photos stands out as a comprehensive yet easy-to-use photo editing software for Mac users, meeting all the basic editing needs without the complexity.
Compare photos or videos before and after editing
To compare versions of an image or video in the Photos app on your Mac:
Double-click the item to open it.
Click 'Edit' on the toolbar.
To view the original, press and hold the 'Without Adjustments' button or the 'M' key.
To return to the edited version, release the button or key.
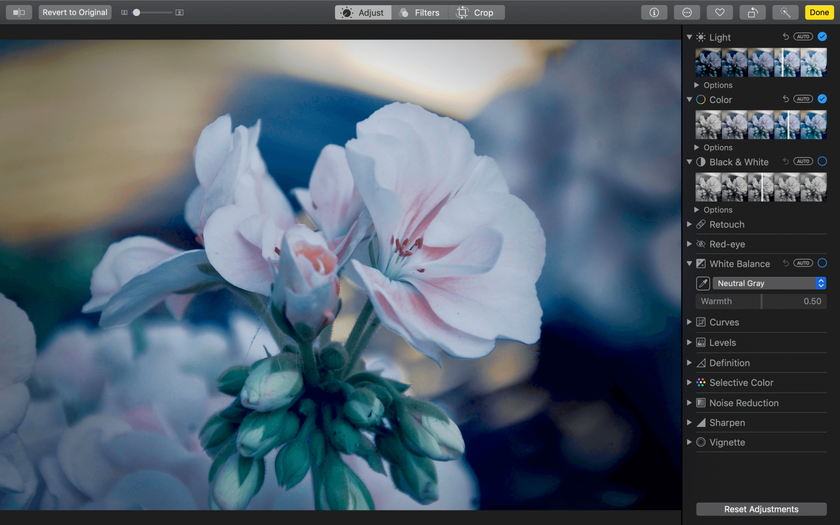
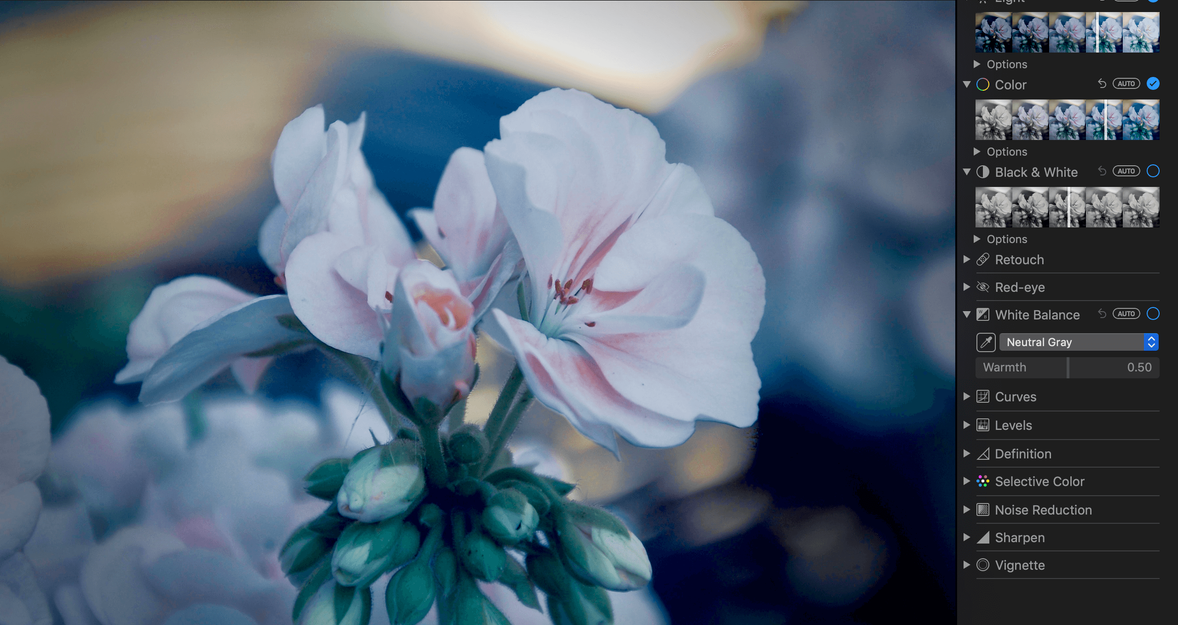
Let's look closer at the sliders in Photos:
- Light: illuminates dark areas and highlights hidden details
- Color: adjusts saturation, contrast, and color cast
- Black & white: removes colors to let you focus on the details and adds a special kind of dramatic effect
- White balance: makes your photos warmer or cooler
- Curves: fine-tunes contrast and color adjustments
- Levels: adjusts the tonal balance in your photos, perfecting midtones, highlights, and shadows
- Definition: increases the clarity of an image
- Selective color: brings out particular colors in your photos
- Vignette: adds shading near the edges to create a unique focus
Since Photos uses a non-destructive system, you can edit your photos to infinity. Click Compare and see the adjustments that you’ve made. If you’re not satisfied at any point, you can always go back to your original photo or make other adjustments.
Copy & paste
Photos is a great Mac photo editor, also because it allows you to copy and paste your adjustments between images. However, settings from the retouch tool, red-eye tool, crop tool, and third-party extensions cannot be copied and pasted.
This functionality makes it easy to edit a batch of images to achieve a consistent look and feel. Once you’ve edited an image, you can copy all your adjustments and paste them onto other images. This feature, commonly found in more advanced photo editors like Luminar, is a great addition to this built-in editor.
To use this feature in the Photos app on your Mac:
Double-click on the photo or video with the edits you want to copy.
Click Edit in the toolbar.
Navigate to Image > Copy Edits from the top menu.
Select the photo(s) or video(s) you want to edit (use Command-click to select multiple).
Choose Image > Paste Edits from the top menu.
By following these steps, you can quickly apply the same edits to multiple photos or videos, ensuring consistency and saving time.
Even more tricks for your Mac image editor
Besides the basic sliders, Photos offers more advanced tools that give you extensive control over your image editing process. To access these:
1. Launch Photos and select the image you want to edit.
2. Click Edit in the toolbar.3. Click the Add button, typically located in the upper right of the editing panel.4. From here, you can choose from advanced tools like:Noise Reduction: Minimize grain in your photo.
Sharpening: Enhance the clarity of your image.
Levels: Adjust the color balance and intensity.
Histogram: View the distribution of colors and tones in your image.
Apply Adjustments: Use the sliders or settings within each tool to fine-tune your image.
5. Once satisfied, click Done to save your changes.
As you can see, Photos isn’t just another built-in Mac image editor that doesn’t give you much control over your photos. Instead, it’s something that can actually replace expensive editors provided you don’t need something overly advanced.
Your AI-Powered Photo Editor for MacOS and Windows
Discover Now!Photos extensions
Photos users like to boost the app’s potential by using Photos extensions. There are multiple extensions for this Mac photo editor that you can use to quickly adjust and enhance your photos according to your needs. If you want to do edit quickly and automatically, Photolemur can help you. To apply great looks, fix saturation and vibrance, or boost your photos with cool AI features, Luminar Neo is perfect. If you’re a fan of HDR bracketing, Aurora is a great choice. Other professional tools like BeFunky, Pixelmator, and Affinity Photo also work well with Photos.
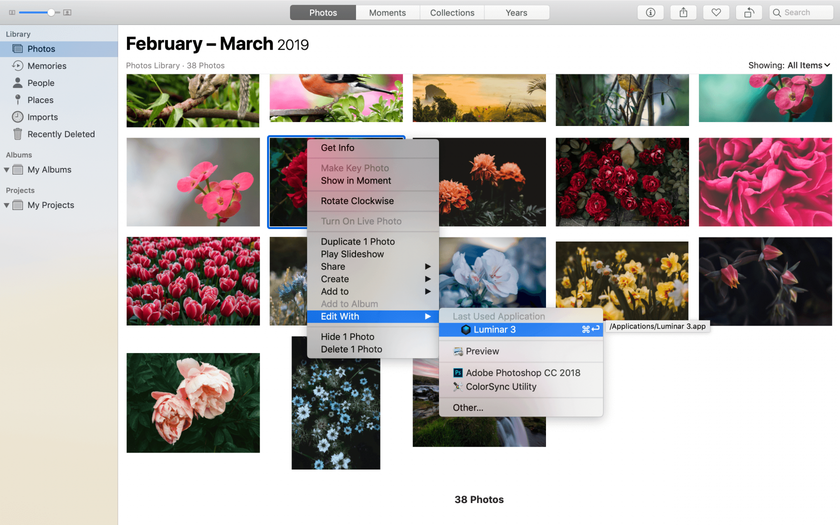
There are also plenty of other third-party editing extensions for this image editor Mac users love, because they’re specifically designed for Photos. You can find them on the Mac App Store. They let you add filters and textures and use even more retouching tools. To start editing with extension, right click on the photo and find "Edit with" option in the drop-down menu:
Alternative photo editor for Mac
If you’re looking for alternative editors with the same beautiful design and ease of use as Photos, Luminar Neo might be a perfect choice for you if you want to edit photos on Mac.

View mode in Luminar Neo
Luminar Neo is a great photo editor for Mac that lets you store, organize, and edit your photos quickly and easily. There’s no need to manually import your images to Luminar Neo. Once you guide Luminar Neo to your default photo folder, you can use Luminar just like Photos. It lets you view your photos in a gallery by date, color code, favorites, and so on.
This photo editing software for Mac is perfect both for beginners and professionals because of its intuitive user interface and powerful arsenal of tools. It’s a Mac photo editor worth giving a shot.
A 7-day Free Trial of Luminar Neo with No Obligation
Get it now!Edit mode in Luminar Neo
Luminar Neo is a Mac image editor that lets you quickly edit photos. Add stunning looks and find handy Workspaces to edit any type of photo, from portraits to landscapes, with built-in filters. The editing tools are plentiful, and Luminar Neo has everything you need to make your photos shine. AI sliders automatically analyze problem spots in your photos and edit them with just one slider.
Thanks to the layers system, you can edit your photos professionally, creating levitation effects, adding logos and watermarks, adding textures, and more. Not all photo editing software for Mac has these features, so it’s extremely wonderful to access them in this Mac image editor that’s perfect for professionals and amateurs alike.

If you want to give this Mac photo editor a try and quickly learn how to edit photos on Mac, click the button below to try Luminar Neo for free.