February 21
13 min. to read
The Art Of Fairy Light Photography
Do you know how the simple strings of flowers affect the mood in shots and look like completely different ornaments? Fairy Light Photography is a special type of artwork decorative light garlands to set up a perfect mood in the picture. They can be a primary or ambient light source or be used to set the scene when taking and to add a touch of fairy-tale photography. This approach creates some enchanting and romantic ambiance to your pictures in light and shade.
The fairy light photoshoot is a simple and affordable way to add a fairy-tale atmosphere to your photos. Light garlands are easy to find and buy. Garlands take up little space, are easy to use, and are suitable for any space—from a small room to a large studio. Garlands look especially charming in romantic photos of lovers. It is simple to “play” with the light, focus, and composition—get round stylish bokeh blur or reflection. Another working tool with which you can recreate this effect is the Luminar Neo Bokeh AI
tool, you can use it on most portrait photos. Garlands create a cozy atmosphere that automatically draws the viewers' attention to the photos.The Fairy Light Photography style is simple for newbies. It enables the actualization of creative concepts by comparing the amount of light and the placement of an item that comes within the scene, enhancing creativity in images and differentiating work.
All About Fairy Lights
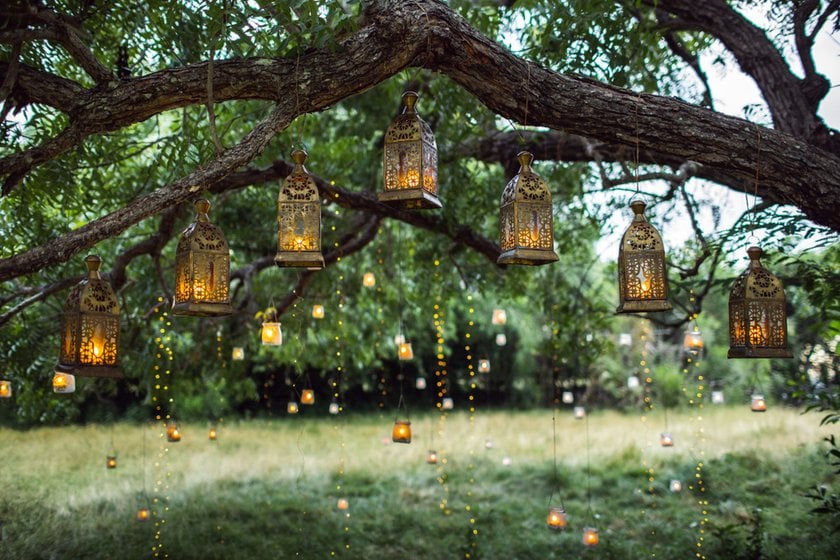
Garlands, also known as twinkle lights, are elegant on thin wires. Usually hung in rooms, and gardens, on holidays, they give the room and each person a special, warm glow. For photographers, they serve as a means of honing their creativity to create ah-ha shots.
Aesthetic fairy lights are used for creative décor and photography. Their objective is to illuminate a room and enhance its ambiance.
Types of Fairy Lights
Fairy Lights are available in various styles for different spaces and purposes. Each type offers unique ways to enhance the décor, from classic garlands to modern LED designs:
LED String. They are energy efficient and can be installed both indoors and outdoors. Garlands are popular because of their affordability and variety of sizes and shades. Strings are energy-efficient indoors, or they are affordable and come in a
Copper Wire. Gentle and flexible, so it can be used to wrap objects.
Globe or Ball. Ball-shaped lamps emit light in all directions, bringing a touch of sophistication to any room.
Battery-operated vs. Plug-in. Lamps can be battery-operated, which need to be recharged, or plug-in.
Each type has its application, but they all have one thing in common — originality, allowing you to turn ordinary shots into unique ones.
Illuminate Your Stories with Magic Light AI
Try it NowCreative Fairy Light Photography Ideas
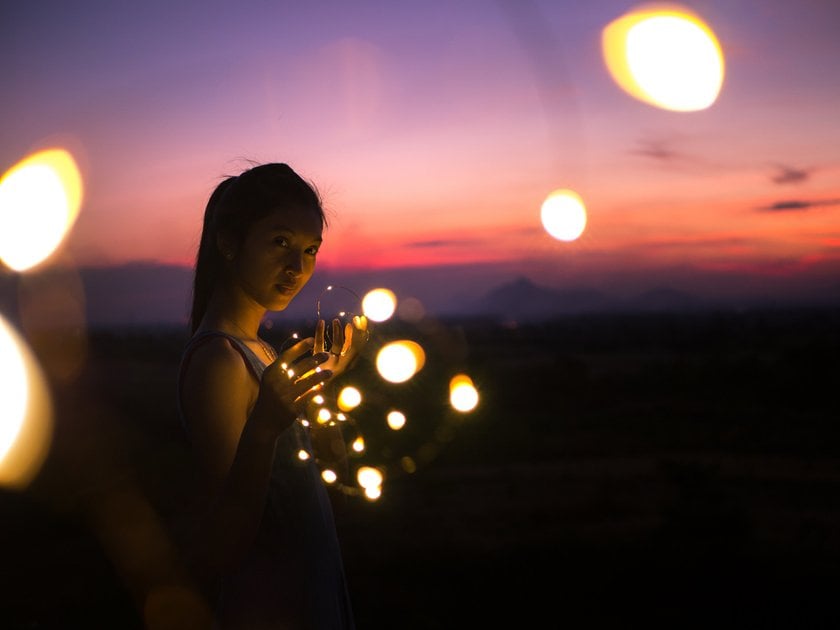
Volumetric bokeh. Place garlands in the background to get a blur in the form of glowing circles. To do this, set a wide aperture (e.g., f/1.8-f/2.8) and focus on the subject in the foreground.
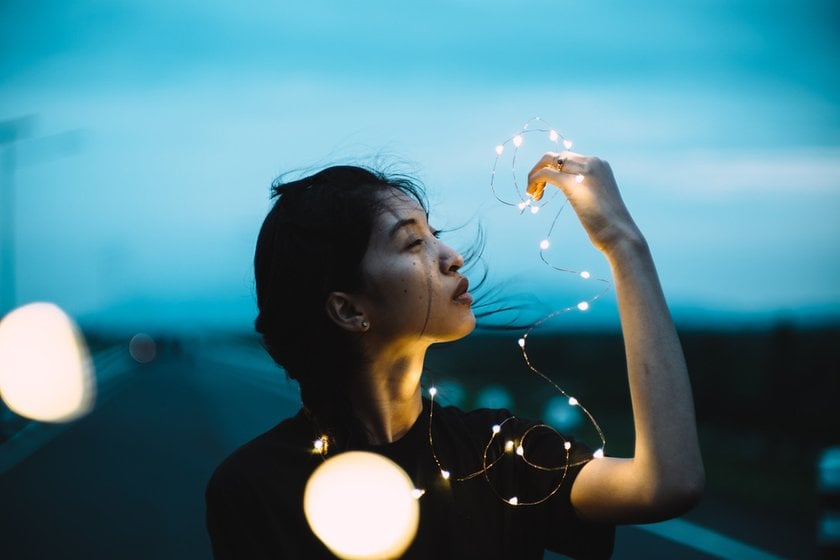
Garlands are the main element of the shot. Wrap garlands around your subject, adding depth and intrigue to the photo. Place them in front of the lens to softly diffuse light. Use garlands with warm hues for a cozy atmosphere.
Portrait with light framing: Create a frame of garlands around the face. With an expressive frame, you can hold lights or wrap a garland around the head.
Using reflections. Place garlands on a glossy surface. The reflected light will give the composition mystery and added volume.
Tunnel of light. Wrap garlands around a door leaf, archway, or other space. Shoot through the tunnel to direct the viewer's attention to the model at the center of the composition.
Lights in motion. Wave garlands during a long exposure (e.g., 2-3 seconds). Light trails will add dynamics and artistry to the photo.
Minimalism with a focus on detail. Illuminate only a small part of the subject, such as hands, a book page, or a piece of décor. Garlands can highlight details and create a cozy, intimate atmosphere.
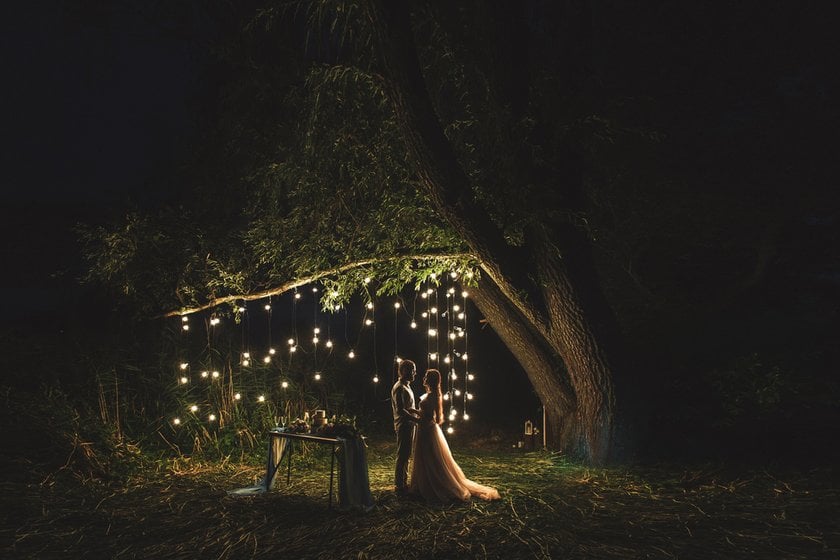
Backdrop lighting. Place garlands behind an object to create a soft illumination of the edges (halo effect). This emphasizes the shape and adds volume.
Adding “sparks” to water. Use garlands around a glass bowl or place them under a clear surface with water. This will create a sparkly water reflection effect.
Narrative photos. Use garlands to build a story. They can depict a lantern in the hands of a traveler, the glow of lights in a New Year's Eve atmosphere, or the magical “stars” in a fairy tale photo.
These ideas will inspire you to create unique shots that emphasize the mood and magical atmosphere of the fairy lights.
Fairy Light Setup
For unique shots, the type of camera you choose is important. DSLR and mirrorless cameras give you the most control over settings such as aperture, shutter speed, and ISO, but don't underestimate tech-savvy smartphones. Most modern devices have great photographic capabilities. With the right settings, they're great at capturing the glow of fairy lights.
Camera Settings
Aperture. Help you get a soft, romantic bokeh with lights. This can be done with a shallow depth of field, which is well created with a wide aperture (between f/1.8 and f/2.8).
Shutter speed. In the evening, using a slow shutter speed to capture more light, making the fairy lights look brighter. A tripod will help make the shots clearer.
ISO. A lower setting minimizes noise. Adjust depending on the ambient light.
Use manual mode in photography to make your shots unique. If you want to learn more about camera settings, check out our guide.
Don't underestimate the role of fairy light setup in photography. Think through their placement—whether they will be the main accent or a background that adds color. Different placement of lights in the foreground or background can add depth to a photo. A dark one will make the lights brighter and more expressive, while a light one will create a lighter effect.
For quality shots, use:
a tripod for stability, especially at slow shutter speeds;
a remote shutter release to eliminate camera shake;
a lens hood to protect against excessive brightness.
Fairy lights photoshoot allows you to create expressive and unique images, adding magic and depth.
Creative Photography Tips

How to style fairy lights? Try these techniques:
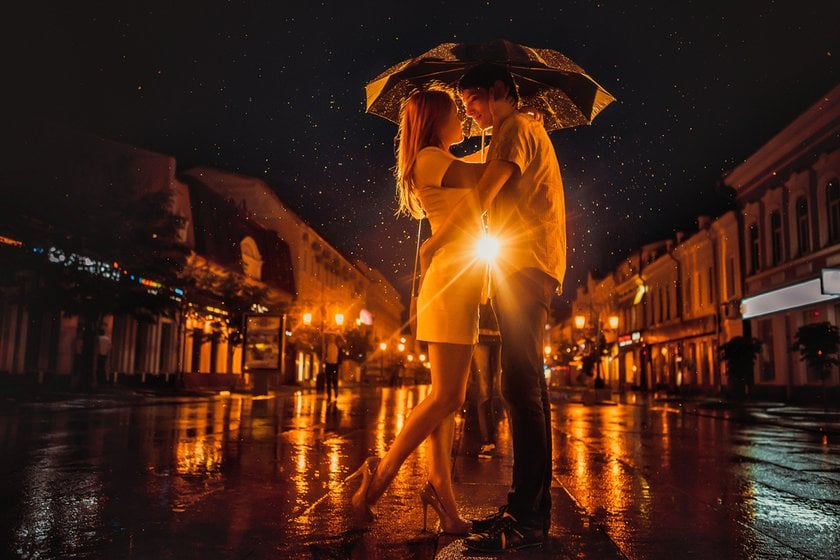
- Glowing umbrella. Transparent umbrellas can develop into genuine works of art. The base of this device gets its charm from fairy lights and shimmering “rain” elements that create a sparkly, dreamlike appearance.
- Shaped bokeh. When you apply special lens filters or manually cut shapes such as hearts, stars, and snowflakes, the background will contain formed light spots.
- Light trails. To produce mesmerizing light trails, you must use long photography combined with the moves of the lights to create enchanting streaks of illumination.
- Fairy lights curtain. Mount fairy lights vertically to establish a twinkling effect that can serve as either a backdrop or background illumination.
Let your imagination run wild, try different photoshoot poses with fairy lights, and make your shots bright and unusual.
Composition Techniques for Fairy Lights
The placement of Fairy Lights in the shot is as necessary as their presence. How to use fairy lights? Use modern techniques and tools to make your photos harmonious and expressive.
The Rule of Thirds. Divide the frame into nine equal parts using two horizontal and vertical lines. Locate objects at the intersection of lines to draw the viewer's attention.
Frame in Frame. Surround your subject of focus with elements like arches, window openings, or tree branches. This emphasizes the main subject and adds volume to the photo.
Leading Lines. Use paths, tracks, or decorative elements to lead the viewer's eye through the scene. This approach adds depth to the photo and creates a sense of movement or journey.
Each of these techniques helps to convey a story through the photograph. By working with composition, you can take more than just a shot of light and create a magical and captivating scene.
Post-Processing
Start with brightness, contrast, and saturation to improve detail and atmosphere. This will help the fairies stand out and create the right mood. It's also a good idea to crop the shot to eliminate distracting elements.
Magic Light AI in Luminar Neo helps to improve the lighting in an image by enhancing brightness and highlighting light sources. This will improve the result without having to manually adjust each element. Editing allows you to finalize your work and make your photos more vivid and expressive.
Summary
Fairy light photography transforms ordinary scenes into fantastic stories. Soft rays of light create an atmosphere that transforms even simple objects. Each shot becomes part of a captivating story, from romance and magic to drama. With the right placement of elements, brightness settings, and post-processing, you create photographs and works of art full of magic. Get your hands on the garlands and let your creativity shine through to make your pictures shine with new colors.
 >
>
