October 16
13 min. to read
How to Add a Background to a Photo: 6 easy steps
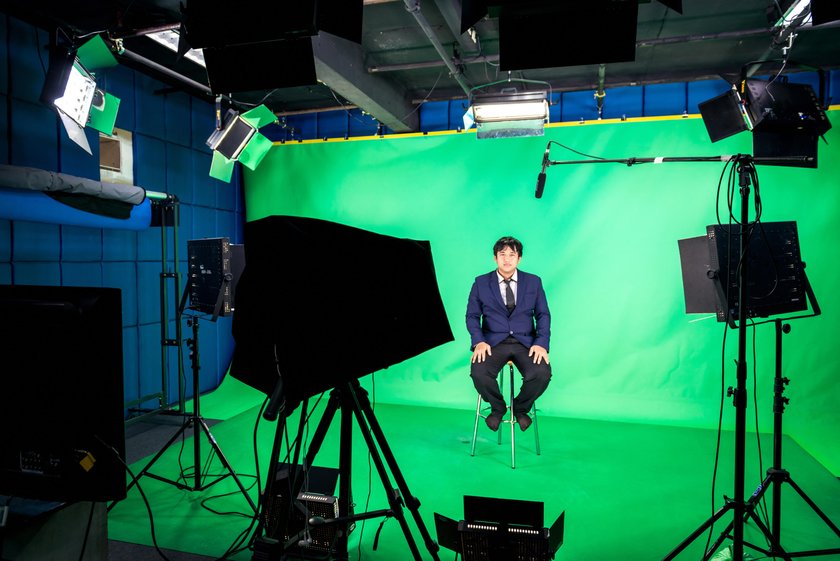 The green in the background allows the software to read it quickly and replace it with whatever background you want to use. So we recommend using photos that are shot in front of green or transparent backgrounds. But how to put a background on a picture that is not shot in front of these backgrounds? You can do it as well but that requires a little more skill where you have to cut the foreground out of the background and place it on a canvas to which you want to add a background. We will make sure to walk you through both ways of doing it. This is your opportunity to change the background to what you desire. Luminar Neo is one of the best photo editors you can find. Many claim that it's an app like Photoshop, but more convenient.
Step 1: Adding Color To The Background
 You can upload whatever color you want to the background by selecting from the color palette. Select the red color and adjust the hue bar to your desired color. Once you think you have what you need, you can use a real-life color palette to compare the two and make minor adjustments. While you are doing this, you may notice that the skin color of the subject is also starting to change alongside. No need to panic here. Just trust the process and keep going. We will take care of this in the upcoming steps and restore the original image.
Step 2: Change The Color To Green
 How to add a different background to a photo without green background? If you don’t already have a photo that has been shot in front of a green screen, you can easily change photo background color to green. This will make it easier for you to change the background from here on out. Making it green allows the software to recognize the background easily and cut it to whatever you want. All you need to do now is select a picture that goes well with the photograph, and follow the upcoming steps.
Step 3: Selecting The Right Background
 Selecting an image for your photo background could be a tricky process. You need to check whether you have a background that goes well with the foreground or not. The best way to do this is by checking the natural color tone of the subject and seeing if it matches the background that you have selected. If the color tones are off, you can adjust them later on as well. But the closer you are to the tone of the background, the better. You also need to check if the colors complement each other rather than contrast. Contrasts can also work but they rarely do so finding a background that fits with the color scheme of your subject is your best bet.
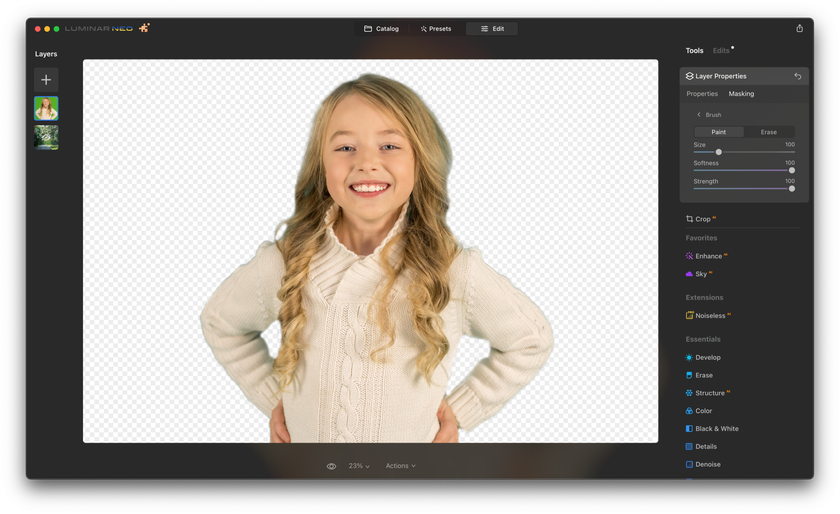
Step 4: Addressing The Color Effect On The Subject
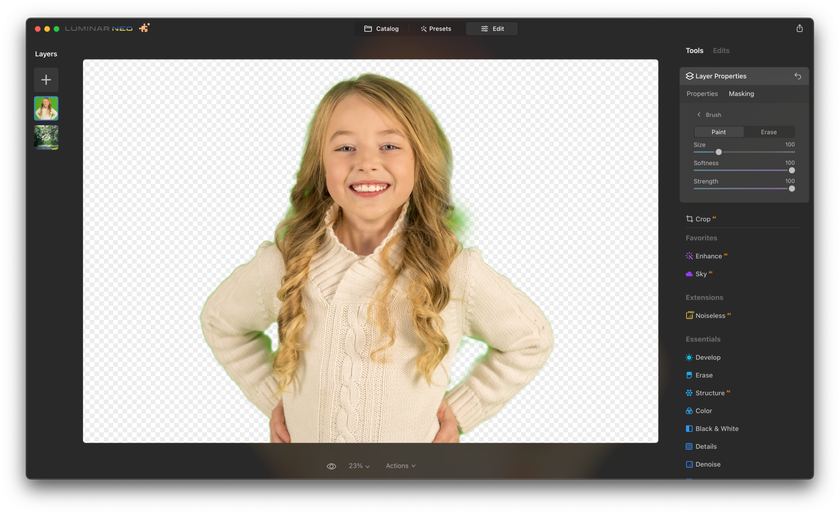 The color effect can make it look like your subject is ruined but that is not the case. It’s all software which means what happened to the subject can be reversed as well. That is the beauty of using Luminar Neo. You need to apply the Tool Mask to reverse the color effect on the subject. Follow these steps:
- Select the brush from the top-down menu.
- Change the mask setting to erase and set the opacity to 100%. This is crucial in order to keep the subject from being affected while the color effect is being removed.
- Now all you need to do is slowly mask out the effect of the subject. To make the process easier, use the left and right bracket keys to adjust the size of the brush. This will allow you to increase it and cover more surface area while you are doing it.
- Make sure you do it precisely so as to not brush into the background. For this, you can use the left and right bracket keys again to make the brush size smaller and carefully brush along the edges of the subject. You can also use the keyboard shortcut “X” to switch between paint and erase so you have more granular control over what you are doing.
Step 5: Once You Are Done
 Once you are done correcting the photo and you have achieved the desired result, press the Done button to apply the mask. Before you do this, make sure you have what you need. If you think the subject still needs a few more brush-ups, make them and then click on done. However, if you find anything wrong with the picture after you have clicked done, you can always go back and make a few changes again.
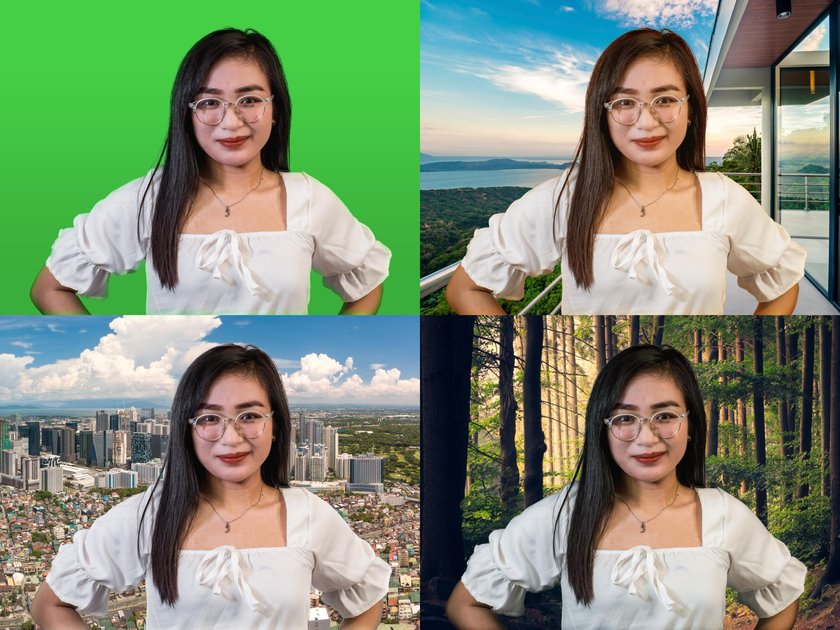
Step 6: Adding a Background to a Photo
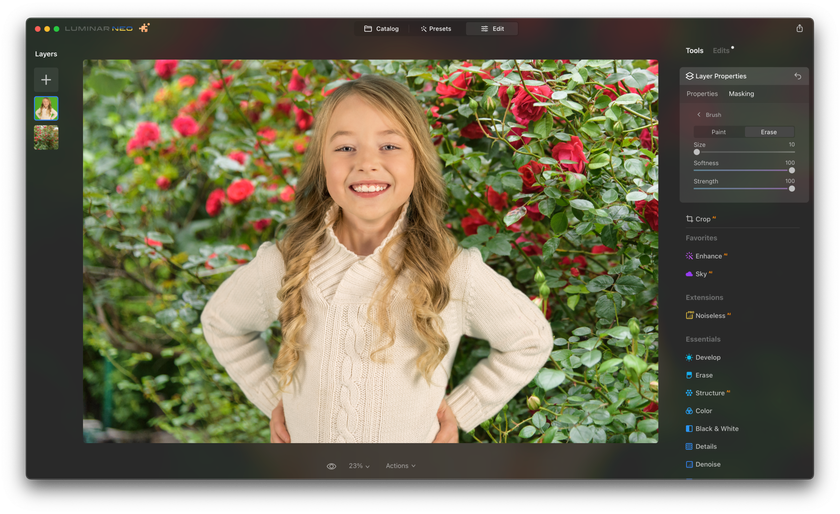 Once you have the background you selected and are ready to go, and you have corrected the color on the subject and restored it back to normal, you are able to add new background. It is easier if you did all this on a photo shot in front of a green screen. For this, all you need to do is go to the background selector and pick the background you desire to use from your camera roll. The app-like nature of the app allows you to do this easily. Once you select it, the software will automatically install it in the background of your subject and you can then adjust the frame to where you want your subject to be in regards to said background. Once this is done you are pretty much set. Just save the file you made and your work is done.
Transform Your Photo Background with a Click
Try It Now!This is how to add a new background to a photo on a still captured in front of a green screen. Not only can you simply put anything you want in the background, but also adjust where you want the subject to be in relation to the background. You can adjust the size of the subject as well and incorporate it into the photo just the way you like. However, many people don’t have a green screen and there could be a million reasons for it. But this is still not a problem at all as we have a solution for you!
So, now you have a photo that has a background that you don’t want. You want to replace the background with a new one. Follow the tutorial we have mentioned below to proceed. We have carefully designed it to take you on this journey step by step so you don’t have a dull moment during the editing process. It is our goal to make the editing as smooth and convenient for you as possible.
Removing The Background From A Photo Not Shot In front Of A Green Screen
Now you know how to put a different background on a picture with a green screen. Here’s a decision!
Step 1: Removing The Background
Select the file you need to edit from the files on your computer and get to work. You need to use the snipping tool or the cutting tool in order to carefully cut around the edges of the photo so the software can lift the foreground from the background. This can be done better if you have a screen with pen input on it as you can carefully draw the outline to good precision and then use it to lift the subject. The software can create an outline for you as well but you need to then check if it is accurate and satisfies you.
Step 2: Adding A Background Canvas
Once you have lifted the subject from the background you don’t need, it is time to add a canvas in the background. Once you have a canvas background, you can simply follow the steps mentioned above to add the background of your desire to the subject.
Conclusion
Now that you know how to add a background to a picture using Luminar Neo, we believe you are more than ready to start using the tool to the best of your ability, ready to start exploring all the capabilities it carries and become the best photo editor using the app. There is a lot that you can do with this tool and harnessing its power is a skill to have. You can become one of the top photo editors in the world if you have the right tools to accompany you and that is exactly what Luminar Neo is here to provide you with. So, what are you waiting for? Grab the application today and start expressing your artistic side in a modern, digital way! The app is available on Android and IOS as well. You can remove all the imperfections and add backgrounds to photos using our powerful app now available on smartphones as well.
