
How to Merge Images in Photoshop: Step-by-Step Guide
April 17
11 min. to read
 But if you're still new to Photoshop, combining even two photos may seem like a serious task to accomplish, because Photoshop opens each new file in a separate, independent document, and the only way to combine the pictures is to put them into one common file. With Photoshop, you can create a beautiful collage of photos, combine your photo with an unforgettable landscape, or combine multiple images. To do this, you need to follow a series of simple steps, which we will describe in detail in our manual “How to merge two photos in Photoshop” step by step.
How to Merge Two Photos in Photoshop — Method 1
Step 1: Open the Necessary Images
Open the two pictures you want to combine in Photoshop. Then, create a new file (File > New) with dimensions that match those of the images you’re combining. Ideally, the images should have the same size, height, and resolution.
Step 2: Arrange Your Layout
In the Layers section for each source, select the layer containing the picture content and drag it into the new file window. Now, the Layers section of the new image contains two new layers, each corresponding to one of the source pictures.
In the Layers panel of the new image, arrange the layers so that the layer you wish to modify is above the layer with the correct content.
Select both layers and go to Edit > Auto-Align Layers. Choose “Auto” and click OK. Adjust the opacity of the top layer as needed to achieve the desired effect. Photoshop will align common areas in both layers.
Add an empty layer mask to the top layer by clicking the “Add layer mask” icon at the bottom of the Layers panel.
Step 3: Add the Finishing Touches
Set the foreground color to black, select the brush tool and size, and zoom in on the part of the image you want to correct if necessary.
Use the Brush tool to add to the mask layer by painting on the top layer. Painting with black will completely mask the top layer, while grayscale will create partial transparency to the bottom layer, and white will restore the top layer.
Step 4: Save the Result
To perform further editing, save the version of the file with layers and masks and make another copy, the layers of which can be glued together, thus creating an image with one layer and resizing the file.
Now, you know how to merge photos in Photoshop, but we will describe one more method.
Layer blending modes — Method 2
Step 1: Load images into Photoshop
Go to the File menu, choose Scripts > Load Files to Stack. In the “Load Layers” dialog box, select Add to Files > Browse.
Specify the photos you want to open. Then click the “Open” button. The two variants at the bottom, “Attempt to Automatically Align Source Images” and “Create Smart Object After Loading Layers” are left unchecked. Then, load the image into Photoshop by clicking the OK button.
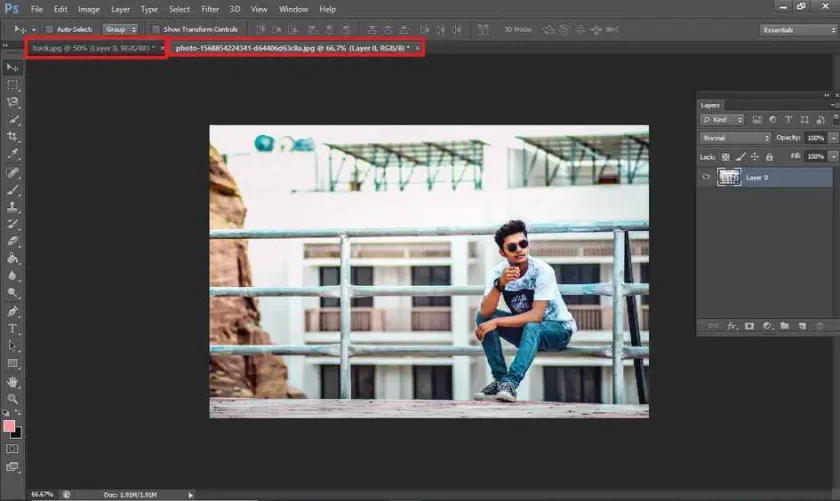
Photoshop loads both images into the same file. In the Layers display, each picture is on a separate layer. The file names are used in the layer names. Turn off the opacity of the top layer by clicking on the eye icon, after that, we will see the image located on the bottom layer.
Step 2: Use the Move Tool
 Right now, the two images are in the same document. But how do you place them next to each other?
One way is to increase the size of your document's workplace with the “Canvas Size” choices and drag one of the images to the new space. But you can do both operations at the same time. To do this, you use the Move tool, then click and drag the selected layer.
Step 3: Bind to document boundaries
Go to the “View” menu and check whether the “Snap” option is active. Below, we turn on the “Snap to” option and check the activity of the” Document Boundaries” option. In the Layers section, select the top layer.
Step 4: Drag the photo to the edge of the top image
Use the Move tool to drag the image in the document to the left or right relative to the file below it.
As you drag, hold down the Shift key to limit the direction in which you can move. As soon as you get close enough to the edge of the document, your file will be drawn sharply to the edge. The top image is now hidden because it is off the edge of the canvas.
To activate the visibility of both pictures, select the “Reveal All” option in the “Image” menu. When you do this, Photoshop resizes the canvas to accommodate the two files.
Now, you know how to merge in Photoshop differently.
How to fix a mistake
If you want to swap images, follow these simple directions. Make sure that the Move tool is still active. We are not going to use the Move tool itself. It must be active. This is how we get access to the alignment options. We are going to swap the pictures by aligning their edges with the indents of the canvas. To do this, we need to select the entire canvas. In the “Selection” menu, we choose the “All” item. After that, a selection outline will appear along the indents of the document. In the Layers panel, select the top picture by clicking on it. After that, click the “Left alignment” or “Right alignment” icon in the Options section. Highlight the lower layer. To move the lower section file to the right, click the “Right Alignment” icon. After that, Photoshop aligns the right indents of the document to the right edge of the canvas. To deselect the canvas, choose “Deselect” from the “Selection” menu. Now we know how to blend images in Photoshop, place them side by side and swap them around!
But what to do if you made a mistake and want to erase it or remove an unnecessary object from the photo?
For these tasks, use the “Clone Stamp Tool” or the “Patch Tool. The latter is preferable if the extra object is located on a simpler (single-color) background. With the “Patch Tool,” we cut (copy) the donor area and cover everything unnecessary with it. Hold down the left mouse button, circle the appropriate area, and move the patch. The tool has two modes:
- “Source”/Source. When you use it, the selected area will be filled with the donor fragment into which the selection has been moved.
- “Destination”/Destination. In this mode, the selection will fill the area to which it has been moved. This function will help you if you make mistakes while blending two images in Photoshop. Or you can use key-combination Ctrl (Cmd) + Z to cancel the last action. Pressing it again cancels the penultimate action. The next press will cancel an even earlier action, and so on. By default, the program remembers the last 50 actions.
Combining images in Photoshop: conclusion
Now that we have explored a few ways to combine images in Photoshop, and described possible problems and solutions. The reader can choose one of them, or try to create his own. The set of tools within Photoshop allows you to accomplish the same task in dozens, if not hundreds, of different ways. Working in Photoshop can bring moral and aesthetic pleasure. After all, thanks to it, you can create magical photos that get appreciative feedback from people. And it helps to have simple skills that are easy to develop, even for a beginner. In this short and uncomplicated lesson, you have learned how to combine two photos in Photoshop. We hope you found it useful!
