November 20
24 min. to read
How to Make a Digital Photo Look Vintage
 Everything seems to come back every decade, from TV shows to new fashion collections. That's why the vintage aesthetic is also popular in the photo industry. Whether celebrities or social media influencers try to publish vintage photos. You may be wondering how to make your pictures look vintage now. Below you will find detailed tips on this topic. Even if you are an amateur, you will get what you want.
Modern photo editors provide a wide range of special effects that transform an ordinary image into a work of art. Subtle effects are used to enhance image qualities and deliver natural-looking results. Artistic effects in digital photos are used to create a specific style such as oil painting, crayon drawing, fantasy, film noir, or watercolors. A vintage look preserves the natural feel of an image but adds a temporal dimension: it transforms a new digital image into an old, analog photograph. Now it is very easy to make a photo look old with an editor.
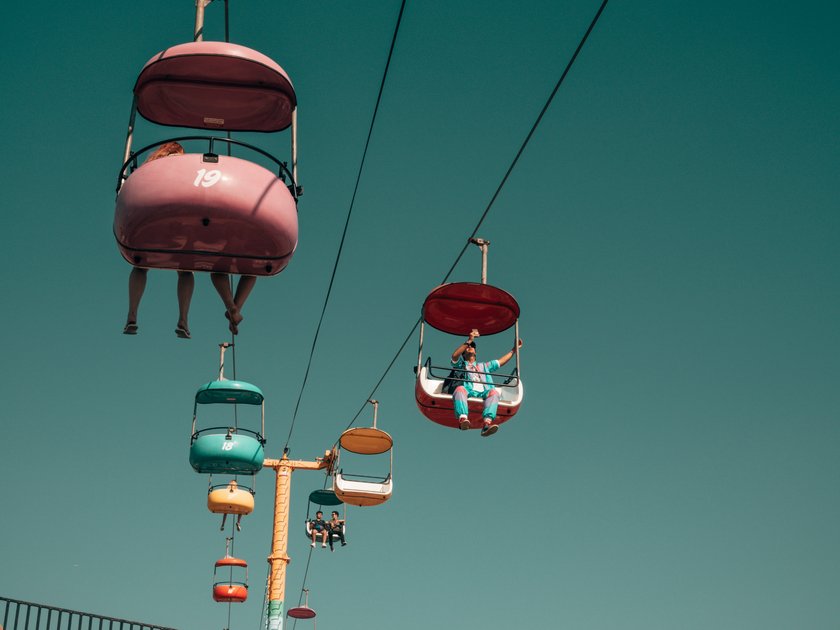
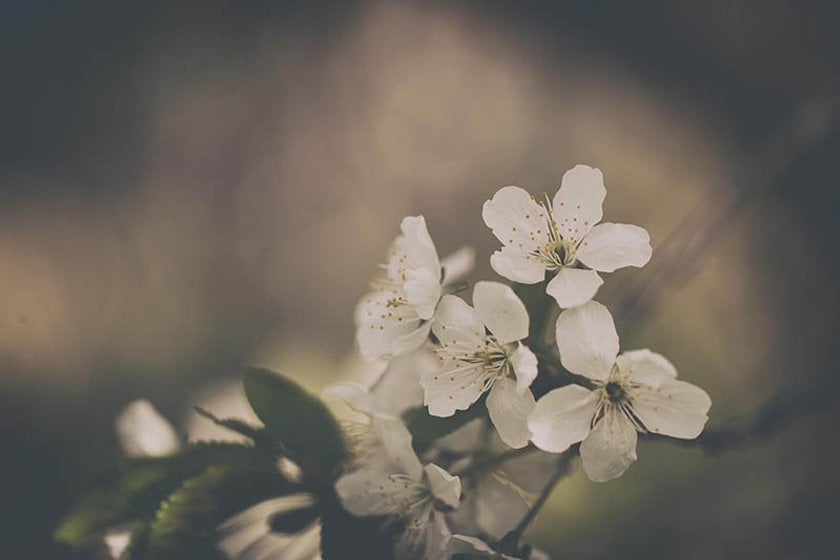
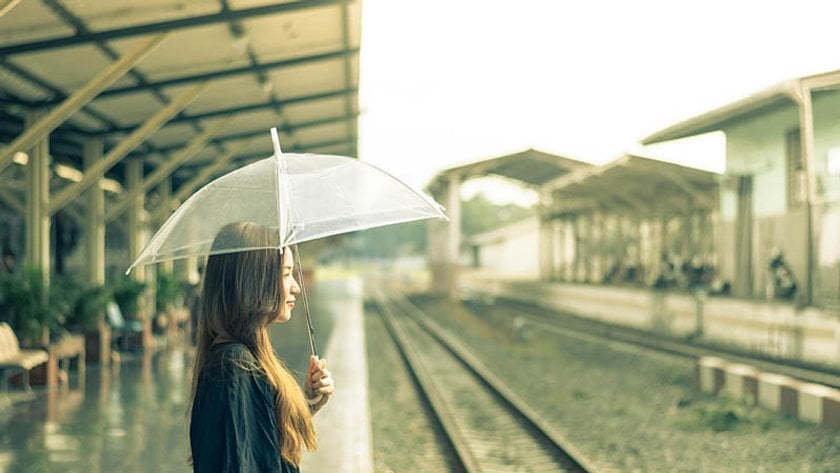
Photographers often use a vintage style for portraits, wedding photos, still life shots, and architectural images. The artificial aging process enhances the composition and helps to create a credible story. Besides, the vintage look flatters the skin and hides imperfections. If you don't know how to make your picture look vintage, then read the following tips and create a real masterpiece.
What is the vintage look and why do you need it?
Why should a new picture look like an old one? Because artificial aging adds a new dimension to composition and allows you to locate your visual story not only in space but in time. A vintage effect is used for complex compositions that create full narratives. It creates a special mood that may be romantic (for wedding photo sessions or vow renewal portraits), nostalgic (for pictures of old buildings or objects), or dramatic (for pictures featuring age, destruction, or sorrow). Before learning how to make a picture look vintage, it is very important for us to consider the main characteristics of this style.
Your AI-Powered Photo Editor for MacOS and Windows
Discover Now!Characteristics of the vintage look
Grainy, muted shades, deep shadows - magic! The era of film photography and vinyl records beckons with its atmosphere. But don't rush off to the flea market to buy a vintage camera. The same retro effect can be achieved in photo editors and with the help of filters in smartphone apps.
- Low color saturation – Color photography became available in the 1950s. Prints from that period tend to have faint colors, washed out by time with an aged look. So the first step in making a photo look vintage is to reduce the saturation. If you want to recreate an even older style, you should begin by eliminating colors altogether and converting your image to black and white.
- Low contrast – Over time, prints lose contrast, structure, and details. Their edges become blurred and faded. To make a photo look vintage, you have to decrease the contrast while slightly increasing the brightness to create a haze effect.
- Noise – All old photos have a high level of noise due to bad cameras and lenses. You can use film grain noise or HSV noise to alter your image and simulate camera noise. Also, you can overlay a texture that imitates noise to make your picture look older and different. Create your own texture or use one from the many free texture libraries available.
- Yellow tint – Photo paper and chemicals deteriorate over time and change their properties. The most common effect is a yellow tint that appears in black and white pictures, it gives photos an original look. The easiest way to recreate this effect is to adjust the color balance by favoring yellow and red. You can also use other tools such as color temperature, curves, and the channel mixer.
- Vignetting – Vignetting occurs when the lens fails to focus well enough across the whole image and the edges of the photo remain underexposed. It’s sometimes used intentionally because it creates a natural frame and enhances the subject in the center of the photo. Most editors have predefined filters for vignetting. You can create a vignette by gradually darkening the edges of an image while keeping the subject brighter.
9 Tips for Making Your Photos Look Vintage
 The term “vintage photos” refers to a number of styles, including film photography, ferrotypes, black and white photography, and others. Vintage decoration is the process of giving a modern digital photograph a vintage look and feel. Such digital filters mimic the effects of shooting on a film camera.
Today, these effects have become relevant because of the nostalgic atmosphere and timeless aesthetic they bring to photographs. Superb retro effects transform modern photographs into images from a very different era, changing their mood, atmosphere, or emotional message. Explore the options on offer and find the best fit for your work. Want to recreate a beautifully aged look? Here are some simple tips.
1. Convert the photo to black and white
If you don't know how to make a photo look vintage, the simplest way is to convert it to black and white. You can also try experimenting with different styles or adjusting the color sliders within each style to alter the photo's appearance. Use the photo editor's sliders, moving them to the right to brighten specific areas and to the left to darken them. This technique allows you to customize the lighting and contrast, enhancing the vintage effect.
2. Add some noise
Give your photo a vintage look by adding some visual noise with special photo editing tools. Modern image editors powered by artificial intelligence offer dozens of features. Even a little noise will give the image an authentic vintage feel. To create vintage photos, you need to work with sliders of tone, contrast, and color. There is no one recipe for image editing. Experiment with new photo effects by using different tools and choosing the most appropriate ones. You can pick up a new combination of settings that you can use to create your own vintage filter.
3. Focus on color
The brightness of old photos changes and fades over time. You can also adjust the hue, saturation, and color balance. Try a few options and perfect the one that best suits the subject of your photo work. Try to recreate the effect as if the color had been washed out by time. Since all photos are unique, there is no one-size-fits-all filter. Instead, experiment with each color editing tool to find the perfect combination for your image.
4. Use a photo filter
Add another correction layer and choose a special photo filter to give your photo a special look. This option is available in the Adobe Lightroom image editor. This will allow you to apply a vintage color wash, such as sepia, which gives the image a warm reddish-brown hue. You can also experiment with other color-blur options, such as cool blue or somber green. Just move the slider in the right way.
5. Create a vignetting effect
Of course, this is one of those options that we think of first. This variant adds a slight shadow effect and makes the image look even less perfect and more like a decrepit or damaged vintage photo. This is also a versatile option if you didn't know how to make a picture look old before. It is very easy to use and can be combined with other photo effects or filters.
6. Adjust the brightness and contrast
Remember that older images look less contrasty or slightly darker, so move the sliders in the photo editor settings to give the image the desired level of contrast and brightness. It’s also easy to achieve, even if you are a novice photographer and haven't mastered all the editing tools perfectly. You can get more creative here or take inspiration from famous photographers to get the nostalgic effect you want.
7. Creating a strongly aged photo effect
If you want to get the effect of a photo you recently found in the attic vintage is to use aged paper for the background. It looks very beautiful. In the gallery of some photo editors, such as Canva, you can find paper even with antique seals and slightly frayed edges which give the photo the texture you want. Follow the same principle - place the old paper on the background, load your photo on top and adjust the transparency. Now you will have far fewer questions about how to make pictures look old.
8. Use newspaper clippings
Simulate black and white film by reducing color saturation completely and increasing contrast to create the effect of an old photo. You have a wonderful opportunity to experiment with both online image editors and installable software. Add some grit for an old photo effect - use a picture with film in the background. Also, adjust the color. You can search the internet for examples of newspaper clippings and pictures of paper with ripped edges to complement the design. You can make a vintage birthday card in this style!
9. Making a lightly lit film effect
Do you want to create something original? Try to use several pictures for overlaying. For a retro photo, you can use a background with grit and adjust the transparency of the main picture. On top of that, apply a lightly ghosted film and adjust the transparency as well. You can use a ready template or add noise by yourself. Load your picture into the editor and change the settings to get the perfect old photo effect.
How to make a photo look vintage with Luminar Neo
Choose your image wisely, as not all images match the vintage look. You can start with a photo taken in black and white that already has dramatic, aged aesthetics or with a color photo with a suitable subject.
Luminar Neo provides full control over the editing process to make photos look vintage. It works with layers, masks, and it allows for selective editing. You can create a vintage look from scratch using only Luminar Neo’s presets and adjustments. But a faster way to make your photo look vintage is to use Luminar Neo Presets, designed by professional photographers to recreate the most popular photography styles.
Create a vintage look by individually adjusting each aspect of the effect
If you choose to create your own vintage look, you’ll have to transform the image according to the characteristics listed above. Make sure you create a new layer at each step of your editing process to make a picture look old. Luminar Neo allows you to fine-tune each layer separately and preview the result of each step. Use the Before/After preview tool to keep track of your adjustments.
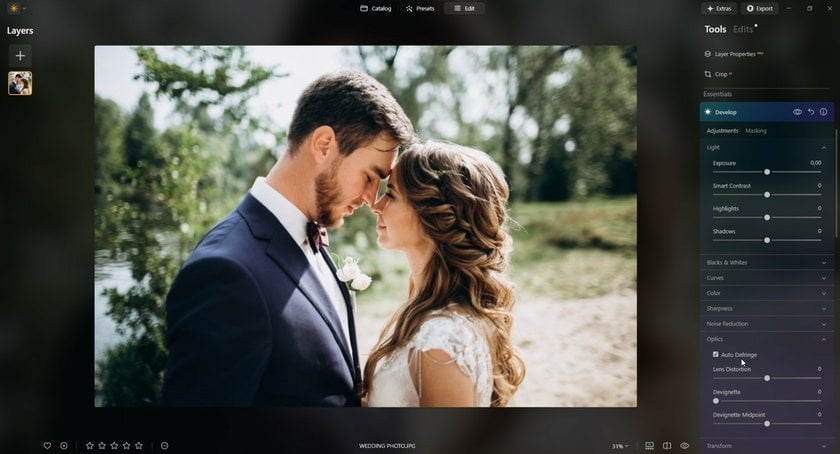
- Step 1: Open your image in Luminar Neo's Edit Mode by clicking the Edit button at the top of the screen or pressing "E" on your keyboard. The vintage effect is the finishing touch. You should retouch and enhance your image before applying this effect.
- Step 2: The next step in making your vintage picture. Go to the Develop tool in the Essentials section and click on it to open it. You will need to click on Optics and check the box next to Auto Defringe.
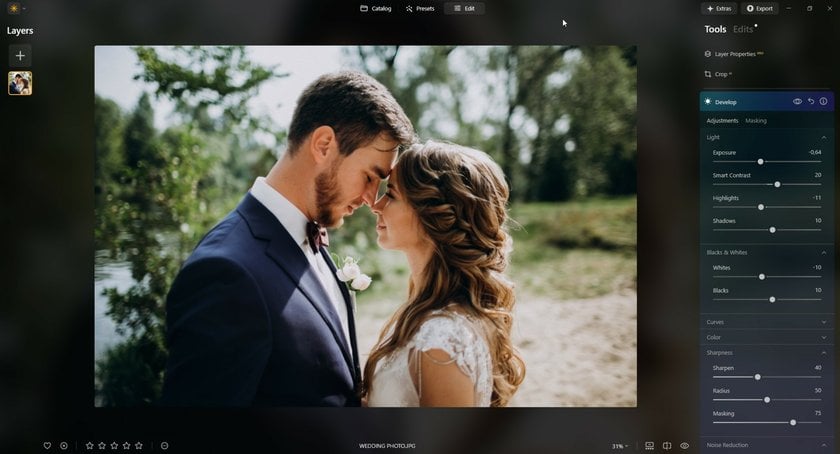
- Step 3: After that you need to take care of Noise Reduction (set "Luminosity" to 20) and Sharpness (set Sharpen to 40 and Masking to 75). The reason we use Masking is that we don't want to sharpen anything that has no details or textures.
- Step 4: Now we can go to the top and make all the basic adjustments it needs. Fix the Exposure, set Smart Contrast to 20 and correct the Highlights, set Shadows to 10. Then go to the Black & Whites (set Blacks to 10 and Whites to - 10).
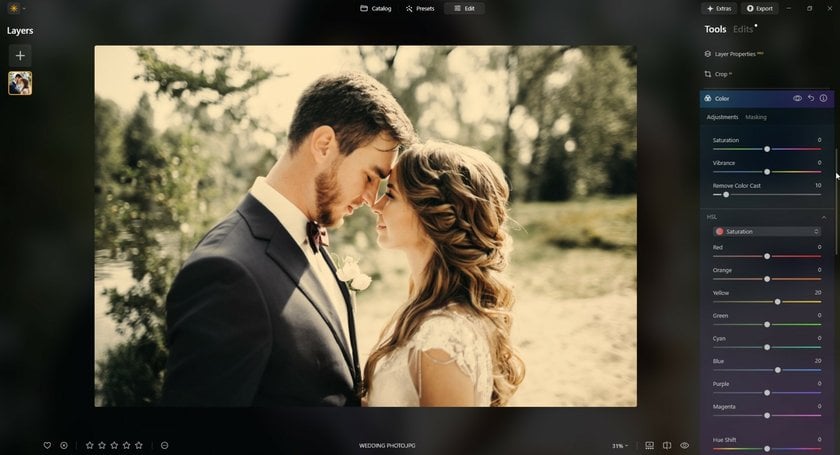
- Step 5: Now you can select the Color to add warmer tones for your vintage picture (also be sure to set Vibrancy to -55). Use Curves to make the image fade. The vintage effect is the final touch. You should retouch and enhance your image before applying this effect.
- Step 6: Choose the Color tool from the Essentials section. You need to select Remove Color Cast and set the value to 10. Also, increase Yellow to 20 and Blue to 20 in the HSL and Saturation panels.
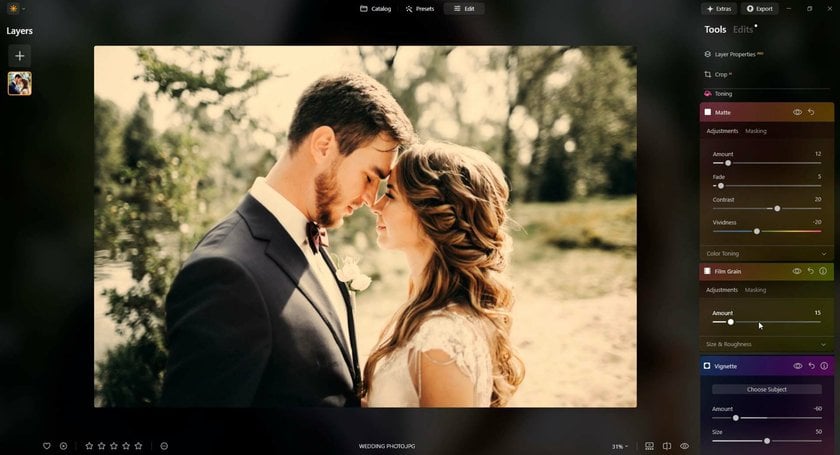
- Step 7: Now select the Matte tool, set the Amount to 10-15 and the Fade to 5.
- Step 8: Then switch to the Film Grain tool with the Amount set to about 15. Your photo already looks great, but there are still a few things we can do.
- Step 9: Of course, we will add a Vignette (find it in the Essentials section and set the "Amount" to - 60).
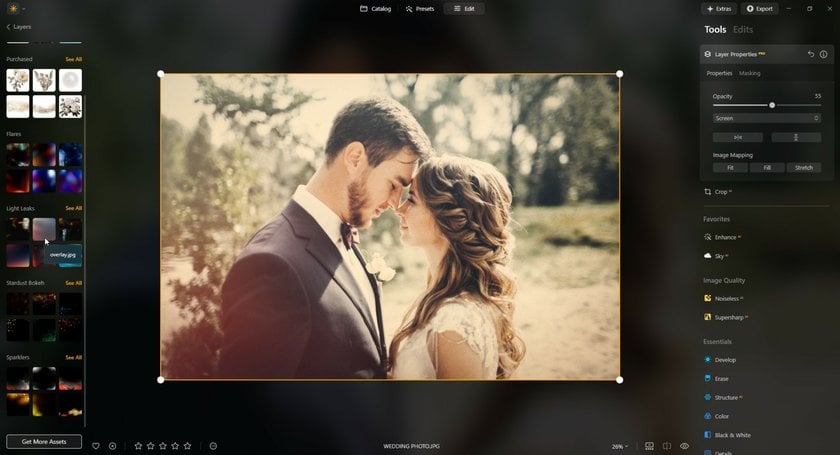
- Step 10: One more thing to do! To add the camera leaks effect, go to the Layers panel and click the + sign to use one of the overlays that come with Luminar Neo. Navigate to the Light Leaks category and click on one of the available options. Now go to the Layer Properties tool and set the opacity to about 55. To change the location of the Light Leaks, use the two buttons below.

Check the result below!
Exclusive Tools of Endless Possibilities in One AI Editor
Explore Now!

How to Create a vintage look with black-and-white photos in Luminar Neo
1. Add Your Photo
Begin by adding the desired photo. Click “Add Photos” or drag and drop your image directly into the program window.
2. Convert to Black and White
Navigate to the Essentials tab and select the Black & White tool. Use the Luminance sliders for each color to fine-tune the appearance and achieve the desired monochromatic look.
3. Incorporate a Vintage Touch
While in the Essentials tab, use the Curves and Colors tools under Develop to enhance the vintage feel. Adjust the tones to create sepia or faded greenish hues, experimenting with the sliders for the perfect effect. For an additional aged appearance, reduce contrast in the Light settings to introduce a subtle fade effect.
4. Add an Aging Effect
For a truly authentic aging effect, switch to the Creative tab and select the Fade tool. Adjust the slider to your liking, and explore additional toning options to refine the vintage look.
5. Finalize with Details
Complete the transformation by adding vintage-style details. The Mood tool in the Creative tab allows you to infuse specific tones into your image. Use the Layers tool to apply effects such as scratches, torn edges, or other imperfections characteristic of aged photos. Be mindful not to overdo it—enjoy the creative process and achieve a balanced, authentic result!
Create a vintage look using Luminar Neo Presets
 How to make photos look vintage with a modern photo editor with an easy-to-understand interface? Presets are kits of adjustments that automatically create a specific style and add atmosphere to a picture. Luminar Neo offers more than 80 built-in Presets divided into categories: Street, Landscape, Portrait, Artistic, Black & White, Cinematic, Travel, and more. In addition, you can download more Signature Presets from the Luminar Neo Marketplace for making photos look old.
If you don’t want to spend time working with layers and filters, you can make a photo look vintage by applying the Vintage Preset from the Dramatic category. After applying a Preset, you can see in the right panel what filters were applied and adjust their settings according to your artistic vision. The Luminar Neo Vintage Preset uses the Dramatic, Color Styles (LUT), and Film Grain filters from the Creative category and the Vignette filter from the Essentials category to make photos look old.
After you’ve created your unique vintage look, you can save it for future use or apply the same set of adjustments to multiple images at once.
You can also use Luminar Neo Presets for black-and-white conversion. There’s a customized black-and-white conversion for each type of photography (landscape, portrait, aerial, etc.), which guarantees natural-looking results.
In conclusion
Well, now you really know how to make pictures look vintage, it's not complicated at all. It is important that the vintage of the photo is reflected not only in the processing but also in the content. Modern buildings and machinery will not look vintage no matter how you process them. You can take vintage-looking photos of nature, buildings, or cars. Portrait shots can also be made vintage, as long as the appearance of the model corresponds to the times you want to convey in your work.
Modern photos can also be done as old-style photos. Studio photos taken with professional lighting and modern scenery look very interesting in a vintage treatment, but they convey a very different mood from really vintage shots.
Creating a vintage look is popular, as it adds meaning and depth to a visual story. It’s also easy to achieve, as many photo editors offer presets you can apply in seconds. But to get high-quality results and subtle transformations for old-style pictures, you need to choose an editor that works with layers and gives you full control over the editing process. It’s good to have smart and automatic tools, but it’s even better to fine-tune each adjustment by hand and create your unique vintage picture effect.
FAQ
How to make photos look vintage on camera roll?
To make photos look vintage from your camera roll, reduce contrast slightly, add warm tones, soften sharpness, and introduce film grain or faded colors. Vintage edits often recreate the softer textures and imperfect look of analog photography.
What are the best digital camera settings for a vintage look?
For a vintage look, photographers often lower contrast, use warmer white balance settings, and slightly underexpose highlights. Softer focus, muted colors, and grain simulation also help recreate classic film aesthetics.
What are the best digital filters for vintage film aesthetics?
The best digital filters for vintage film aesthetics usually include faded blacks, warm highlights, film grain, light leaks, and muted color palettes inspired by Kodak, Fujifilm, or Polaroid film stocks.
Which editing tools offer vintage and cinematic filter packs?
Editing tools like Luminar Neo and Luminar Mobile offer vintage and cinematic filter packs designed to recreate film-inspired looks. Photographers choose these tools because they combine AI-powered editing with customizable presets, allowing users to create nostalgic, cinematic styles quickly while still keeping creative control.
 >
>
