January 15
20 min. leestijd
Een Afbeelding Verscherpen in Photoshop
Soms zijn je foto's te glad of wazig. Door ze te verscherpen kun je contrast toevoegen langs de randen van objecten. Maak je onderwerp prominenter en dramatischer en voeg volume toe door te leren hoe je een afbeelding verscherpt in Photoshop.
Ben je op zoek naar hoe je wazige foto's kunt herstellen? Photoshop kan wonderen doen en je helpen de beste resultaten met je fotografie te bereiken. Tegelijkertijd is het ingewikkeld en moeilijk om onder de knie te krijgen vanwege de vele functies.
Hoe dan ook, onze foto's hebben meer scherpte nodig. Dus laten we eens uitzoeken wat beeldverscherping is en hoe je het kunt bereiken.
Wat is Beeldverscherping?
Beeldverscherping verbetert het contrast langs de randen van een afbeelding om de helderheid en details te vergroten. Deze techniek benadrukt de grenzen tussen kleuren en tonen, waardoor de afbeelding helderder en meer gedefinieerd lijkt. In het digitale tijdperk waarin perfectie wordt nagestreefd in elk frame, zijn er momenten waarop je de behoefte voelt om je afbeeldingen te verscherpen. Photoshop blinkt in dit opzicht uit en is de beste tool om die scherpe afwerking en precisie te bereiken waar zowel professionals als hobbyisten naar op zoek zijn.
Waarom is het verscherpen van een afbeelding zo belangrijk?
Het verscherpen van een foto is om verschillende redenen van het grootste belang. Ten eerste accentueert het de fijnere details, waardoor de onderwerpen en elementen in een foto opvallen. Deze verhoogde helderheid zorgt ervoor dat de aandacht van de kijker wordt getrokken naar de belangrijkste aandachtspunten van de foto. Ten tweede, door de inherente beperkingen van camerasensoren en lenzen, kunnen beelden die rechtstreeks uit de camera komen slechts soms elke nuance in perfecte helderheid vastleggen. Verscherpen compenseert deze beperkingen, verfijnt het beeld en geeft het een meer gepolijst uiterlijk.
Bovendien zorgt een goed verscherpte afbeelding bij het afdrukken of weergeven op verschillende digitale platforms ervoor dat de foto zijn integriteit behoudt en niet zacht of uitgewassen overkomt. In de competitieve wereld van fotografie en digitale kunst, waar elk detail belangrijk is, is verscherpen een onmisbaar hulpmiddel om de visuele impact van een afbeelding te vergroten, waardoor deze aantrekkelijker en boeiender wordt voor de kijker.
Dus, hoe verbeter je je foto's met software? Laten we het samen uitzoeken!
Een Kleine Bonustip: Versnel uw Bewerkingen met Luminar Neo
Voordat ik me in de complexe wereld van Photoshop ga verdiepen, wil ik eerst Luminar Neo uitlichten. Deze geavanceerde fotobewerker evenaart de mogelijkheden van Photoshop en maakt gebruik van de efficiëntie van AI, waardoor je snellere bewerkingen kunt uitvoeren. Stel je voor dat je Photoshop-kwaliteitsresultaten behaalt, maar dan in de helft van de tijd!
Voor diegenen die de beeldscherpte willen verbeteren zonder de steile leercurve van ingewikkelde gereedschappen, is Luminar Neo de ideale oplossing. De gebruiksvriendelijke interface is ontworpen voor de beginnende fotograaf en de doorgewinterde fotograaf die op zoek is naar een gestroomlijnde bewerkingservaring.
Je Foto's Verscherpen in Luminar Neo
Je kunt een snel en eenvoudig verscherpingseffect bereiken met het gereedschap Scherpte. Deze bevindt zich op het tabblad Bewerken onder de categorie Ontwikkelen. Hier volgt een korte handleiding voor het gebruik van het gereedschap:
Stap 1. Upload uw afbeelding naar Luminar Neo en open deze.
Stap 2. Ga naar het tabblad Bewerken en zoek het gereedschap Scherpte onder de categorie Ontwikkelen.
Stap 3. Pas de volgende schuifregelaars aan voor het beste effect:
Verscherpen - bepaalt de hoeveelheid scherpte die op je afbeelding wordt toegepast.
Straal - bepaalt de grootte van het gebied rond elk punt dat je wilt verscherpen. Een kleinere straal beïnvloedt kleinere details. Deze aanpassing werkt hand in hand met de schuifknop Verscherpen en het aanpassen van de ene heeft een aanzienlijke invloed op de andere. Als je een van beide schuifregelaars te hoog instelt, kan dit leiden tot aanzienlijke kleur- en contrastvervorming. Dus als je wilt dat je foto er natuurlijk uitziet, houd het dan onder 50%.
Maskeren - hiermee bepaal je welke gebieden worden aangepast. Je kunt bijvoorbeeld selectief het contrast verhogen in gebieden met een hoog contrast (bijv. ogen of gebladerte) terwijl je gebieden die je glad wilt laten (bijv. huid of lucht) vermijdt. Als je alles gelijkmatig wilt aanpassen, laat je de maskerschuifregelaar op 0 staan.
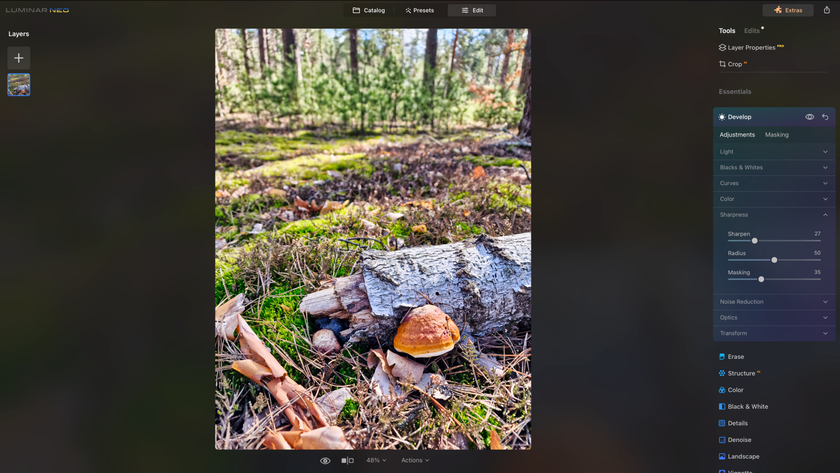
Stap 4. Als u tevreden bent met het resultaat, gaat u verder met de volgende aanpassing, want Luminar Neo heeft uw werk al opgeslagen.
Niets is makkelijker, toch?
De Kracht van op AI Gebaseerde Tools Benutten
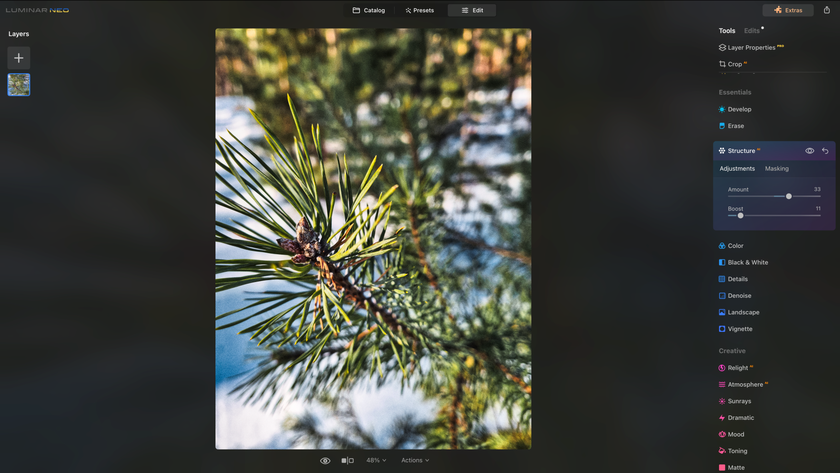
Structuur AI
Luminar Neo heeft meer dan één hulpmiddel om te helpen bij het verscherpen van je foto. Kies Structuur AI in het tabblad Bewerken om snel en slim de helderheid en details van elke foto te verbeteren.
Het beste aan Structure AI is dat kunstmatige intelligentie de verbetering selectief toepast en menselijke gezichten vermijdt, waar verscherping er onnatuurlijk uit zou kunnen zien.
Superscherpe AI
We raden je aan om een van de Extensies van Luminar Neo, Supersharp AI, te proberen om meer gecompliceerde bewegingsonscherpte op te lossen.
Het is een hulpmiddel op professioneel niveau met eenvoudige bediening dat de algemene wazigheid in foto's met bewegingsonscherpte aanpakt en zelfs wazige gezichten kan verbeteren.
Synchronisatie-instellingen
Als je hetzelfde effect aan andere foto's in je bibliotheek wilt geven, kun je de instellingen kopiëren en plakken naar andere foto's zonder dezelfde workflow te hoeven herhalen. Wat een tijdsbesparing!
Luminar Neo is een geweldige fotobewerkingssoftware om snel en eenvoudig een foto onscherp te maken. Het heeft slimme schuifregelaars en geweldige gereedschappen en kan je snel helpen de beste resultaten te bereiken. Als je op zoek bent naar een alternatief voor de ingewikkelde gereedschappen van Photoshop, probeer dan Luminar Neo en kijk hoe perfect het past bij jouw bewerkingsworkflow. Dit is een geweldig hulpmiddel om de klus snel en gemakkelijk te klaren.
Een Afbeelding Verscherpen in Photoshop
Elke foto heeft baat bij een beetje verscherping, omdat het contrast toevoegt. Het is echter belangrijk om de grenzen van je foto te kennen en niet te overdrijven.
Dit is de snelste en eenvoudigste manier om afbeeldingen te verscherpen in Photoshop:
1. Open je afbeelding in Photoshop.
2. Selecteer de fotolaag in het Lagenpaneel en navigeer naar het menu Filter. Kies Omzetten voor slimme filters om te verscherpen zonder de foto permanent te wijzigen.
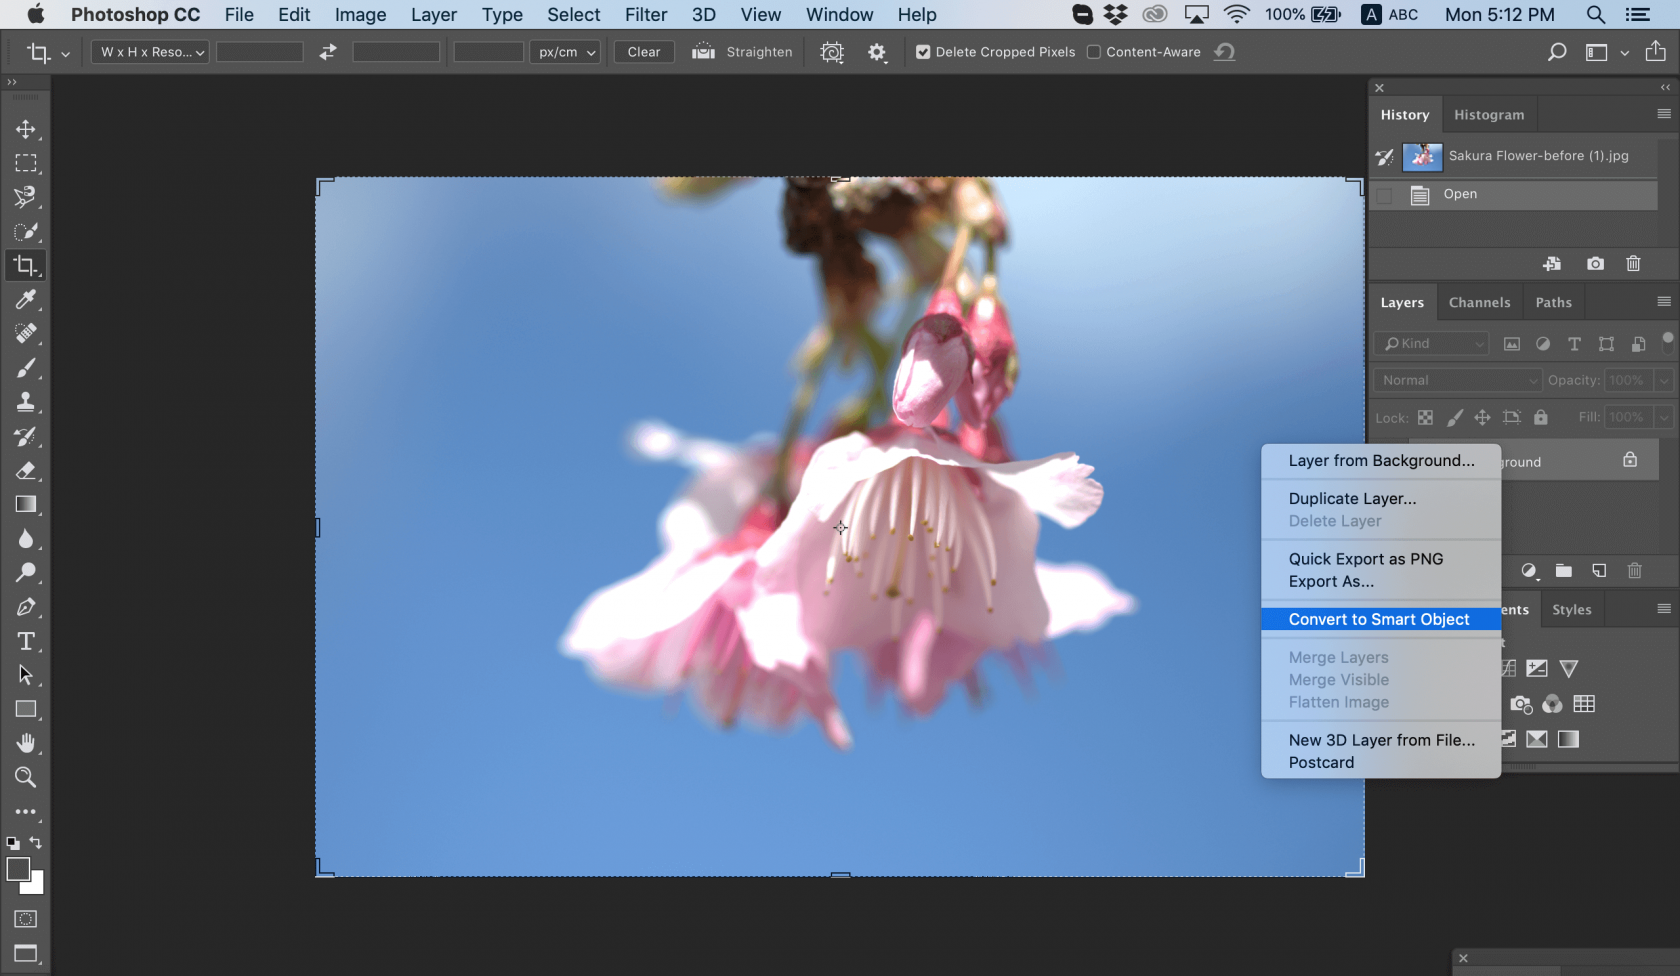
Foto door Chris Willson
3. Pas het filter Onscherpmasker toe.
4. Kies Verscherpen > Onscherpmasker in het menu Filter.
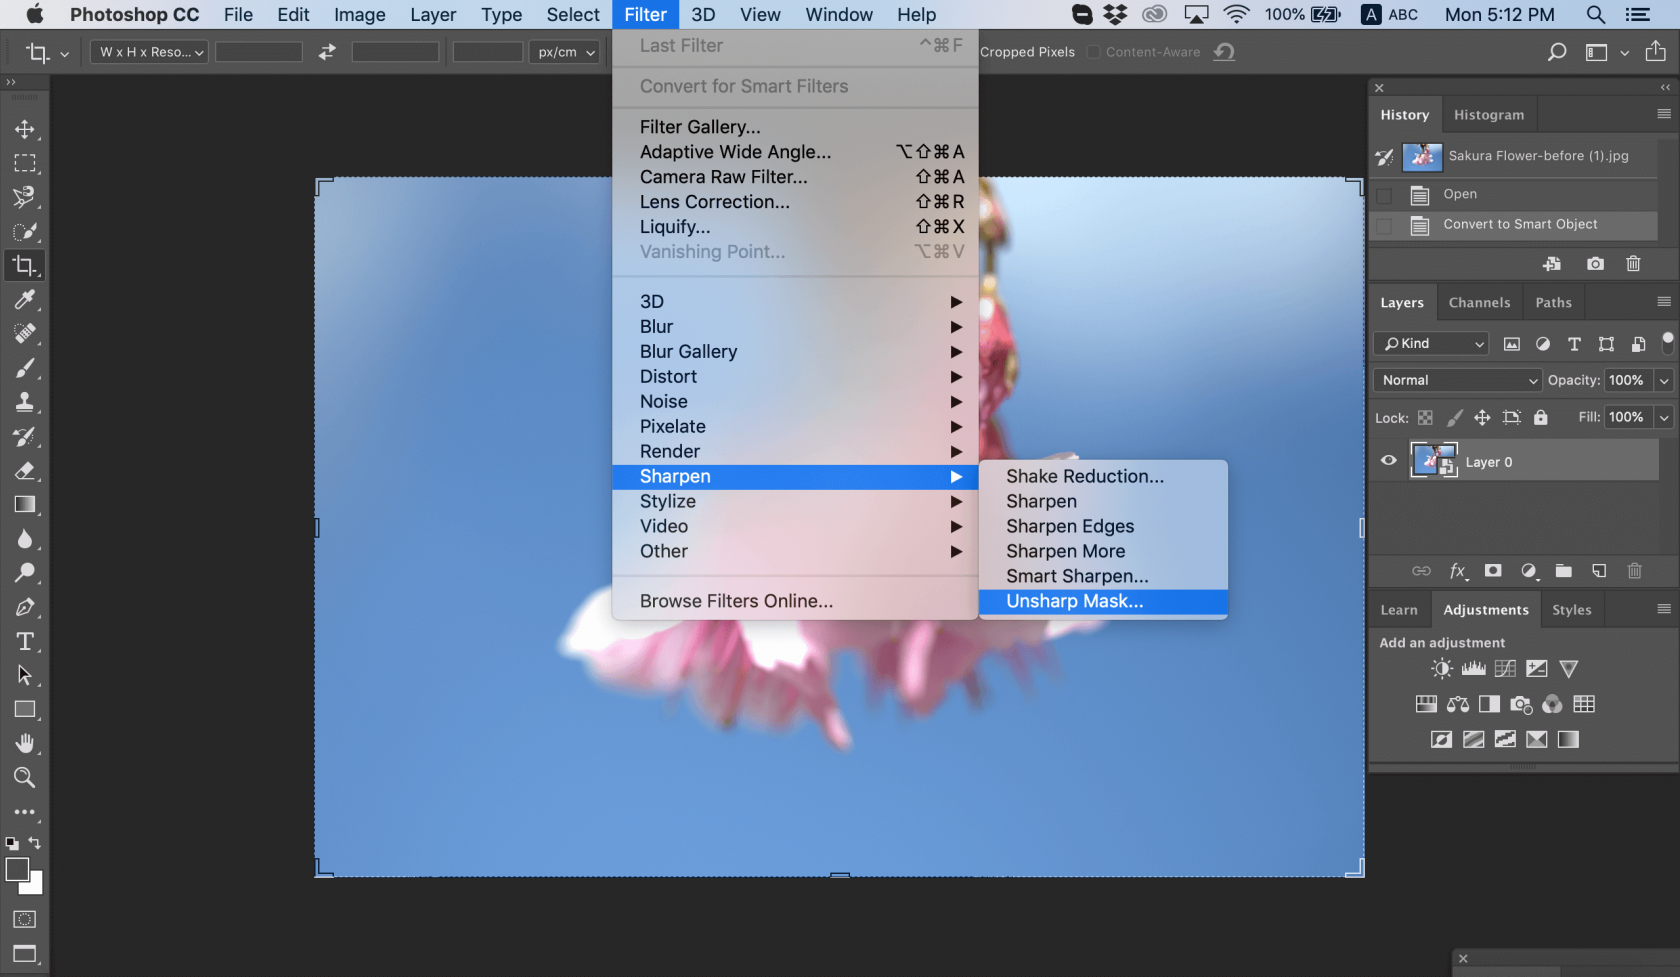
Foto door Chris Willson
5. Sleep de schuifregelaars om het gewenste effect te bereiken in het dialoogvenster Onscherpmasker.
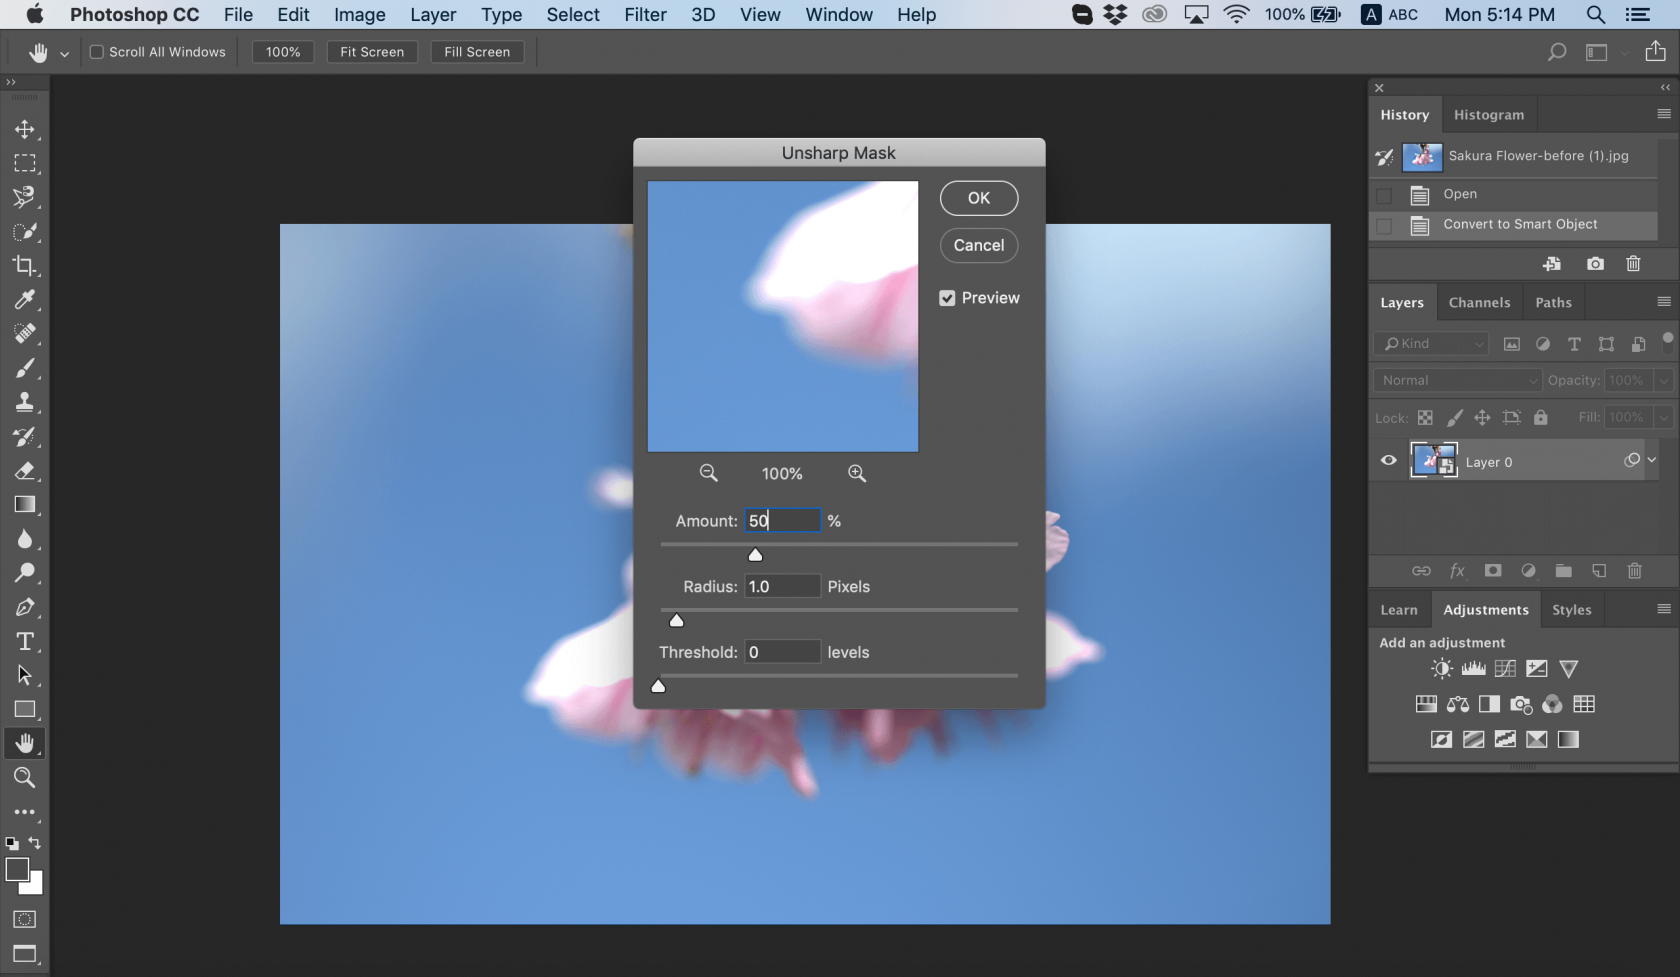
Foto door Chris Willson
6. Sla je foto op.
Dit is de essentie van hoe je een afbeelding verscherpt in Photoshop. Er zijn echter veel details die we zouden kunnen toevoegen. Je kunt bijvoorbeeld dubbelklikken op het Zoomgereedschap in het paneel Gereedschappen om tot 100% in te zoomen om de scherpte nauwkeurig te beoordelen.
Als je de verscherping moet wijzigen, kun je dat doen door te dubbelklikken op Onscherpmasker in het Lagenpaneel om het dialoogvenster Onscherpmasker opnieuw te openen.
Onscherp Masker
Zoals je in het bovenstaande voorbeeld kunt zien, hebben we het Onscherpmasker gebruikt om een afbeelding te verscherpen. Unsharp Mask is een filter voor het verscherpen van afbeeldingen met schuifregelaars voor de hoeveelheid, straal en drempelwaarde.
Met de schuifregelaar Hoeveelheid kun je de sterkte van het verscherpingseffect instellen. Hoe meer je schuift, hoe meer verscherping je krijgt.
De schuifregelaar Straal stelt de breedte van het verscherpingseffect aan de randen van objecten in. Met deze regelaar kun je de scherpte van de pixels aan de randen van je foto beheren.
Met de schuifregelaar Drempel kun je de algemene scherpte van een afbeelding regelen. Gebruik het om de verscherping te minimaliseren van elementen die je niet wilt benadrukken, zoals korrel in de lucht. Door deze naar rechts te schuiven, kun je de scherpte van overscherpe pixels minimaliseren.
Experimenteer met deze schuifregelaars om te zien welke het beste werkt om onscherpe afbeeldingen te verscherpen. Houd er rekening mee dat het effect varieert op basis van de grootte van je afbeelding omdat Unsharp Mask zich richt op pixels.
Slim verscherpen
Zijn er nog andere manieren om een afbeelding onscherp te maken? Je kunt het Smart Sharpen filter gebruiken om onscherpe afbeeldingen online te verscherpen en scherpte toe te voegen. Basis- en geavanceerde instellingen bevatten besturingselementen waarmee je kunt spelen met verschillende hoeveelheden scherpte, schaduw, hooglichten en meer. Waarin verschilt Smart Sharpen van Unsharp Mask? Smart Sharpen wordt aanbevolen voor gerichte verscherping omdat het ruis minimaliseert in gebieden met een laag contrast. Aan de andere kant is het Unsharp Mask filter goed voor het verscherpen van de uitvoer.
Zo pas je Smart Sharpen toe:
1. Open je foto.
2. Klik in het Lagenpaneel op een afbeeldingslaag of op de Achtergrond en druk vervolgens op Ctrl-J (Windows) of Cmd-J (Mac) om deze te dupliceren. Klik met de rechtermuisknop op de gedupliceerde laag en kies Omzetten in Smart Object.
3. Kies Filter > Verscherpen > Slim verscherpen. Er wordt nu een dialoogvenster geopend.
4. Kies Default in het menu Preset.
5. Verlaag de schuifregelaar Ruis verminderen om het volledige verscherpingseffect te bekijken.
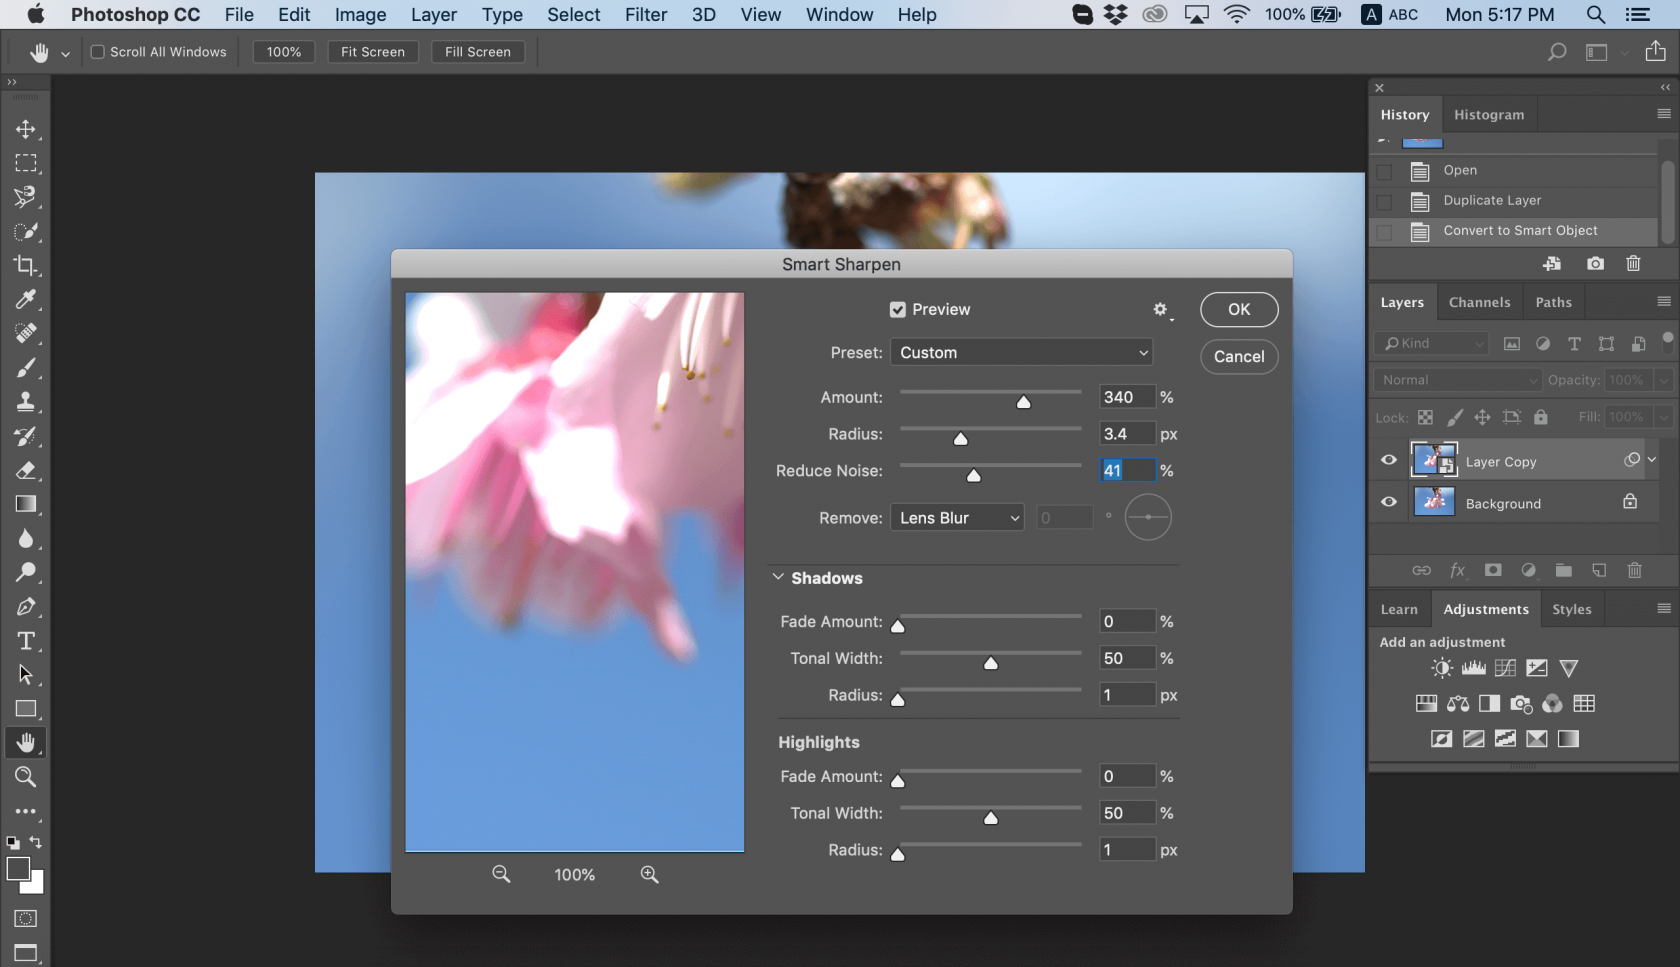
Foto door Chris Willson
6. Kies een waarde voor de sterkte van de verscherping. Verhoog de Straalwaarde tot je halo-effecten ziet langs scherpe randen en verlaag deze dan net genoeg om de halo's te verwijderen. De afbeelding ziet er nu misschien te scherp uit, maar maak je geen zorgen; je kunt dit aanpassen door de waarden Straal, Vervagingshoeveelheid en Toonbreedte in de Hooglichten aan te passen.
7. Om de onscherpe en verscherpte versies van de afbeelding te vergelijken, druk je op de knop Voorbeeld in het dialoogvenster. Je kunt nog steeds de details wijzigen en je wazige afbeelding verscherpen. Sla je afbeelding op als je klaar bent.
Een ander voordeel van het gebruik van het Smart Sharpen filter is de mogelijkheid om instellingen op te slaan en ze in de toekomst met andere foto's te gebruiken.
Hoogdoorlaatfilter
Een andere manier om een afbeelding te verscherpen in Photoshop is door het Hoogdoorlaatfilter toe te passen. Dit is een geweldige beeldverscherper als je niet wilt experimenteren met verschillende schuifregelaars, omdat het slechts één zeer effectieve instelling heeft.
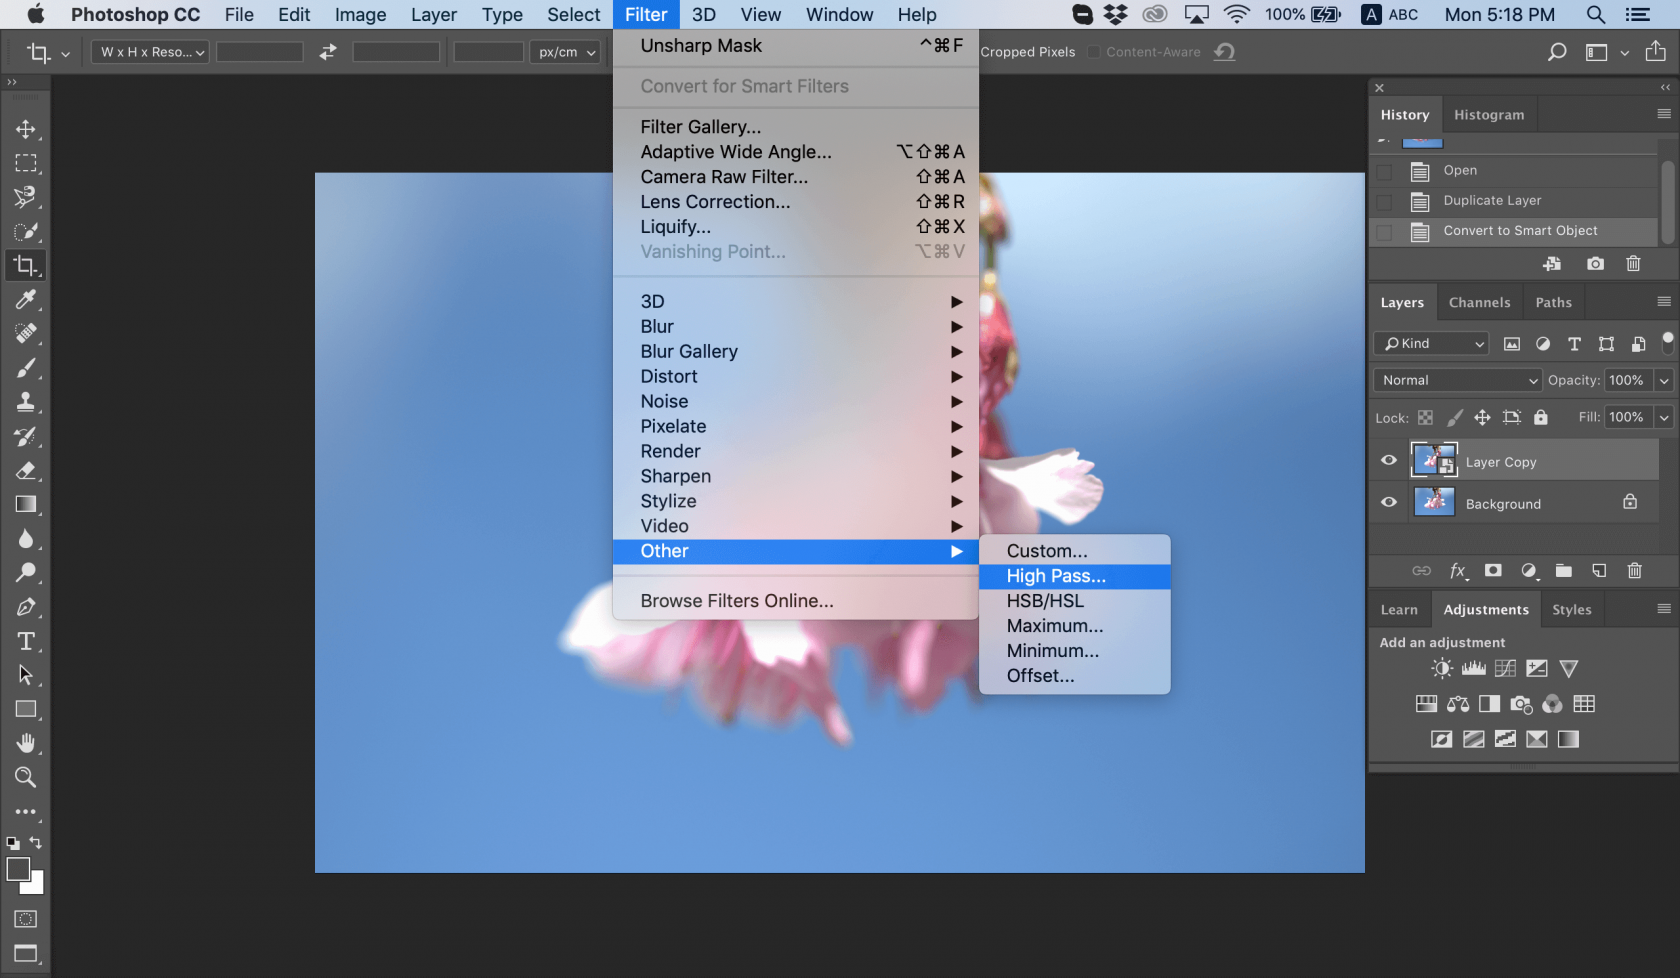
1. Stel de Stralingschaal in op het minimum en klik op OK. Met deze instelling kun je grijswaarden toevoegen aan je afbeelding.

Foto door Chris Willson
2. Wijzig de overvloeimodus voor je foto.
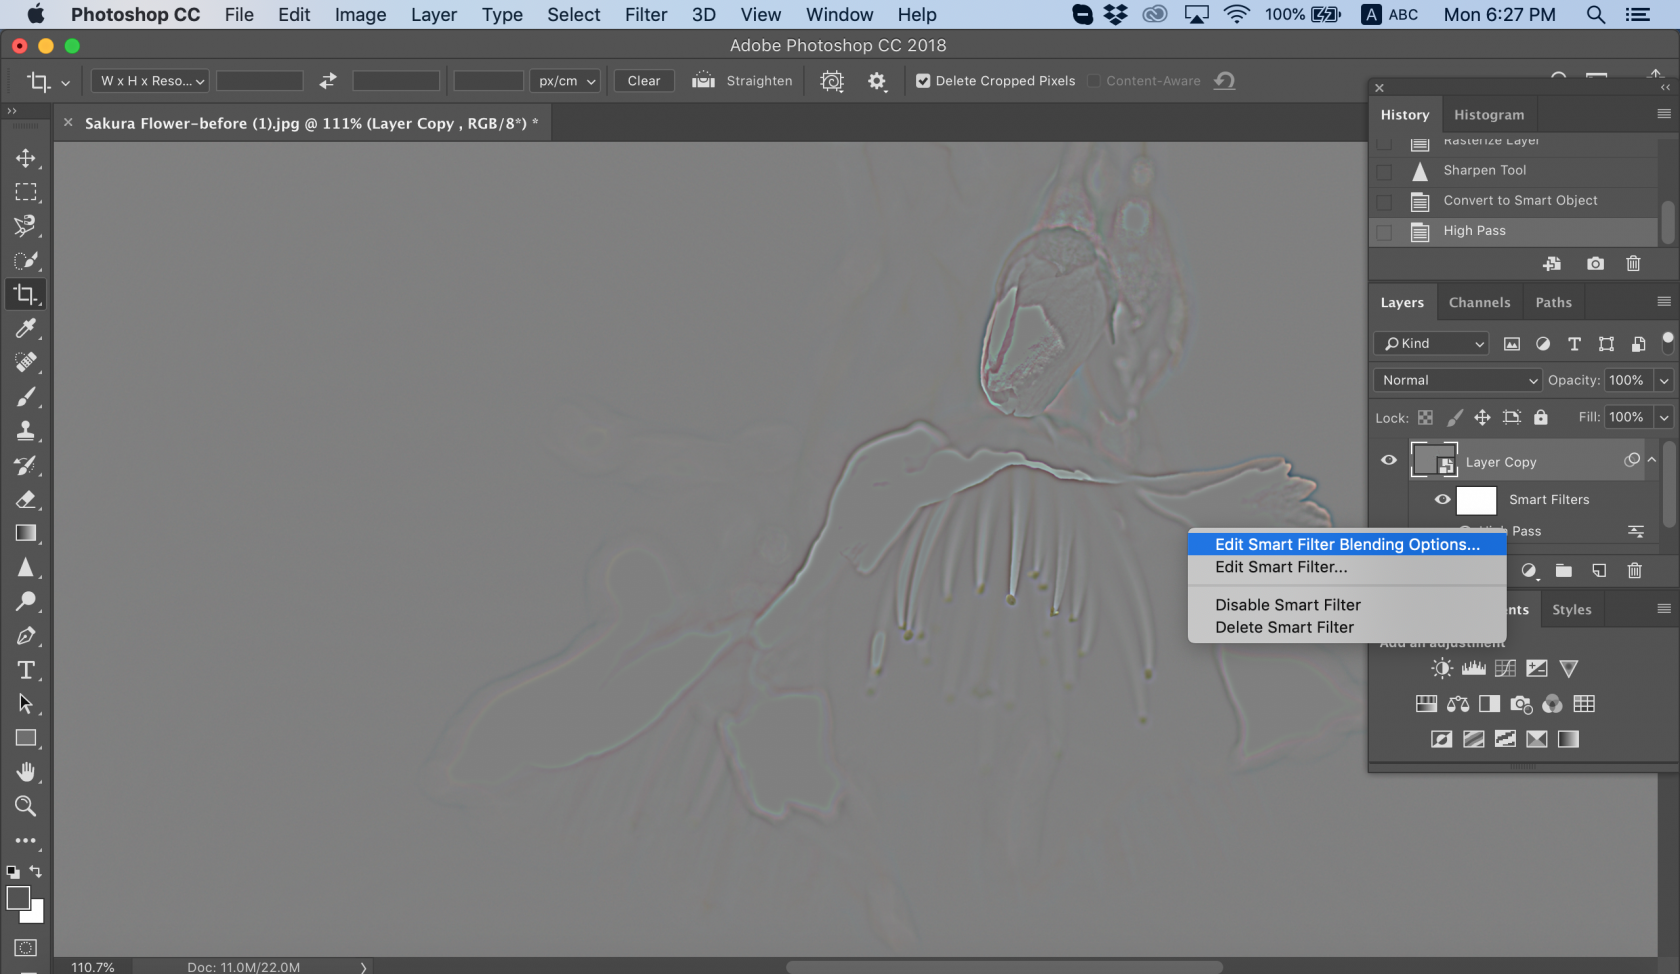
Foto door Chris Willson
Gebruik wat je maar wilt: overlay, zacht licht, hard licht of lineair licht. Terwijl je de overvloeimodus wijzigt, kun je de scherpte van je foto zien en de gebieden waaraan je moet werken.
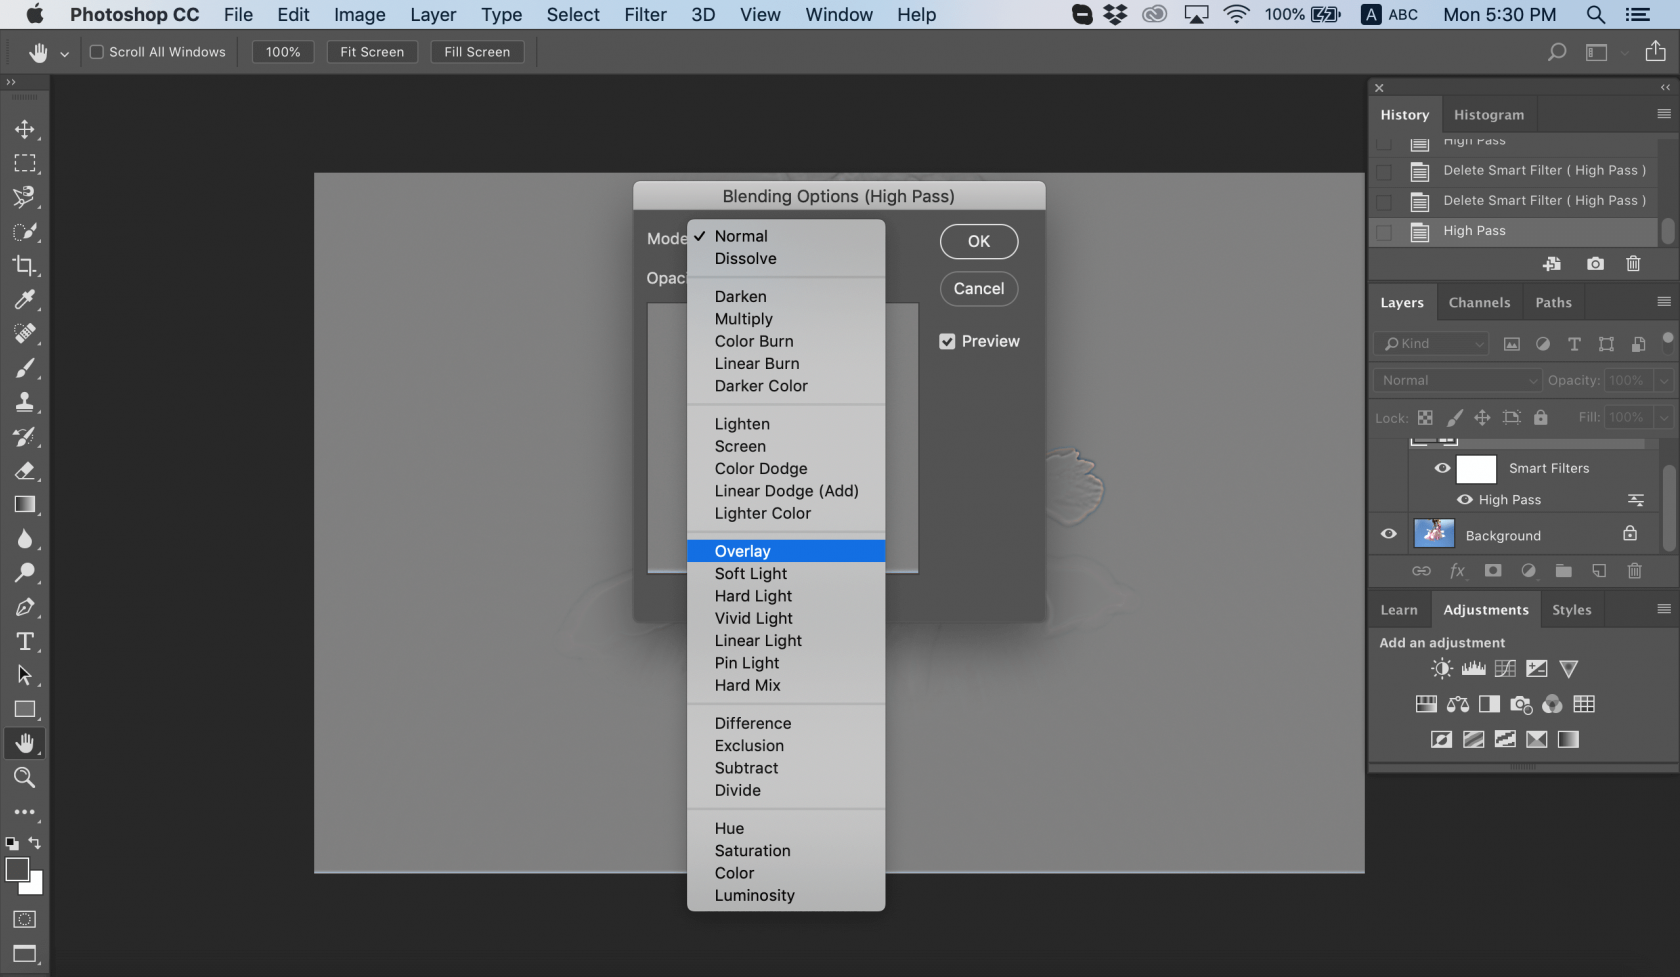
Foto door Chris Willson
3. Klik op OK.
4. Sla je project op of exporteer je foto voor verder gebruik.
Als je niet tevreden bent met het resultaat, kun je de straal en overvloeimodus wijzigen om een perfecte balans van scherpte te vinden. Hier lees je hoe je een foto onscherp maakt als je de tegenovergestelde workflow nodig hebt.
Trillingsreductiefilter
Soms moet je een afbeelding scherper maken, omdat beweging van de camera trillingen veroorzaakt. Photoshop heeft een geweldig hulpmiddel dat is ontworpen om beeldonscherpte te verminderen die wordt veroorzaakt door het per ongeluk schudden van de camera. Dit hulpmiddel heet de Shake Reduction filter, die je kunt vinden in het menu Filter > Sharpen. De belangrijkste functie is het minimaliseren van onscherpte die het gevolg is van verschillende soorten camerabewegingen, waaronder lineaire, boogvormige, roterende en zelfs zigzag bewegingen. Hier lees je hoe je dit filter gebruikt om je foto onscherp te maken:
1. Open de afbeelding in Photoshop.
2. Selecteer Filter > Verscherpen > Bewegingsreductie. Photoshop zal automatisch het deel van de afbeelding analyseren dat het meest geschikt is voor trillingsreductie, de aard van de onscherpte bepalen en de juiste correcties extrapoleren naar de volledige afbeelding.

Foto door Chris Willson
3. De gecorrigeerde afbeelding wordt weergegeven in het dialoogvenster Bewegingsreductie. Je kunt er nu andere aanpassingen op toepassen.
4. Sla je werk op als je er tevreden over bent.
Als je geen verschil ziet, klik dan op de optie Voorbeeld om de afbeelding voor en na het toepassen van het filter te bekijken. Of gebruik een ander gereedschap voor het verscherpen van foto's om de klus te klaren.
Afbeeldingsgebieden verscherpen
Het laatste gereedschap dat we vandaag behandelen is Verscherpen. De belangrijkste functie is om het contrast langs de randen van je foto te verhogen. Dit verhoogt op zijn beurt de schijnbare scherpte. Hoe vaker je dit gereedschap gebruikt op een deel van je foto, hoe meer verscherping je krijgt. Tip: Als het gereedschap Verscherpen niet zichtbaar is, klik dan op het gereedschap Vervagen en houd dit ingedrukt.
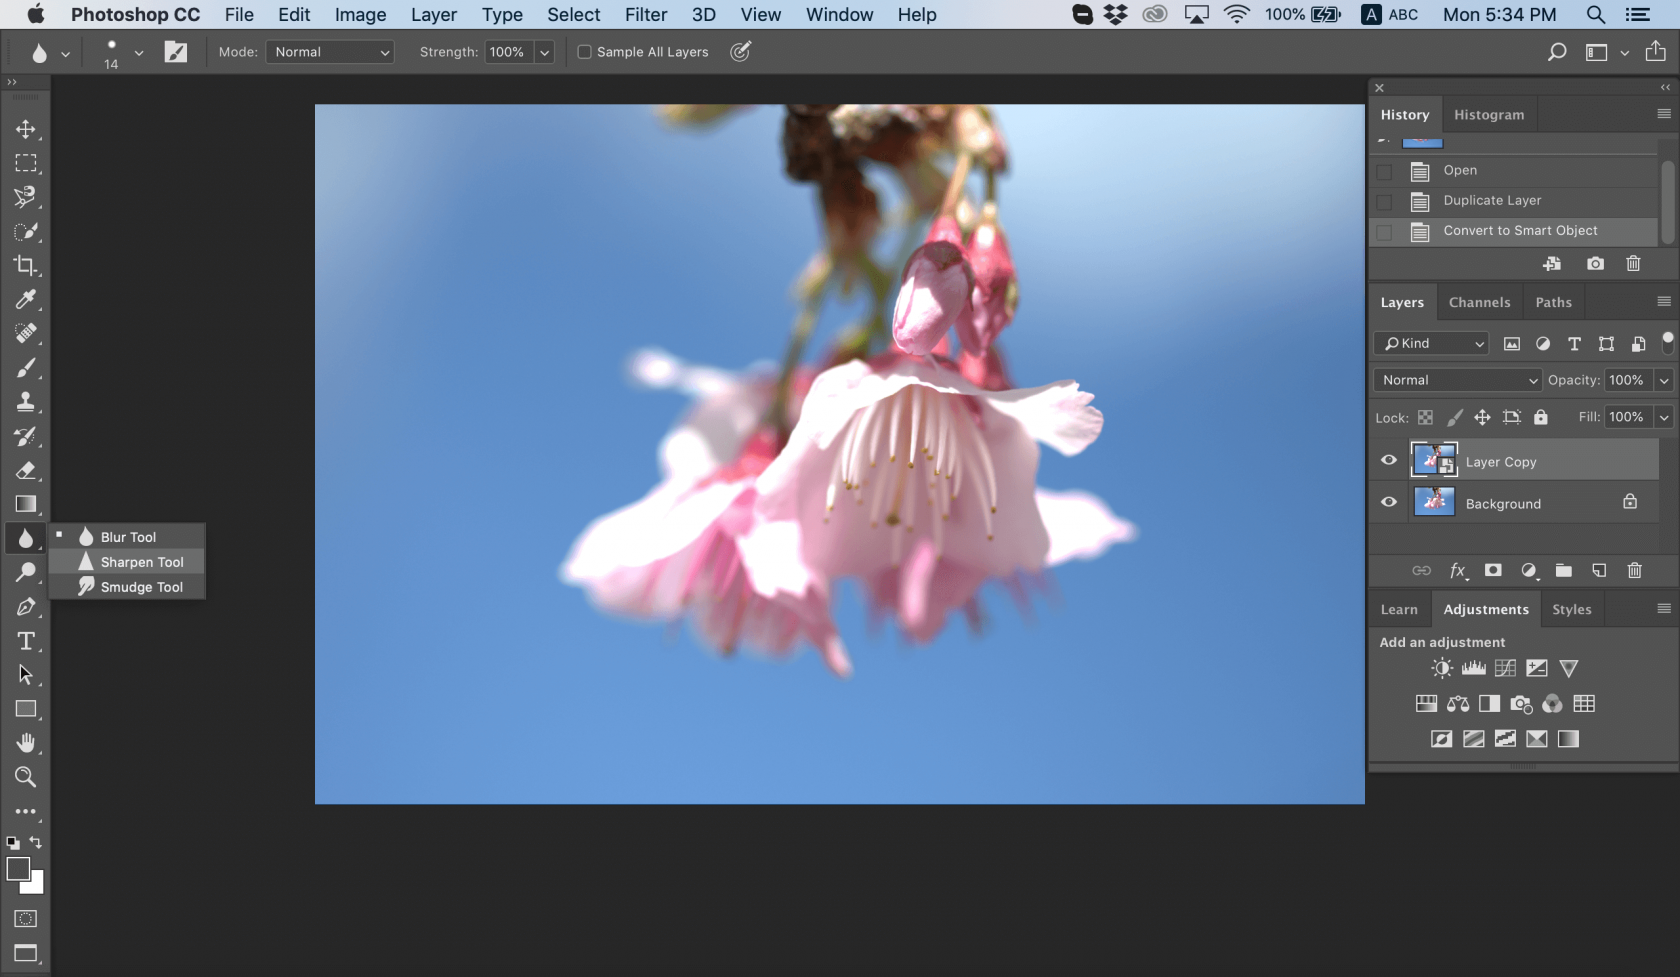
Foto door Chris Willson
1. Open je afbeelding in Photoshop.
2. Kies een penseelpunt en stel opties in voor de overvloeimodus en de sterkte.
3. Selecteer Sample All Layers om te verscherpen met behulp van gegevens van alle zichtbare lagen. Als deze optie niet is geselecteerd, gebruikt het gereedschap Verscherpen alleen gegevens van de actieve laag.
4. Selecteer Bescherm detail om details te verbeteren en pixelachtige artefacten te minimaliseren. Je kunt dit deselecteren als je een meer dramatisch verscherpingseffect wilt.
5. Sleep over het gedeelte van de afbeelding dat je wilt verscherpen en maak je afbeelding onscherp.
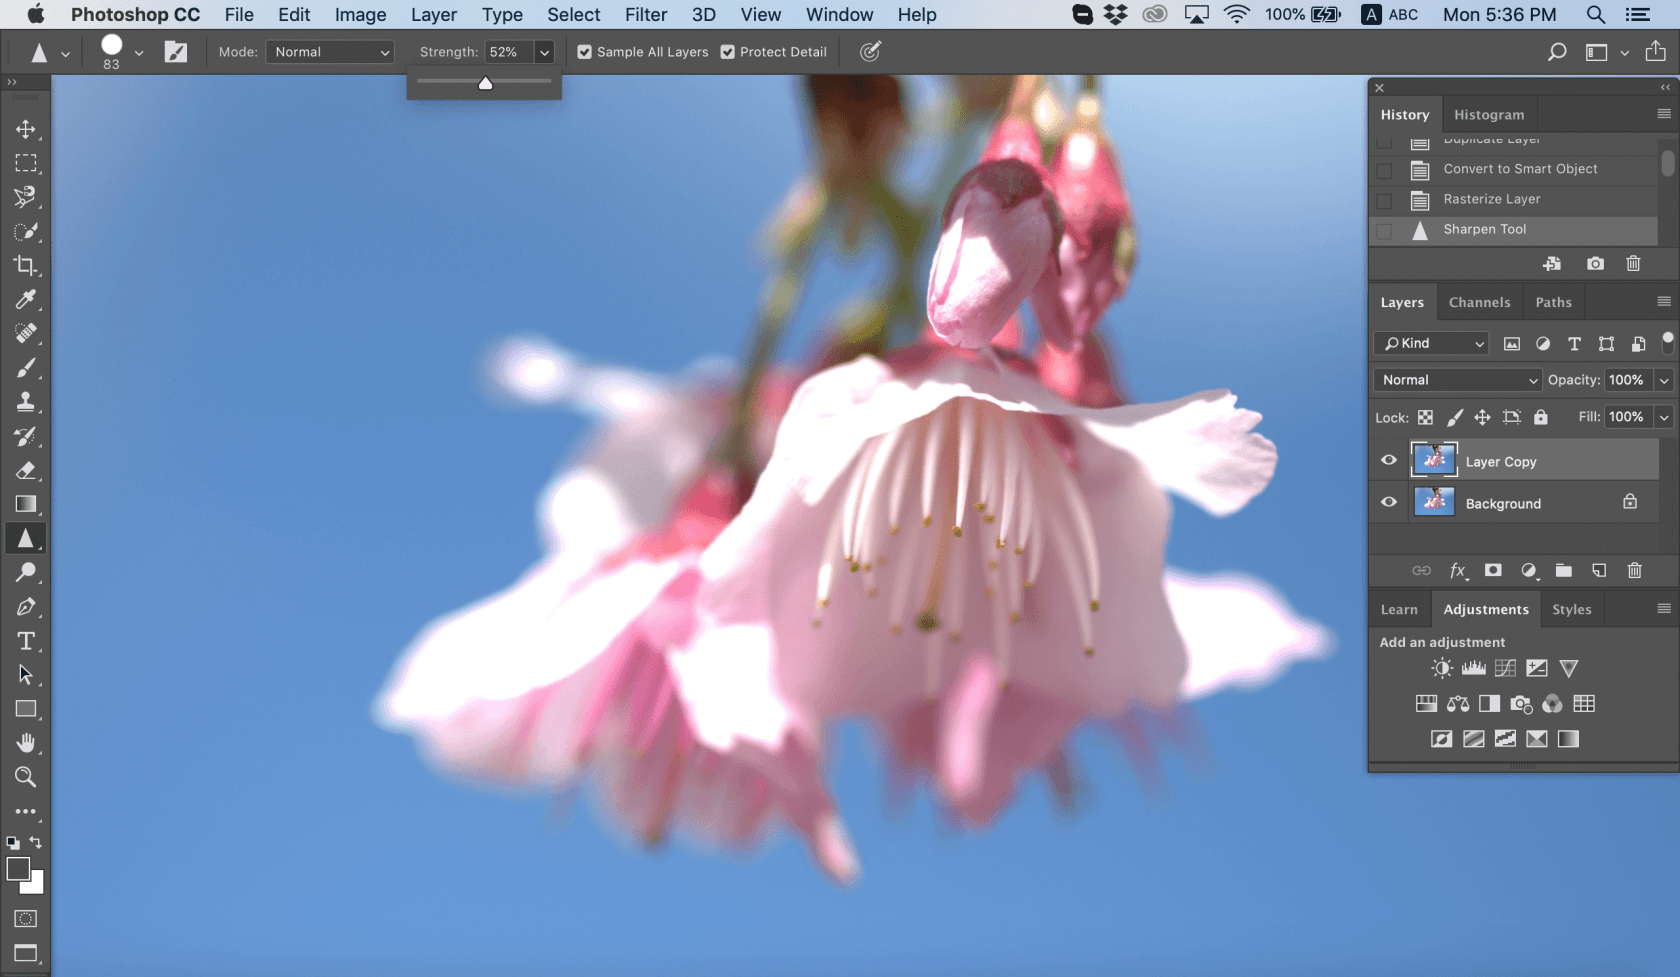
Foto door Chris Willson
Dit is een geweldig hulpmiddel als je de klus snel en gemakkelijk wilt klaren. Als je afbeelding te wazig is, kun je ook dit artikel bekijken om uit te vinden hoe je een wazige afbeelding helder kunt maken.
FAQ
Is er een verscherpingsgereedschap in Photoshop?
Ja, Photoshop biedt verschillende methoden om afbeeldingen te verscherpen, waaronder het gereedschap "Verscherpen" en filters zoals "Smart Sharpen" en "Unsharp Mask".
Hoe verscherp je een onscherpe foto in Photoshop?
Open de afbeelding in Photoshop.
Blader naar Filter > Verscherpen > Bewegingsvermindering.
Bekijk de gecorrigeerde afbeelding in het dialoogvenster Trillingsreductie.
Als het resultaat aan je verwachtingen voldoet, sla dan je werk op.
Hoe vergroot ik de helderheid in Photoshop?
Selecteer in het Lagenpaneel je afbeeldingslaag.
Klik met de rechtermuisknop op de laag en kies "Omzetten in Smart Object".
Blader naar Filter > Camera Raw Filter.
Open in Camera Raw het Basispaneel.
Pas indien nodig de schuifregelaar Textuur of Helderheid aan.
Klik op OK om de wijzigingen toe te passen en Camera Raw af te sluiten.
Wat is een beter alternatief voor Photoshop?
Luminar Neo van Skylum is een echte aanrader voor liefhebbers van fotobewerking. Deze AI-gestuurde software maakt indruk met gereedschappen zoals AI-gebaseerde hemelverbeteringen, naadloze objectverwijdering en gedetailleerde portretcorrecties. Voor diegenen die op zoek zijn naar geavanceerde bewerkingen, is dit een van de beste alternatieven voor Photoshop op het gebied van fotobewerking.
 >
>
