April 13
14 min. to read
How to Create an Old Paper Texture in Photoshop
Photoshop has some fantastic filters. You can really get creative and use texture overlays to develop interesting effects. For example, you can create photo textures. Moreover, you can create parchment paper effects. Textured effects such as these can add depth to your digital images, transforming a simple image into something artistic.
 If you understand the different filters, you can create whatever your imagination can conjure. In this guide, we look at how to create an old paper texture. This texture is perfect for image backgrounds or as a photography texture vintage paper overlay. In the second part, we will take a look at how to apply this texture in Luminar Neo. Luminar Neo is one of the best Photoshop plugins and has some brilliant effects that allow you to get creative with textures.
What is Vintage Paper?
In Photoshop, this is a texture or layer style that looks like aged, grunge, and a weathered sheet of paper. It can be used to add a retro, antique, or distressed effect to your digital artwork or photographs. Vintage crumple paper effects can come in a variety of styles, such as rough, stained, torn, or yellowed photo prints.
To apply this beautiful effect in Photoshop, you can either download and use a ready-made vintage paper texture image or use your own using filters, adjustments, brushes and blend modes. You can easily create an antique pattern in Photoshop and save it as a PSD file.
How to Make an Old Paper Texture in Photoshop
Creating an old paper background in Photoshop is a great way to add a distressed look to your graphic artwork or photos. By saving your file as a PSD, you can preserve all the layers and effects you have added to your picture, making it easy to edit and modify in the future as needed.
But how to add old paper texture in Photoshop? With some experimentation and creativity, designers can create a unique image that fits the style and mood of your project. Here are the basic steps to creating a vintage paper texture in Photoshop.
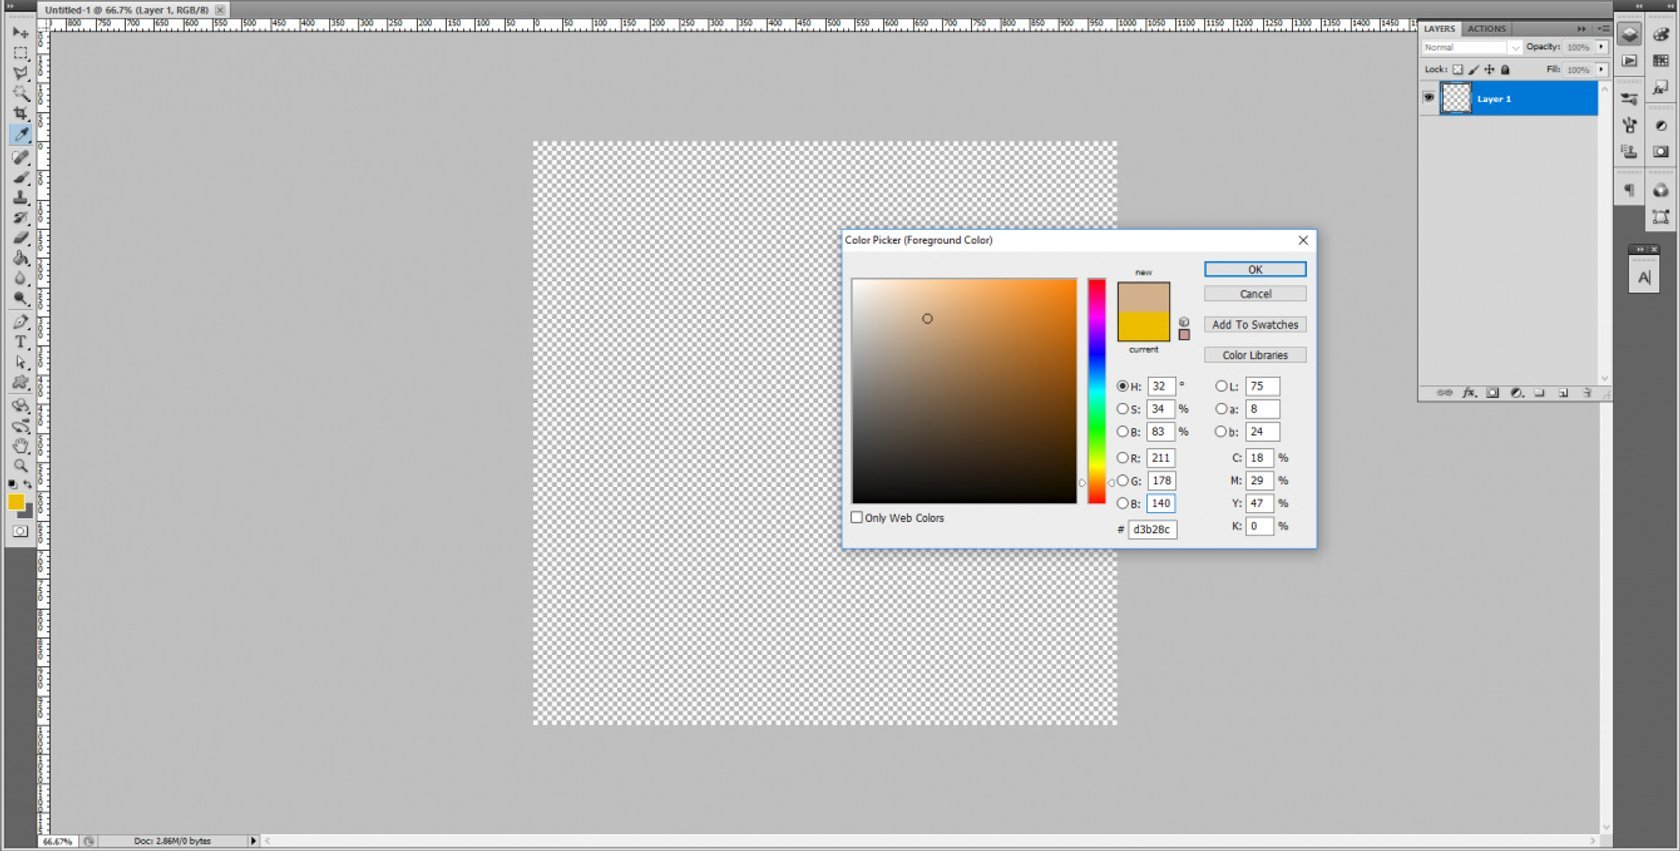
1. Create a new document and fill it with a solid color
First, create a new blank document (the document in our example is 1000px × 1000px at 72dpi resolution). Fill the white paper background layer with a solid brown (we used R 211 / B 178 / G 150). This will be the basis for your old paper texture retro effect. Then select whatever background color you feel is suitable. We chose this shade of brown as it resembles old parchment.
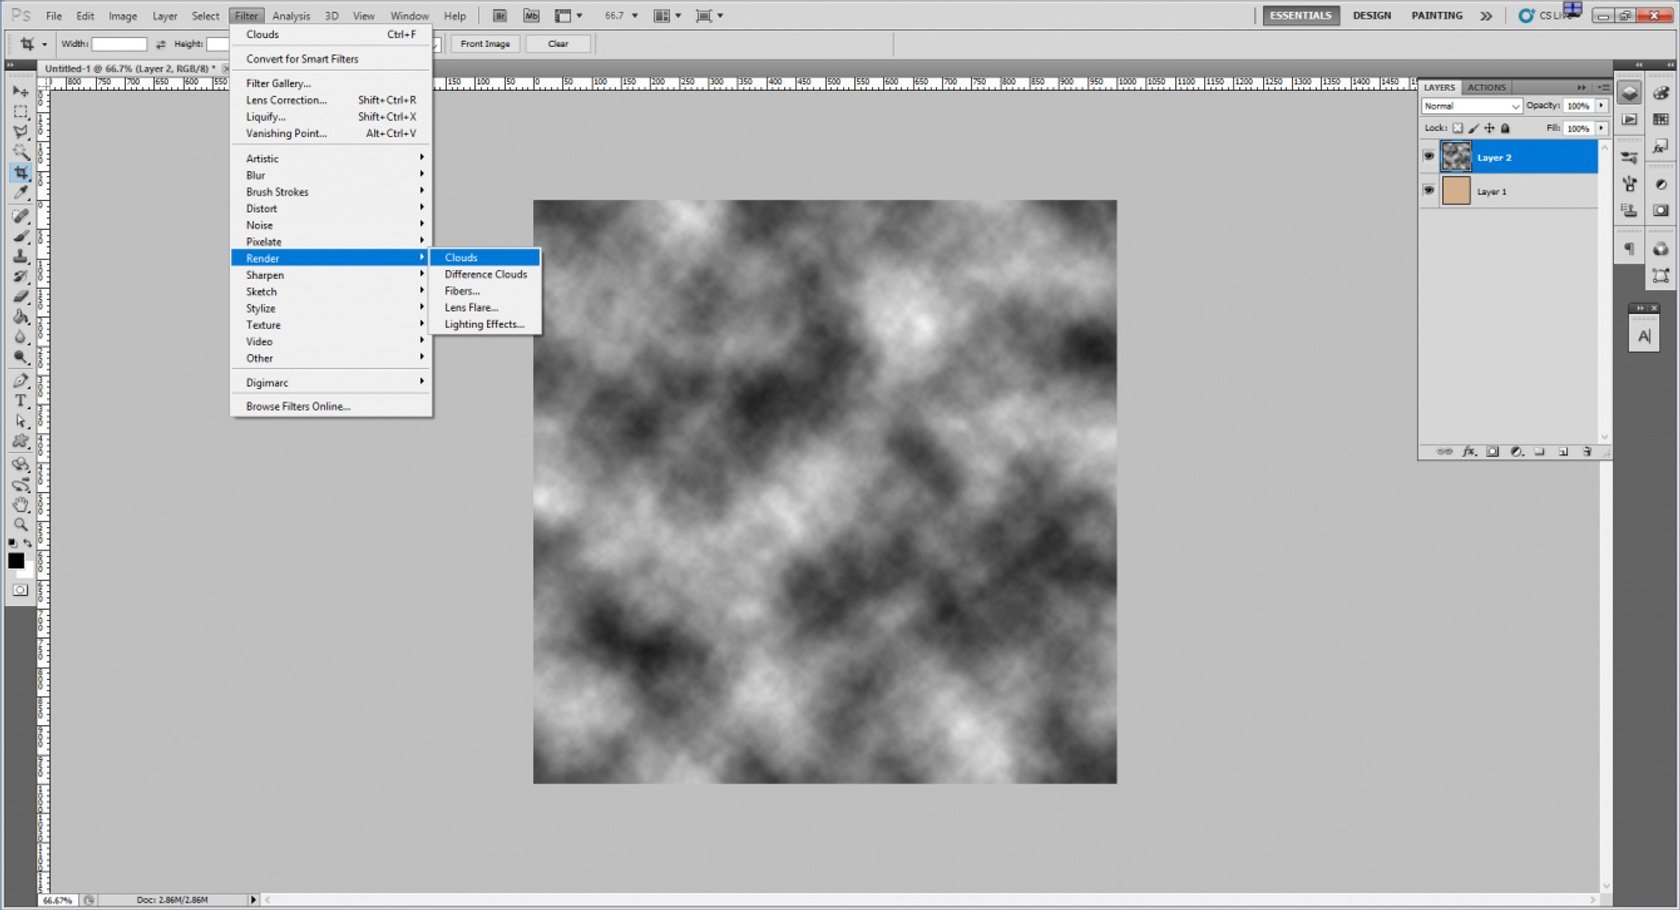
2. Create a new layer and apply the Clouds filter
Create a new layer on top of the brown background layer. Make sure that your color selections are reset to black and white (shortcut keys X, then D). Apply the Clouds filter: Filter > Render > Clouds. This will form the first layer of your paper texture background.
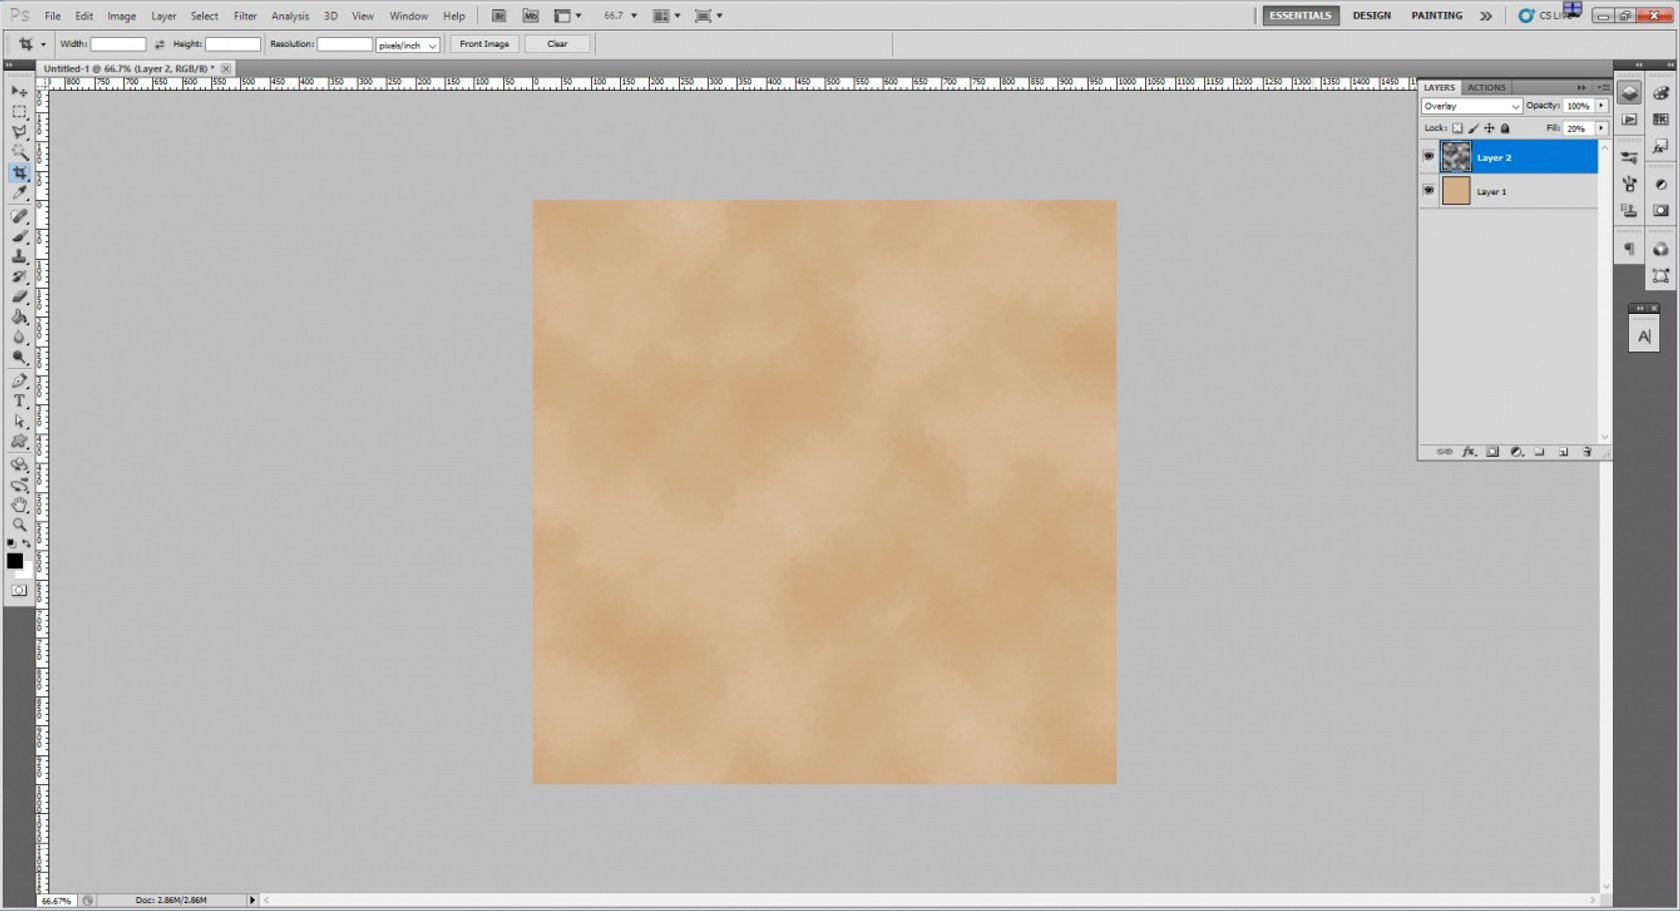
3. Apply the Spatter effect and change the overlay mode
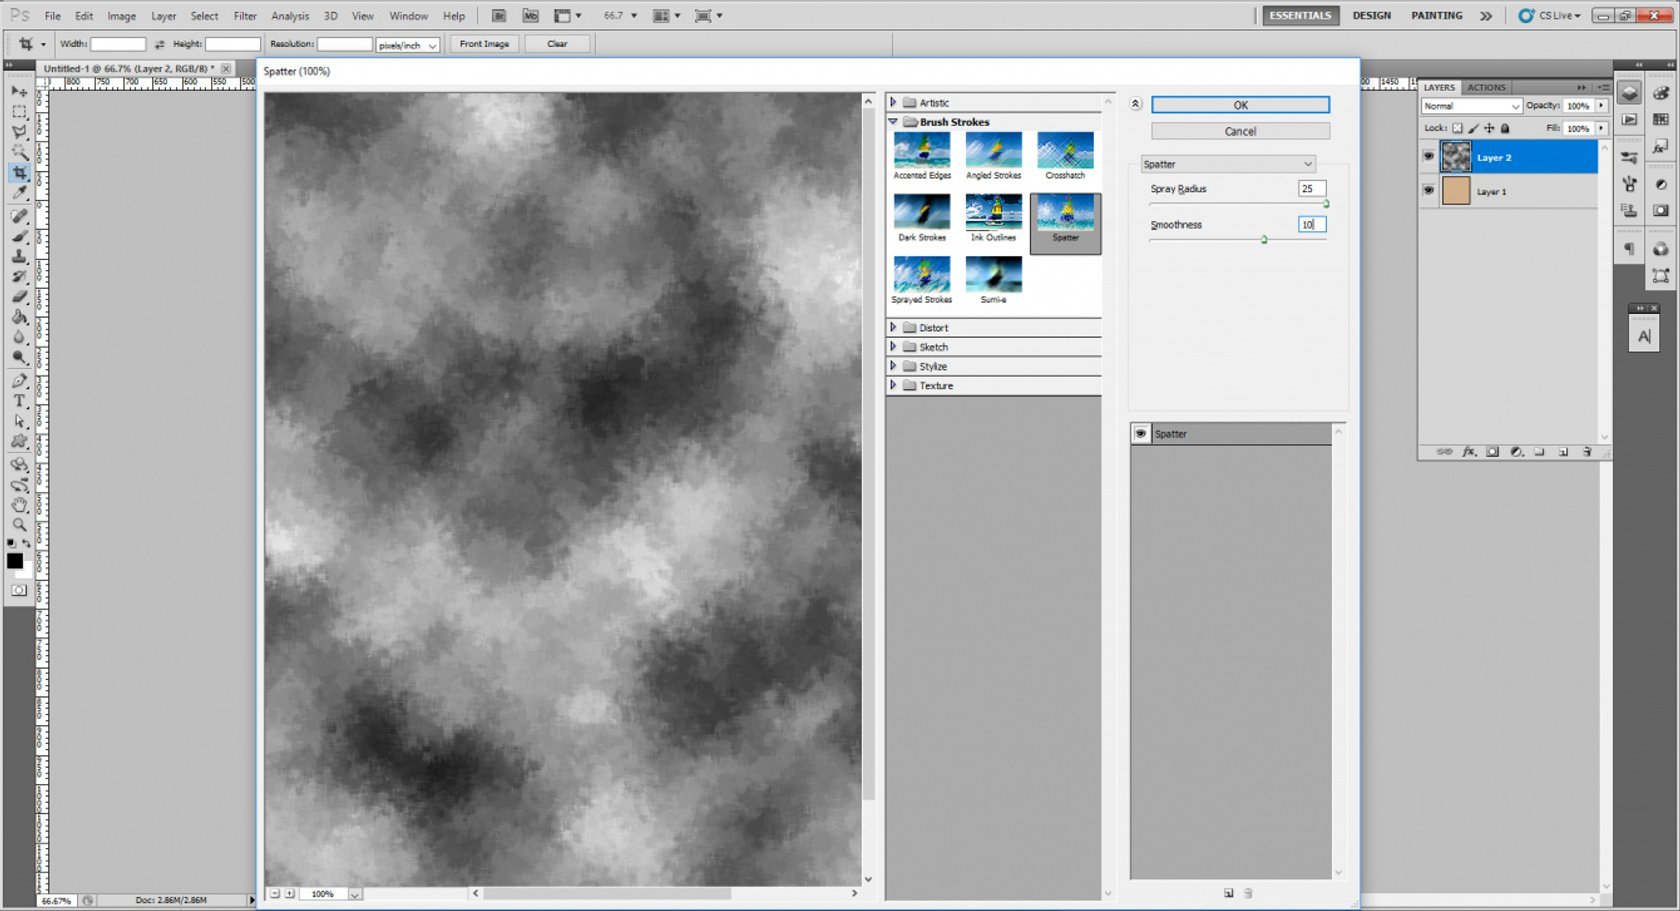
Moving on to the next step in our old paper texture Photoshop tutorial. With the second layer still selected, apply the Spatter filter: Filter > Brush Strokes > Spatter. Set the spray radius to 25 and the smoothness to 10. Once the Spatter filter has been applied, change the layer mode to overlay. The image should now start to resemble old paper. The above settings are preferable, as anything larger begins to resemble something completely different.
4. Create a new layer and apply the Clouds filter
Create a third layer on top of the second layer. Make sure the color palette is still set to black and white, then apply the Cloud filter once again. As you can see, creating an old photo paper texture in Photoshop is not that difficult.
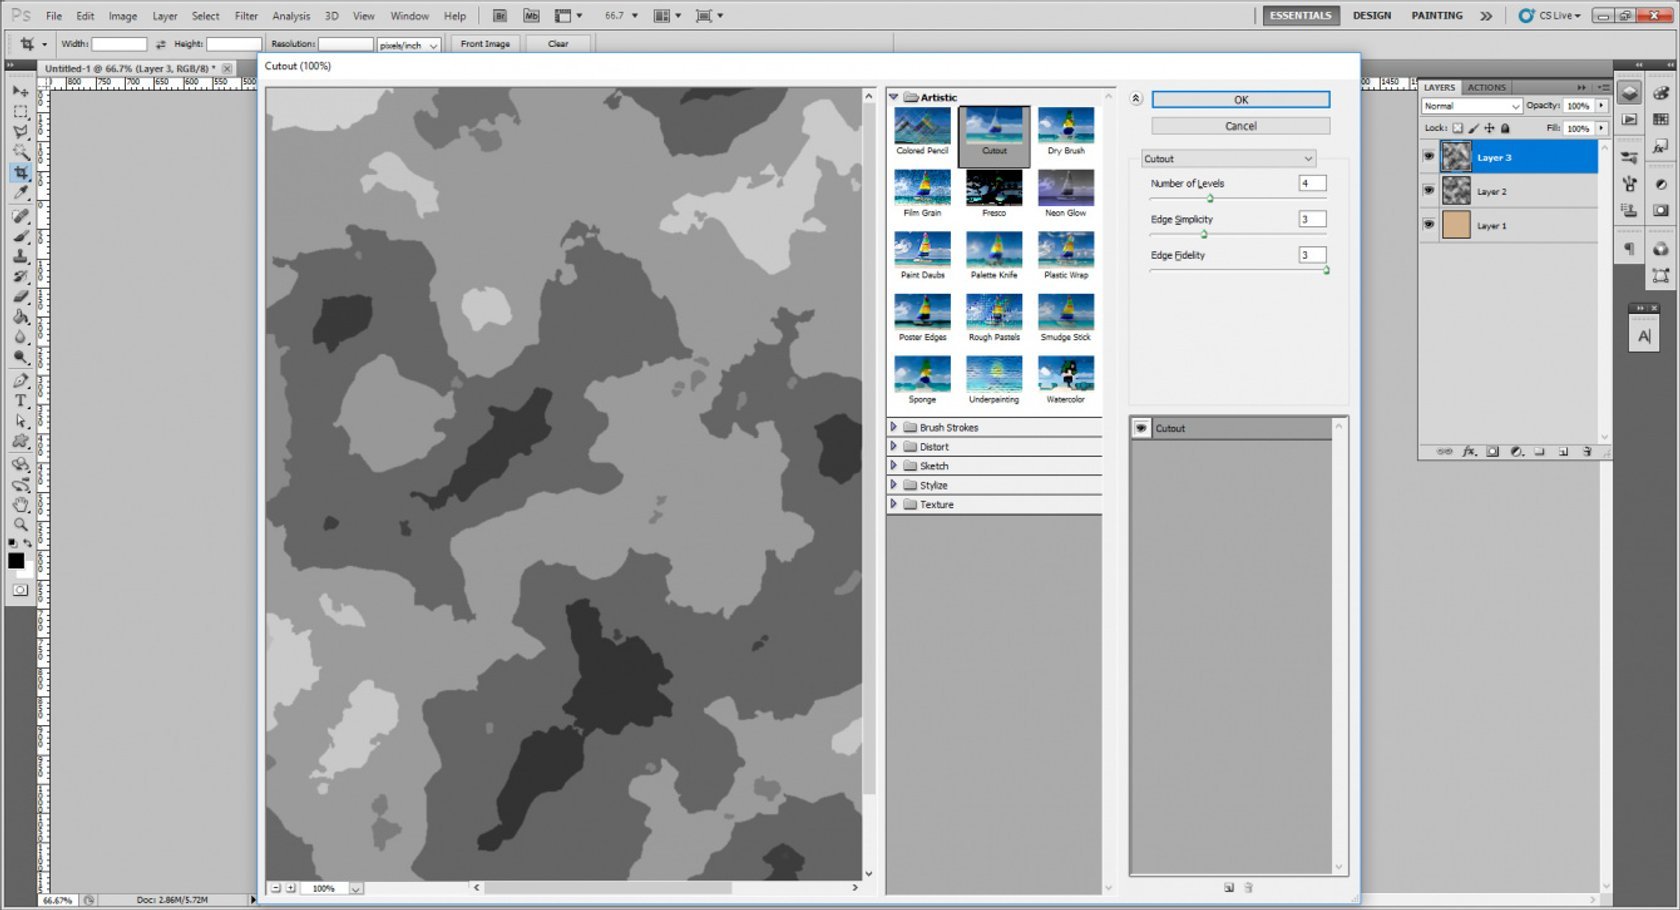
5. Apply the Cutout effect and change the overlay mode
With the third layer still selected, apply the Cutout filter: Filter > Artistic > Cutout. Set the number of levels to 4, the edge simplicity to 3, and the edge fidelity to 3. Once you’ve applied the filter, change the layer mode to overlay. By now, your image should strongly resemble the texture of the old paper. The cutout effect is intended to mimic stains on the paper in the foreground.
6. Merge layers
When steps 1 through 5 have been completed, you can click and merge the existing layers. Simply click on the drop-down arrow next to the layers panel and select Merge visible. This will flatten your paper texture and leave one layer to work with. Don’t choose any of the other options — you still want the layer to be editable and not locked as a background.
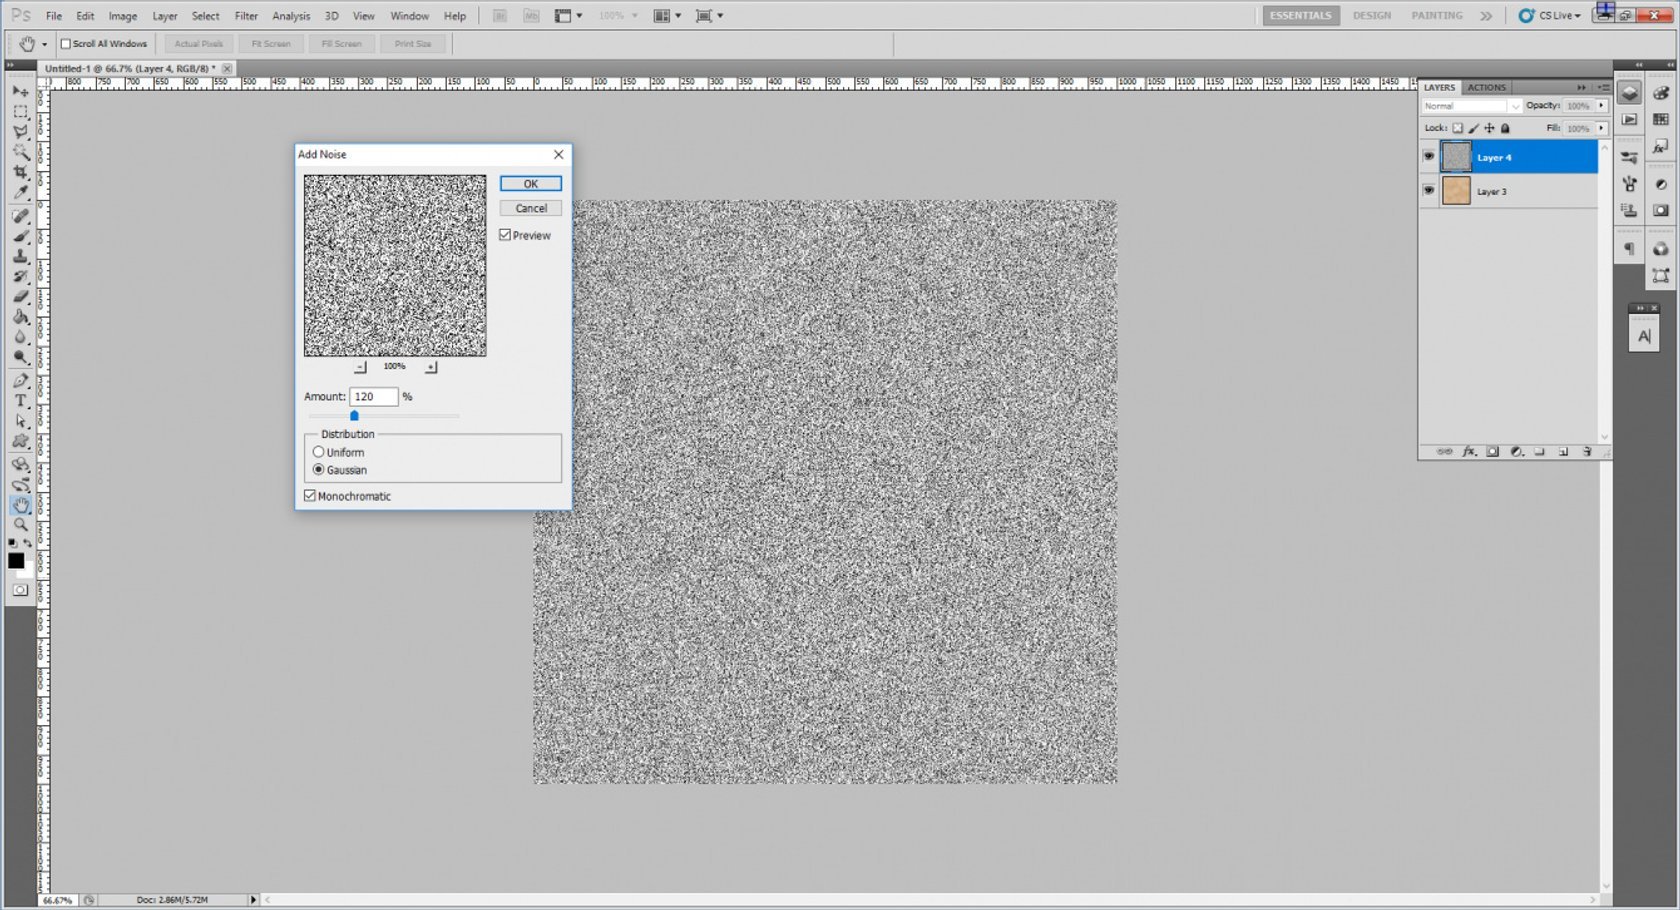
7. Create a new layer, fill it, and apply the Noise filter
The final stage involves adding textured grain. Create a second layer on top of the layer you’ve just merged. With the second layer selected, apply the Noise filter: Filter > Noise > Add Noise. To create an old paper texture in Photoshop, change the amount to 120% and the distribution to Gaussian. Make sure the Monochromatic box is ticked — this ensures that the noise is black and white. After you check the noise, change the layer mode to overlay and reduce the opacity to between 10% and 15%.
8. Flatten the image and save
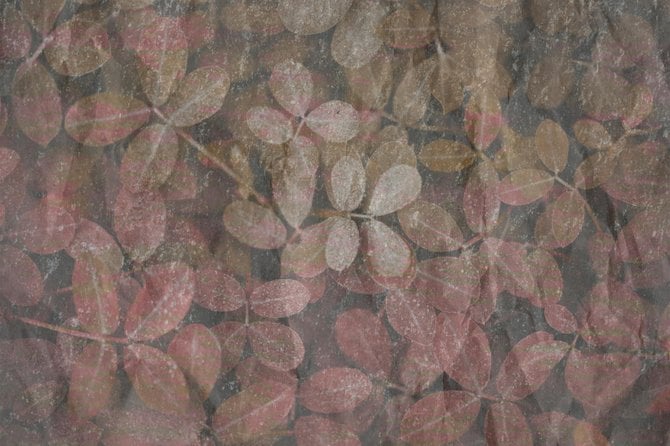
Your image should now resemble a paper texture or a wrinkled paper texture depending on how you look at it. Below is an example of the final image:
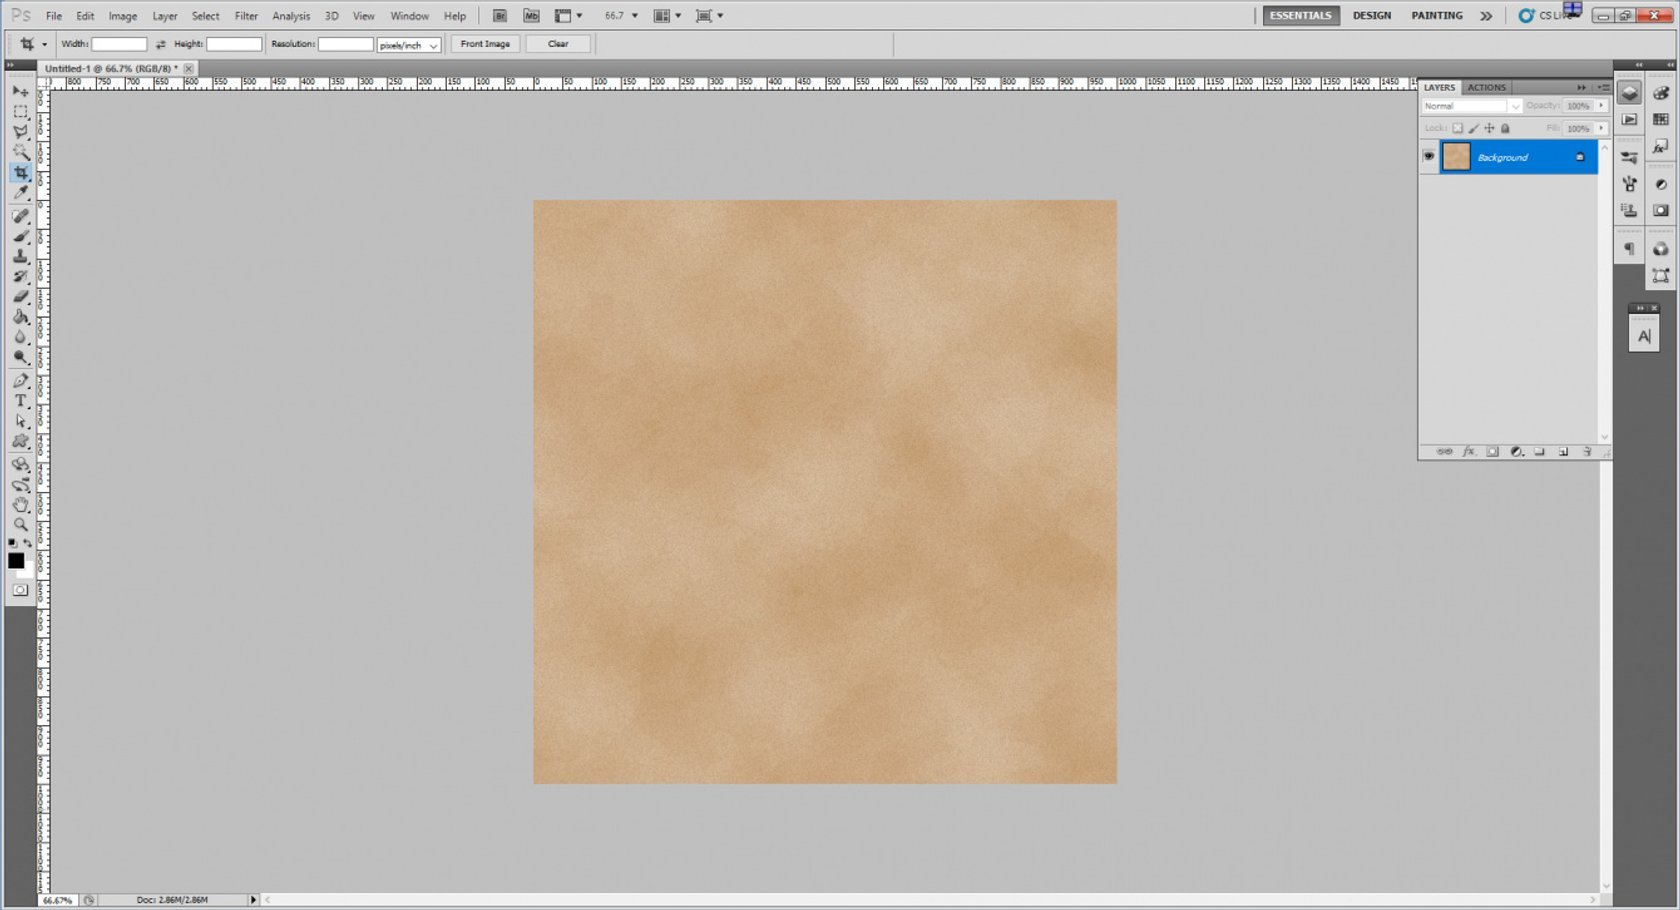
The settings we’ve chosen here provide you with a natural old paper texture. You can change the initial background color. Furthermore, you can change the settings of the spatter and cutout effects to give a different vintage paper texture. You can then use this image for any number of purposes. For example, you can use it as a brush to add texture to your photos. Alternatively, you can use it to create a vintage-style photo for marketing pieces.
How to add an old paper texture to an image in Luminar Neo
Now that we’ve seen old paper overlay in Photoshop, how does this process look in Luminar Neo? The section below describes how to add an old paper texture (such as the one we just created in Photoshop) to an image in Luminar Neo.
Blend an old paper texture as a new layer
- Open your target image in Luminar Neo.
- Add a new image layer above the original background image.
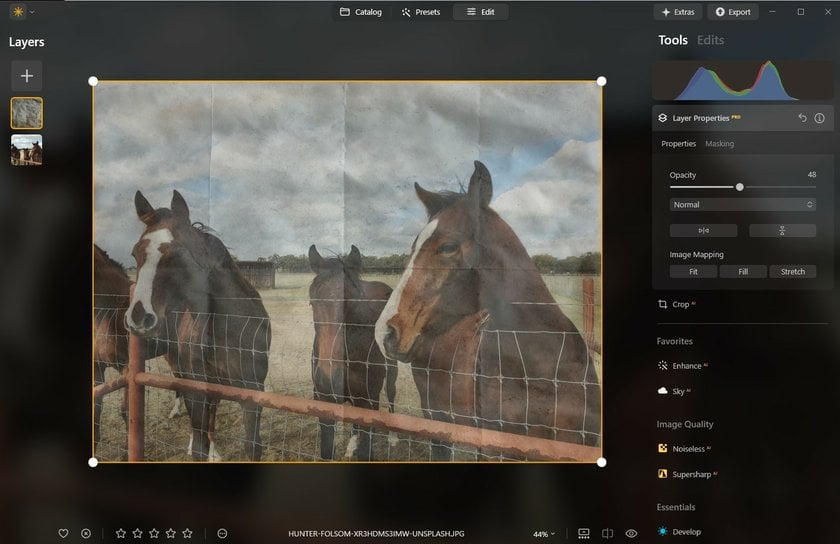
- To make the original image visible through the texture, simply reduce the opacity of the texture layer. Try different opacities to see what effect it creates with the original image and texture.
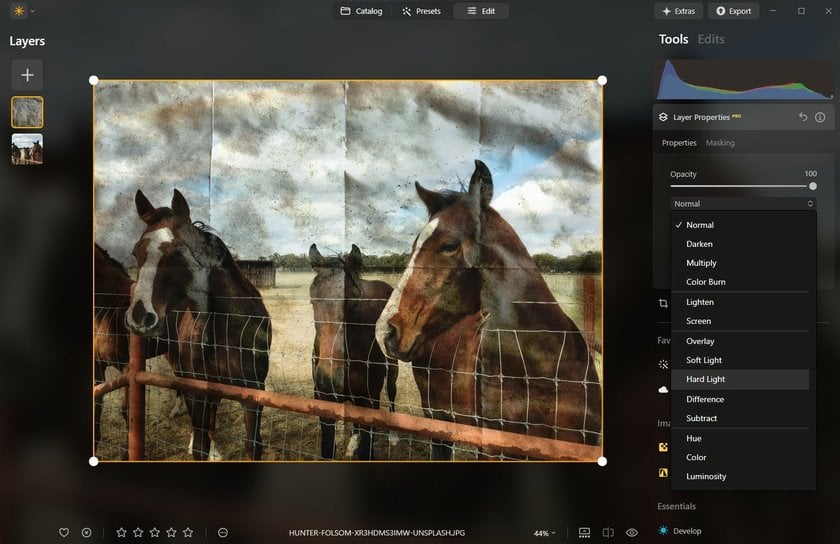
- If the texture doesn’t look right, you can change the layer mode. Different layer modes will blend the old paper background into the original image in different ways. Several layer modes work particularly well for this, including Overlay, Hue, and Darken.
- When you’ve found a suitable balance, save the image.
 The image you select for the next layer should be the texture you wish to apply, for instance the old paper background we created in Photoshop. This texture will cover the original image.

This method is extremely quick and easy, without complicated tools — you can apply a texture to your image using Luminar Neo in a matter of seconds. Furthermore, the different blend modes give great flexibility. You can benefit from these and other features if you purchase a full license for the Luminar Neo suite.
As you can see, it’s just as easy to apply an old paper texture in Luminar Neo as it is in Photoshop. Indeed, you can use these two programs together to create some superb textured effects. Once you’ve created an old paper texture in Photoshop, you can easily apply it to an image using Luminar Neo.
If you don’t want to create your own textures from scratch, Luminar Neo actually has some texture presets you can download. You can try out these awesome textures for yourself by downloading the free trial version of Luminar Neo. The trial gives you full access and allows you to experience what this photo editor has to offer.
Bottom Line
Old Photoshop texture overlays can be beautiful because they add a sense of nostalgia and history to digital designs. They can create a warm, rustic, and aged look that can be especially effective for themes with a classic or retro feel.
In addition, these texture overlays in Photoshop can create a sense of storytelling or convey sentimentality. They can evoke memories of the past and add a sense of charm o a design.
FAQ
Can I Use Other Colors Besides Beige or Yellow for the Background?
Yes, you can use colors other than beige or yellow for the background of an old paper texture in Photoshop. While beige/yellow options are often used to create an antique look, other colors such as tan, cream, or even gray can also work well. The key is to choose a light and muted hue, as this will help to enhance the aged and weathered look of the texture overlays for Photoshop.
Can I Use Different Textures for the Paper?
In fact, using multiple textures can help create a more realistic and authentic look, as real paper often has a variety of structures and imperfections.
Can I Use Vintage Paper for Commercial Purposes?
If you are choosing a texture pack that you created yourself or obtained from a free source that allows commercial use, you can generally use it without any problems. If you are working with an old paper Photoshop texture that you get from a third-party source, it is important to check the applicable copyright before using it for commercial purposes.
Follow Skylum Software on YouTube // Get the latest videos, tips, and photography inspiration each week!
 >
>
