January 01
11 min. to read
Mastering Mood: How to Elevate Your Photos with the Sky AI
Ever snapped a photo and wished the sky had just a touch more drama? Maybe a fiery sunset or a stormy cloud formation? The atmosphere plays a pivotal role in photography, setting the mood and tone of every shot. With
Luminar Neo's Sky AI, you no longer have to leave it to chance.
Photos, Feelings, and the Sky's Magic
 Ever looked at a photo of a beach sunset and felt relaxed? Or seen a picture with dark stormy clouds and felt a sense of tension? That's because photos aren't just about what's happening on the ground. They tell stories with feelings, and the atmosphere above plays a big part in this.
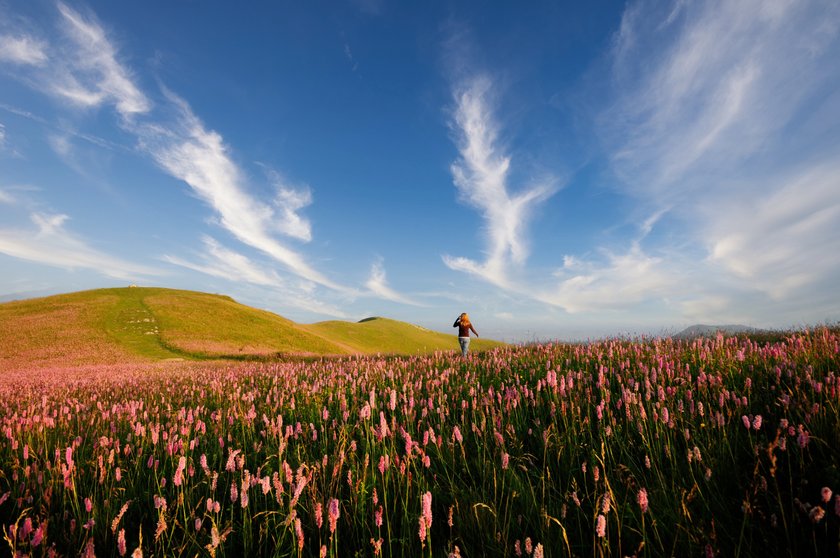
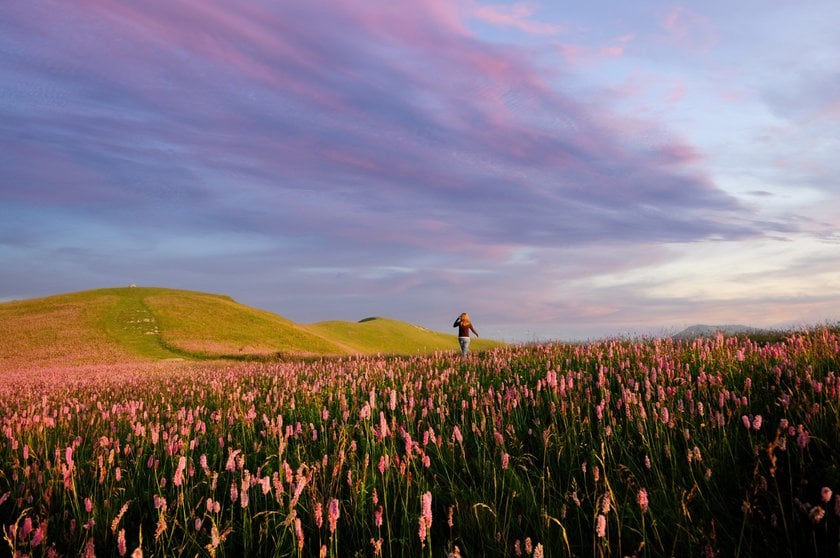
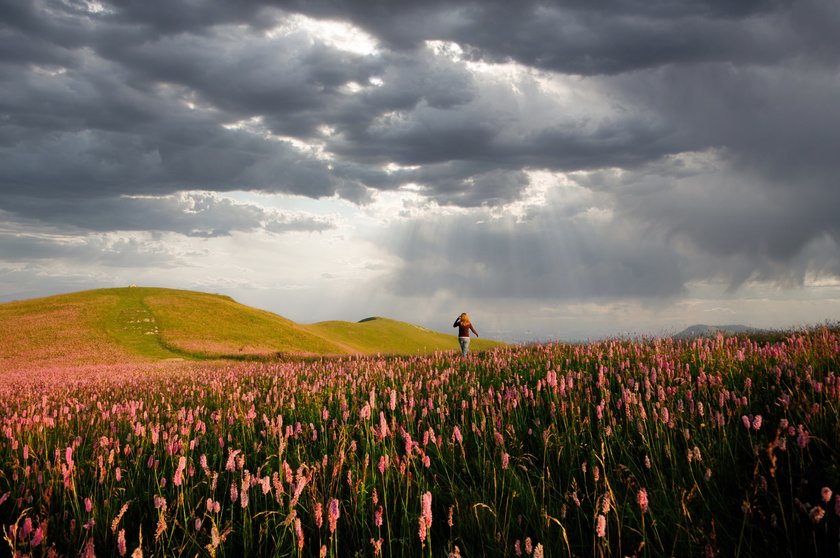
The sky in photos is like background music in movies. A bright blue expanse at a picnic can make you think of fun and laughter. On the other hand, gray clouds looming over an old house can give it a spooky, haunted feel.
But what if the sky on the day you took the photo was just meh? No worries! That's where our guide on how to do sky replacement comes in handy. Imagine turning a plain background behind a mountain into a dramatic sunset. Or switching out a cloudy day at the beach for a sun-filled, kite-flying kind of day. With a few tricks, you can make your photos tell the story you want!
So next time you're snapping pictures, think about it! It's like the secret sauce that adds flavor to your photos!
How the Sky Changes Our Mood
 Recall the last time you looked up at the sky. Was it a bright blue, a fiery red, or filled with fluffy clouds? Each pattern and color can make us feel a certain way, just like different songs can change our mood.
- Bright Blue Skies: These often make us feel happy, free, and full of energy. It's like when you hear your favorite upbeat song on the radio and can't help but dance.

- Fiery Sunsets: Those mixes of reds, oranges, and purples can make us feel amazed and inspired. They're the show-stoppers, kind of like the grand finale in a fireworks show.

- Cloudy and Gray: These might make us feel calm or even a bit gloomy, like listening to a slow, mellow song on a lazy Sunday.

- Stormy Dark Clouds: They can create a sense of tension or excitement. Think of them as the dramatic background music in a movie scene where something big is about to happen.
So, when you're taking photos, remember: the sky is more than just a backdrop. It's setting the mood for your picture, just like a DJ sets the vibe for a party. Choose the one that fits the feeling you want to share!
Change the Mood of Your Photos with Luminar Neo's Sky AI
Try it now!Game-Changer in Photography
 Do you still wonder how some photos have such jaw-dropping skies? Enter Sky AI, a cool tool in Luminar Neo that makes the sky in your photos pop. In simple terms? It changes or improves the atmosphere above in your pictures with just a few clicks.
Why Do Photographers Love It
- Quick and Easy: No more spending hours trying to get that sky just right. With AI, it's a breeze.
- Looks Natural: Your edited photos still look real, not like they've been heavily tampered with.
- Unleash Creativity: From calm sunsets to stormy clouds, you pick the mood you want your photo to convey.
And just like that, Sky AI has become the go-to for many who want to make their photos stand out. So, if you want skies that tell a story, you know where to look!
How Does Sky AI Work
Ever wondered how Luminar Neo's Sky AI does its sky-changing magic? Let's break it down!
This feature isn't just a simple photo filter. It's powered by a combination of machine learning and advanced algorithms. What does that mean? Well, think of machine learning as a computer's way of teaching itself. Over time, it has looked at thousands and thousands of photos to understand what a sky looks like, how it interacts with various landscapes, and how to naturally blend it into a picture.
When you choose to change the sky in a photo, the Sky AI first detects the area, differentiating it from trees, buildings, people, and other objects. It's smart enough to handle tricky spots, like gaps between leaves or reflections in water.
Next, when you pick a new sky, the algorithm analyzes both the original photo and the new part. It matches the lighting, colors, and perspective, ensuring that it looks natural, not just pasted on.
Step-by-Step Guide: Sky AI
Ready to change the skies in your photos? Here's a simple guide to help you master Sky AI in Luminar Neo:
1. Open Luminar Neo & Import Your Photo
Start by launching the Luminar Neo software on your computer. Navigate to the “Catalog” menu and select “Add Photos.” Then back to the “Edit” menu.
2. Access Sky AI & Choose Your Sky
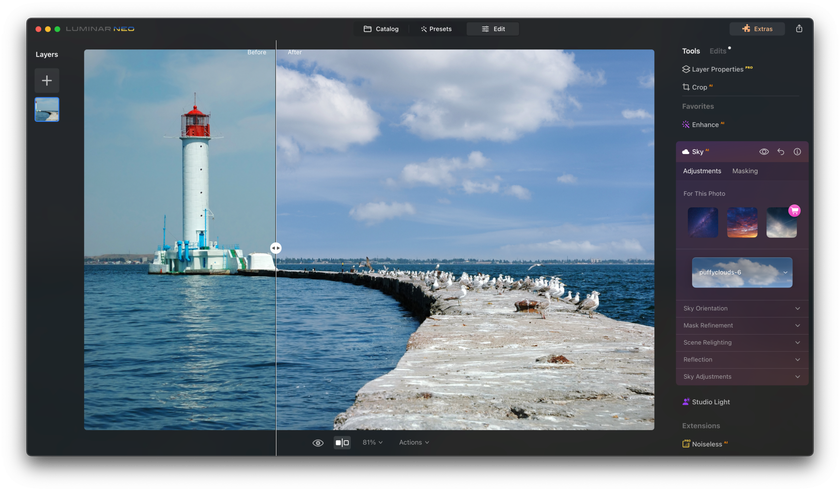
On the right-hand panel, you'll see various editing tools. Click on the “Favorites” tab and select “Sky AI”. Once in the “Sky AI” tool, you'll see a dropdown list of different skies. Browse through them and pick one that you like.
3. Adapt to Your Needs
Once you've chosen a sky, utilize the sliders below to customize the sky's orientation or make adjustments for reflections in case there's water present.
4. Match the Mood
Don't forget to adjust the overall lighting and color of the image, if needed, to make sure the mood of the sky matches the rest of your photo. The “Sky Adjustments” tab will help you with this.
5. Preview & Compare
Often, it's helpful to see a before-and-after. Use the “Before/After” button to compare your edits with the original.
6. Save & Export
Once you're happy with the edits, go to the “Share to” menu and save your masterpiece in your desired format and location.
There you go! With these easy steps, you can use AI in Luminar Neo to turn any sky into a scene-stealer!
Download Luminar Neo and Get a 7-day Free Trial
I'm in!Jump in, have fun, and let AI elevate your photo game! And if you're curious about how to edit night sky photos on an iPhone, click here to dive into our dedicated article on the topic!
Tips for Making Your Photos Unforgettable
 First, choose a sky that matches your photo's vibe. A quiet countryside might pair best with a soft sunrise, while a cityscape could dazzle with a fiery sunset. Always consider the lighting direction in your original to ensure a natural fit.
Attention to detail is key. Smooth out where the sky meets the horizon, and if your photo features water, ensure the reflection matches its mood. A splash of color adjustment can harmonize the whole scene, making your new sky seem like it was always there.
But remember, simplicity often shines brightest. Go for edits that feel genuine and not overdone. The aim? Captivating photos that resonate with emotion, not just showcase editing skills.
Conclusion
Through the power of Luminar Neo’s AI, the sky is no longer a static backdrop but a dynamic canvas for storytellers. Whether you crave drama, tranquility, or a splash of color, Sky AI lets you fine-tune the heavens to your heart's content.
Remember, every photo tells a story, and with the right sky, you can make it unforgettable.
Dive in, explore the magic, and let your scene resonate with emotion!


 >
>

