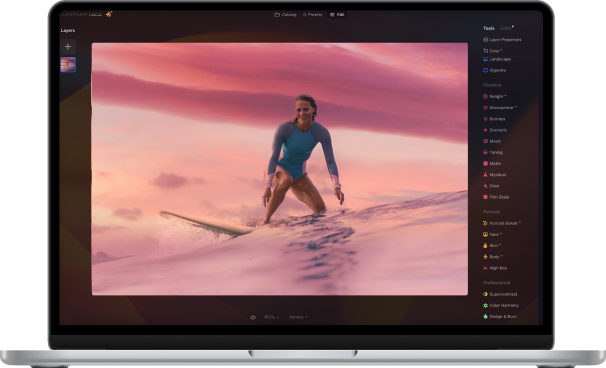
Evgeny Tchebotarev shows us how to effortlessly edit your images with Luminar presets.
Using different looks is probably one of my favorite things about Luminar. It’s easy, and I get a kick out of it when in just a few short moments, I can transform my raw images into works of art. Best of all, it saves me a lot of time. Once I figure out which look goes best with my series, getting dozens of photos out is a blast.
Luminar comes with several packs of preinstalled looks for basic enhancement such as Street, Portrait, Outdoor or Aerial photography. However, you can download new ones as well, some of which are designed by your favorite photographers for everything from landscapes and portraits to giving your images a holiday vibe. And when you’re savvy enough with Luminar, you can even create your own!
I’ll show you just how easy it is to apply presets and adjust your photos to get the effect you want when editing your images in Luminar... For this quick tutorial, I will be using my my new Neon Tokyo collection to demonstrate, but you can also use this same process when working with other Luminar presets.

Pick Your Photos
First of all, my Neon Tokyo Signature Presets are developed mostly to enhance urban night scenes, so it’s best if you start with a photo shot in a similar setting. This essentially applies to most Luminar presets, as some are designed for certain photography genres while others are designed for certain scenes.

Of course, this is not a hard and fast rule. Much like in photography and editing, you are free to get creative and utilize presets however you want!
Presets are made to change the feel and look of the photo, and to introduce a new story to it. Sometimes, however, because not all photos are the same, you need to adjust few things in order to make a photo you want.
If you have downloaded your desired presets — in this case, my Neon Tokyo set, scroll down to them below the photo. If they aren’t showing, tap on the Preset Pane button to display it.
Adjusting Preset Strength
Looks are made to change the feel and look of the photo, and to introduce a new story to it. Sometimes, however, because not all photos are the same, you need to adjust few things in order to make a photo you want.

You might notice that sometimes, the presets can be overpowering when applied to your images. This is because they are designed to show the maximum effect, giving you the great option of controlling just how strong you want the effect to be. On the look preview at the bottom, move the slider from 100 to any desired amount — for example to 50 or so — and see how your photo changes based on the preset strength.


The most basic adjustments you can make to match your photos with the presets are in the RAW Develop panel. It’s the filter that’s available when your photo is a RAW file (not a JPG). If you don’t see RAW Develop panel, click on Add Filters and search for RAW Develop.
Most presets are developed to not make changes to these basic adjustments, so you can freely control the look and feel of the photo. One of the basic adjustment tools you can control is the White Balance. If the photo appears too cold or too warm, adjusting white balance can easily fix that. If the photo is too dark, push the Exposure slider a little to the right side to “normalize” the dark and bright parts of the photo.
Tweaking the Filters
In this evening shot of Hong Kong, I wanted to used the Tokyo L2 preset to give it more of a dark evening feel, but it simply made my photo look way too blue. I wanted to give it more of a dark evening feel, so I adjusted the Exposure to -1 stop, and pulled Shadows a little darker from 50 to 14. With these quick tweaks, my photo looks less bright neon blue and instead has this dark rich colour of the night.

Saving Presets
Lastly, if you made changes to your photo after applying a preset, and you want to save those preset tweaks, click on Save Filter Preset on the right bottom side to save it for future use. Next time you want to apply that same look on a different photo, it’s just one click away!!

To get the urban nighttime looks showcased in this quick tutorial, purchase Evgeny Tchebotarev’s Neon Tokyo Signature Presets. Be sure to visit our Marketplace to check out our other Luminar presets.


