How To Post A Panorama On Instagram?
November 07, 2024
Ever wanted to show off a big, wide picture on your Instagram? You know, those cool long photos that capture a whole scene, like a big beach or a long street? Well, you're in luck! We're going to show you how to make a panoramic Instagram post!
Most of the time, we just post square pictures on Instagram, right? But sometimes, you just can't squeeze everything into that little box. That's where panoramic photos come in. They let you share the whole view, so none of the cool stuff gets cut off.
In this guide, we're going to walk you through the steps of making a panoramic Instagram post. It's easier than you think! We'll help you choose the right photo, get it ready, and put it on your Instagram for all your friends to see.
Let’s get started and make your Instagram feed super interesting with some amazing wide pictures!
Understanding Instagram's Image Size Requirements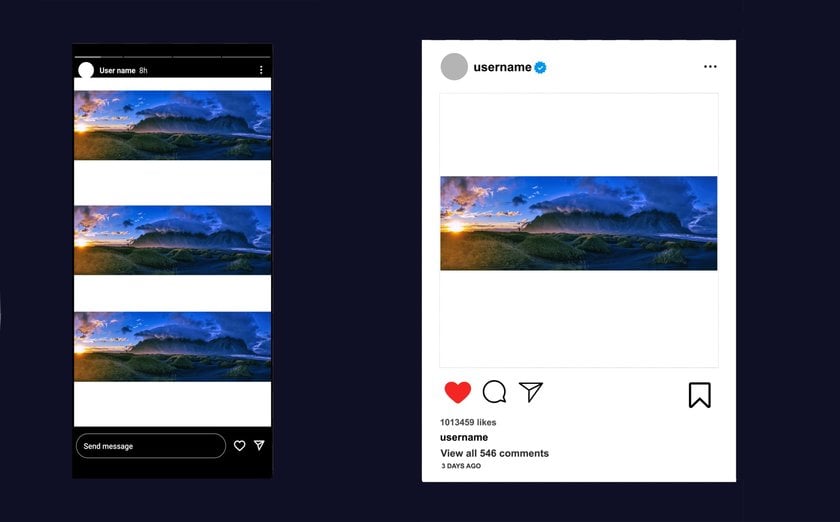

Before you start posting panoramic photos on Instagram, it's important to know about the different sizes and shapes of images that Instagram likes. This will help make sure your pictures look great and fit perfectly on your feed. Let's break down these sizes:
Square Posts: These are the classic Instagram photos. They should be 1080 x 1080 pixels. That means they're as tall as they are wide, like a perfect square.
Landscape Posts: For a wider view, like a sunset or cityscape, landscape posts are perfect. They should be 1080 x 566 pixels. These are wider than they are tall, kind of like looking out a wide window.
Portrait Posts: If you want a taller image, like a picture of a person or a tall building, use portrait size. This should be 1080 x 1350 pixels. These are taller than they are wide.
Stories: These are the full-screen photos and videos that disappear after a day. They should be 1080 x 1920 pixels, which is like holding your phone upright.
Now, why does this matter?
Quality: If you use the right size, your pictures will look sharp and clear. Instagram can make photos look bad if they don't fit these sizes.
Looks Good on the App: When your images are the right size, they look nice and neat on Instagram. This makes it easier and more fun for people to look at your posts.
Get More Likes and Comments: Good-looking pictures get more attention. When your photos are clear and fit well, people are more likely to like, comment, and share them. This can help more people see your posts.
For panoramas, you'll want to think creatively. Panoramic shots don't always fit these standard sizes. You might need to split your panorama into several parts or use special tricks to make it look good on Instagram. Don't worry; we'll cover how to do that in the next sections!
Also read: What Are Megapixels And Their Impact On Photo Quality
Preparing Your Panorama for Instagram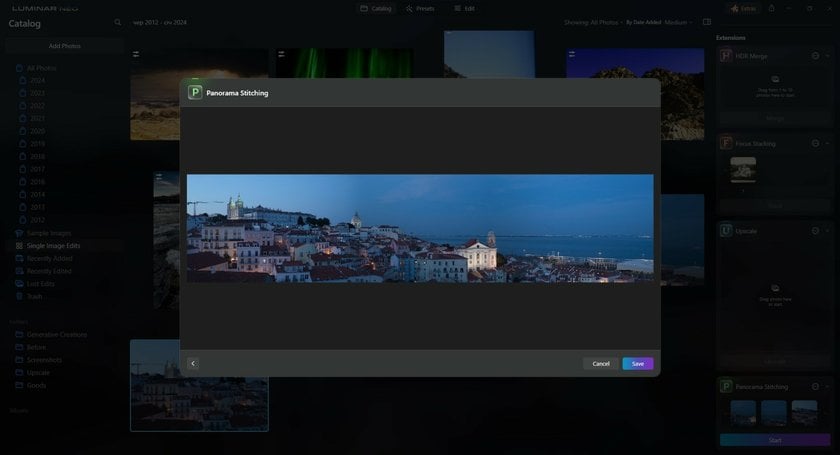

Let's get your big, wide photo ready for Instagram, also known as your panorama IG post. First, pick a good photo. You want one that's clear and has cool stuff in it. Think about what your friends on Instagram like – maybe a big city or a beautiful nature scene.
Next, it's time to make your photo look its best. If you have more than one photo you want to turn into a big panorama, there's a neat trick you can use. It's called AI panorama stitching, and it's like magic. A program called Luminar Neo can take your photos and stick them together all by itself. It's really easy and does a great job.
Your Go-To for Seamless Panorama Captures
Explore in Luminar NeoSometimes, you might want to put two different pictures together to make one big one. With Luminar Neo, you can do this too. It lets you blend 2 pictures together. Just put one picture over the other, move them around, and change how see-through they are until it looks perfect.
But remember, Instagram likes pictures to be a certain size. So, you might have to cut your big panorama to fit. Make sure you keep the best parts in the picture. Sometimes, you might want to split your big photo into a few smaller ones. Then, people can swipe on Instagram to see the whole thing.
Using Luminar Neo makes it easy to stick photos together or blend two pictures for your panorama post. You don't need to worry about the hard stuff. Just focus on making a cool photo for your Instagram friends. If you're not sure about Luminar Neo, you can try it first to see if you like it!
So, pick a good photo, use some cool tricks to make it better, and make sure it fits on Instagram. That's how you get a great panorama IG post that your friends will love.
Also read: How To Add Stickers To Photos For A Creative Flair
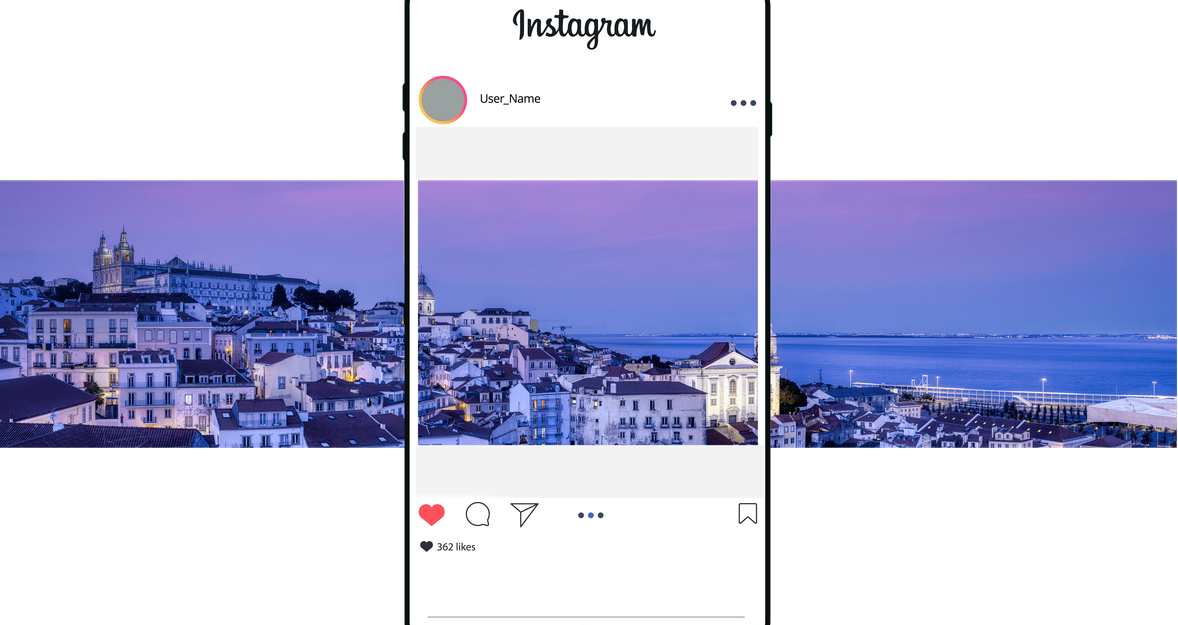
How to Post a Wide Photo on Instagram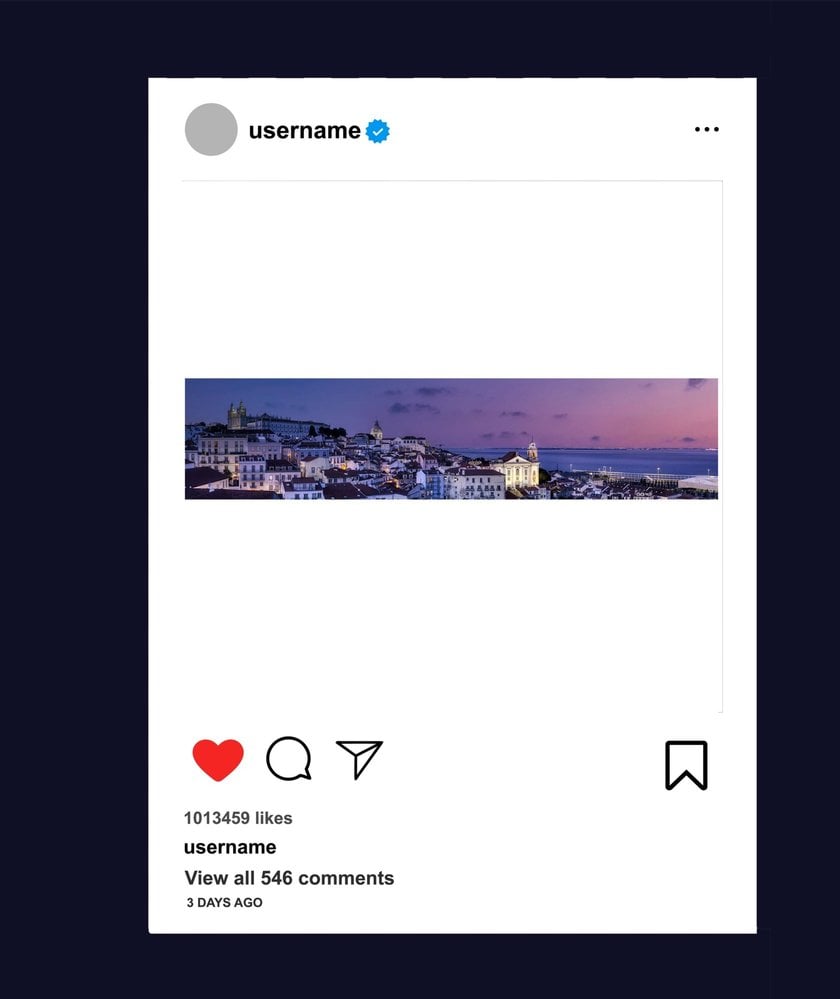

Ready to show off your big, wide photo on Instagram? Here’s an easy way to do it:
Uploading the Panorama
Open Instagram and tap the plus sign to start a new post.
Pick a big photo from where you keep your pictures.
Use your fingers to make the photo smaller on the screen so you can see as much of it as possible. Remember, it might not show the whole thing because Instagram likes certain photo sizes.
Using Multiple Images for a Seamless Panoramic Effect
Instagram lets you put up more than one picture at a time, like a little photo album called carousel. This is perfect for your big panorama. You can cut your photo into smaller parts that fit together like a puzzle. Usually, cutting the photo into three parts is a good idea. This way, people can swipe through each part and see your whole big picture!
Adding Captions and Hashtags
Now, think of something fun or interesting to say about your photo. This is your caption. It’s like telling a little story about your picture. Then, add some hashtags. These are words you put after a # that help more people find your photo. Use some popular ones and some that are about big, wide photos, like #panorama.
After you cut your photo into pieces, write your caption, and pick your hashtags, put them all up on Instagram as one post. People can swipe to see each part of your photo. It's a cool way to share a big view with everyone!
Also read: Best Instagram Username Examples For A Standout Profile
Engaging with Your Audience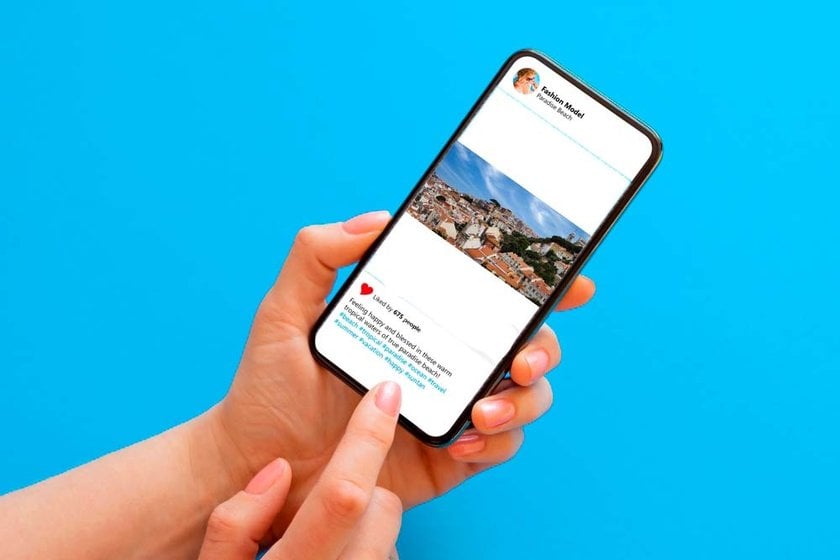

Once you've put up your wide photo on Instagram, it's good to chat with the people who see it. This can make your Instagram more fun and help more people see your photo. Try asking a question in your photo's caption, like what people think of the place in your picture or if they've ever been there. You can also ask them to share their own wide photos. Another fun thing to do is use those question stickers or polls in your Instagram Stories that are about your photo. This gets people involved and talking!
When people leave comments on your photo, make sure to write back. Even a simple 'thank you' can make a big difference. It shows you're happy they wrote something and that you care about what they say. Sometimes, people might ask about where your photo was taken or how you took it. Answering these questions can get even more people talking. The more you chat with your followers, the more they'll want to see and talk about your photos. So, have fun talking with everyone about your cool wide photo!
Advanced yet easy-to-use photo editor
Get Luminar Neo NowConclusion
And that's your step-by-step guide on how to post wide, panoramic photos on Instagram! We've walked you through everything from selecting the ideal panoramic shot, using AI panorama stitching in Luminar Neo to make your pictures look amazing, to sharing them on Instagram in a way that truly captures their grandeur.
But the journey doesn't end here. If you're eager to dive deeper into the world of Instagram and enhance your posting skills, we've got more for you. Be sure to check out our other helpful posts, like "How to Post Multiple Photos on Instagram" for those times when one image just isn't enough, and "How to Change Background Color in Instagram Story" to add an extra flair to your stories.
Remember, engaging with your audience and sparking conversations around your posts can transform your Instagram experience. So, embrace these tips, experiment with your panoramic shots, and see how they can change the look and feel of your feed.
Happy Instagramming and we can't wait to see the panoramic views you'll share with the world!