
December 04, 2025
Fotografía de Perfumes: Cómo Capturar la Esencia de un Aroma
La fotografía de perfumes hace visible lo invisible, y es más fácil de lo que crees.

December 04, 2025
Cómo Mejorar la Resolución de una Imagen: 6 Consejos

December 04, 2025
Las 11 Mejores Apps para Hacer Collages de Fotos en 2025

October 20, 2025
Mejores poses masculinas – Guía para fotografiar hombres

October 20, 2025
El elemento de la forma en la fotografía

October 20, 2025
Guía completa para elegir cajas de luz

October 20, 2025
5 consejos para fotos con estética oscura

October 20, 2025
10 secretos de la fotografía urbana
![Lista de equipaje: Qué empacar para un viaje [Esenciales + Consejos]](http://media.macphun.com/img/uploads/macphun/blog/3758/image.jpg?q=75&w=1348&h=715&resize=cover)
October 19, 2025
Lista de equipaje: Qué empacar para un viaje [Esenciales + Consejos]

October 19, 2025
Los mejores consejos y técnicas de fotografía macro
El más popular
January 13, 2025
El mejor MacBook para Editar Fotos en 2025
Elegir el mejor portátil para fotógrafos es a veces como hacer malabarismos con los requisitos. Por un lado, el dispositivo debe ser lo suficientemente potente como para trabajar fácilmente con los mejores editores fotográficos. Por otro, el portátil debe ser portátil para que puedas llevártelo a cualquier sesión fotográfica.
Leer más

September 01, 2025
Los 11 Drones Más Caros Del Mundo En 2025
Sumérgete en el mundo de los drones de alta gama con nuestra guía de los 11 modelos más caros de 2026. Explora lo último en tecnología y funciones de lujo.
Leer más
September 01, 2025
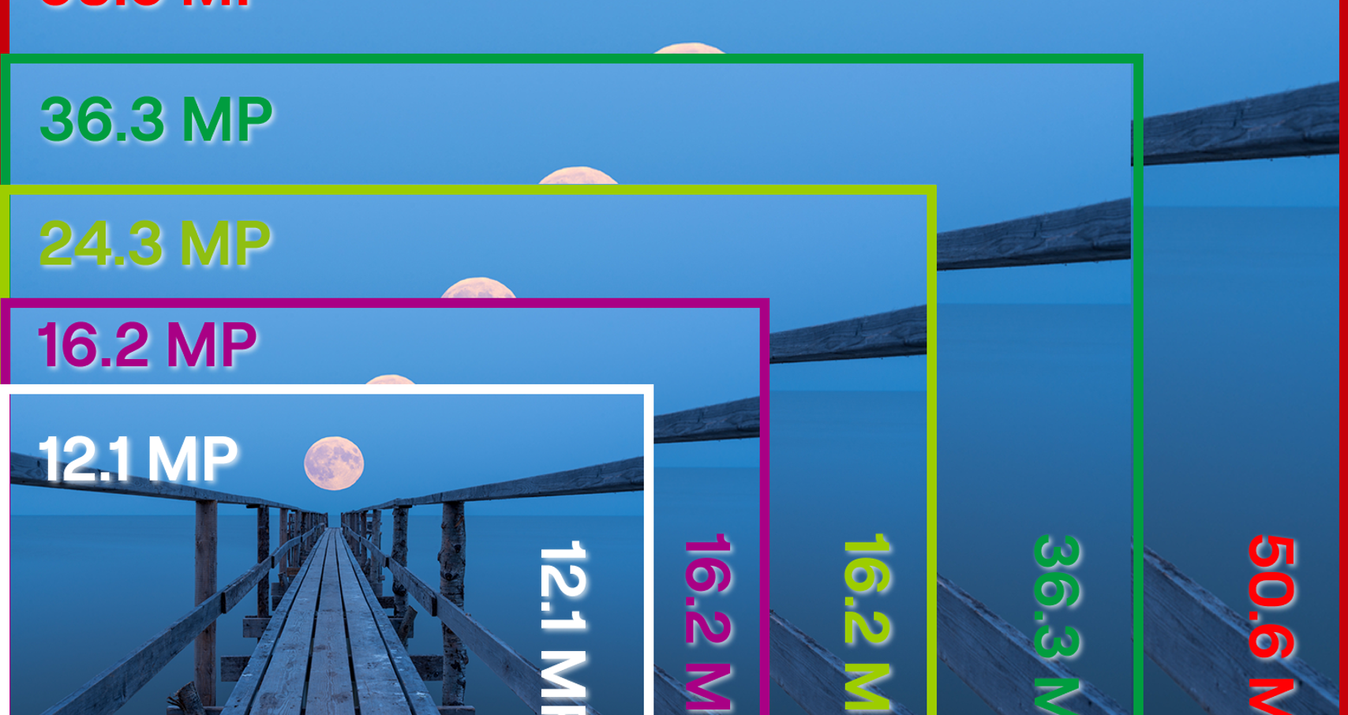
Qué Son Los Megapíxeles Y Su Impacto En La Calidad De La Foto
Todo fotógrafo debe conocer el significado de MP en una cámara. Si este término es nuevo para ti, ¡vamos a aclararlo juntos! Hoy en nuestro blog aprenderás qué es un MP y cuántos megapíxeles son buenos para una cámara.
Leer más
Suscríbete para ser el primero en enterarte
Nuestra paloma mensajera se encargará de hacerte llegar nuestras mejores ofertas y noticias sobre Skylum.
Gracias por suscribirte!