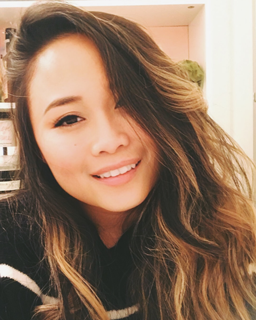

Pittsburgh photographer Jesse Proie talks about his photography as well as his editing techniques and the goodies in his camera bag.
To many, photography is a pastime. To a good few, it's become a profession. To others more, it's a way to express themselves creatively and share their experiences with the world.
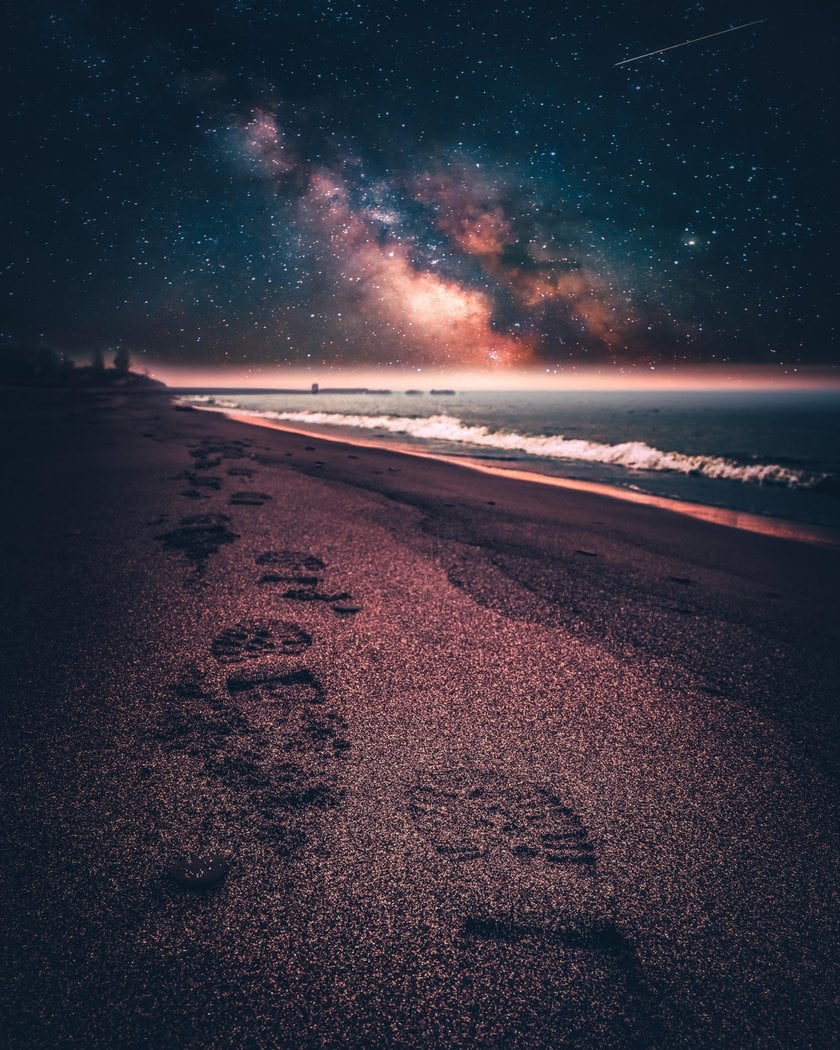
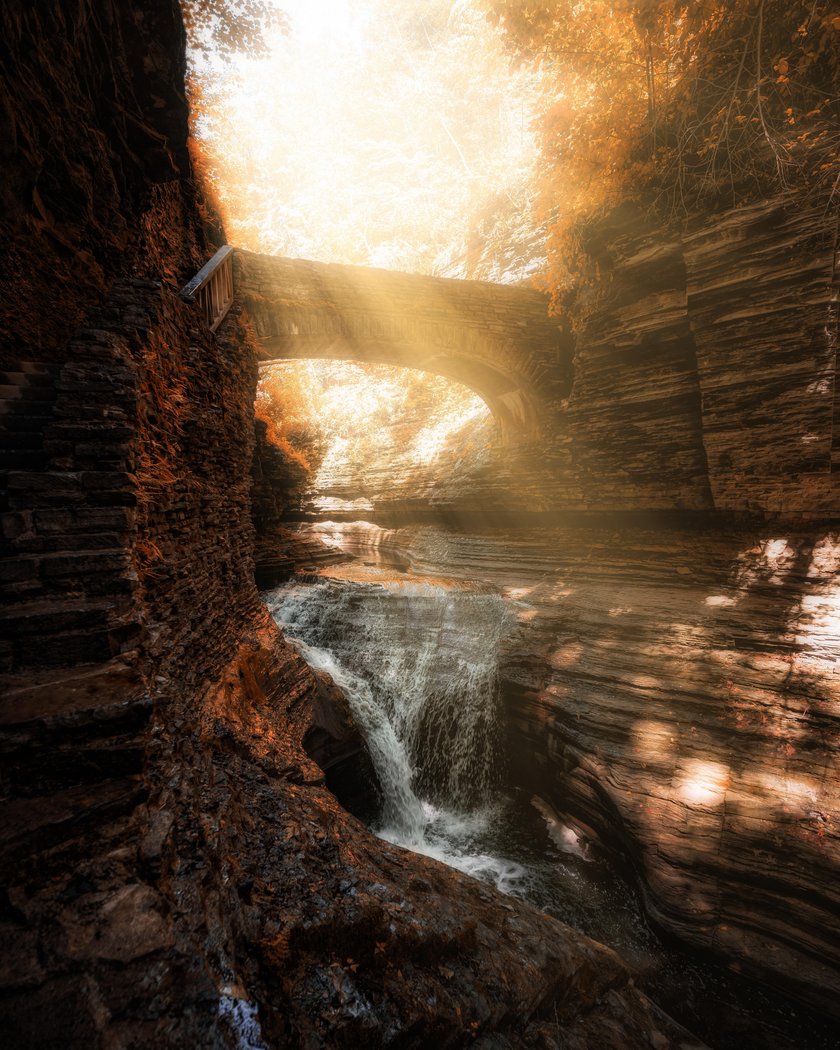
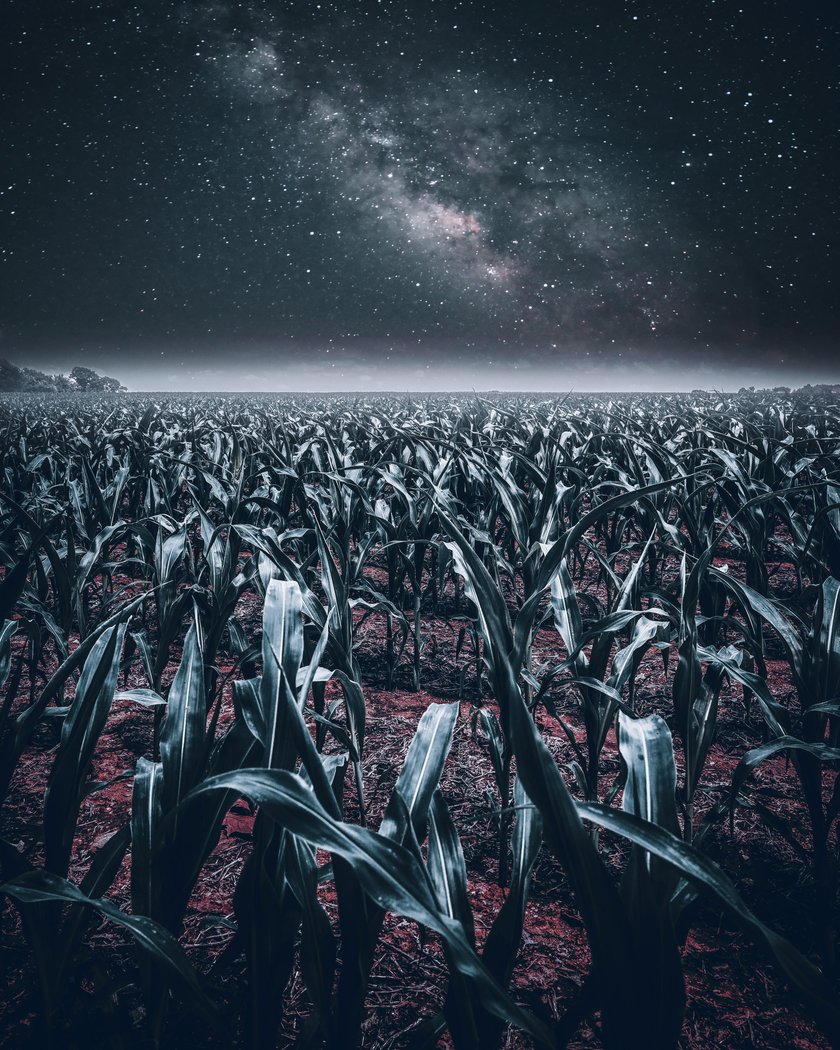
That's what it is for Pittsburgh-based photographer and outdoor lover Jesse Proie who spends much of his time discovering nature's wonders, so much so that arming himself with a camera seems like the most natural step forward. A year later, and he's already gaining steam on Instagram with his dreamy waterfall shots, cool urban-scapes snaps, and epic Milky Way captures, some of which he edited with Luminar.
For this week's User Spotlight, we caught up with Jesse to talk about his photography as well as his editing techniques and the goodies in his camera bag.
I wanted to express myself creatively while sharing these experiences with others and remembering these moments for personal reference.
 What do you love most about photography?
 What do you love most about photography?
The thing I love most about photography is having the ability to freeze a particular moment in time permanently.
What does photography mean for you?
Photography, for me personally, has become the one way I can express my creativity and make something my own. It has been an extremely positive experience for me thus far.
 How did you get into photography?
 How did you get into photography?
I was spending all my free time hiking around Pennsylvania and driving to some of the best locations that I could think of. I purchased my first camera to be able to remember these moments, and share them with others. I was interested in film photography back in high school, but never took it seriously until recently.
 What are your favorite subjects to photograph, and why?
 What are your favorite subjects to photograph, and why?
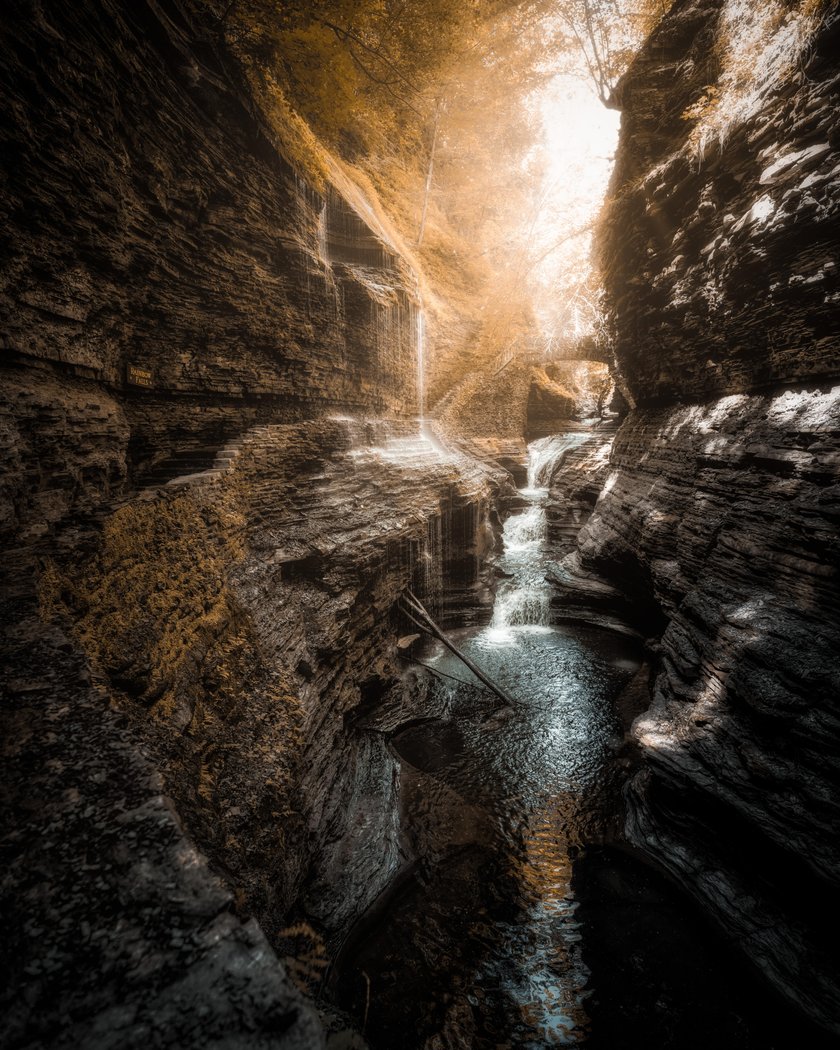
I love shooting waterfalls. Waiting for the right lighting, mixed with a good long exposure always strikes my interest. Street photography has always interested me as well. Seeing the buildings mixed with people and cars always make for a good composition.
READ MORE: Photographing Waterfalls with Ian Plant
What's in your camera bag?
My camera of choice is the Sony a7R II. I always have the Sony G 24-105mm f4 with me, along with the Zeiss Batis 18mm f2.8, and the Zeiss 55mm f1.8. I usually carry a Hoya variable ND with me in my bag as well.
What photos are you most proud of?
The one shot I am most proud of is one of the Solar Eclipse last year. I left the Saturday before from Pittsburgh in my Jeep with a little food, my camera, and no where to stay. I drove into The Smokey Mountains and slept in the back of my Jeep for two nights. Monday morning I drove a couple of more hours to meet up with my father and my brother to watch one of the most remarkable things I've ever witnessed. I snapped one shot of the solar eclipse (I promise you its not even that great of a shot), but the moment was so perfect, I was thankful I had my camera to capture it.
 How did you discover Luminar?
 How did you discover Luminar?
One of my favorite photographers, Max Rive, mentioned in his Instagram story that he had become an ambassador for Luminar. The rest is history.
READ MORE: Max Rive's 5 Luminar Editing Tricks to Epic Landscape Photos
What do you love most about using Luminar as a photo editor?
It is extremely easy to use. The learning curve is almost non existent, and the integration with Adobe Lightroom made the whole experience seamless.
What are your go-to Luminar filters when editing your photos?
I love using microstructure and the Orton Effect together to sharpen a photo. Using these in combination seems to create the sharpest looking photos, without the over-sharpened look. I also love Sun Ray effect in Luminar, the outcome is always incredible.
 What are your editing tips for beginner Luminar users trying to edit their landscape photos?
 What are your editing tips for beginner Luminar users trying to edit their landscape photos?
The best bit of advice I can offer, is to start in small increments. Never push the limits too far with one effect. Generally, a blend of multiple effects in smaller increments leads to a more appealing and balanced shot. Also, don't be afraid to try something new. Even if you are unsure of the look you are going for, sometimes reworking the same photo will yield better results just by trying something different.
 Would you recommend Skylum products to your friends? Why?
 Would you recommend Skylum products to your friends? Why?
Of course! Having additional tools for editing your work is never a bad thing in my opinion. Skylum continues to put out exceptional products that are very powerful yet very easy to use for amateur photographers like myself.
Jesse Proie is a Pittsburgh-based landscape and urban photographer. Follow him on Instagram or buy his prints online on Darkroom.
A Special Perk for Our Blog Readers
Get a 10% discount on Luminar Neo and dive into professional photo editing today!
Thank you for subscribing.
Your gift is waiting in your inbox!