Guide to Aerial Drone Photography
Last Updated on September 23, 2025
Master aerial drone photography with this guide. Learn flying tips, golden hour tricks, and editing techniques to capture stunning drone images.
Drone photography comes with challenges such as strong winds, trees, mountains, and GPS loss in remote areas, making safe flight and control more difficult.
To get professional outcomes, obey local regulations, avoid no-fly zones, maximize golden hour, and try various altitudes. Afterwards, to process it, programs like Luminar Neo are employed to enhance color, change the lighting, and explore the full capabilities of your drone photo, whereas apps like how to cut out an image in Photoshop can be used to sharpen your focus to the max.
What is Drone Photography?
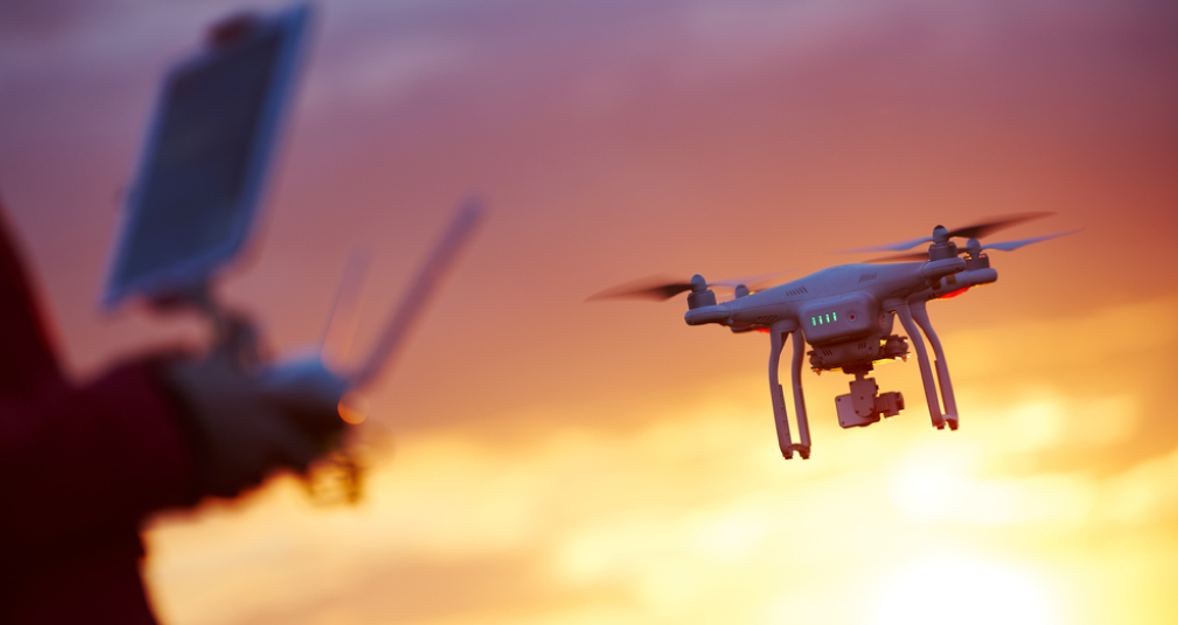
 Drone photography is the art of taking still photographs or video footage with the help of a camera attached to a drone, providing unusual aerial viewpoints. Low-end entry-level models, like DJI Mini 4 Pro, Ryze Tello, or Autel Evo Nano+, are easy to carry and operate, and additional options are covered in the best drones for beginners guide. These types of models offer perfect access to aerial photography.
Edit Drone Photos Like a Pro with Luminar Neo
Explore FeaturesTechniques and Best Practices for Drone Photography
 Photographers require more than flight skills to produce professional outcomes using drones. It is all about practice, planning, and the proper settings. Begin by knowing how to take professional drone photographs in terms of composition and point of view. Then learn how to use the camera in aerial drone photography to improve the quality of the images. Lastly, use optimal flight skills to make your shots stable, sharp, and cinematic.
How to Capture Professional Drone Photos
 Precision and creativity are essential to achieve professional-quality drone photos. Before you even fly, you should consider all the things and remember several rituals. The following are the main things to take into consideration:
scout out the position;
study composition rules (lines, angles, perspectives);
shoot during golden hour for best lighting and timing;
control movements;
practice and edit;
perform post-processing (HDR merge software, noise reduction, color correction).
With preparation, composition, timing, and proper post-processing, you will be able to transform your drone photography into a snapshot and a high-quality professional photograph.
Camera Settings for Aerial Drone Photography
 The correct camera positioning is extremely fundamental to quality drone photography. To give room to editing, use RAW, and keep the ISO (100-200) at the minimum possible to reduce noise. Quick shots: use a fast shutter, a slow shutter speed for the scene, and a close-up aperture of f/4-f/5.6 to focus.
These ways provide your aerial imaging photos a seamless and professional appearance right out of the camera, particularly when combined with the use of HDR photo merge software. In this manner, you get more detail and have balanced exposure in each shot.
Best Flight Techniques
 Learning how to fly is like learning your camera angles. The drone's fluent, gradual flight assists you in producing film shots while staying safe. Some of the techniques you may know thanks to the movie-making industry. However, drone photography has some differences. Check the table below for more details.
Technique | Description |
Height altitude change | Variable height to get close-ups or panoramas. |
Cinematic shots | Cinematic fly-throughs help create dynamics and atmosphere to enhance the emotional perception of the frame. |
Hovering | Hold still in the air to give a better composition and capture the ultimate shot. |
Smooth movements | Smooth movements help to even out the sharpness and minimize damage to the integrity of the frame. |
With the help of technical control and creative work, you will be able to take your films with a drone to a new level and gradually get closer to a professional approach to cinema.
Overcoming Challenges in Drone Photography
Terrific drone photos always catch the eyes of viewers. Whether they were published like video footage or added to a personal gallery, there are some points to consider. Let’s notice them together.
Dealing with Weather Conditions
 One of the largest challenges of drone photography is the weather. Powerful winds, rain, or fog can impact stability and decrease image quality. Tip: Check the forecasts first when planning a shoot.
Whenever possible, choose sunny days that are clear and cloudless, and avoid flying during extreme weather conditions. Wear protective items, such as propeller guards, to boost protection. You can save your gear by observing weather restrictions and are guaranteed sharp and uniform aerial shots.
Avoiding Common Piloting Mistakes
 Novice drone pilots are prone to minor yet exclusive errors, which influence performance and safety. With the early awareness of these issues, you will be able to fly more responsibly and attain better results:
lowers the control and elevates dangers;
can lead to emergency or automatic landings;
boost the risks of collisions or accidents;
reduces confidence and does not allow maneuvers to be seamless and precise.
By keeping your drone in sight, flying slowly, and maintaining control, you can avoid accidents and capture better shots. As you practice, your confidence level as a drone pilot is going to grow.
Ensuring the Best Image Quality in Drone Photography
 Take photos in RAW rather than JPEG because they can be edited better, maintain a low ISO to prevent noise, and motion is controlled with the use of a shutter. To achieve even better outcomes, it is worth flying at the golden hour when the light is warm and soft, using a steady drone to avoid blur, and applying creative framing to get clean and bright photographs.
Optimize Your Workflow with a Batch Image Enhancer
I'm in!Post-Processing Drone Photos
Drones photographers commonly use the post-processing software to process raw aerial photos into impressive images, according to a tutorial on how to augment the quality of drone photos with the aid of software such as Lightroom and Photoshop. A systematic summary of efficient editing strategies between simple corrections and sophisticated artistic changes is presented below.
Step | Task | Luminar Neo tools | Purpose |
1 | Import RAW files | Raw Develop | Retain maximum image data |
2 | Lens & distortion correction | Optics | Eliminate vignetting, chromatic aberration |
3 | Basic exposure adjustments | Light | Attain even lighting and color. |
4 | White balance settings | White Balance | Neutralize color casts |
5 | Color grading (HSL) | Color (HSL-panel) | Color palette- boost or refine |
Before taking drone photos, you can choose a preset (Sunny, Cloudy, Auto, etc.) or manually adjust the temperature/tint before or during the shot, depending on the weather and other variables. In turn, the exposure can be modified in flight by changing the shutter speed, ISO, and aperture (if the drone supports it). With Luminar Neo, you will get astonishing photos due to the variety of filters and built-in tools.
Elevate Your Photography with Our Advanced Software
Discover PricingDrone Photography Regulations
There are some tasks connected with flying a drone, and even though regulations differ in each country, there are general principles all pilots should adhere to:
make sure you register your drone where necessary;
do not go near airports and restricted places;
please keep your drone in visual range;
never fly over a crowd without due authorization;
observing altitude limits (120 m / 400 ft usually).
With these in place, drones aerial photography is safe, privacy-conscious, and clean in the airspace regulations. Being aware of local news will be a responsible flying activity.
Drone Laws and No-Fly Zones
Drone laws are designed to guarantee safe flight operations and protect people and property. No-fly zones are enforced by most nations around airports, government buildings, and military grounds, and therefore, pilots must always consult official maps or apps before flying. By following these regulations, you will save on fines, conserve equipment, and ensure that the skies remain unharmed.
License for Aerial Drone Photography
If you're just flying your drone for leisure in the United States, you won't need a pilot's license or a Part 107 certificate. However, this does not mean you can fly with no qualifications at all. However, the Federal Aviation Administration (FAA) needs a license for commercial drone operation. This covers photography, videography, and any other drone-related enterprise.
Safety Tips to Follow When Flying Drones
 Safety is always the core point of drone flying. Check your equipment, propellers, battery, and GPS signal before every flight. Have a clear sight of view, don’t stay in congested places, and keep a distance between people, animals, and property. Observations of weather-changing conditions, wind, or rain may have an immediate impact on stability. Safety and creative success are guaranteed by responsible flying.
Tips to Make Your Drone Photos Stand Out
This is a common wish to take photos like a pro. However, taking aerial photography with a drone differs from camera filming. Your hands wouldn’t be shaking, and pictures will be perfect in theory. Practically, it’s a challenge for beginners. So, how do you ideally capture drone footage? Let’s find out!
Planning the Best Aerial Drone Photography
For typical camera shooting, capturing golden hours is a rule. However, in drone photography, all day could be the perfect time. It depends on equipment quality and software. Some drones can take photos at night, some not. Before finding a spot, check the drone’s settings for choosing a frame. So, the location should be open-spaced, without buildings and light shields.
The right planning mostly builds on the backpack. Extra lenses, a charger, and a bottle of water wouldn’t be worth it. What can you do for the awesome drone photography? Check the table below.
Tip | Description |
Make a frame exposition | Seize warm light and long shadows and dramatize effects. |
Capture all-in-one or the one object | Draw the eye of the audience with the exterior or architectural domain. |
Experiment with height | Change of altitude to have astonishing views. |
Rule of thirds | Two horizontal and two vertical lines on display will help with focusing and aesthetic vibes shooting. |
Fly a circle | Make colors and clarity better with a mind-blowing composition. |
Great drone photography begins a long time before takeoff. Beautiful aerial photos require preparation, and image stacking software can provide more clarity and finer details. If you want to get cinematic pictures, it's better to have a high-priced drone or a perfect photo editor.


Filters and Accessories
 Add-ons such as ND filters would help reduce the intensity of sunlight to allow for seamless shots, and polarizers would help eliminate glare and enhance skies or water. Additional helpful equipment consists of spare batteries, propeller guards, and landing pads for safe flights. Other than equipment, tools like a free photo editor for beginners make editing easier and make aerial drones photography even more enjoyable.
How to Choose Your First Drone
 The lovely aspect about drone photography is that they usually come with a gimbal that stabilizes the image flawlessly. That alone makes film and photography easy to do and cinematic nearly immediately. What are some hidden tips for getting excellent drone snaps? Check out the list below.
Get one cheap and one high-cost drone for testing location views and better cinematic effect.
A less expensive drone with GPS and stabilization that may not include a camera. So, you'll need a GoPro or an action camera.
If you are simply seeking a novice drone to learn how to fly, don't spend more than $50-80.
The correct tools can help you plan and execute your photographs, whether you're a professional drone pilot who makes a job taking aerial photos or a hobbyist just starting out. While there are a number of free and premium weather applications for iPhone and Android, you may often need more accurate data than what they offer. Drone apps can help you plan routes and check weather conditions.
Final words
Drones photography allows new possibilities to view the world from new angles. It is to master flight control, camera settings, and composition, while also observing safety rules and no-fly zones. Take your aerial shots to a new level of professionalism and distinctiveness with the help of high-quality post-processing in Luminar Neo. And bear in mind: nice shooting starts with a nice feeling!