How to Edit Product Photos to Turn Them Into Sales Magnets
June 04, 2024
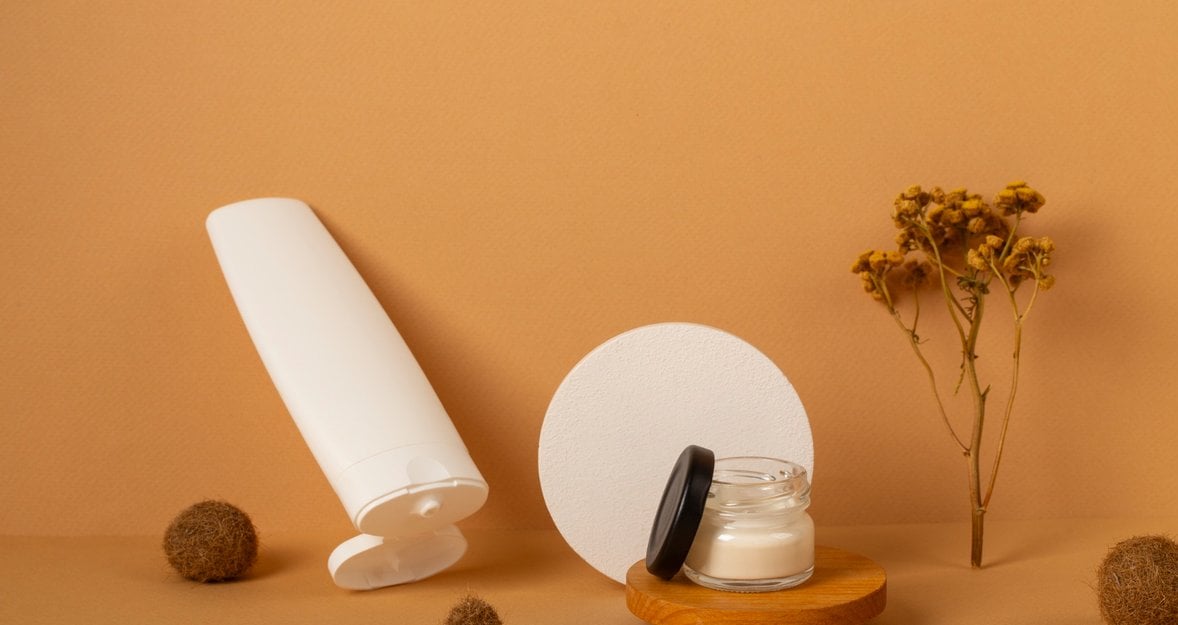
When it comes to commercial product photography, the magic happens in the editing room. This guide teaches crucial techniques for transforming your photos and wowing your clients.
In commercial product photography, editing is as crucial as the shoot itself. Even with perfect lighting, excellent props, and brilliant composition, your photo requires equal time and attention during the editing process. More than ever, companies are seeking high-quality images that stop people in their tracks, whether on social media or advertisements on the streets. That's why professional editing is vital to ensure that all the product's best features are eye-catching for potential customers.
In this guide, we will explore several key considerations to help you perfect your work, turning it into something that will make your client say, "Wow, we need to contact you again for more photos!" Let’s get started.
Maximize Your E-Commerce Potential with an AI Photo Editor
ExploreUnderstanding the Basics of Product Photography

Before we dive into editing, it’s essential to ensure that our photo is already of great quality. Just as a chef selects only the finest ingredients to guarantee a high-quality dish, the same principle applies to your product photography.
Lighting
Lighting is one of the most critical elements in a professional-standard product photography shoot. Ensure your photos are well-exposed; this minimises the need to compensate with higher ISO settings, which can introduce unwanted noise. If your product photography includes a model, you might want to check out our comprehensive guide on lighting techniques.
Composition
Developing a creative set that complements the product and makes it stand out is part of the fun of product photography. Pay careful attention to details like the colour of your background and props to ensure they harmonise with your product and enhance its appeal. We also offer a comprehensive guide on composing commercial product photos that you might find helpful.
Camera Settings
As mentioned, it's important to keep your ISO as low as possible to avoid noise and ensure sharp, clear images. Aperture settings are also crucial, most lenses have a 'sweet spot' usually between f/8 and f/12 where images will be sharpest. If you need more depth in your images, adjust your aperture accordingly, but remember to increase your lighting to compensate for reduced exposure.
Checking Your Monitor
One last thing to mention before we jump into our editing, and it's about your monitor. The colour of the product in your edit must be the same as the product in real life. While this may seem obvious, have you checked that your monitor is calibrated to show true colour?
Professional photographers work on calibrated monitors and refer to a colour correction card. This card has a range of colours displayed, allowing you to check if the exposure matches. It’s also a good idea to view your image on multiple devices to ensure the colours are consistent and that it looks great everywhere, not just on your monitor.
Cleaning Up the Image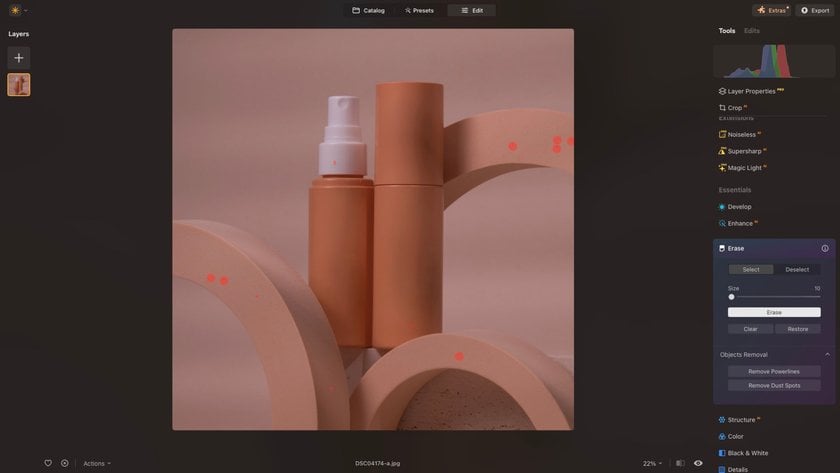

This initial step in editing requires a sharp eye. You'll need to meticulously scan your image to remove debris, erase blemishes, or eliminate unwanted elements.
Erase Tool
Luminar Neo’s AI Erase Tool allows you to remove any debris that finds its way onto your set. No matter how careful you are, dust will inevitably appear either on your product or on your background and props. Zoom into your image and carefully examine each section and simply click on the dust and debris. Once you’ve made your selection, press erase, and your image will be cleaned up. Another handy feature of the Erase Tool is the “Remove Dust Spots” option, which automatically detects and removes dust spots, saving you time.
Blemishes
Luminar Neo also offers many excellent skin and face tools. These tools can automatically detect and remove blemishes from the skin, or you can do this manually with the Erase Tool. The skin tool also helps to smooth the skin of your model and remove any shine. Additional tools such as those for brightening the skin, eyes, and teeth, are fantastic time-savers and deliver excellent results. However, I recommend using these tools after making exposure adjustments to ensure your model looks natural in your shot.
GenErase
For larger unwanted elements in your image, GenErase is the ideal tool. It removes unwanted elements while filling in the gaps by matching the surrounding areas and textures using generative AI technology. For example, if you’re using acrylic rods to create a floating effect for products, you can use GenErase to remove those rods and blend the area with the background textures and colour.
Background Removal
Some clients may require a standard PNG of their product for use in promotional graphics. Typically, this involves carefully cutting out the image, which can be quite time-consuming. Instead, try Luminar Neo’s Background Removal Tool. This tool uses AI to detect the edges of your product and allows you to seamlessly cut out the image, again saving a lot of time in the process.
Adjusting Colours and Exposure

This phase of the editing process is crucial for making your image pop and stand out. It's advisable to shoot in RAW mode, as this format provides a wider dynamic range of tones compared to JPEG, allowing for more flexibility during editing. Here are the main areas to focus on:
Brightness: Ensure your image is well-lit without being under or over-exposed. To check the correct exposure, use Luminar Neo’s Histogram. You can access it by going to the toolbar at the top of your screen, selecting 'View', and then 'Show Histogram'. If you're unsure how to interpret a histogram, we have a handy guide that can help.
Contrast: Contrast is crucial for a well-edited image. You'll want to ensure there is significant contrast between the background and the product to make it stand out. One effective way to adjust this is by using Luminar Neo’s Supercontrast tool, which allows you to fine-tune the contrast in the highlights, midtones, and shadows separately.
Colour Correction: Luminar Neo offers a comprehensive range of colour correction tools. You can use toning tools to balance the colours in your image, or the Colour Harmony tool for more nuanced control over the tones in your shadows, midtones, and highlights. For detailed adjustments, the standard Colour tool within the Essentials section allows you to hue shift, saturate, and adjust luminance. Always refer to a colour correction card and the actual product to ensure your colours are accurately represented.
Enhancing Details and Textures

Once your image is cleaned up and well-exposed with vibrant colours, it's time to focus on enhancing the finer details.
Structure: To add detail to the textures in your image, use the Structure Tool. Carefully increase the effect by adjusting the Amount slider. Remember, a little enhancement goes a long way here, so it's best to avoid over-application.
Dodge and Burn: This tool allows you to lighten or darken specific areas of your image. Using a brush, you can use the Dodge tool to brighten areas of your product or background to make them stand out more. The Burn tool darkens areas, which can be useful for creating stronger contrast or accentuating shadowed areas.
Masking: Masking is an excellent technique for targeting specific areas of your image without altering the entire photo. In Luminar Neo, many tools include a Masking option. When you select Masking, you'll see various choices, such as 'Object Select,' which uses AI to detect objects in your image. Hover your mouse over your product, and it will be highlighted in pink. You can select multiple objects within your image. Once selected, return to the Adjustments panel to apply changes exclusively to those areas.
Bonus Tool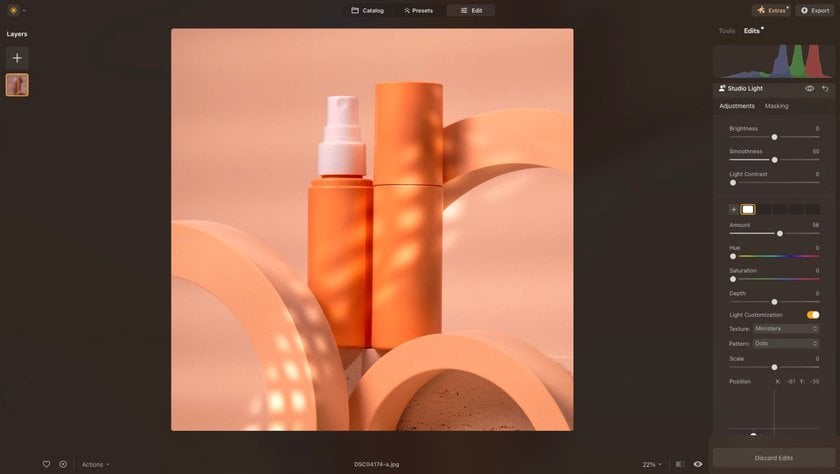

If you feel like your image could do with a little something extra, how about adding shadows? Don’t worry if you didn’t do this during the shoot, Luminar Neo has you covered. Head over to the Studio Light tool and turn on the Light Customization option. This tool will give you a range of shadow patterns such as leaves, windows and more that you can superimpose onto your shot. You can also adjust the hue of the light shining through these shadows and layer them for more complex effects. This is a fun tool to experiment with, so give it a try.
Enhance Your Photos with Luminar Neo's Studio Light
Try It Now!Creating Consistency Across Product Images


When editing multiple images, it’s crucial to ensure a consistent look throughout. The colours and aesthetics should not only match the images but also align with the brand’s existing visual content. Review the brand’s social media and website to compare their existing shots with yours. One effective way to maintain consistency in your edits is to use batch editing. With tools like Luminar Neo, you can easily apply the same adjustments to a series of photos, ensuring a uniform appearance. Luminar Neo offers advanced AI-driven features that streamline this process, making it easier to achieve cohesive results across all your product images.
Optimize Your Workflow with a Batch Photo Editor
Learn moreAnother good way is to create presets based on the adjustments you made to your first image. This approach not only saves time before you start your next edit but also ensures a uniform style across all your work. If the lighting conditions vary across shots, however, you’ll need to make necessary adjustments. To create a preset, go to the Actions button at the bottom of your screen and select 'Save as Preset.'
The Bottom Line
Editing product photography images is a process that is just as important as the shoot itself. Ensuring you use a colour-calibrated monitor is essential for achieving true colours that match the brand’s product. Additionally, it's important to align your edits with the aesthetic of the brand’s existing imagery to maintain a consistent look across its social media and website.
When starting your edit, carefully comb through your image to detect any dust and debris that has made its way onto your set and clean them up with the Erase tool. If your shoot includes a model, utilise skin and face tools to refine blemishes, smooth skin, and remove shine. After completing your edits, review your shots on multiple devices to ensure that they look exceptional and the colours remain consistent across different displays.
The editing process can be creative too, using elements like Light Customization inside of the Studio Lights tool allows you to add a new dynamic to your shot. Editing product photos is a skill that improves with practice, just like photography. So practice with plenty of test shoots, and eventually, brands will become excited to work with you.