Night Photography Will Never Be The Same / Noiseless AI Demo
November 03, 2023
The elusive dance of light and shadow, the shimmering stars, and the cityscape's radiant glow at night have long fascinated photographers. Under the cloak of darkness, ordinary landscapes and urban settings take on an entirely new persona. The play of light and shadows, the glimmer of stars, the soft glow of street lamps, and the reflections in water bodies provide photographers with a palette of elements to create stunning and imaginative compositions. These images can evoke emotions, spark curiosity, and transport viewers to a dreamy and enigmatic alternate reality.
However, the alluring journey of nighttime photography can be challenging for photo enthusiasts. The lighting conditions at night are typically far from ideal, often characterized by low illumination levels, leading to the dreaded issue of grainy images. If photographers want to use the full potential of their pictures taken at night, they need to learn how to reduce noise in photos.
It means they must grapple with the delicate balance of gathering enough light to illuminate their subjects while minimizing noise and maintaining image quality. This challenge demands a solid understanding of camera settings and equipment, an artistic eye to harness the unique character of nighttime lighting, and an extended knowledge base on how to denoise a photo during post-processing.
The following article not only gives practical tips on taking pictures at night. We will also showcase some of the best noise reducing software that can bring your photos back from the dead. We are going to learn how to take pictures at night and how to edit them properly using the AI-based photo editor Luminar Neo, paying special attention to its Noiseless AI extension.
Taking Photos At Night: General Tips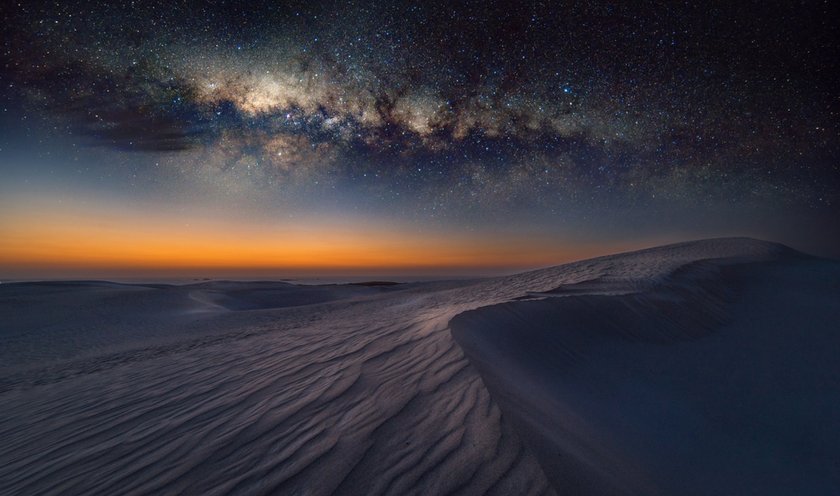

Stability is crucial when shooting in low-light conditions. A tripod will help eliminate camera shake and allow longer, blur-free exposures.
Set your camera to a low ISO (e.g., ISO 100 or 200) to reduce photo noise. Higher ISO settings can introduce grain or noise, which is more noticeable in low-light situations.
Use a lens with a wide aperture (e.g., f/2.8 or lower) to let in more light. A wider aperture also creates a shallow depth of field, which can add a creative touch to your night shots.
Night photography often requires longer exposures. Experiment with slower shutter speeds (e.g., 1/15s, 1s, or even longer) to capture more light. Use a remote shutter release or the camera's timer to minimize camera shake when pressing the shutter button.
Autofocus can struggle in low-light situations. Consider switching to manual focus and use the Live View mode on your camera to fine-tune focus, especially for subjects that are challenging to focus on in the dark.
Capturing images in RAW format gives you more flexibility during post-processing, allowing you to adjust exposure, white balance, and other settings without degrading image quality.
Night lighting can vary in color temperature. Adjust the white balance settings to match the ambient light, or experiment with different settings to achieve the desired mood and colors.
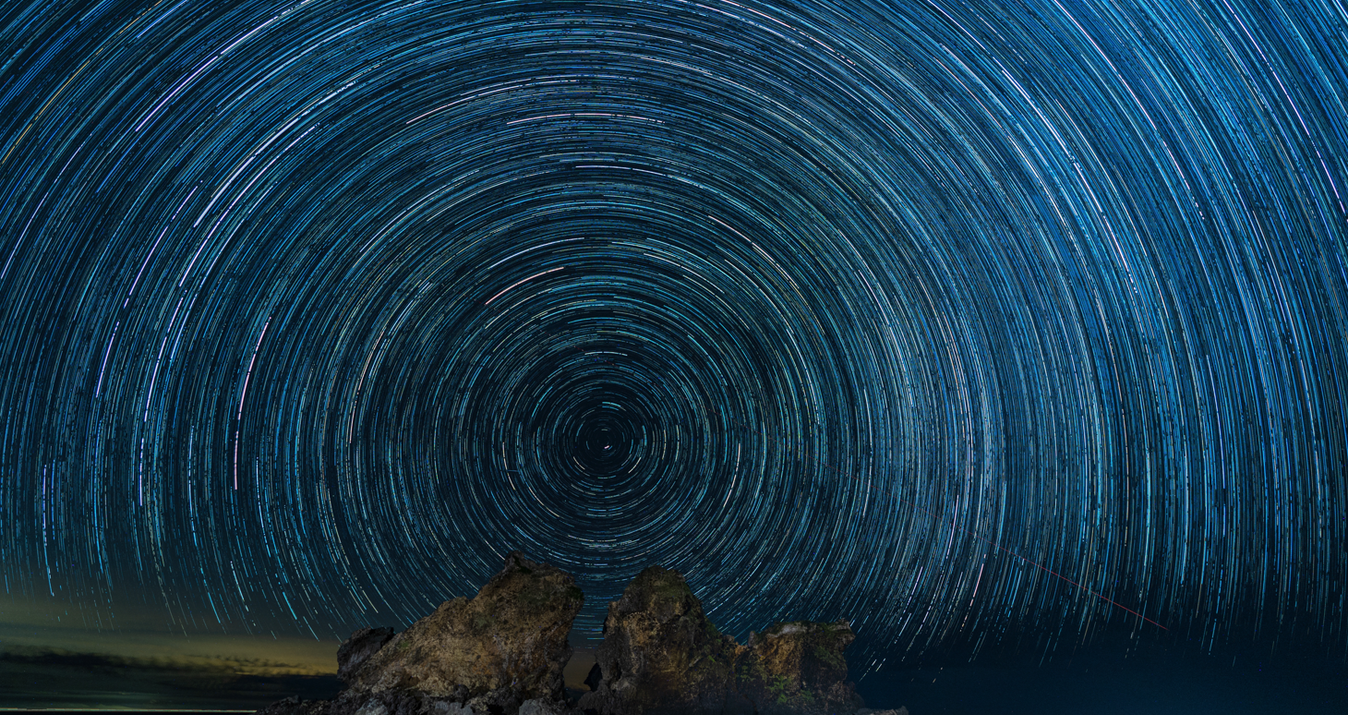
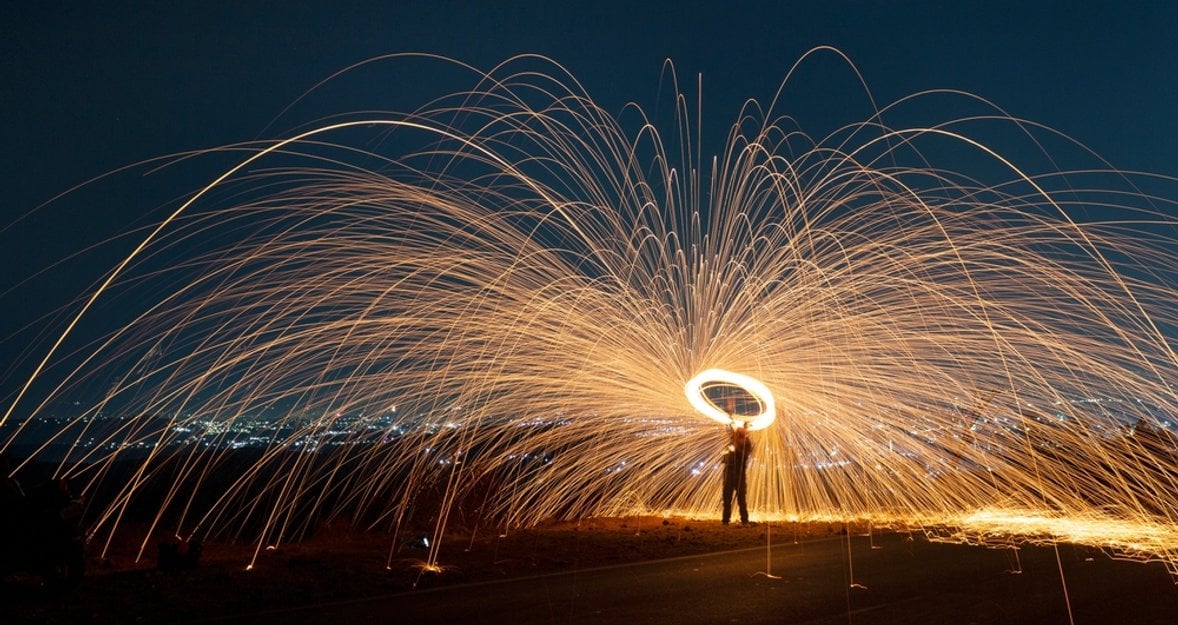
Explore long exposure techniques to capture light trails, star trails, and other creative effects. Use a neutral density filter to extend exposure times during bright nighttime scenes.
Pay attention to available light sources, such as street lamps, car headlights, or artificial lighting, as they can be used creatively in your compositions.
A remote shutter release or an app on your smartphone can help prevent camera shake when taking long exposures.
Take multiple shots at different exposure settings (bracketing) to ensure you capture the scene correctly. You can later blend these exposures in post-processing for a well-exposed image.
Night photography often requires time and patience. Wait for the right moments when the lighting and composition come together for a great shot.
If you are shooting in dark or remote areas, consider your safety. Have a plan, and let someone know where you are going. It's also a good idea to carry a flashlight.
Advanced yet easy-to-use photo editor
Get Luminar Neo NowEditing Night Photos With Luminar Neo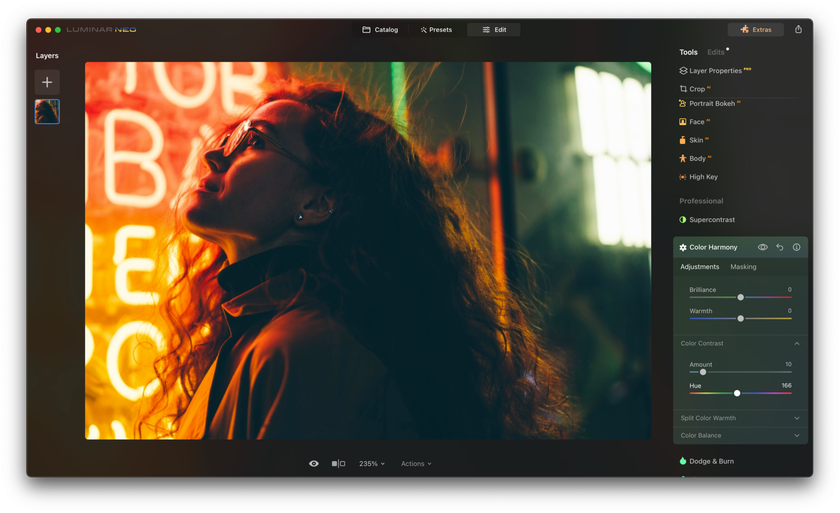

The darkness of the night takes away most colors from the image, but it does not mean that you will only have to deal with darkness. The Color Harmony tool within the Luminar Neo software can save vibrancy.
Experiment with the Hue slider to see how the tones are changing along the color spectrum. You can highlight certain elements in the photo and darken the others. The changes are not applied to the whole image; you control them manually. The Split Color Warmth tool within the Color Harmony tool recognizes cool and warm tones in the picture. It makes them cooler and warmer, respectively, without affecting the temperature of the whole photo.
The Color tool includes the HSL (Hue, Saturation, Luminance) panel. This panel is perfect for adjusting the contrast and darkness of the images, which is a common problem of pictures taken in nighttime lighting conditions. The "remove color cast" slider helps eliminate the odd tints.
You can also use the Sky Enhancer to make the skies on your image look deeper or darker. But be careful because it can affect the balance of blue in your picture. Sky Replacement is an option if you want to add some dramatic effects like storm or lightning flashes to your images or if you are just not satisfied with how the actual sky looks in your photo.
Within the Creative Toolbar is the Relight AI, which allows you to experiment with the exposure, brightness, and depth of your image and make it lighter or cooler. The Magic Light tool of the same Creative bar is perfect for pictures with multiple sources of light (city lights, lanterns) when you want to adjust the intensity, direction, softness, and spread of each of them.
The Noiseless AI extension (Tools/Extensions/Noiseless AI) may take some time to process the image (especially if you upload multiple pictures, the AI has to remain consistent). Still, in the end, it erases all the grain and digital noises from the image, maintaining the objects' color and integrity. You can decide whether you need low, middle, or high cleanup for your picture before adjusting other parameters: Luminosity Denoise, Color Denoise, Details, and Sharpness.
You don't need to remember all the tools and adjustment parameters if you edit night photos regularly. It will be enough to save one edited nighttime picture as a preset to apply the edits to your next photographic masterpieces.
Unleash Your Creative Potential with Luminar Neo
View PlansBottom Line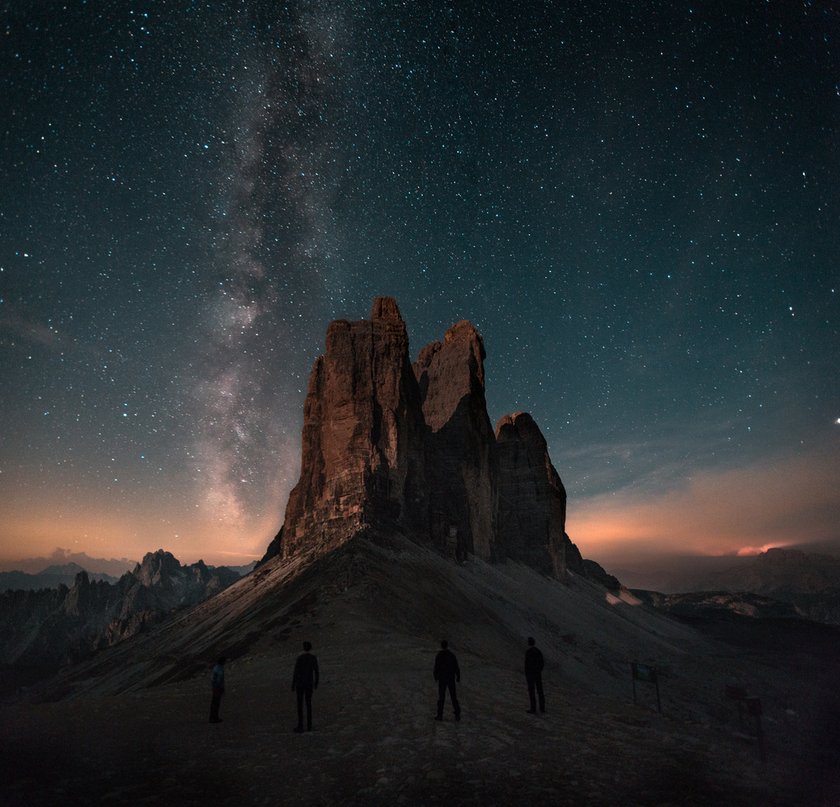

The art of capturing nocturnal beauty is a journey filled with fascination and challenges. The allure of the night's play of shadows, starlit skies, and the radiant glow of urban landscapes has entranced photographers for generations, offering a unique canvas for creative expression.
The low light conditions often result in grainy, noise-ridden images, requiring a delicate balance of technical skill and artistic vision. Overcoming these challenges is what makes night photography a truly rewarding pursuit.
In this comprehensive guide, we delved into the heart of night photography, providing you with a wealth of practical tips and techniques to master this enchanting art form. From the importance of stability through tripods to the subtleties of ISO settings and wide apertures, we have covered the fundamentals to help you create remarkable nocturnal images.
To transform your night photos from good to extraordinary, we've explored the Noiseless AI, a powerful tool that erases grain and digital noise while preserving the integrity of your images. In addition, we have learned about the creative possibilities within Luminar Neo, demonstrating how to enhance your night photos through color harmony, HSL adjustments, and AI-powered tools that breathe life into your pictures.
Night photography is a world of endless possibilities and captivating scenes waiting to be discovered. As you venture into the realm of nocturnal beauty armed with the knowledge and tools provided in this guide, you're poised to capture breathtaking images that reveal the true magic of the night. So, pick up your camera, embrace the challenges, and let your creativity shine in the dark. The future of night photography is here, and it's brighter than ever.