Real Estate Photography: Tips for Dominating the Market
June 05, 2019

Take a look at these real estate photography tips that can help you get the most out of your shots.
In this day of online shopping and virtual tours of the property, professional real estate photography can make or break a sale. Luckily, there are ways for a competent real estate photographer with a good camera and a trained eye to show homes for sale in a positive light.
Take a look at these real estate photography tips that can help you get the most out of your shots.
Things to Do Before You Shoot the Real Estate
Let’s begin our real estate photography tips with the set-up. There is nothing more frustrating than spending extra time cleaning the house while you are there taking photos, so the first thing you can do before starting your real estate shoot is to set up the scene.
Think about all the things you would like to be done to the property before you arrive - cleaning up the house, arranging furniture, clearing off any photos or items you or the sellers don’t want to be photographed. After figuring out everything that needs to be done, make a checklist to give to the real estate agent or property owner.
One of the things I always want to see is turned on lights. I like to make sure that all the lights are on and working before the shooting starts. And, make sure you don’t forget about cleaning up the front and backyard, including mowing the grass and trimming trees.
 Photo by Captain Kimo
 You should also make a checklist for yourself that includes the photos you need for a property. While no two properties are the same, there are specific shots you’ll need to capture to get prospective clients to view the property positively. If you are not sure about this, here are some real estate photography tips for how many photos you should have of the property.
The most important shots are the kitchen, living room, and master bedroom with bath, and there should be at least 2-4 photos of each. Of course, the number of shots depends on the property, but this is the general principle you can follow.
Make sure to take a representable photo of the bathroom. Believe it or not, potential buyers want to see the bathroom, so whenever it is possible, you should catch its best features. If the bathroom is a showplace, take more shots.
 Photo by Captain Kimo
Now, let’s turn to the backyard, patio, or balcony. Whichever one the property has, your real estate photography needs to have two or three photos of either of those places. If the backyard or terrace or balcony has a killer view or unique features take pictures of these. You want to capture your property’s curb appeal, and taking a shot or two will highlight this.
Another area of interest is storage, so take shots of the pantry, the laundry room, the closets, the garage, the basement, and other places. Use these shots to show space and organization of the place - another factor that will appeal to future buyers.
Having this checklist will help you with your professional real estate photography, to make sure you get all the photos needed and shots the realtor wanted the first time. As for myself, I’ve been doing this long enough that I already have a mental checklist of everything I need to shoot. I also like to do a last walk through the house after the photoshoot is finished and make sure I shot everything - which is also another tip I recommend you do!
Now that we covered the basics of real estate photography, let’s work on getting some of the best real estate photos for your realtor’s listing. In order to dominate the market, you really have to present the best photo to your client. Naturally, your client will want to see beautiful interior and exterior photos of the house, but they will also want to see aerial photos of the property.
And if it’s a million dollar listing they will most likely want some lovely twilight photos to go along with the package! If that is the case, in the next part, I will tell you how I use Aurora HDR to get the best interior exposure.I will also show you how I process my aerial photos and my workflow for twilight photography with the Aurora HDR.
Real Estate Photography Lighting
To get the best real estate photography lighting, it would be best to use a flash with your HDR brackets. When you shoot with just HDR brackets, you can get very strong colors from all the lights in the room. Using flash exposure can help you eliminate shadows and create a more natural looking photo.
However when you use a flash in the room, it looks like you used a flash! The trick is to make it look like you didn’t use a flash. To do this I combine HDR brackets with a single flash exposure that give me a total of 4 exposures. I use Aurora HDR for editing the exposure and merging the brackets and editing the photos. I have a preset already made for interior photos so most of the time I just adjust the opacity of the preset to get it the way I like.


Photo by Captain Kimo
Real Estate Drone Photography
Another thing you will need to if you wish to be a dominating photographer in this field, is to cover real estate drone photography. Nowadays, it is almost mandatory to provide aerial photos with your real estate photography service. If you are not offering aerial photography services to the client, they will look for another photographer that will. The same goes for photographers who only provide aerials for realtors - if you are only providing aerials than the realtor will look for someone who can do both. So, whichever service you offer, it is almost obligatory that you offer both aerial and regular real estate photography.
The reason why aerial photography is important is because it shows the property with the surrounding area. For example, if you have a property that is close to the beach, you will want to show it to potential buyers, which is why it is best you master real estate drone photography.
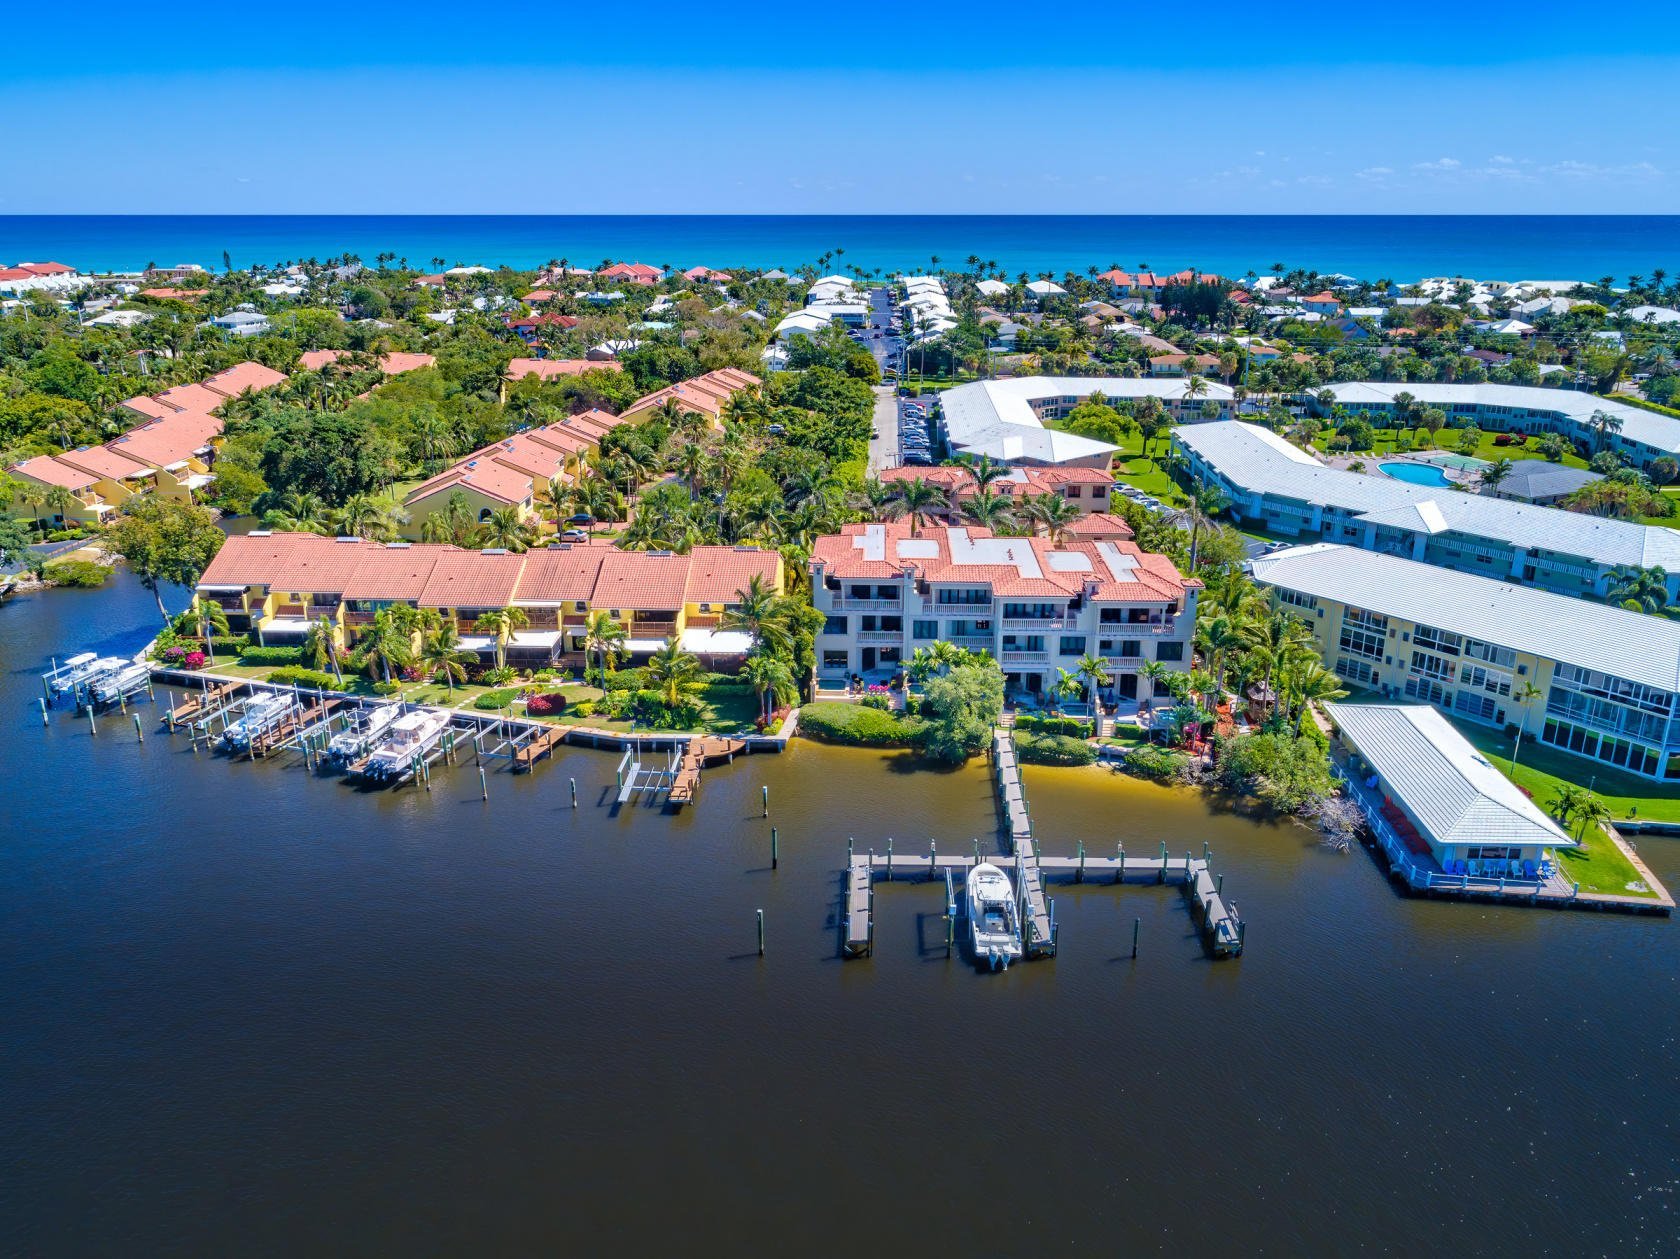 Photo by Captain Kimo
 As a real estate photographer, I use the Mavic Pro 2. I feel that this is the perfect camera for any real estate drone photography. Why? Because it has a one-inch sensor that offers great image and color quality for real estate drone photography. Additionally, this drone is also small and very portable, making it easy to carry around.
When I shoot aerials I will normally use a single exposure for daytime shots and bracket 5 exposures during sunset or sunrise. For editing daytime photos, I use Lightroom or Luminar - sometimes both. Luminar is great because of the AI Accent and the AI Sky Enhancer Filter. Along with, it can bring out the colors in daytime aerial photos.


Photo by Captain Kimo
For Aerial HDR photos I like using both Lightroom and Aurora to merge my HDR brackets. I like to use Lightroom for quick HDR edits and Aurora HDR for more colorful HDR images.
Real Estate Twilight Photography
One way to make the property you’re photographing look dreamy or compelling is to capitalize on certain times of day. Twilight or sunset is a great time to take real estate shots, because they can have a great emotional appeal.
Twilight real estate photography is done around sunset time, including 30 minutes before and after sunrise. This type of photography will give the realtor a more dramatic photo that can help them sell the property. For my personal real estate photography lighting, I bracket my shots with these photos, with the basic 3 exposure and 2 stops apart, which works for most of the photos. On a side note I also find that using 2 brackets will also do just fine.


Photo by Captain Kimo
For editing the photos I like to use Aurora HDR. I will merge the two photos together and a lot of the time the photo looks great and the only thing I do is bring up the color contrast.
Conclusion
Because so many home buyers are scattered all over the world, they rely on photos of the property before they actually make an appointment to see the home. In fact, some even buy a house from what they see online.
For this reason, professional real estate photography has become a lucrative career choice, especially if you enjoy interior design and love photography. If that is the case, then being a real estate photographer may be the perfect fit for you!
But of course those two things aren’t enough. Organization, good equipment, excellent photography skills, and a good eye are crucial for a successful real estate photography career.
A terrible time waster is showing up for a shoot only to discover something isn’t working or some piece of equipment is missing. To avoid such mishaps check your gear the night before, make sure it is fully charged. And just in case, bring your charger and a backup camera along.
What I like to do right before I leave my house for a shoot, is take a few test shots and review the images. This will provide assurance that I have a working camera with a memory card and battery ready for the real estate shoot.