Are you curious about how to fix issues with skin? Discover how our Pro Photographer, Robert Vanelli used Luminar to even out the skin tones and wrinkles in this image.

About the Image
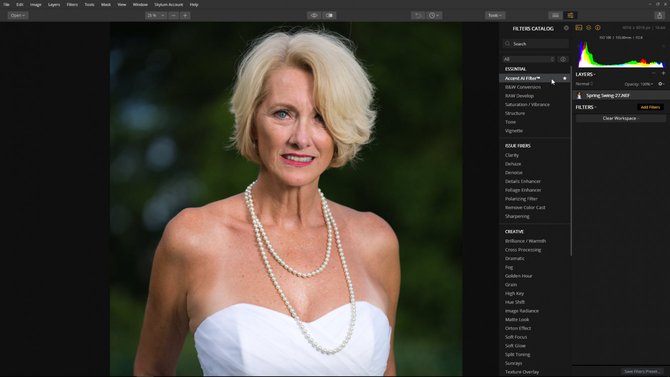
Johnathan Aulabaugh is the photographer who took this image of Florida based model Barbara Bale. Although the image looks good straight out of the camera, Johnathan wants to see how Luminar can make the image look better without investing a lot of editing time.
The Image Makeover Process
My typical starting point for most portraits is adding filters to the base Adjustment Layer. I start with Accent AI and RAW Develop before I begin to soften and enhance the skin with the Soft Focus and Orton Effect filters. I’ll take you through these steps then show you how to save the results as your own Preset — this will create a one-click proficient workflow. Let’s get started!
Developing the Image with Accent AI and RAW Develop
I like to begin with the Accent AI Filter™ as a starting point to adjust an image. The filter can be found in the Essential section of the Filters Catalog. For this image, a low Boost value of 20 properly exposed the background without affecting the subject — a sign the subject was already properly exposed. Good job Johnathon!
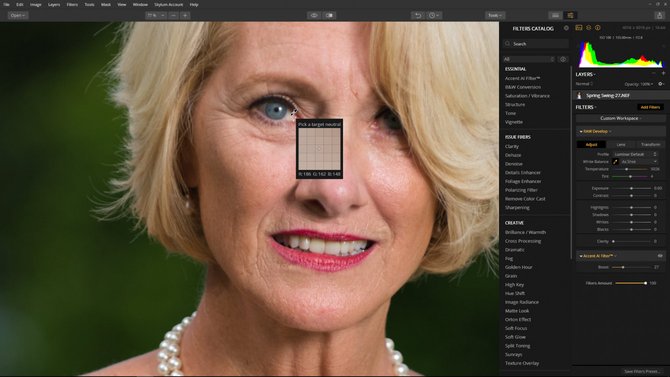
Images shot in the RAW format need to be developed. Select the RAW Develop filter from the Essential section. The first step is to set the White Balance of the image. Normally you search the image for a neutral gray. I’ve found using the white area of the subject’s eye is a great starting point. Click on the eyedropper tool — next to White Balance — and select the white area of the subject’s eye. Noticed the values of Temperature and Tint changed. I like the tint value but I want the image to be a little warmer so change the Temperature. Leave the other values set to the default of 0. We will adjust them a little later in the tutorial.
Smooth Skin and Enhance the Image
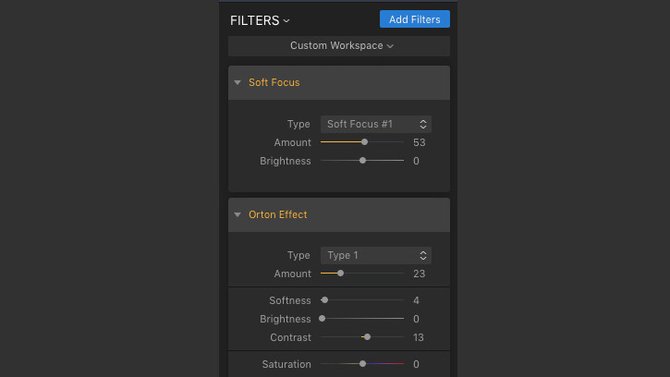
We can quickly smooth the skin and enhance the image at the same time by applying two filters — Soft Focus and Orton Effect. The Soft Focus filter adds a creative glow as it smooths the skin and evenly balances the skin tones while the Orton Effect filter produces a sharp and blurry photo at the same time. The key is to apply the right amount of each filter until you get the results you like. Both filters can be found in the Creative section of the Filters Catalog.
Adding Remaining RAW Develop Settings
Remember how we kept the remaining RAW Develop settings at 0? We waited because we needed to see how the combination of the other filters affected the image.

Creating Your Own Portrait Preset
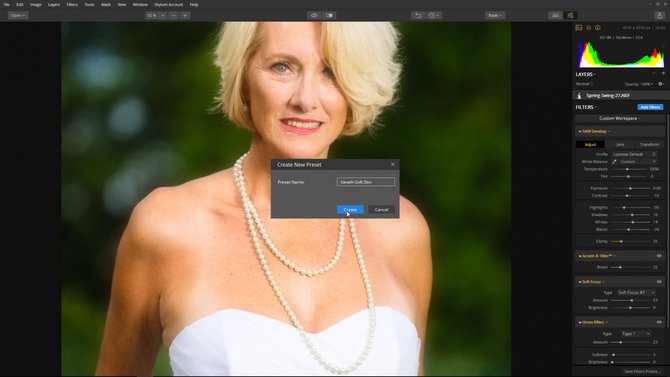
Once you start repeating the same routine during an editing session, stop and save the combination of filters as a Preset. Select Save Filter Preset from the bottom section of the Layers panel. Name your Preset and click Create. Your new Preset is located in the Custom folder of the Presets Categories.
 Now, you don’t have to go through the motions of adding each filter to an image. You simply apply the new Preset and Luminar will add those filters along with the values you set. The beauty of Luminar is that you can still adjust each filter inside of that Preset!
 Erase Away Wrinkles
To finish our Portrait Makeover, let’s remove a few wrinkles. Your goal here is to enhance the subject, not completely change them so their own mother doesn’t recognize them. To do this, lets put the changes on a new Adjustment Layer. This will give us the ability to bring back some of the wrinkles in the next step to produce a realistic look.
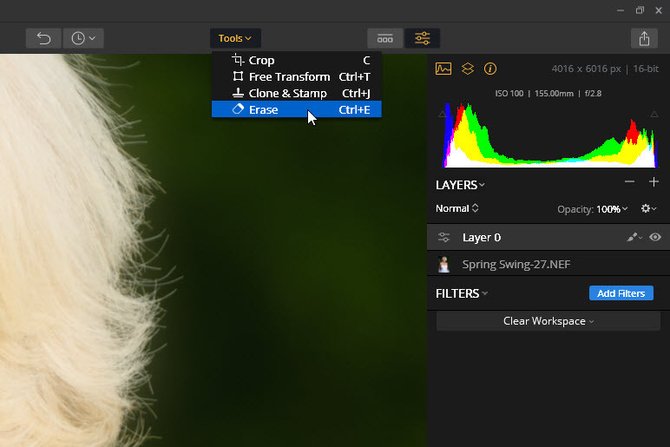
Clicking the + button at the top of the Filters section and choose the item Add New Adjustment Layer. Click on the Brush and select Erase from the Tools drop-down menu.
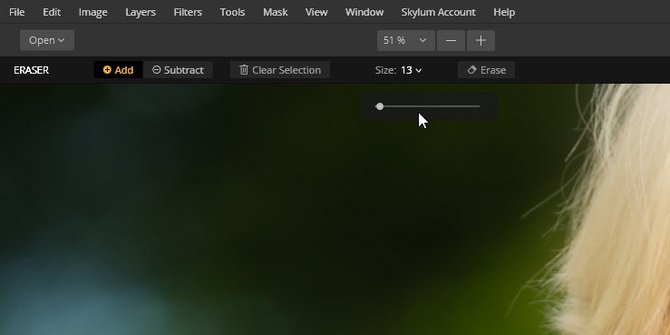
Adjust the brush size for accuracy and start to draw over each wrinkle.
The red marks below represent the areas that will be erased when you click the Erase icon. In my example, I show all the areas I would erase. This is just for illustration purposes. Removing a few wrinkles at a time — not all at once — produces better results.


Realistic Wrinkles
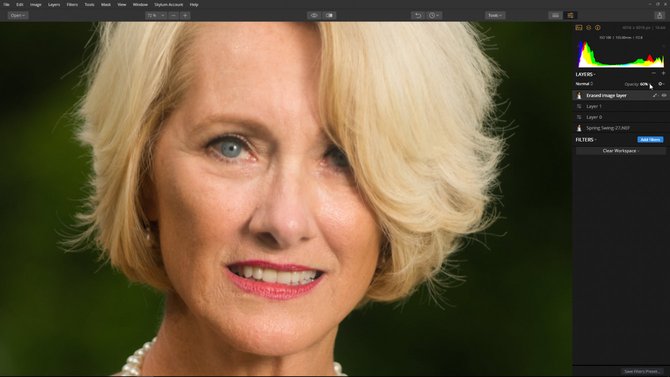
To make the portrait look realistic, we need to bring back some of the wrinkles. This is easily accomplished by simply changing the Layer’s Opacity.
The Conclusion
Now that we are done, let’s take our new Preset out for a test drive. Open a new image and from the Presets Categories, click the Custom folder and select the new Preset we just created. Adjust the Preset amount then follow the steps to remove the wrinkles.

Wow, wasn’t that much faster! By combining a few creative filters and using the Erase tool, we were able to take an already good image and make it better.
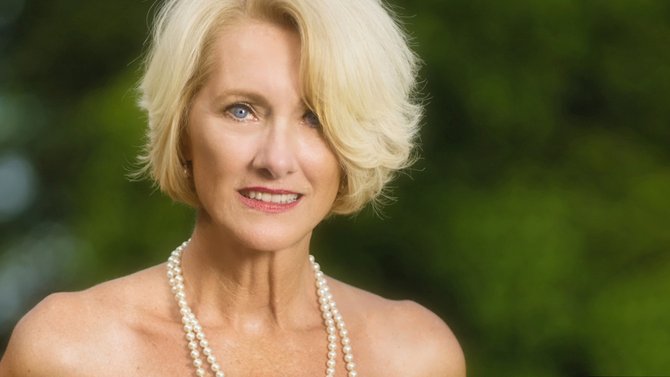 Th Final Result