April 17
14 min. to read
How to Face Swap in Photoshop
When you take multiple pictures of the same person, sometimes the best facial expression is in one shot and the best background is in another. During fashion or commercial photo sessions, you’re often photographing the same model for hours, looking for the perfect facial expression and attitude. And you can’t redo the session. In these situations, using an image editor to do a headswap is sometimes the best thing you can do to deliver satisfactory photographs to your client.
A headswap (or a partial face swap) can also be required for fixing wedding, business, or school portraits. Children are especially hard to photograph due to their continuously changing facial expressions. Some people also use this technique for artistic effects and caricatures.
 Unfortunately, there are also people who use headswaps to fake pictures. One notable case when a headswap was used for malicious purposes was a fake picture of the dead Osama bin Laden, published in 2011. Photo manipulation is a common practice in our digital era, and ethics should be an important part of your photography career.
The most famous software for photo manipulation is Adobe Photoshop. It’s so famous that “to photoshop” has become a verb. Photoshop offers several head-swapping methods, but it isn’t the only image editor you can use for this job. You can check out Photoshop plugins dedicated to face retouching that are faster and easier to use than Photoshop. You can also look for standalone image editors dedicated to photography that offer tools for image retouching. Keep in mind that whatever software you choose, it has to work with layers and masks.
A realistic headswap isn’t entirely the result of your image editor’s functionalities or your ability to use them. The entire process begins in the camera and relies on your attention to detail. Here’s everything you need to know about fixing your images using a realistic and intelligent headswap.
The basics of a headswap
A headswap means replacing a person’s head in a picture. A face swap means replacing only the face, which is useful when you want to keep the hairstyle and change only the facial expression.
Before looking for image editors that allow you to make this transformation, you need to know the prerequisites for a headswap:
- Use pictures of the same person posing in the same position, with the face and hair clearly visible (no hands in the hair or under the chin, no objects partially covering the face).
- Use pictures taken in similar lighting conditions (for example, in the same weather conditions and at the same time of day for natural light, or using the same artificial light sources).
- Use pictures taken from the same angle (for example, frontal portraits or profiles) and from the same distance.
- Use pictures in which the person has similar hairstyles and a similar neckline (it’s hard to fix a shirt collar over a high-neck sweater).
- Use pictures with a neutral background (it’s hard to blend a complicated floral background into a picture with blue sky background).
- Avoid lateral lighting and any shadows or highlights that aren’t in both pictures.
 Photo by Oliver Ragfelt
Further, make sure the head is approximately the same size in both pictures. You can slightly resize the selection in Photoshop. But especially if you have low resolution images, too many geometric transformations can leave you with blurry images and messy facial features. Your portraits need to look natural and reflect reality in even the slightest details.
How to do a headswap in Luminar Neo
Carefully following all the rules above, we’ve selected two pictures of the same person, taken in similar conditions. We like the facial expression in the first picture (on the left) and the composition of the second (on the right). Now it’s time to decide what software to use.

 Photos by Andrew Worley
Luminar Neo is a standalone photo editor that’s been praised as being one of the best photo editors of 2023. It’s dedicated to photographers with little time but many photographs to retouch. Luminar Neo is an automatic photo editor based on artificial intelligence, and it’s designed to deliver realistic and outstanding images. Moreover, it works with layers and masks and allows you to do a headswap in just a few minutes. If we’ve made you curious, download the free trial version right now.
So how can you do a headswap using Luminar Neo? It’s easy just follow these steps:
- Open the base image.
- Select Add New Image Layer and open the image with your favorite facial expression.
- Set the opacity of the new layer to 25% and align the two images. The faces should be the same size and in the same position. If they aren’t, select the new layer and open Free Transform from the Tools menu. Then resize and reposition the layer until you have everything in place.
- Set the opacity of the new layer back to 100%.
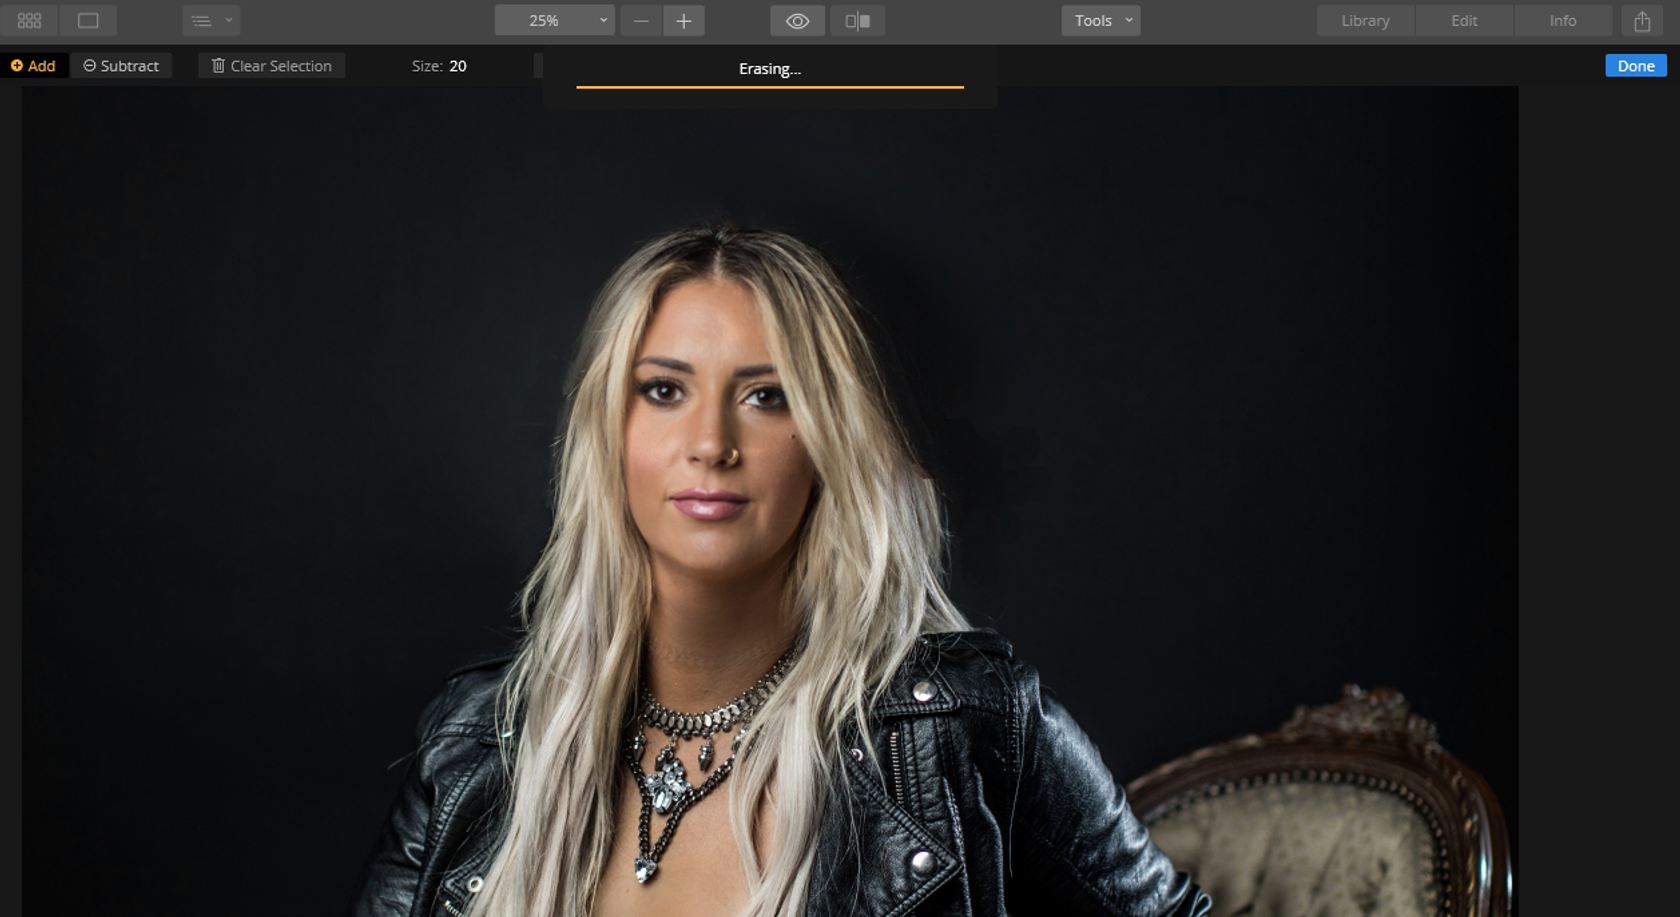
- Select the new layer and choose Brush. Select a brush diameter that suits your image, then use the brush to reveal the face from the new layer.
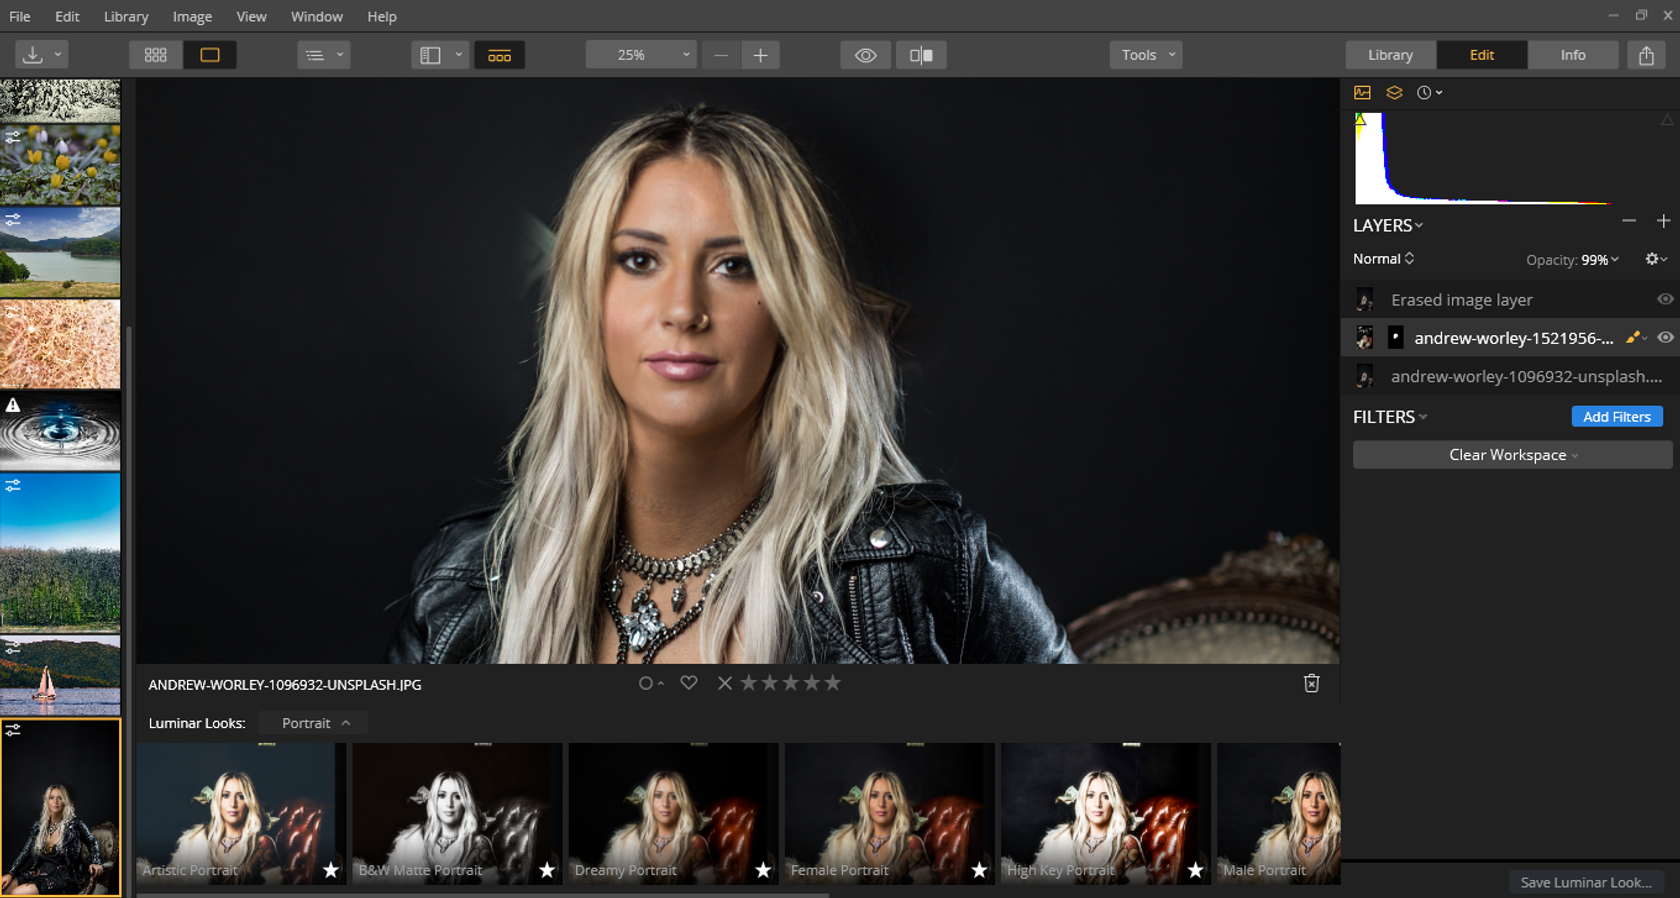
- If you reveal too much of the new layer and need to make small adjustments, select Erase from the Tools menu and clear the unwanted details.
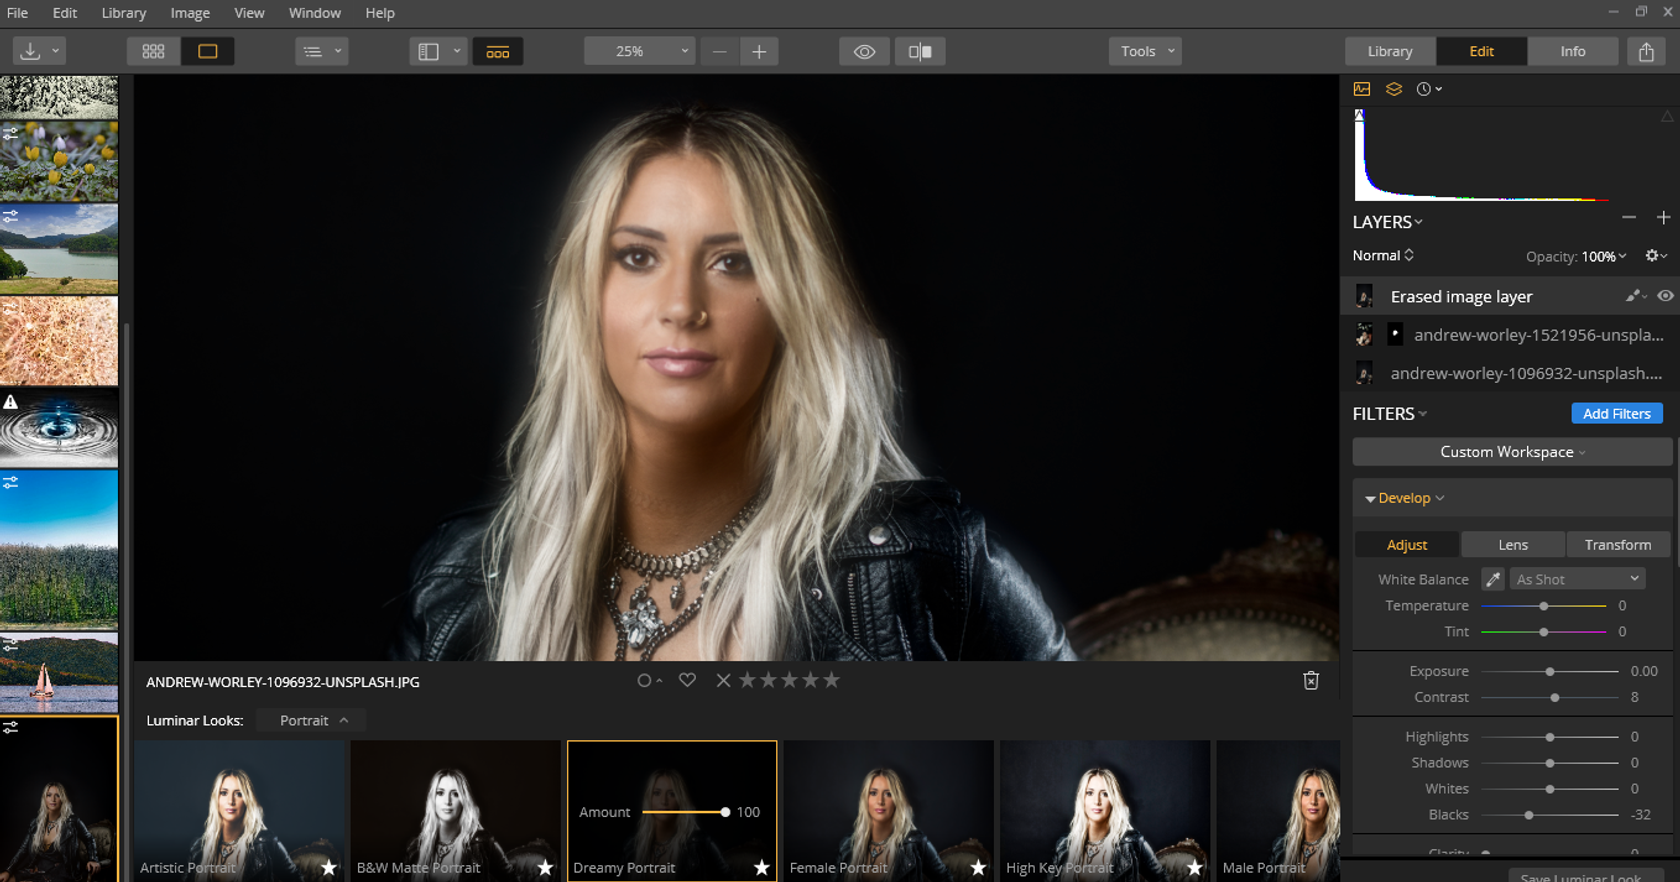
That’s it! You’ve successfully done a headswap in Luminar Neo. Now you can use one of the many Luminar Looks and add the final touches that suit your artistic vision. For example, you can choose the Dreamy Look from the Portrait category.
How to face swap in Photoshop
There are several techniques to do a face swap in Photoshop. You’re free to use whichever suits your skills and needs. The same prerequisites apply, so choose your images carefully before beginning your face swap in Photoshop.
If your portraits don’t have too many details and you’re good at making selections, follow these steps:
- Open both images. (Let’s call them the base image and the new face image.)
- Use the Lasso tool on the new face image and select the face (or the head if you want to do a headswap) and a small area around it. (Learn how to cut out an image in Photoshop if you aren’t familiar with this tool.)
- Copy the selection you’ve made and Paste it onto the base image.
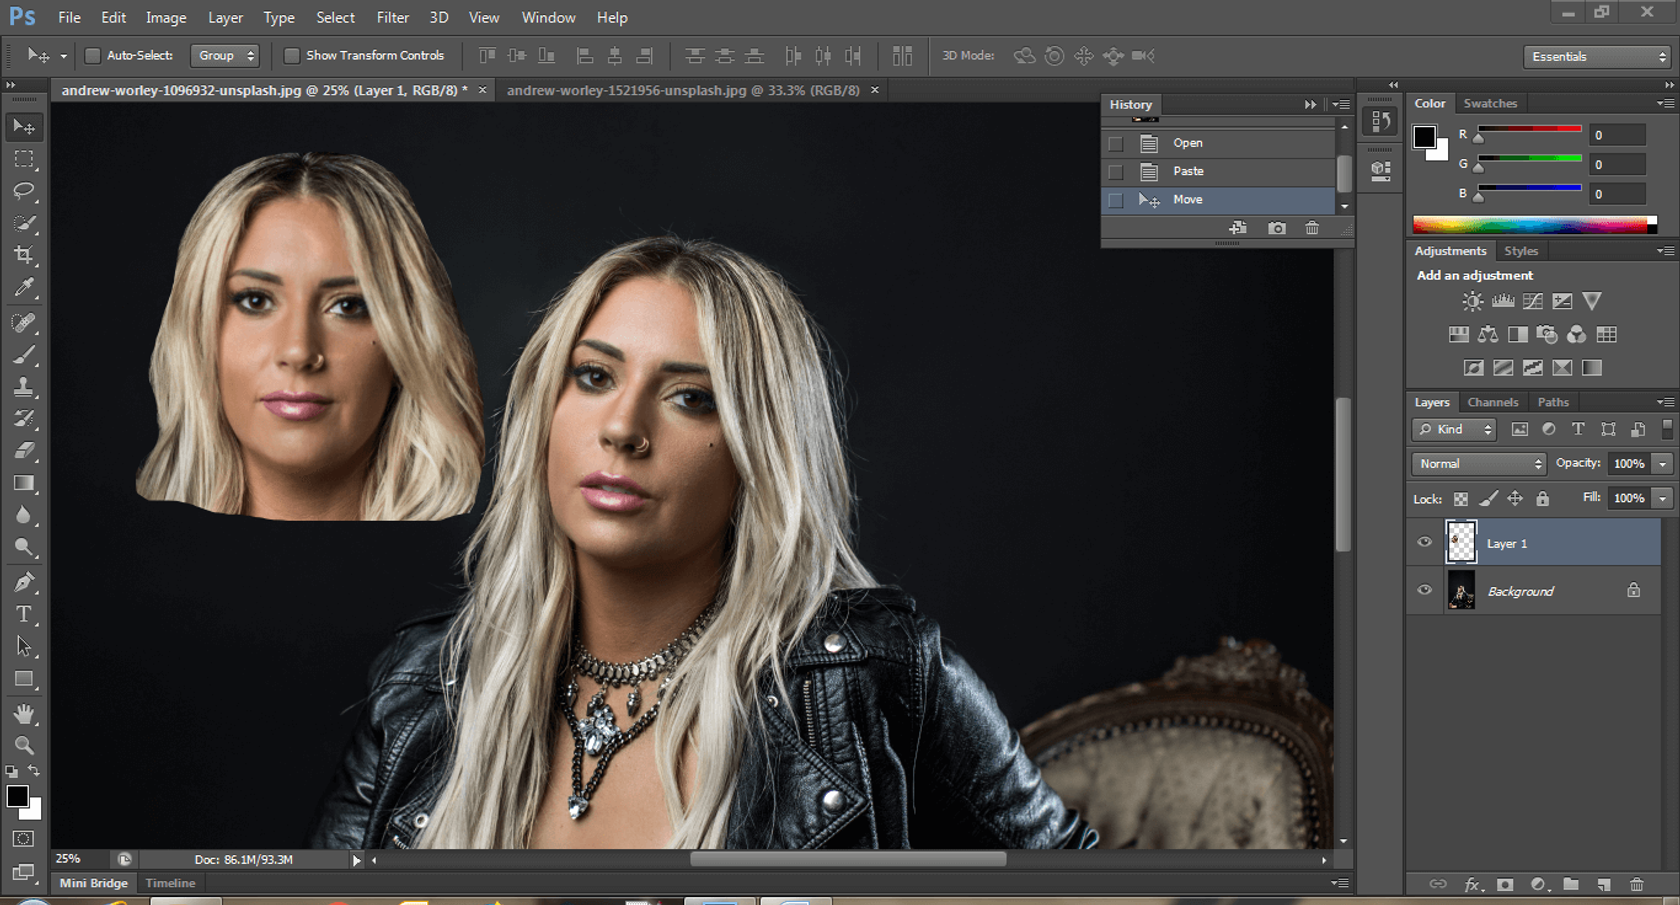
- Create a new layer from the selection you’ve pasted in.
- If the new face has different dimensions than the original face, you’ll have to resize the selection.
Resize a selection in Photoshop
All you have to do to resize a selection in Photoshop is place it in a new layer, select the layer, and choose Free Transform from the Edit menu. Make sure you lock the aspect ratio by holding the Shift key or by pressing the dedicated button.
Then drag the layer’s corners until you reach the desired dimensions. Press Enter to confirm the new dimensions.
- Lower the opacity of the new face layer and use the Move tool to align the new face with the base image. When you finish, reset the opacity to 100%.
- Add a mask layer to the new layer you’ve created.
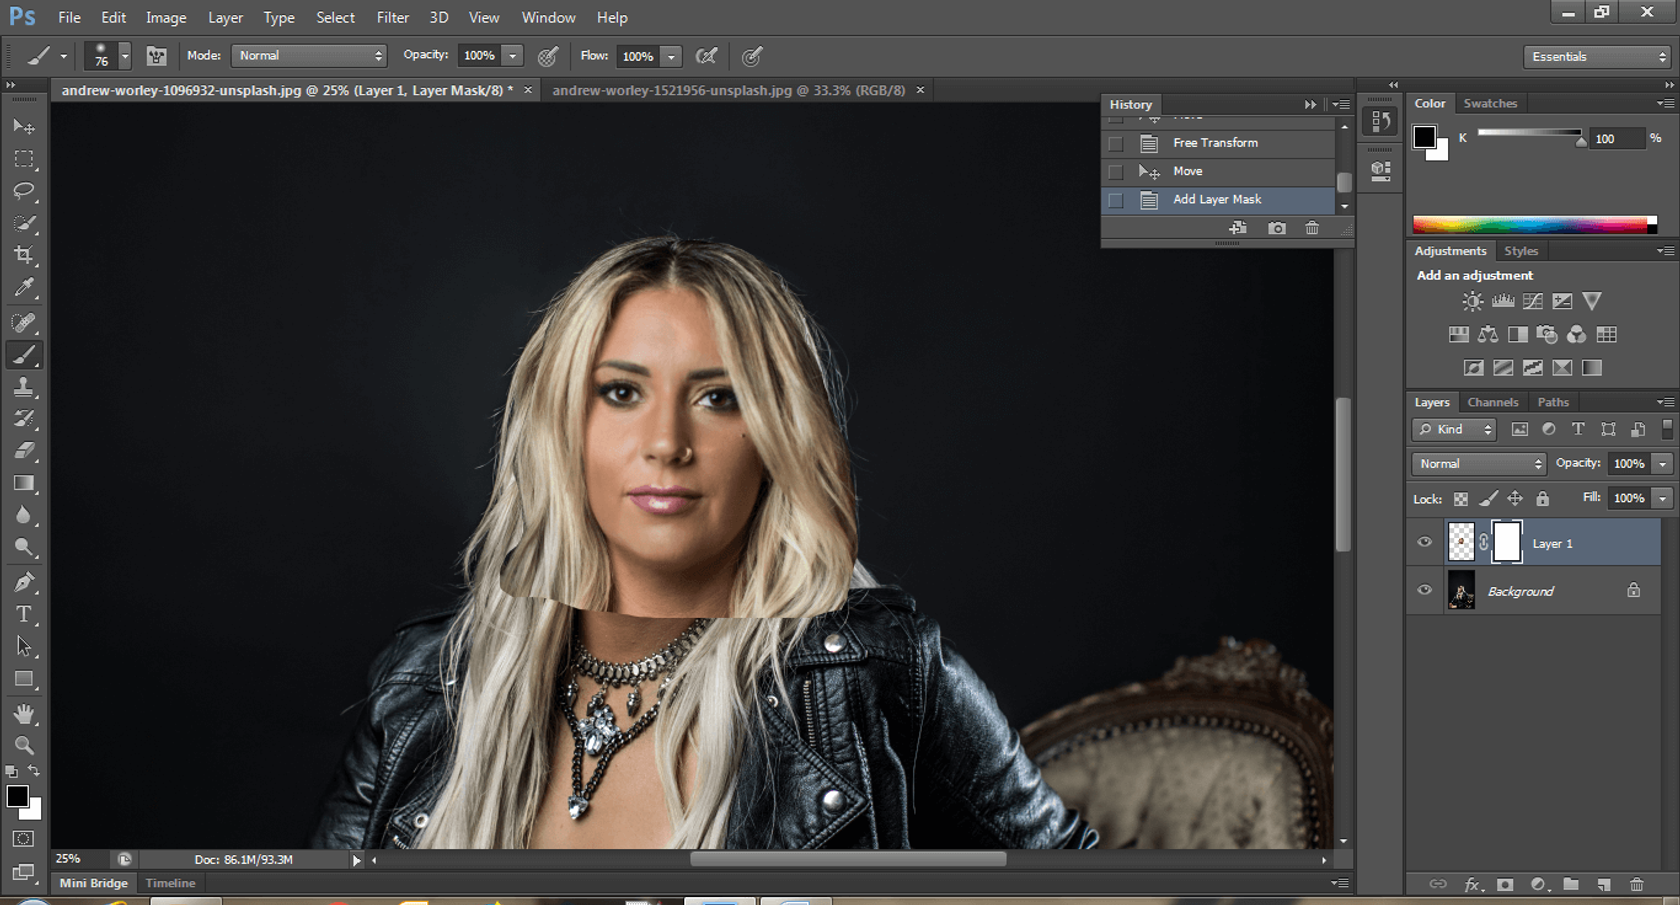
- Select a black brush and hide the area you don’t want to see around the new face.
- If you can still spot some inconsistencies, learn how to blend edges in Photoshop. You can work with Feather Edges or some of the other great tools offered by Photoshop.

You can use whatever selection tools work best with your image. For example, the Magnetic Lasso tool works well if the face you want to select has distinct edges, while the Magic Wand tool works better for faces with uniform color.
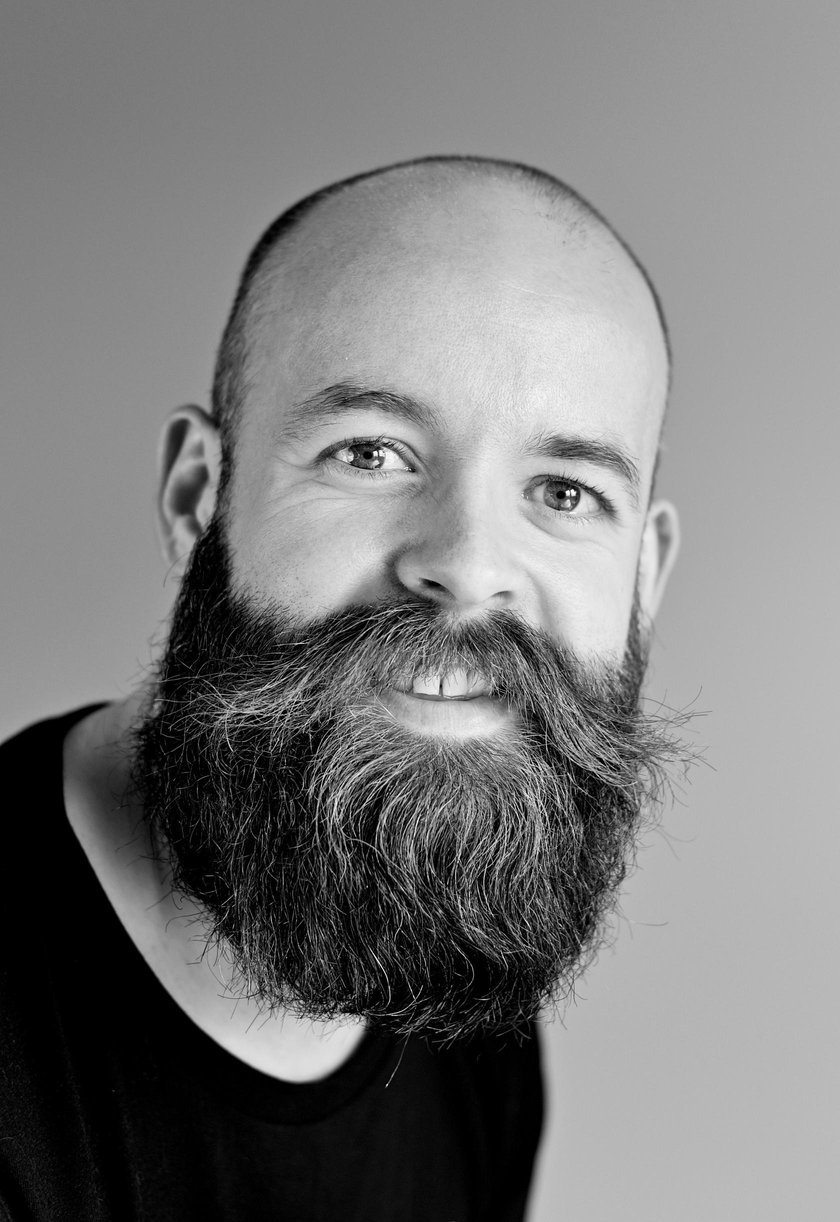 Photo by Craig McKay on Unsplash
For replacing just the face or a specific part of the face (for example, adding a smile or replacing closed eyes), you can use the Clone Stamp tool instead of selections. Just make sure that the source area and destination area are very similar. The Clone Stamp tool works only for small color modifications.
When you do a headswap in Photoshop, you need to pay attention to small details. Zoom in as much as possible while making your selections and using brushes. Every pixel counts, and the smallest mistake can result in a visible fake.
A headswap is an efficient method to fix a portrait when you can’t redo the photo session. It allows you to combine two images and achieve the perfect facial expression and the right composition at the same time. In terms of software, you can rely on Adobe Photoshop if it’s your usual image editor. But you can also consider Photoshop plugins and other standalone applications.
Image retouching is an essential part of a photographer’s job. More and more photographers choose dedicated software like Luminar Neo that’s easier to learn than Photoshop and delivers more realistic photographs. You can try Luminar Neo too. Download the trial version for free right now.
Don’t forget that a headswap is an image manipulation that should be used responsibly. You can have fun replacing people’s faces in a group photo or creating special effects, but you should be respectful and make your intentions clear.
 >
>
