Best Camera Settings For Wildlife Photography
May 02, 2024

Dive into the world of wildlife photography with this comprehensive guide on mastering the essential camera settings. This post is your gateway to transforming good shots into great ones, making each frame a vivid portrayal of the wild!
Seeing a deer at dawn or a hawk in mid-dive isn't just a visual treat; it’s a hint at the depth of wildlife photography! It's important to know how to capture those quick, magical instances that reveal the spirit of the wild!
Getting these shots to turn out just right depends heavily on understanding your camera settings. This post will unpack the essentials—shutter speed, aperture, and ISO—to help you not just photograph nature, but capture the essence of the untamed world!
So, let's gear up and learn how to make your wildlife photos come alive!
Mastering Shutter Speed for Dynamic Shots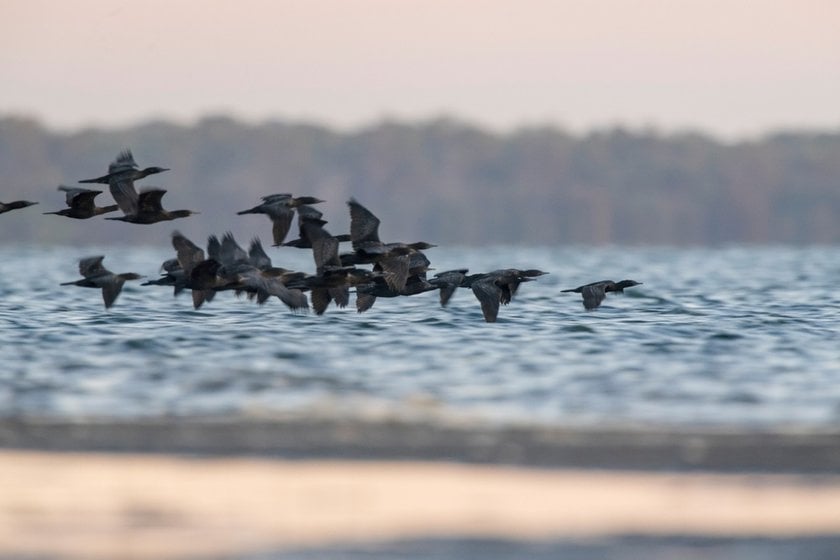

What is Shutter Speed?
Think of shutter speed as your camera’s heartbeat — quick for action-packed scenes to capture every detail frozen in time and slower for calmer moments, allowing light to draw out the scene’s depth.
Choosing the Best Shutter Speed For Wildlife
To snap sharp photos of wildlife in motion, like a bird slicing through the sky or a deer darting through the forest, you’ll need a fast shutter speed. This stops the action dead in its tracks, letting you see every detail without blur. For animals lounging or moving slowly, you can ease off the speed, allowing your camera to soak in more light and fine details.
Practical Tips
We all love capturing the diverse behaviors and beauty of different animals, each requiring a unique approach to photography. Let’s find out how to adjust your camera settings to get the results you want!
Capturing Dynamic Birds: Aim for a shutter speed of 1/2000th of a second when photographing birds. This setting freezes their rapid flight and helps you capture every detail of their feathers in crisp, vivid clarity, allowing viewers to experience the thrill of flight.
Fast Mammals in Motion: To photograph fast-moving animals like deer or foxes, set your shutter speed to between 1/1000th and 1/1600th of a second. This range is ideal for stopping these animals in their tracks and capturing each moment of their swift movement with precision.
Calm Scenes with Stationary Wildlife: In quieter moments, like a bird quietly perched or a bison grazing, a slower shutter speed of 1/500th of a second is ideal. This slower setting lets in more light, which brightens your subject and fills the scene with rich detail, all while maintaining sharp focus throughout the image.
By understanding and manipulating shutter speed according to your wildlife subject, you transform from simply taking pictures to creating artful snapshots of nature in action.
The Best Camera Settings for Indoor Photography with Tips and Tricks
Learn moreOptimizing Aperture for Stunning Detail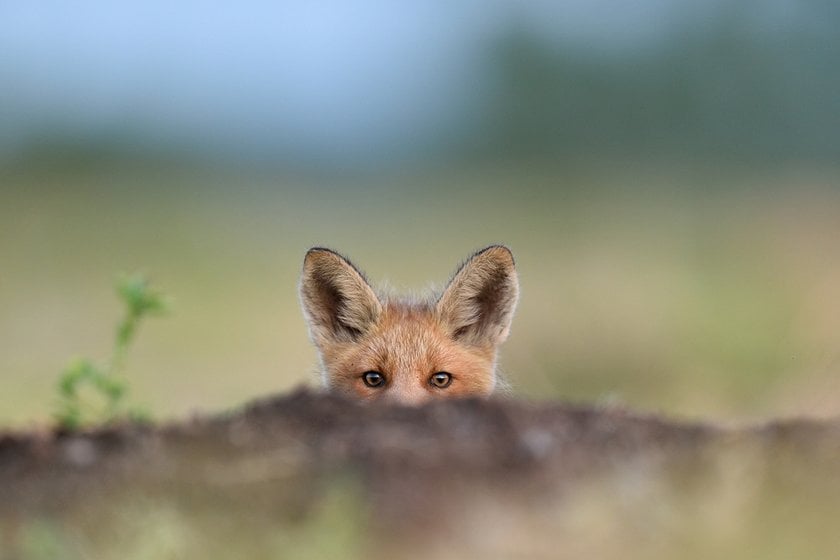

What Aperture Means
The aperture controls how much light gets into your camera, similar to how the size of a window affects the light in a room. This setting, shown as f-stops, directly influences how much of your photo is in sharp focus from the foreground to the background.
The Best Aperture for Wildlife Photography
For wildlife, you usually want the animal sharp and the background just a touch blurry to make your subject stand out. An aperture around f/5.6 to f/8 is typically best. This range sharpens your subject while gently softening the background, helping the animal catch the viewer's eye.
Adjusting Aperture Based on Lighting
Outdoor lighting is always changing, and so should your aperture:
On bright days, you'll want to use a smaller aperture (higher f-stop number) to prevent the photo from becoming overexposed. Plus, this also helps keep more of your scene in focus.
In darker settings or when you want to highlight an animal from a distance, use a larger aperture (lower f-stop number). This opens up the lens to let in more light and blurs out busy backgrounds, making your subject more prominent.
Learning to adjust the aperture based on your surroundings and the light available is key to taking great wildlife photos!
How to Take Photos in Manual Mode
Learn moreAdjusting ISO for Perfect Exposure

ISO is like your camera's magic knob that controls how sensitive it is to light. Turning this setting up or down changes how bright or dark your photos are. On a sunny day, you can keep the ISO low, around 100 to 200, because there’s plenty of light. Your photos will turn out sharp and clear. In darker situations — like under a cloudy sky or during the golden hours of dawn and dusk — you’ll want to nudge that ISO up to between 400 and 800. This helps you capture more light without losing the crispness of your shot!
But what about those really dim scenes, like shooting in the shade of a thick forest or as the evening turns to night? That's when you might push your ISO up to 1600 or higher. Yes, this might make your photos a bit grainy, but sometimes, it’s the only way to get a good exposure in low light.
ISO Settings for Different Lighting Scenarios
When you’re out in the field, the lighting can change fast, and knowing how to adjust your ISO is crucial!
Bright Days: Stick with a low ISO. This keeps your images free from graininess.
Cloudy or Dimly Lit Times: Increase the ISO slightly. This extra sensitivity can make a big difference in capturing details that would otherwise be lost in the shadows.
Dark Conditions: Don’t be afraid to go high with your ISO. The noise might increase, but you’ll also capture details that are essential for setting the scene.
Managing Noise in High ISO Photos:
While higher ISOs make it easier to shoot in low light, they also increase the graininess or noise in your photos. To manage this:
Use noise reduction software either in-camera or during post-processing. Most modern cameras and photo editing software have tools specifically designed to smooth out grain without losing too much detail. For example, you can try out Luminar Neo’s feature, Noiseless AI, which will reduce noise in just one click!
Experiment with your camera’s limits. Some handle high ISOs better than others. Knowing how far you can push your equipment helps you make better decisions on the fly.
So, mastering ISO settings is all about balance! You're playing with how much light your camera sees, which can dramatically affect the mood and clarity of your photos. Whether you’re capturing the harsh midday sun or a soft sunset, getting your ISO right can be the difference between a forgettable shot and a breathtaking photo!
Boosting Your Nature Shots with Luminar Neo
After you've nailed the best camera settings for nature photography and taken some great landscape shots, it's time to make those images pop. Luminar Neo, an AI photo editor, comes in handy here! Its EnhanceAI feature looks at your photos, figures out what needs fixing, and tweaks things like brightness and colors all by itself. It's like having a smart assistant that knows exactly how to make your landscape photography editing easy!
Editing wildlife photos can be tricky sometimes, but Luminar Neo keeps it straightforward. Want to make the sky more dramatic or add some fog for mood? The SkyAI and AtmosphereAI features can do that without making it look fake. They understand where things are in your photo and apply changes that fit just right. There’s also a cool tool called CompositionAI that helps you crop and frame your photos automatically to make sure the focus is always on the wildlife!
Luminar Neo isn't just another photo editor — it’s like a magic wand for your nature photos, giving you the power to quickly enhance and transform your images so they tell a more striking story. Whether you’re working on wide landscape views or detailed animal shots, Luminar Neo makes it easy to get professional-looking results!
Bottom Line

When you're out in the wild snapping photos, nailing the perfect camera settings—shutter speed, aperture, and ISO—is just the start!
Once you've captured the raw moments of nature, Luminar Neo steps in to amplify your efforts. This software isn't just about touching up; it transforms your raw images into evocative, powerful narratives!
So, keep your camera ready, and let Luminar Neo help you share the beauty of the wild!