Invisible Editing: How AI Can Erase People and Objects from Pictures
November 22, 2023

Welcome to the world of AI image editing, where amazing changes happen with just a few clicks. Imagine being able to remove people or things from your photos easily, making crowded places look empty, or getting rid of distractions. This isn't just an idea; it's what's happening now with AI technology in photography!
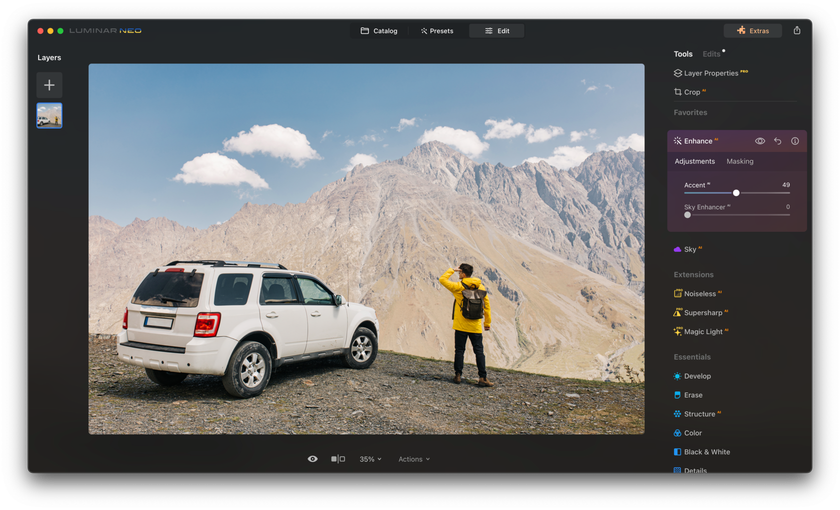
One of the leading platforms in this exciting area is Luminar Neo. It's a powerful AI image editor that can make people and objects in your photos vanish, leaving behind a perfect picture. Whether you're a pro or just love taking images, the power of Luminar Neo is something to be excited about.
Let's dive in and discover how to make editing easier and more creative than ever!
Why Clearing Out Distractions from Photos Matters
When you take a picture, sometimes there are extra things in it that you don't really want, like random people or objects. It's important to remove these distractions for a few simple reasons:
Makes Your Main Subject Stand Out: If you’re taking a picture of a person or a special thing, you don't want other stuff in the background taking away the attention. Removing these distractions helps your main subject shine.
Gives a Cleaner Look: Too many things in a photo can make it look messy. Taking out these extras makes your photo look cleaner and nicer.
Makes the Photo Better: Getting rid of things that don't belong in your photo can turn an okay picture into a great one. It looks more professional and pleasing.
Lets You Be More Creative: When you remove stuff from a photo, you can make the picture look just how you want. It's like having a magic wand to change the photo to match your ideas.
So, cleaning up your photos by taking out people and objects you don't want makes them look better and helps tell your story the way you want.
The Process of Erasing People and Objects with AI
In today’s world of photography, AI tools like those in Luminar Neo make it incredibly easy to remove people from photos and leave out objects. Let's take a look at two such tools: the Erase Tool and the GenErase Tool. You can also read our guide on these two tools - GenErase vs Erase
Erase Tool in Luminar Neo
The Erase Tool is a simple, free feature in Luminar Neo. It's great for quickly removing small things you don’t want in your photo, like a stray person in the background or an unwanted object. This feature blends the spot where the object was with the rest of the photo, making it look like the object was never there.
Using the Erase Tool:
Find it in the Edit Panel of Luminar Neo.
Select the object you want to remove.
Click ‘Erase’ and watch the object disappear.
This tool is easy to use for anyone, whether you’re new to photo editing or have been doing it for a while!
GenErase Tool
For more complex edits, Luminar Neo’s GenErase, an AI object removal tool, is the way to go. This is a more advanced, paid tool that does more than just erase; it also fills in the space where the object was with matching textures from the surrounding area. This is perfect for when you need to remove people from photos and want the background to look natural!
Using GenErase:
Open your photo in Luminar Neo and choose the GenErase tool.
Paint over the person or object you want to remove.
Hit ‘Erase’ and see the space fill in naturally.
GenErase is especially useful for photos where you want to focus on a specific area without distractions and match it to the surroundings.
Both the Erase and GenErase tools in Luminar Neo make it easy to clean up your photos by removing people and objects. With just a few clicks, you can transform your pictures, making them look exactly how you want!
Tips for Smoothly Using AI Tools to Remove Objects and People
Removing people and objects from your photos using AI tools like those in Luminar Neo can be incredibly effective, but it requires some know-how for the best results. Here are some practical tips to ensure a smooth and successful editing process:
Choose the Right Tool for the Job
If you're dealing with small, simple objects or people, the Erase Tool is perfect. It's quick and straightforward. For more complex scenarios where you need the background to blend seamlessly after the removal, the GenErase Tool is your go-to option.
Start with a Clean, High-Quality Image
The better the quality of your original photo, the more effective the AI tool will be. High-resolution images offer more details for the AI to work with, resulting in a more natural-looking edit. If you want to make the details in your photos really pop, like the textures in fabrics or the little details in decorations, give Structure AI in Luminar Neo a try. It helps bring out all these small, important parts of your picture, making everything look clearer and more vivid. You can find more information about it and how to use it here!
Zoom In for Precision
When selecting the area to be erased, zoom in for a closer look. This allows you to make more precise selections, ensuring that only the unwanted elements are removed.
Use a Properly Sized Brush
Adjust the brush size according to the size of the object you’re removing. A brush that’s too large can remove more than you intend, while a brush that’s too small might not cover the entire object.
Check Your Work
After using the erase function, review your photo thoroughly. Look out for any areas that may need a touch-up or additional editing.
Experiment with Multiple Attempts
If the first try doesn’t give you the desired outcome, don’t hesitate to undo it and try again. Sometimes, it takes a few attempts to get the perfect result.
Combine with Other Editing Tools
After removing an object or person, use other editing tools to fine-tune the image. Adjusting brightness, contrast, or color can help blend the edited area with the rest of the photo.
Backup the Original Image
Always keep a copy of the original photo. If the editing doesn’t go as planned, you’ll have the original to start over.
By following these tips, you can make the most out of AI tools in Luminar Neo, achieving clean, distraction-free photos that highlight your intended subject beautifully!
Advanced yet easy-to-use photo editor
Get Luminar Neo NowOther Editing Tools
In Luminar Neo, you have some really cool tools to make your photos look even better. There's Relight AI, which is great for fixing lighting in your photos, making everything look bright and clear. Enhance AI helps to improve your whole photo easily, keeping your own style and making everything look neat and professional.
If you want to adjust the light and dark parts of your photo to make them stand out more, you can use Supercontrast AI. And for changing the sky in your pictures to something more dramatic or pretty, Sky AI can do that really well. It's smart enough to make the new sky fit perfectly into your photo, even in tricky places.
All these tools help you to make your images look just the way you want!
Wrapping It Up
In short, this post has shown us how cool editors like Luminar Neo are changing photo editing. With its advanced AI tools, it's super easy to take people or things out of your pictures, making your main subject stand out.
It's really amazing how AI can help make your photos look just the way you want, simply and quickly. This is a big step forward in making photography fun and creative for everyone!


