Travel With AI: How To Transport Your Photos To Different Locations
November 24, 2023

In the ever-evolving realm of photography and digital artistry, the integration of Artificial Intelligence (AI) has ushered in groundbreaking possibilities.
Luminar Neo, an advanced photo editing application, has recently introduced the GenSwap tool, residing within the Generative Tools section. This innovative feature empowers users to transport their photos to diverse locations digitally, enabling the addition or substitution of elements seamlessly within images.
AI is an ingenious collaborator within photography, offering an unparalleled ability to transport photos to different locations seamlessly. Through the GenSwap tool's intuitive interface, users can witness the metamorphosis of their images as AI swiftly replaces or augments elements within the selected areas, creating stunning visual narratives that evoke a sense of wonder and imagination.
Nowadays, photo editing with the help of artificial intelligence is not merely limited to basic adjustments or enhancements; it extends to storytelling. Imagine transporting a serene woodland scene to the heart of a bustling metropolis or infusing an otherworldly element into an everyday landscape, all achieved with a few clicks and the guidance of AI.
The article aims to teach experienced photographers and passionate hobbyists how to operate the brand-new GenSwap tool from Luminar Neo. Below, we provide detailed step-by-step instructions on using GenSwap, slowly navigating photography enthusiasts through the impressive creative capabilities of this cutting-edge feature. Travel through time and space without even leaving your room.
GenSwap From Luminar Neo: A Tutorial
The GenSwap tool is a part of the latest updated version of the Luminar Neo software — version 1.16.0. This innovative feature operates through a fusion of intuitive controls and AI technology, allowing users to select specific areas for modification, create detailed prompts, and witness the AI's transformation in real time. This transformative capability streamlines the editing process and opens unprecedented creative avenues, transcending traditional photo editing constraints.
Try GenSwap for Quick Photo Element Replacement!
Take a look!Now, we will guide you through the intuitive interface of this outstanding tool. Explore how artificial intelligence seamlessly transports your photos to diverse locations. Discover the simple yet powerful techniques that empower you to manipulate and enhance your images, creating visual narratives that transcend ordinary photography.
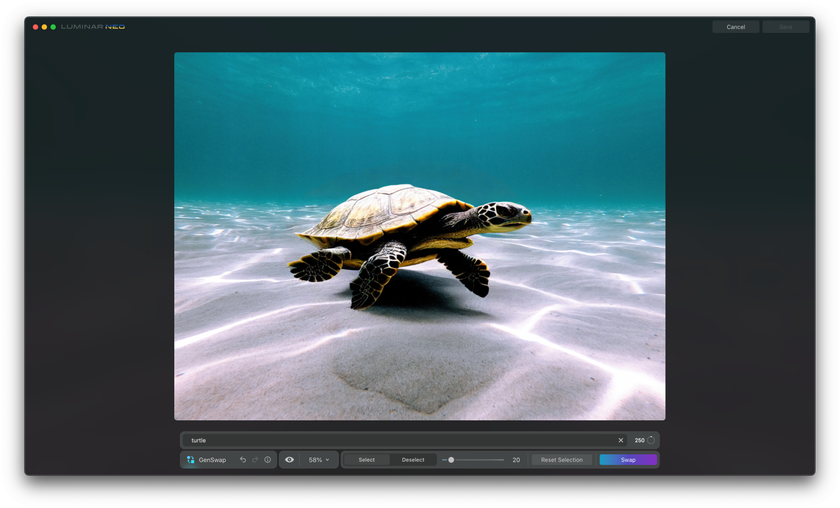
Once you update the Luminar Neo application, the GenSwap tool will appear in the panel on the right side of your screen. It will appear in the new section called Generative Tools. To choose GenSwap and use it again, you need to be in the catalog module, where you can select a sample file and click the GenSwap icon. It will open the GenSwap window, and you can start editing the image.
First, let's go to the bottom of the screen, where we will look at the available controllers. Starting from the left, you have the name of the tool and then the possibility to do, undo, or redo, depending on the steps you will make. You can click on the eye icon to learn more about the tool, or you can move on and use the before and after view and the zoom option. If you want to zoom in, you can also use the wheel on your mouse.
After that, there is a whole section focusing on the brush. The brush will help you to select the area where you want to swap or add a new element. First, you must ensure you are on Select, as you will choose a specific location. Now, after that, you can adjust the size of our brush. You can do that using the little slider, or you can also use the bracket keys on your keyboard. Once you are happy with the size, just like with any brush in Luminar Neo, you can brush over the area where you want to add or swap the element on your image.
There is also an option to click on Select, and by doing that, you can now come back to the mask and brush over the part of the selection you would like to remove to top it off. At the end, there is also an option to reset the entire selection. When we do that, you will see that the selections disappear altogether. So now you need to return, click Select again, and start everything from the beginning.
You will notice that when you select a part of the image, you will see a prompt bar above your control panel. It is right here where you can enter the prompt. Regarding the prompt, it should be as detailed as possible.
And it will depend on what you want to do in your case. Once you are happy with the prompt, all you need to do is click on Swap. Once you click the button, the application will start replacing or adjusting that area.
At the same time, it will also show you several tips that will make using the GenSwap tool easier.
How does the new feature work?
The most amazing thing about the work of AI is that its algorithms work invisibly, magically creating a picture at our request. We live in an amazing time when new improvements in the creation of artificial intelligence appear every day. As photographers, we need to keep an eye on new products and immediately try to introduce them into our use because the more unique and modern tools we have, the easier it is for us to create better photos.
So, how exactly does the GenSwap tool from Luminar Neo work? Simply put, the tool takes the chosen area and sends it to cloud storage. It is where an AI machine attempts to create the requested element and blend it seamlessly into the surrounding areas. As soon as the task is complete, the tool returns the updated image to the application, replacing the original selected location with the newly created element.
You can review the look when the application returns the image with the adjustment. You can return to the Before and After and look at the adjustment, undo, or redo any steps. You could regenerate the area by clicking on the Swap button again.
When you are happy with the result, you can navigate to the top right corner of your screen and click Save. By doing that, you will return to the catalog module and specifically to the new generative Creations folder. From here, you can move the image into any folder you want or immediately move it into the Edit module and continue to enhance your picture.
With newfound knowledge of Luminar Neo's GenSwap tool, you are equipped to embark on a journey of artistic exploration. Embrace this innovative tool as a gateway to crafting compelling narratives that mesmerize and captivate audiences, marking a significant leap in your photography and digital artistry endeavors.
Advanced Yet Easy-to-Use Photo Editor
Get luminar neo nowBottom Line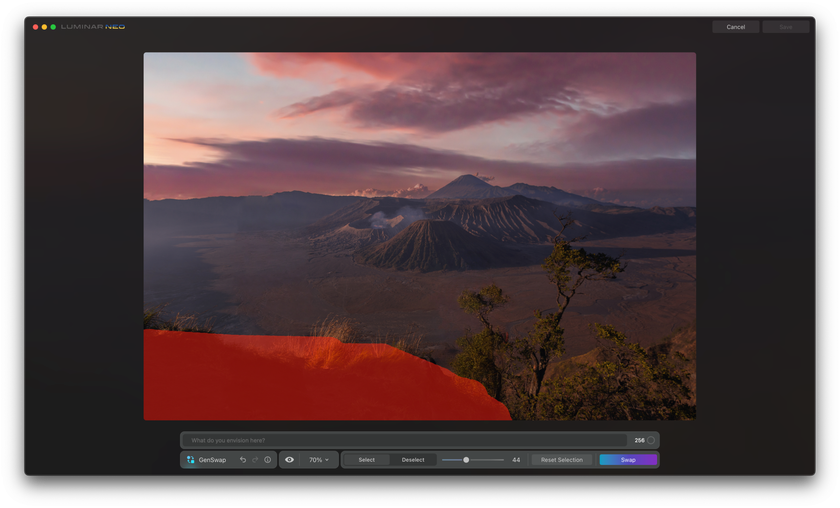

In contemporary photography, the convergence of Artificial Intelligence (AI) and creative expression reaches an exhilarating zenith with Luminar Neo's GenSwap tool.
With AI as an innovative collaborator, photographers wield the power to redefine reality through intricate manipulations. The tool's seamless integration empowers users to infuse their compositions with new locales, altering backgrounds, enhancing atmospheres, and even transposing elements to create captivating juxtapositions. This transcendence of spatial and contextual limitations fosters a realm where creativity knows no bounds.
By leveraging this tool, users can effortlessly craft stunning compositions, swapping or augmenting elements within images with remarkable precision. Upon completion of the editing process, the ease of saving and organizing the modified photos within the application's catalog module further enhances the user experience.
Whether refining images for personal or professional purposes, the GenSwap tool within Luminar Neo marks a significant leap in the synergy between AI and visual artistry, offering a gateway to an expansive realm of possibilities in digital editing and image manipulation.


