Using both Aurora HDR 2019 and Luminar can give you the best of both programs. Discover an example of how to use both programs together.
Follow along in the step-by-step tutorial or watch the video. You can download the example files here. (Note: Images are to only be used for this tutorial. Images by © Richard)
In this tutorial, let's look at how to use Aurora HDR 2019 and Luminar together. We will start by processing an HDR image in Aurora HDR and then use Luminar’s intelligent filters, smart presets and some of its specialty tools to edit the image.
Process an HDR image
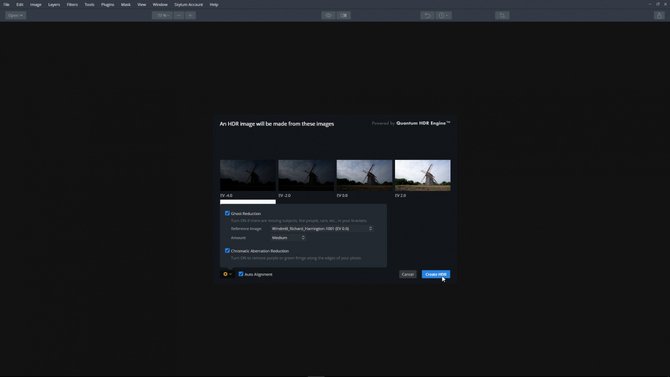
Step 1: Select a group of bracketed images, check Ghost Reduction, Chromatic Aberration, and Auto Alignment then click Create HDR.
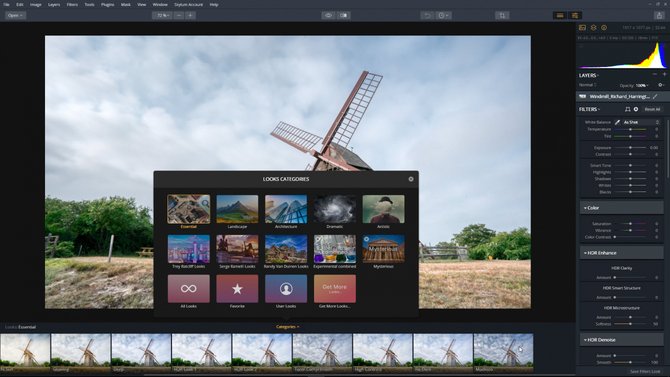
Step 2: Click Categories, choose Essential and select Modesto Preset to apply an Aurora HDR Look to the image.
Step 3: Enhance the image a little more by increasing HDR Enhance Filter’s HDR Clarity and add color to the sky by increasing Adjustable Gradient Filter’s Vibrance.
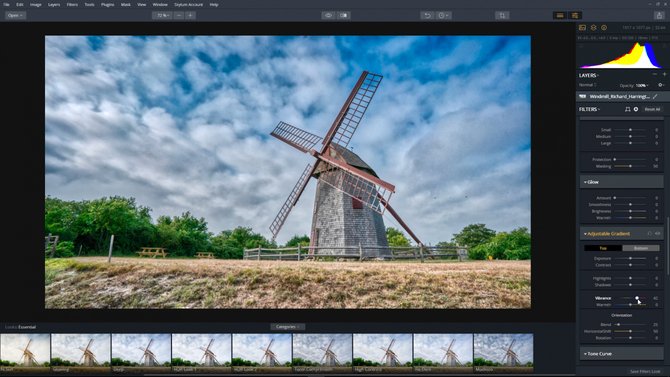
At this point, the image is looking good. To make it even better, we are going to use Luminar to remove the fence post, yellow sign and add an additional Look.
Sending an image to Luminar from Aurora HDR
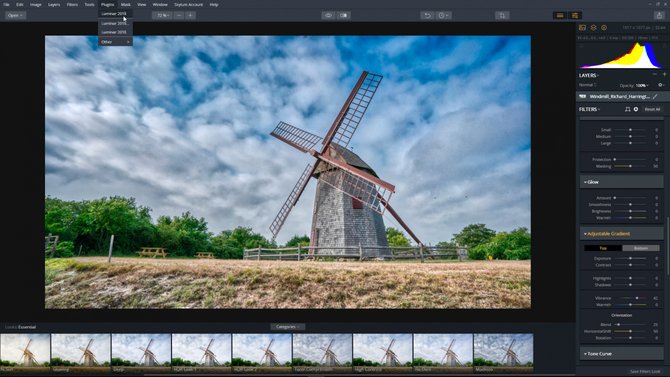
Step 1: Click Plugins on the Top Toolbar and select Luminar from the drop-down list. Aurora HDR opens Luminar and imports the edited image.
Step 2: To remove the fence post and distractions, select the Erase tool from the Tools drop-down menu and paint over the areas you want to erase. Luminar examines the surrounding pixels and generates a new texture based on its awareness of what’s nearby in the photo. Click the Erase button to remove the selected areas. When you are happy with the results, click Done.
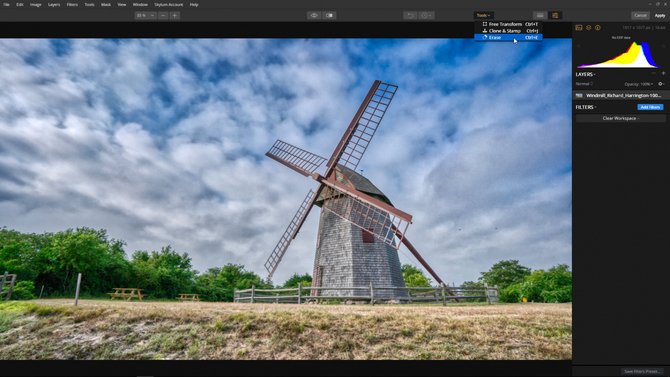 Select the Erase Option in the Tools menu
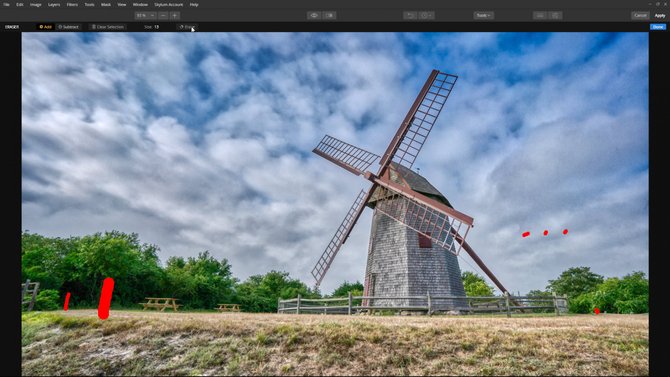 Paint over the areas that you want to remove
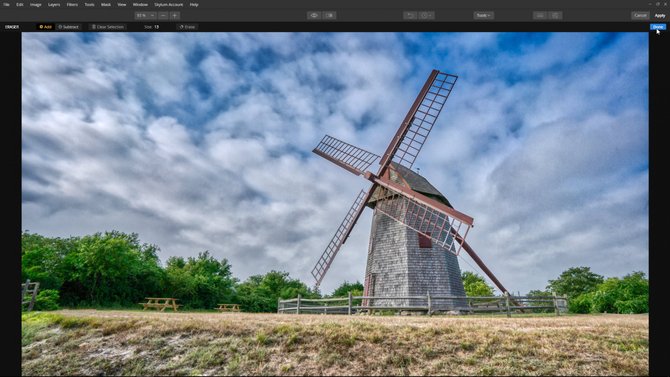 When you are ready, press the Done button
Step 3: Add a bit of dramatic effects to this image, select Dramatic from the Presets Categories and select the Dramatic Grungy Preset option.
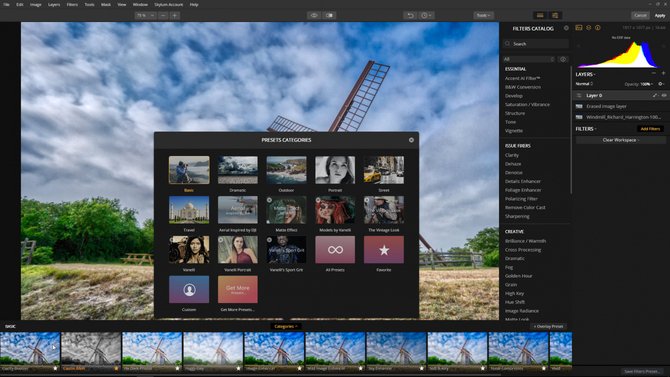
At this point, you can return to Aurora HDR by clicking the Apply button found on the Top Toolbar or you can continue editing — take advantage of Luminar’s intelligent filters and smart presets.
Returning to Aurora HDR from Luminar
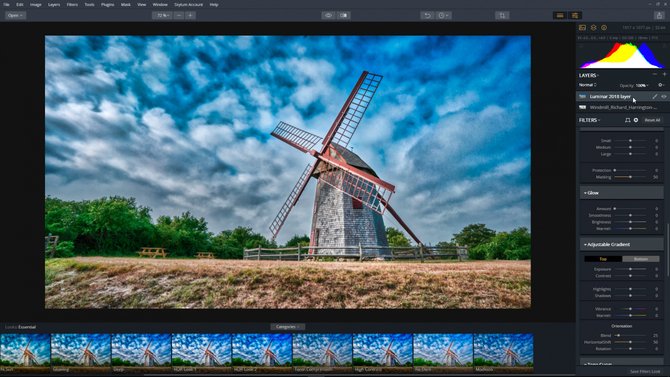
Our image is back in Aurora HDR and placed on a new layer named Luminar 2018 Layer. We can save, export or make additional changes to the image.
Conclusion
Let’s review. We use Aurora HDR when we need to create an HDR image from several bracketed images and we use Luminar to remove distractions with the Erase Tool and added a Dramatic Preset. Aurora HDR is a simple and fast High Dynamic Range (HDR) photo editing software that contains every imaginable tool needed to produce high-quality “next generation” dramatic images. Luminar is a full-featured photo editor with fast RAW support that includes layers, custom brush, selective editing, intelligent filters and smart presets.


