Discover how to easily apply a Cinematic and Stylized look to your images by using Aurora HDR 2019's LUT Mapping filter.
Follow along with this step-by-step tutorial or watch the video. You can download the example file here. (Note: Images are only to be used for this tutorial. Image by © Dima Sytnik)
A Lookup Table (LUT) allows you to apply preset color recipes to artistically adjust your image. Often you will hear LUTs describe as giving your image a "Cinematic", "Analog", and "Stylized look. In short, a LUT will let you completely change the look of your image with a single filter.
How to use the LUT Mapping filter
Step 1: From the Right side panel select the LUT Mapping filter.
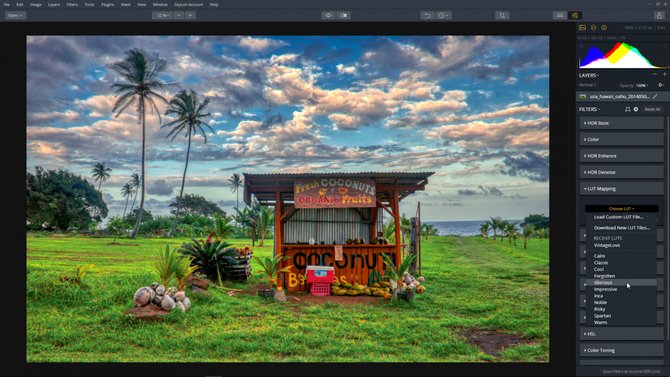
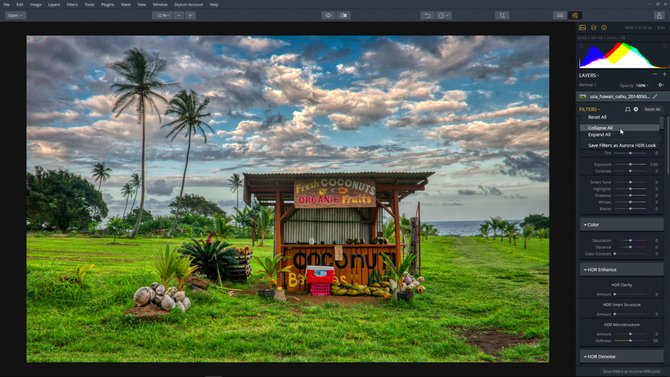 Step 2: Click the drop-down menu and scroll through the 11 custom LUTs that are included with Aurora HDR 2019 and select one.
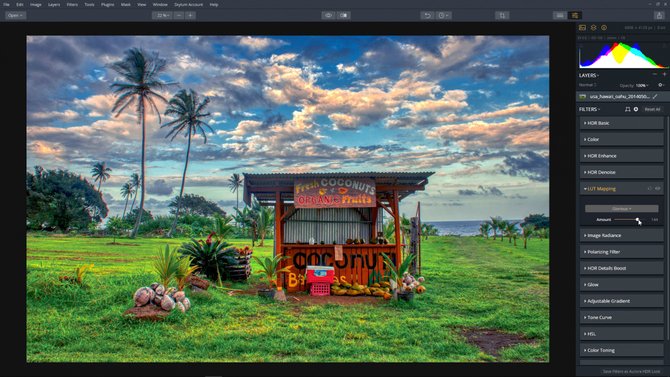
 Step 3: Adjust the Amount of the Lut. The default is 100%. Move the slider left and right to increase or decrease the effect from 0 to 200%
How to Load your own Lut
Aurora HDR 2019 allows you to load your own Lut file. These can be Luts you have collected over the years or have created on your own. Aurora supports cube, look, 3dl, and csp formats.
To use a custom Lut:
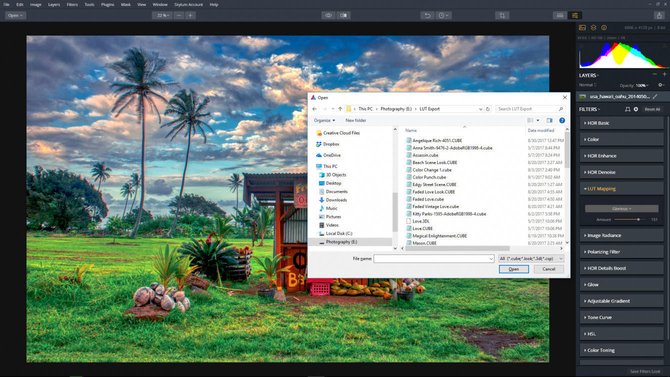
Step 1: Select Load Custom Lut file from the drop-down list
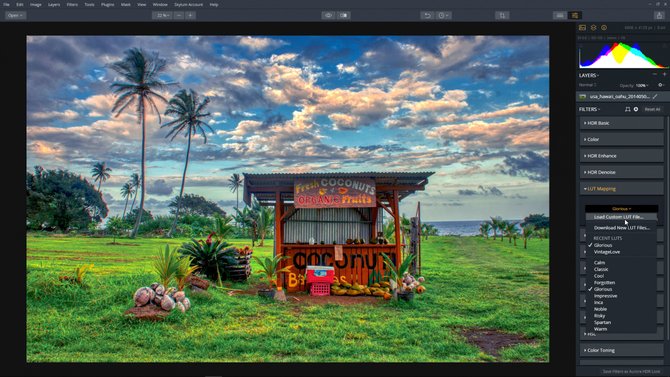
Step 2: Browse your computer to find your custom Lut. If you start collecting or create a lot of Luts, it’s a good idea to create a Lut folder.
Additional LUTs are available
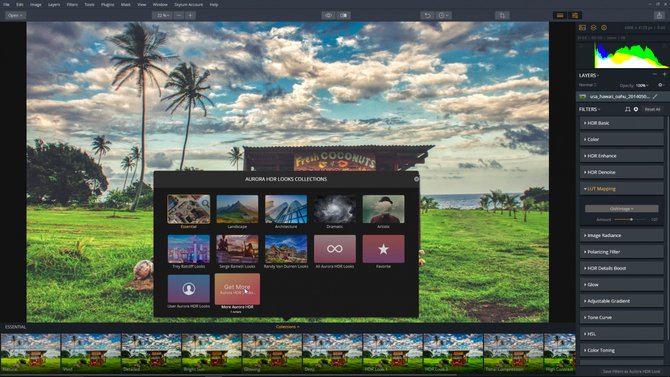
If you have fallen in love with Luts but you don’t have the time or know how to create them, don’t worry. You can download them from Skylum’s website. From the Aurora HDR Looks Collections click on Get More Aurora HDR Looks.
 How quick and easy was that? In a few short minutes, we were able to artistically alter an image just by applying a LUT Mapping filter.


