We asked the members of our Skylum Photography Facebook Group to submit a portrait that they would like Pro Photographer, Laura Tillinghast to work on using Luminar. Here are the results!
 The Image
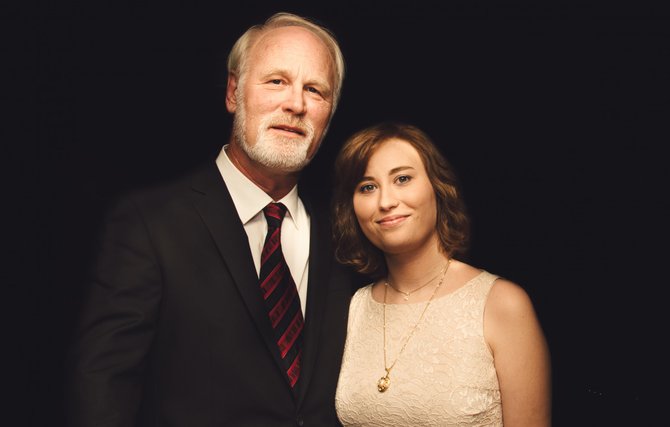
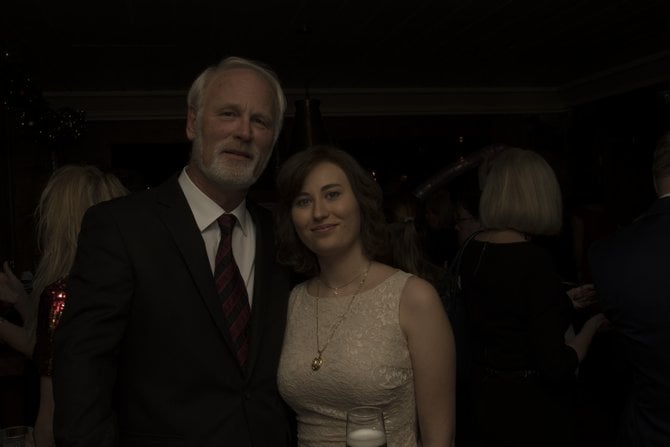
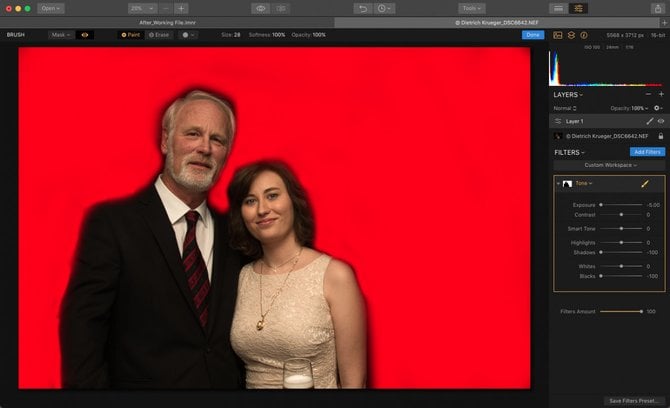
Dietrich Krueger captured this portrait at an indoor event using on-camera flash. I think he used a small amount of flash but it’s difficult to be 100% sure). He captured great expressions from both subjects and the portrait has an intimate feel, despite being taken in a busy setting. With Luminar we can take this a step further and make this portrait look like it was captured in a studio environment. This will remove all distractions and help viewers to focus on just the subjects.
 Original Image by © Dietrich Krueger
RAW Develop
The first step for editing any portrait image is to start with basic adjustments using the RAW Develop filter in Luminar. For this image, I increased the exposure by roughly one stop, and increased the contrast slightly. I also increased the highlights to help the subject’s faces “pop” more from the background. The white tones were increased to brighten skin tones and reduce any muddiness in the shadows. The color balance looks great so I left that alone.
 Removing Distractions
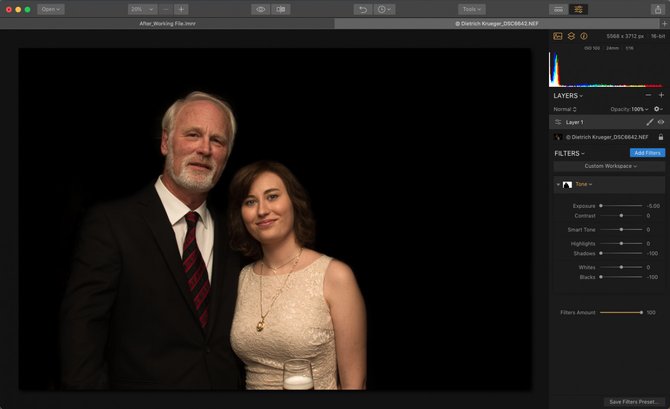
With this being a portrait from a busy event, there are a few elements in the background drawing focus away from the subjects. There’s nice light on the subjects but it is also illuminating the partygoers in the background. The lights above the subject's heads also draw the eye away. Luckily with Luminar, I can remove these distractions in one easy step.
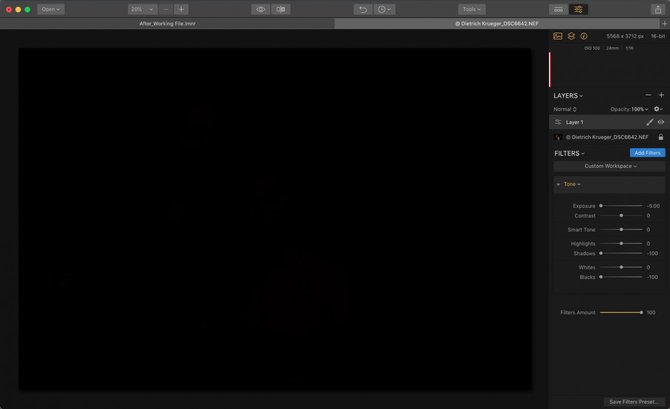
First, I create an adjustment layer so that I can work on this task separately from the RAW Develop settings. Then I add the Tone filter and use the Exposure slider to create a dark background. To do this I drag the Exposure slider to the left until the elements in the background start to disappear. Then I go on to also reduce the Shadows and Blacks until everything has been hidden. This results in a very dark frame but don’t worry, I will only be applying this effect to the background.
 Once I have the background completely darkened, I will use the Brush tool to begin painting in these adjustments, just where needed. I like to do this slowly so that I don’t accidentally overlap the edges of the subjects. I can also switch the Brush if needed to the Erase setting and paint away any areas that I didn’t mean to cover with the first pass. Clicking the eye icon at the top of the screen will show the full mask. I like to zoom in for doing tricky sections like the edges of the hair and between the subjects’ heads.
 Now I have a nice and dark background to isolate the subjects and all distracting elements are gone. This portrait is already beginning to look like it was captured in a photo studio.
 Fine Tuning
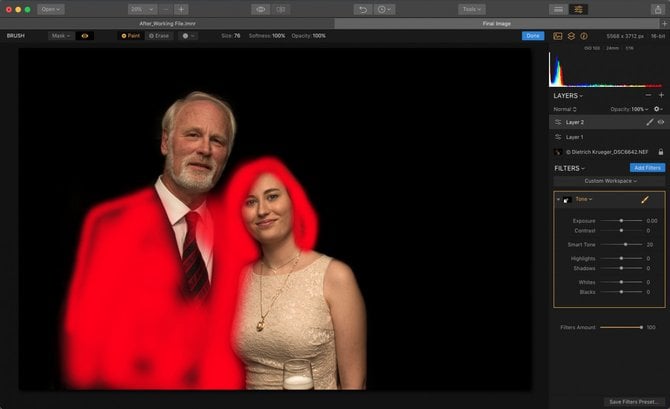
Looking at the subject on the left, there are areas where the suit is melting into the background a bit too much. And for the subject on the right, her pretty hair color is getting lost in shadow. I do want separation between the subjects and the background so my next step is to add another adjustment layer. This time, I add the Tone filter but increase the Smart Tone slider until I see a separation between the suit and the background. I can then go in and paint this adjustment in with the Brush tool only where needed.
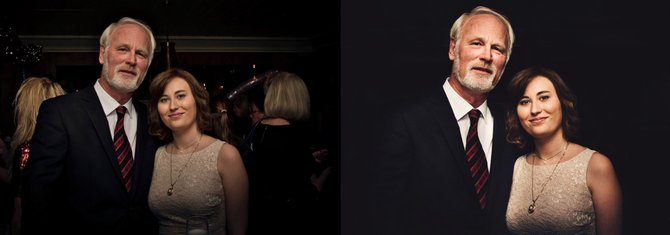
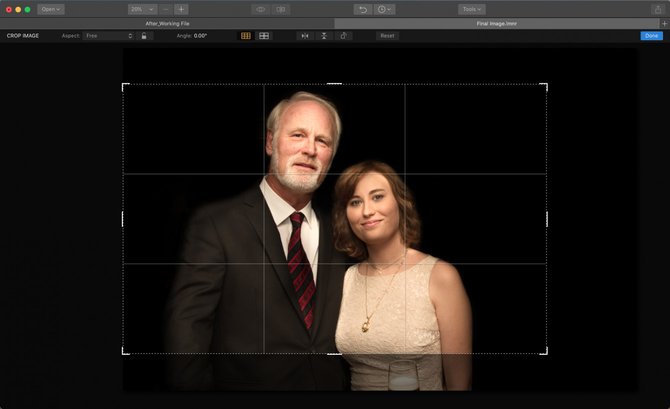
 Now that the background is gone, the drinking glass in the foreground doesn’t make sense. I also want to center the subjects in the frame more so I am going to crop the image to a more traditional landscape portrait composition.
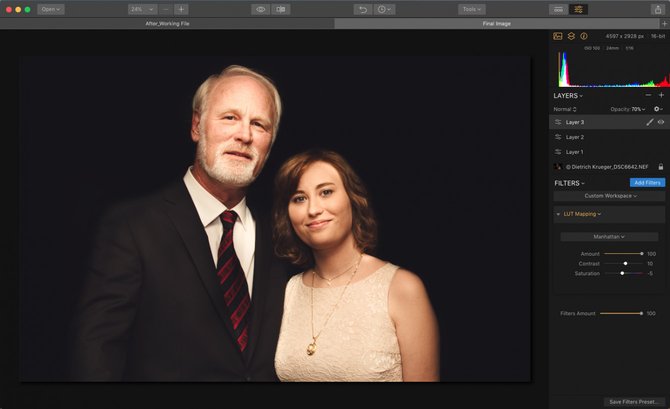
 Working with LUTs (Lookup Tables)
I am happy with the results so far but I want to give this portrait a bit more personality. I am a big fan of using Luminar’s LUT Mapping feature to give a different look and feel. LUTs (Lookup Tables) allow you to quickly change the color and tone in an image and often mimic the look of film stock. I want this image to have just a bit more oomph.
To work with a LUT, I first create a new adjustment layer so that I can adjust it separately from the other filters. For this image I chose the Manhattan LUT preset because I like the warmth it adds and the reduced contrast in the dark tones. To blend this look a bit I lower the layer opacity to about 70%. This allows the subject’s natural skin tones to shine through a bit and result in a very flattering look. I then adjust the Contrast slider to give the image more “punch” and reduce Saturation as needed.
 The final image gives the intimate feel of a studio portrait without any distractions to draw focus away. It’s wonderful how much is possible with Luminar in just a few steps.