Using Masks and Adjustment Layers for Better Skies in Aurora HDR
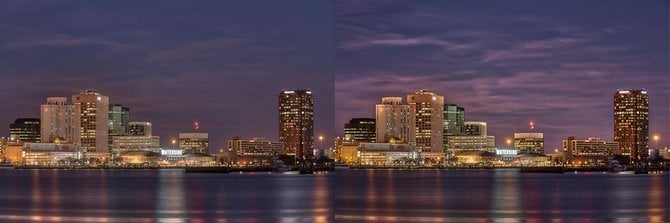
City skylines, especially at night, are fun to photograph and can make fantastic HDR subjects! Discover how photographer, Angela Andrieux, uses Aurora HDR to improve her Skylines.
Aurora HDR does a great job at merging multiple exposures into a single high dynamic range image, but the default image can be a bit too natural-looking for some. With the help of masks and adjustment layers, we can transform the default HDR into a vibrant and detailed cityscape.
For this tutorial, we’ll be working with five bracketed exposures of the downtown Norfolk, Virginia skyline with the Elizabeth River in the foreground.
Once the exposures are tone-mapped, the first step is to take a close look at the default processing. Aurora HDR did a pretty good job automatically, but we can make it even better!
Some of the highlights are still a touch too bright, the clouds lack definition, and the skyline doesn't have the warm glow we're looking for...yet.
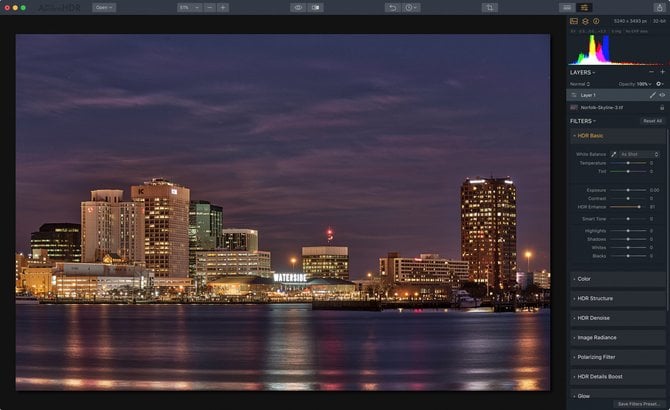
We'll start by opening the Presets Panel - selecting User Presets - and then choose a custom preset I designed called Cityscape at Night. Presets are a great way to get a solid starting point, but they are infinitely customizable.
The Cityscape at Night preset gives us a better starting point that tones down the bright city lights and adds a bit of contrast.
Adding Contrast and Detail to the Architecture and Sky
Now that we've toned down the overall highlights and added a bit of contrast we'll start working on select areas of the photograph. First, we'll address the architecture and the sky together. Both could use some extra detail and contrast so we'll add an adjustment layer to fix this.
1. Click on the (+) button under the histogram and choose Add New Adjustment Layer
2. In the HDR Basic panel move the HDR Enhance slider significantly to the right.
The HDR Enhance added substantial mid-tone contrast and looks great on the sky and buildings, but has added too much detail in the foreground. We'll fix this with a Gradient Mask that will preserve the effect on the clouds and architecture, but remove the effect from the water in the foreground.
3. Click on the Brush icon on Layer 1 and select Gradient Mask
We want the gradient effect to blend from the bottoms of the buildings into the river without a harsh transition so I'll click to start my gradient a little above the bottom of the buildings and then hold and drag my mouse down so that my gradient slightly overlaps the water.
As you can see above, the gradient mask has helped us retain the added detail and contrast in the architecture and sky, but removed the effect from the water so we can keep that beautiful, silky quality created from a long exposure.
Adding Color Contrast to the Sky
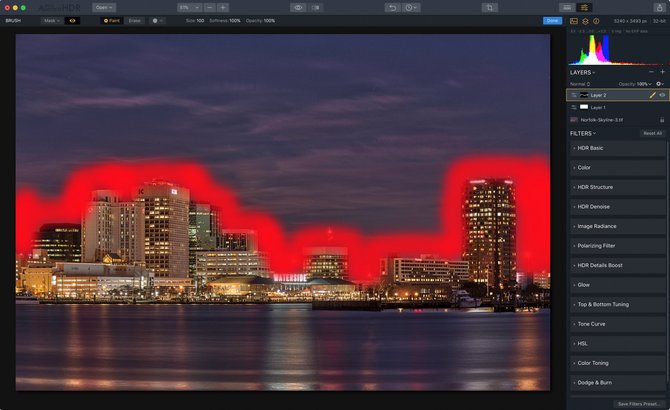
Let's create another Adjustment Layer and use the Brush tool to work exclusively on the sky and clouds. This way we can enhance the textures and colors for a more interesting scene.
1. Click on the (+) button under the histogram and choose Add New Adjustment Layer
2. Click on the Brush icon on Layer 1 and select Brush
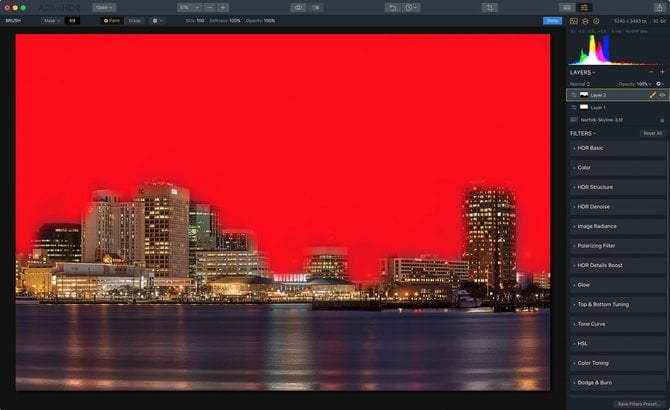
3. With the Brush activated, toggle the Mask Visibility Icon to show the mask. By default, the entire image is masked with red which means any filter used will affect the entire image.
Once we start painting with our brush the view will automatically switch and only the areas that we've painted will appear red and be affected by the filters we add on this layer.
4. Making sure our brush is in Paint mode, we'll create a small, soft-edged brush and start painting the area around the buildings. Its ok to let the feathered edge of the brush slightly overlap the buildings as it will minimize any halos and make a smooth transition between the sky and architecture.
5. Once we've selected the detail areas around the buildings we can enlarge the brush, make the edge a bit harder and then quickly fill in the rest of the sky.
6. Now that we've created our mask for the sky you can click Done in the Masking Toolbarand start working on the sky.
7. Let's brighten up the sky by increasing the Exposure, Contrast, and Smart Tone in the HDR Basic panel.
8. Now add a bit of structure using the HDR Structure filter. Be gentle with this slider because it can add a tremendous amount of noise to the sky if used with a heavy hand.
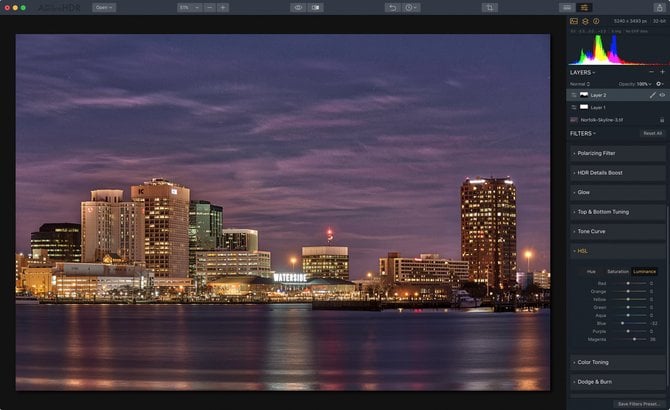
The sky is already looking quite a bit better but I'd like to bring in more color contrast by darkening the blue tones and lightening the magenta tones. To accomplish this we'll scroll down to the HSL filter and choose the Luminance tab.
9. To darken the blue tones we'll move the Blue slider to the left, and to lighten the magenta tones we'll move the Magenta slider to the right.
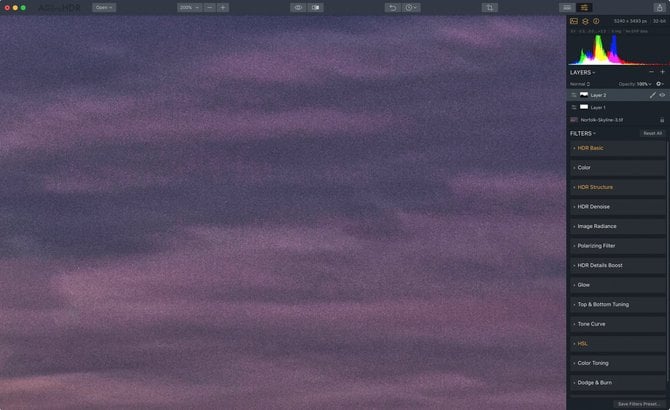
Our sky now has much more detail, but if we zoom in you'll notice that our edits have created a noisy mess. We'll fix it with the HDR Denoise filter.
10. Click on the HDR Denoise filter and drag the amount slider significantly to the right until the noise disappears. Since we are still on the layer that is affecting only the sky we don't need to worry about losing detail in the architecture.
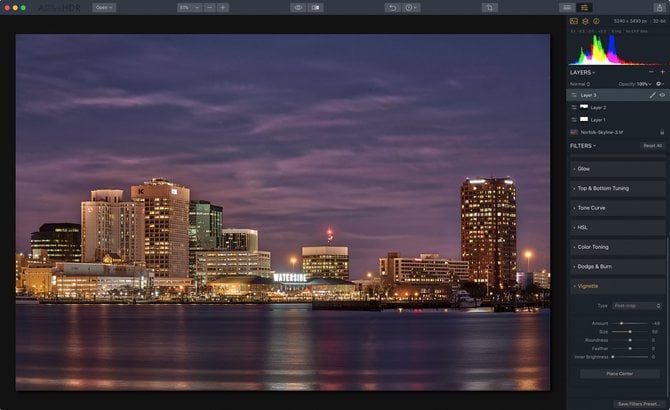
The Finishing Touch
Our final editing step is to draw the viewers' eyes into the scene with a vignette. These are also called "power windows" as they can guide the viewer where to look in the scene.
1. Let's add one more adjustment layer (Click on the (+) button under the histogram and choose Add New Adjustment Layer). 2. Now scroll down to the Vignette filter. 3. Move the Amount slider to the left until the edges of the photo are slightly darkened.
Exporting for Printing
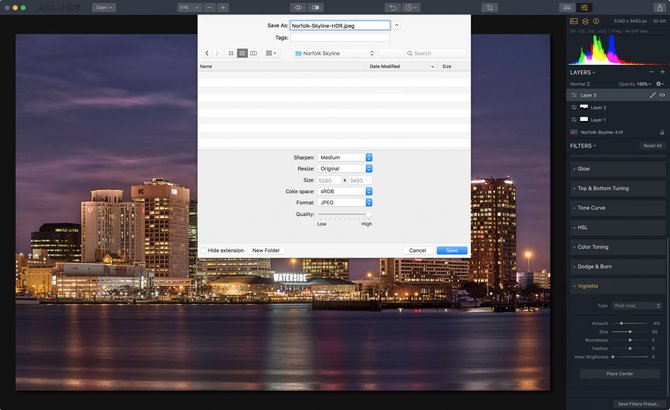
Now that we've finished our editing we can save our photograph so it is ready to send to a print lab.
Go to the File menu and choose Export
Choose a name and save location for your photo
Select the amount of Sharpening desired (I chose Medium since we didn't apply any sharpening during our editing process)
Resize your photo, if desired
Choose your preferred Color space (Most print labs prefer sRGB)
Pick your file Format (JPEG is the most universally accepted file format for print labs, but you may want to opt for a 16-bit TIFF for the highest quality)
Select the Quality setting (Since we are printing this photo I want to ensure we have the best quality to work with so I'll make sure the Quality slider is set to High)
Once you have finished choosing your export settings, click Save.
Conclusion
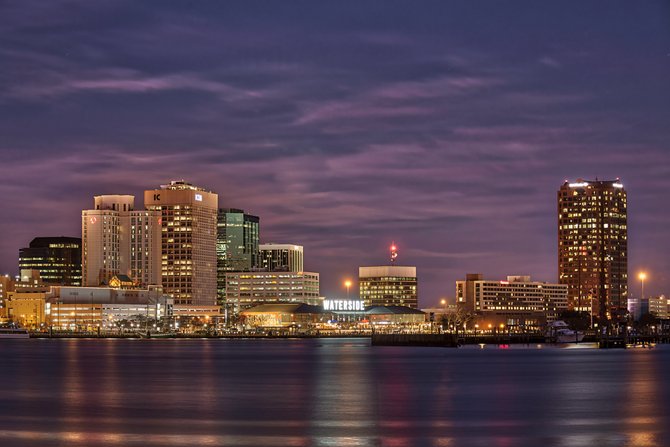
Selective edits with layers and masks are vital post-processing tools for creating dynamic photographs. Whether you are seeking a natural or more dramatic effect, the tools used in this tutorial can help you enhance the colors and details of your images and take your cityscape and skyline photographs to the next level.
Angela Andrieux is a photographer, blogger, and photography coach living in Chesapeake, VA with her US Navy husband, and their cat, Pumpkin. She will photograph just about anything but her love of travel tops it all. Angela also enjoys helping other photographic artists find their creative voice. Whether through her blog, group workshops, or one-on-one coaching, her students’ excitement to learn keeps her inspired.


 The HDR Enhance added substantial mid-tone contrast and looks great on the sky and buildings, but has added too much detail in the foreground. We'll fix this with a Gradient Mask that will preserve the effect on the clouds and architecture, but remove the effect from the water in the foreground.
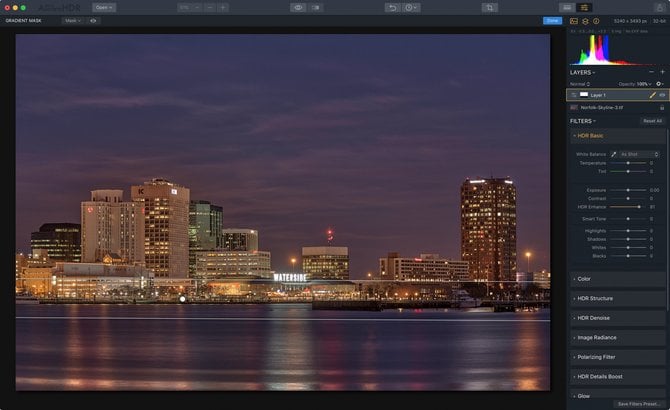

 6. Now that we've created our mask for the sky you can click Done in the Masking Toolbarand start working on the sky.
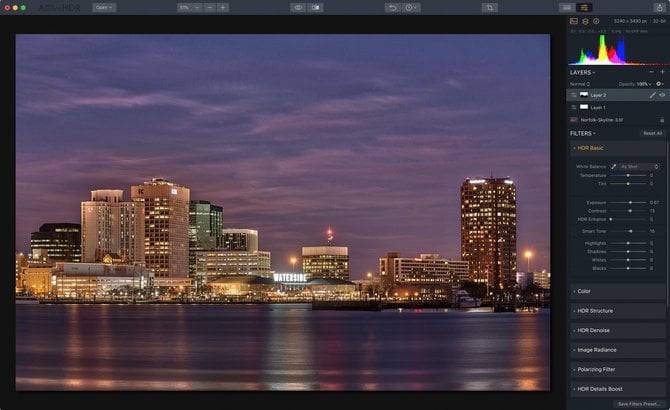

 10. Click on the HDR Denoise filter and drag the amount slider significantly to the right until the noise disappears. Since we are still on the layer that is affecting only the sky we don't need to worry about losing detail in the architecture.
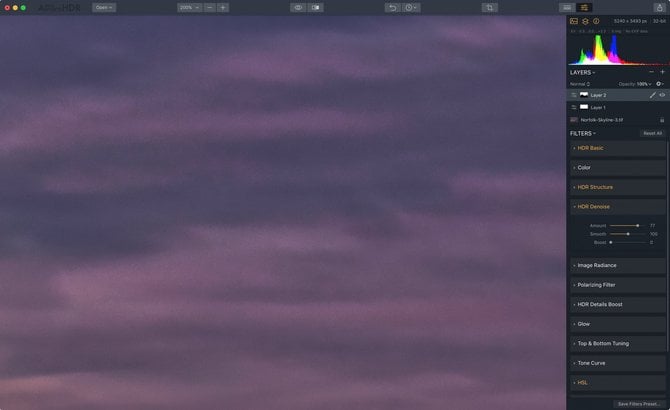
 Selective edits with layers and masks are vital post-processing tools for creating dynamic photographs. Whether you are seeking a natural or more dramatic effect, the tools used in this tutorial can help you enhance the colors and details of your images and take your cityscape and skyline photographs to the next level.