Each month we invite a Pro photographer to rework or retouch an image submitted in our Skylum Facebook group. This week Derrick Story tries his hand at enhancing an image by photographer Preston Turner.
Evaluating the Photo
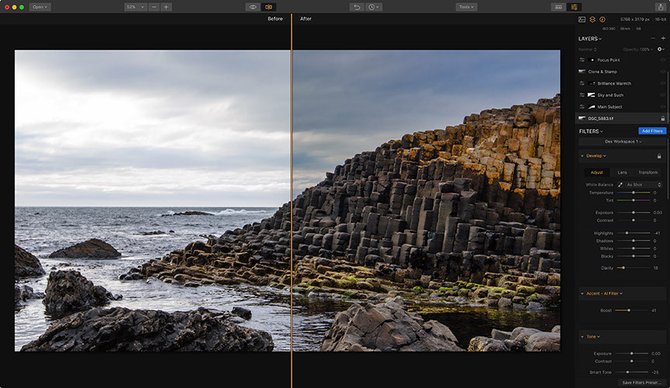
This month’s image was a real treat to explore. The main subject, a basalt rock formation, was nicely positioned in the composition with many visually interesting complementary elements. As initially lit by nature, I thought that the foreground rocks fared better than the main subject.
So my approach to relighting the image was to enhance the basalt formation in order to draw the viewer’s eye there first.
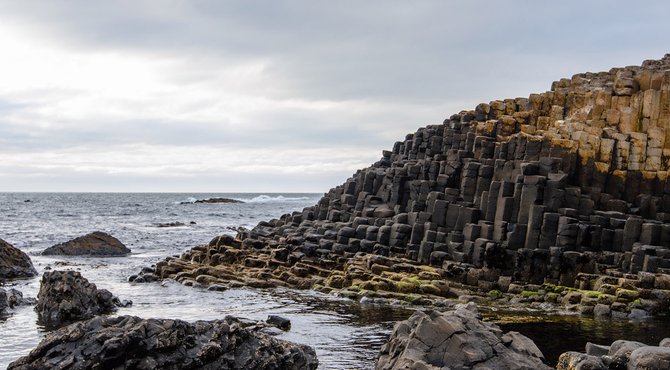
 Image by © Preston Turner
Fixing Tone and Depth
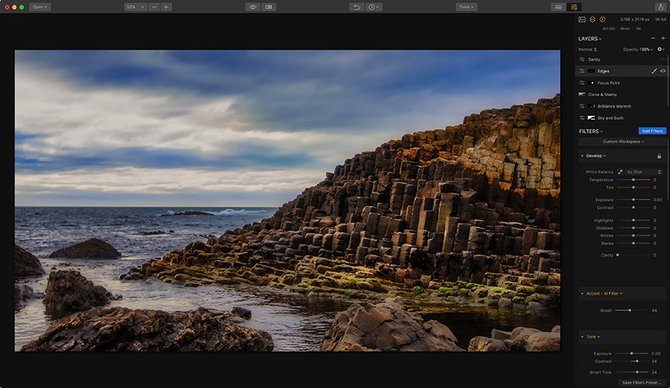
Before even opening a workspace, I studied Preston’s image to decide how I wanted to proceed. Looking at the photo, I wanted to make sure the base exposure looked great. My first steps were to apply global tonal adjustments.
I used the Develop and Accent - AI Filters as starting points. They help reveal some of the luminosity that wasn’t initially apparent in the photo.
These tweaks were fairly simple. I pulled down the highlights, boosted the Accent AI Filter, then fine-tuned a bit more with the Tone slider in the Develop filter. After these initial adjustments, I felt like I knew the photo better as details were easier to see.
 Finding the Sunset
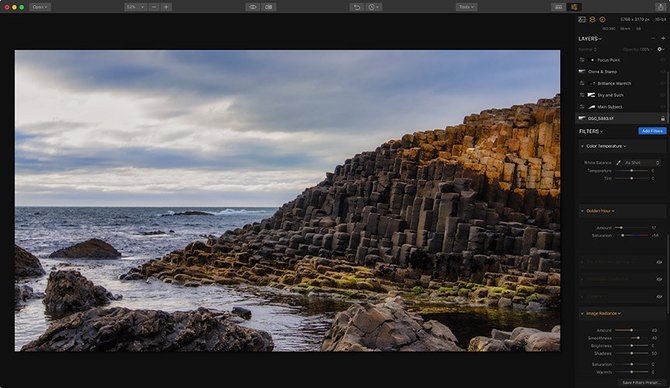
The next step was to unlock the color of the natural light. I wanted to explore color and style, so I applied the Golden Hour and Image Radiance filters. I liked the results for the dark basalt, but I felt that the orange color at the top was getting too intense. I made a note to address that later in the edit.
 Bringing Out The Details
The last step on the base layer was to add some depth. This was done using Clarity, Dehaze, and Sharpening. I didn’t want to overdo it in this early phase, but those rocks were just calling to me for more detail. I had to accommodate.
Clarity – a perfect fix for bringing out the contrast and depth. Dehaze removes the feeling of too much fog or mist. Sharpening – remove apparent softness often caused by a camera's sensor.
 Now it was time to work on a few specific areas. So I added my first adjustment layer. Just click the Create Layer button in the Layer controls and choose Add New Adjustment Layer.

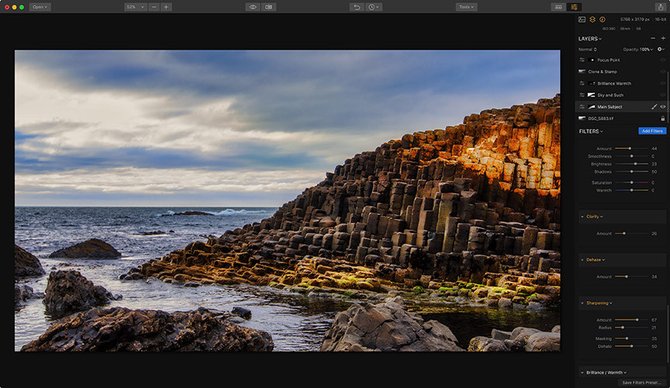
I used an Adjustment Layer with filters applied to enhance details. By using an adjustment layer, I can better control where additional corrections are applied. By painting on the basalt rocks for further enhancement, this isolated the effect. The Adjustment layer can hold additional filters. I boosted Contrast. Added Accent - AI. Used generous amounts of Clarity, Dehaze and Sharpening.
 Pop the Sky
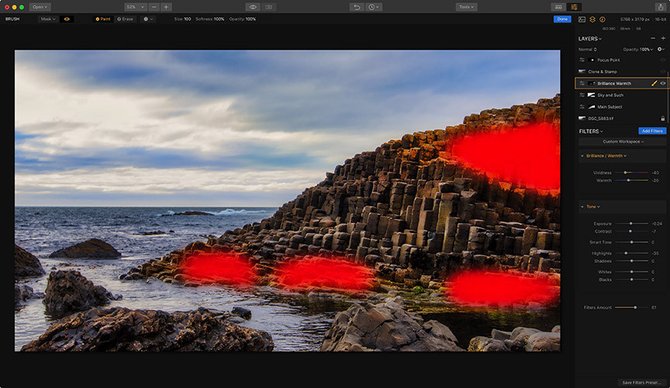
I decided to do a little tonal work on the sky, then decided that I would come back to its bright area in a bit. Noting this, I could turn my attention to the orange rocks that were glowing way too bright as a result of my other adjustments.
I created a new adjustment layer, painted on the rocks that had gained an abundance of saturation and luminosity, then toned them down a bit. I toned down the brightly colored rocks to pull them more into line with the rest of the composition.
I returned to the sky and fixed the bright area in the upper left with the Clone and Stamp tool. Fortunately, I had a semi-bright area that I could use as a source. I got it right on the first try, so I stopped editing it… something that I wish I did more often.
 A Little More Rock
Now, back to the basalt rocks themselves. In a sense, everything I had done to this point was to get the image the way I wanted so I could focus on those lovely textures in the main subject. I was aiming to create a focal point right in the middle of the basalt rocks by lightening that area. I hoped this edit would better attract the viewer’s eye.
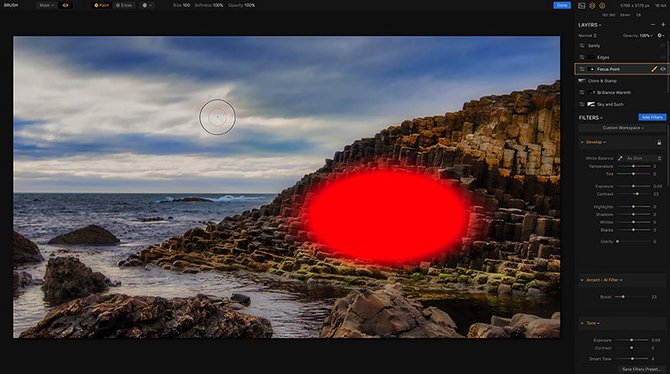 By painting an area in the center of the basalt formation, I could brighten it a bit. To make the relighting easier, I used a radial mask. A simple Develop adjustment right there made it easy to pop the rocks.
 Final Check
Now it was time to walk away from the computer for a few minutes to let my eyes re-calibrate (fresh eyes are always good). When I returned for a final evaluation. I decided that the colors needed to be toned down just a bit more. So I created what I call a “Sanity Layer” that I put one more Adjustment Layer on the top of the stack.
Using that layer, I decreased both Saturation and Vibrancy slightly to pull down the colors. If I change my mind about this in the future, I can revisit the Sanity Layer and adjust again. My goal with this image was to enhance its overall luminosity, bring up the colors, control the distracting areas, then relight the basalt giving it more dimension.
By paying attention to tone and color, as well as making a few selective adjustments, the image really stands out.
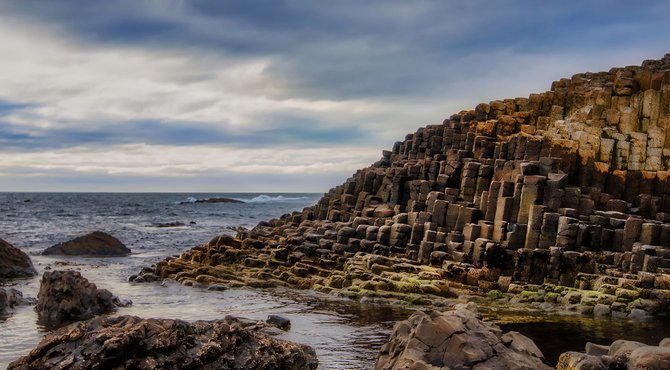
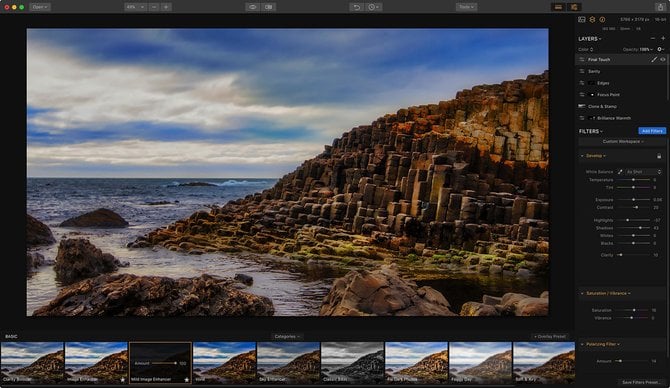 I named the last Adjustment layer, Final Touch. I added the preset Mild Image Enhancer preset from the Basic set. I then set the layer to the Color blending mode for this layer. All the colors jumped off the screen.