In this tutorial, Pro Photographer, Robert Vanelli will show you how to apply a combination of Luminar filters, image layers, and layer blend modes to turn your photo into something frightening!
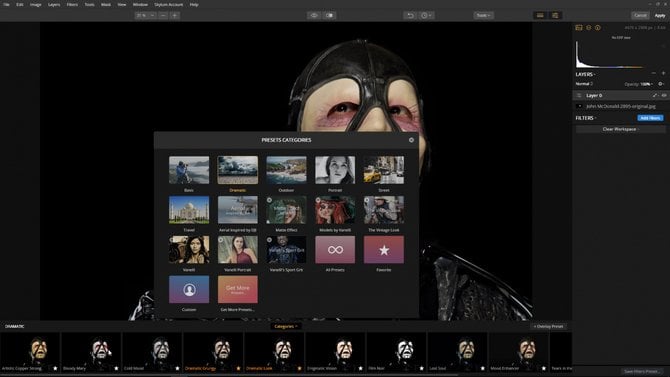
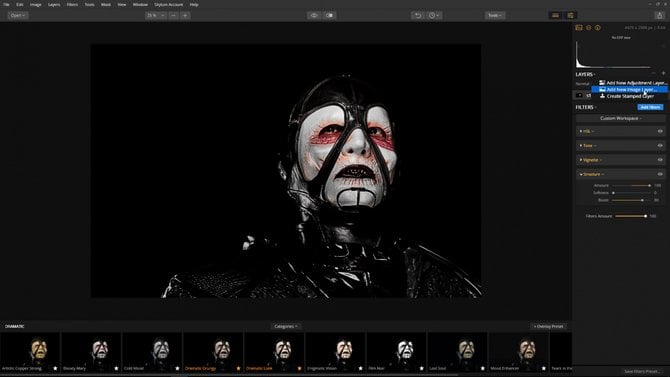
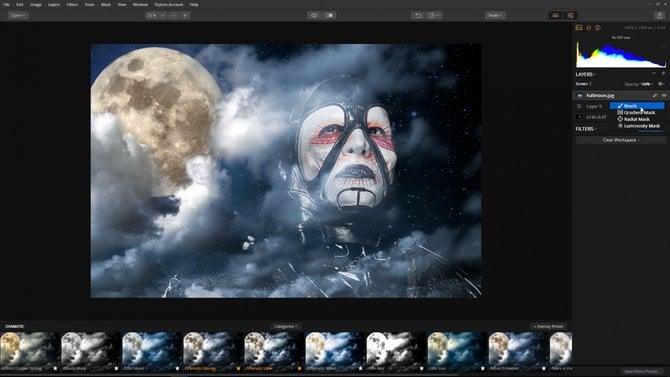
Start with the dramatic Bloody Mary preset
Let’s make this monster look more dramatic by applying the Bloody Mary preset from the Dramatic category.
 Step 1: To enhance the red under his eyes, increase Saturation to 72 and decrease Luminance to -41. Increasing Structure to 100, Softness to 0 and increasing Boost to 80. This will add a very strong texture to his face — perfect for a monster.
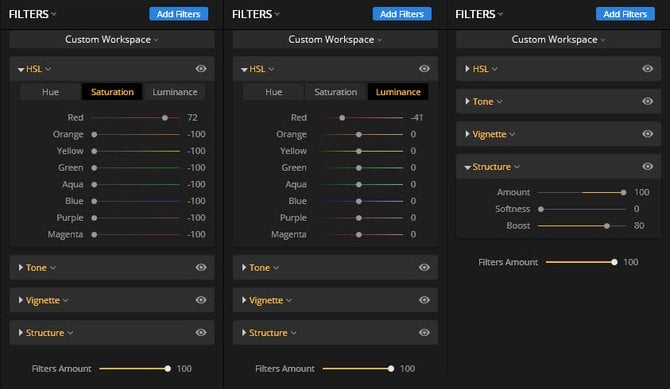
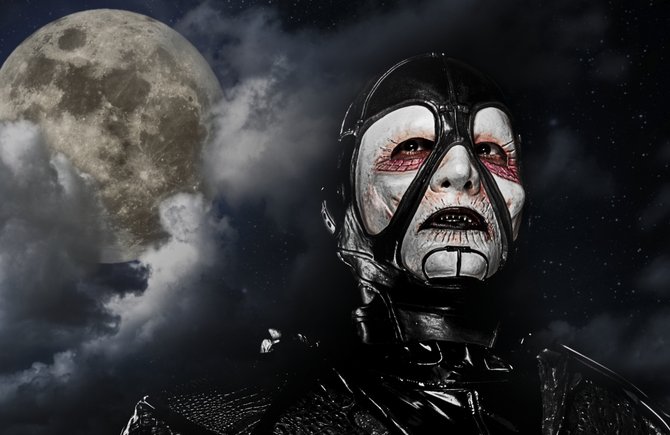
What monster doesn’t like the moon?
Step 2: When thinking of scary monsters, a vision of a dark moon against a dark night sky comes to mind. We can add a moon to the image by using a New Image Layer. Click the + button on top of the Layers control and select Add New Image Layer from the drop-down list.
 Step 3: Browse your computer for an image of a moon and click the Open button. (Note: You can find an image of the moon from most stock agency sites or by searching the web — be sure to respect the owner’s copyrights.)
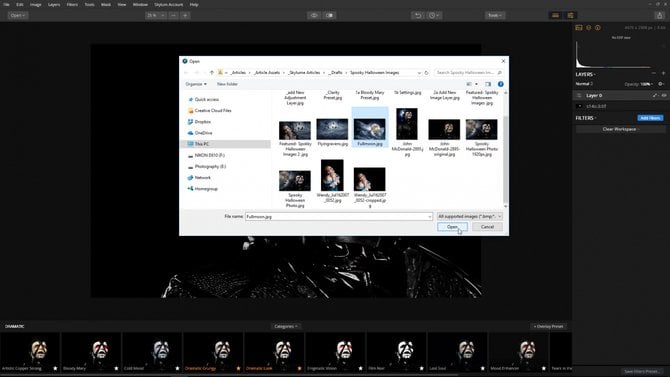 Step 4 Use the Free Transform Tool from the Tools menu to scale and position the moon.
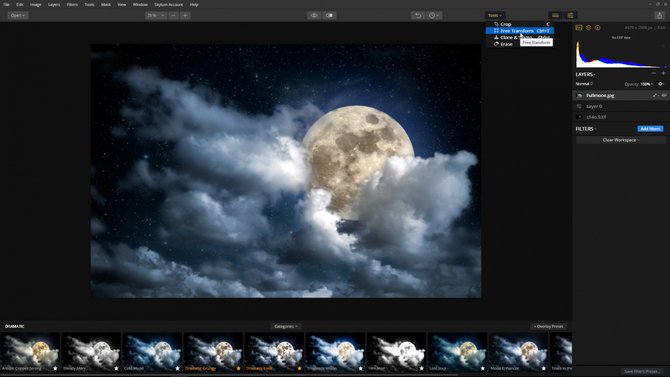
Revealing the monster
Step 5: The moon is on the top layer causing the monster to be hidden. To reveal the monster, change the Layer Blend mode to Screen.
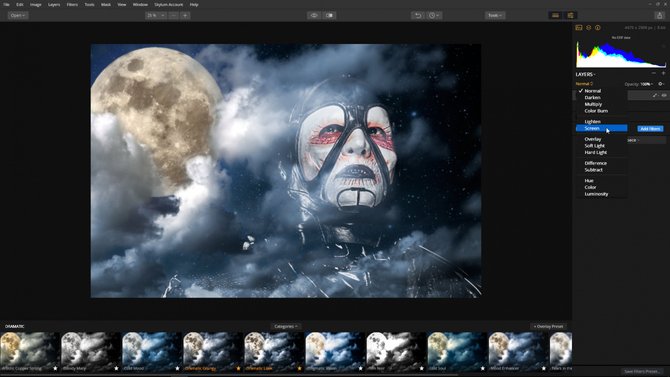
Step 6: Select Brush from the Layer mask drop-down list and erase the moon from the monster.
 Step 7: Keep the opacity setting at 50% and gradually brush over the areas you want to reveal. Click the Done button to apply the layer mask.
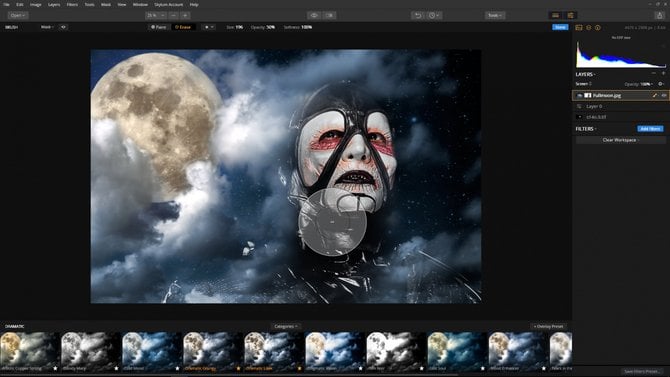
Merge the layers and add one final effect
Step 8: A little trick when compositing images is to merge them together and add one final effect. This ties the images together. Click the + button on top of the Layers control and select create Stamp Layer.
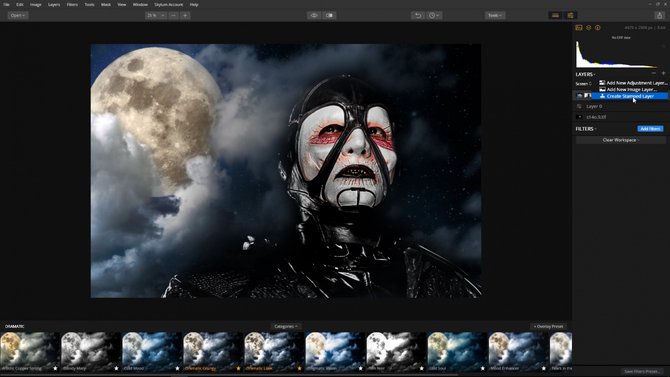 Step 9: Now that the images are merged together, add the Dramatic Grungy preset from the Dramatic category and lower the amount to 45 to complete the effect.
This fun example showed how to use Luminar filters, add an image layer, apply a layer mask and gave you a little secret when compositing images. Don’t wait for Halloween to take a few photos of monsters and make spooky images!