December 19
18 min. to read
How to Add a Drop Shadow in Photoshop? Difficult Concept Explained Simply
 You can also use shadows to focus the viewer's attention on a particular object in an image and make it look more important. Just choose the right way to add drop shadow in Photoshop and create your own awesome pictures with our tutorial.
What Are Drop Shadows Used For?
 Shadows are one of the most important components of the composition, making the scene more realistic and alive. If you don't take care of this element when adding a new object to a photo, the subject will "hang" in the air and the picture will look unnatural.
When creating a shadow, it's important to remember that it must appear on the side opposite to the light source and fall at the used angle as other similar parts that are already in the image.
With our step-by-step guide, you will know a few ways how to add drop shadows in Photoshop in many different ways. Let's look at the most popular ones.
Adding a Drop Shadow in Photoshop: 5 Easy Methods
How to add shadow to the image in Photoshop? Let's find out!
1. Creating a Shadow Along the Contour of a Silhouette
 One of the easiest and fastest methods to create a shadow over the entire outline of a silhouette. It doesn't always look good in public, but on the text and the images, and specific objects, it's very nice.
Open Your Project: Start by launching your Photoshop project and selecting the layer where you'd like to add a shadow.
Access Layer Styles: Click the 'FX' button at the bottom of the Layers panel and select 'Drop Shadow'.
Customize Your Shadow: Adjust settings like opacity, angle, and distance in the dialog box to get the desired effect.
Apply the Changes: Click 'OK' to apply the shadow and enhance your image's depth.
2. How to Make a Drop Shadow in Photoshop With a Brush

Open your image and add a new layer by holding Shift + Cmd + N or by clicking the plus button at the bottom of the window.
Select a soft brush. Then, set opacity and pressure to around 35% and draw the shadow.
If needed, cancel the action by pressing Cmd + Z. For more convenience and accuracy, adjust the scale with a combination of Cmd and +, Cmd and -.
This option is good for cases where the light source is on top, and is also good for soft, diffuse Photoshop shadows effect without a clear transition from the dark areas to the light areas.
If necessary, you can create a drop shadow in Photoshop softer by reducing the transparency of the layer. Export the finished image and you need to ensure that you save changes.
Advanced yet easy-to-use photo editor
Get Luminar Neo Now3. How to Make a Shadow in Photoshop Through Transformation
 Now we will tell you how to create a drop shadow in Photoshop of a person, animal, or any other object. The principle is the same as with the styles method, but it gives a better result.
- Open the image with the object on a transparent background and double-click on the layer.
- Check the "Shadow" style and set the parameters by moving the sliders and then clicking OK.
- Select the shadow in the list of layer Photoshop drop shadow effects and, by right-clicking, choose "Form Layer" from the context menu.
- Highlight the new layer style with the added outline and press Cmd + T. Then right-click on the selection and choose "Distort".
- Grasping the key points, resize and reposition the shadow to match the light source, and press Enter.
- Now add a new layer with Shift + Cmd + N or click the plus button and fill it with some color. If you are going to transfer the object to another photo, don't do anything else just save it with a transparent background.
4. Creating a Text Shadow
 Following these few simple instructions step-by-step, you will know how to make a drop shadow in Photoshop to text or an object:
- Select the Text tool on the sidebar.
- Enter the desired characters. When you're ready, switch to another tool, such as the Move tool, to complete your input.
- Press Ctrl+J to copy the text layer (it must be selected in the Palette).
- Switch back to the original text layer.
- Now we need to turn the text into graphical information, i.e. rasterize it. Right-click on the layer and select the desired command in the context menu that appears.
- Then press Ctrl+T to launch the "Free Transform" function. As a result, a frame will appear around our text (now as an image on a transparent background).
- Right-click inside this frame and choose "Distort" in the opened list of commands. After this action, there will be no visual changes, but the properties of the frame itself will change.
- Now it is necessary to make the shadow from our text fall on the supposed horizontal plane behind. This is done by using the markers located on the edges of the frame. Pressing the upper center marker with the left mouse button pulls it in the desired direction. When ready, release the button and press Enter.
- Then you need to turn the created distortion into a shadow. To do this, go back to the Palette and for the current layer create an adjustment layer "Levels".
- In the appeared properties turn on the correction for the layer with shadow only, then move the white slider to the left side to the black one.
- In the Palette, right-click on the layer with the level (by free space, not by name or thumbnail), then in the menu that appears, choose "Merge with previous".
- Now let's add a mask layer to the resulting merged layer by clicking the corresponding icon.
- On the side toolbar, select "Gradient".
- The parameters of the tool stops at the linear type, from black to white.
- Clicking the left mouse button, drag the gradient from the top border of the shadow to the bottom. Depending on the desired result, this can be done either straight down or at a certain angle.
5. Using 3D Modeling
 Usually, photo editing is taken that serves as a background and a new image for creating a drop shadow in Photoshop. If you have a weak computer or laptop, this method may not work due to low power or a lack of OpenGL support.
On the left side of the tool menu, choose Quick Selection (W key). Select the pixel size in the range from 7 to 20 units and hold down the left mouse button to select the object or area for which the shadow will be created. If the area is large, you can hold down the key.
Now you need to select small details. To do this, change the pixel size in the range from 1 to 3 units. After you have selected the entire object, copy it with CTRL+C and paste it into the desired image with CTRL+V.
In the Layers menu on the right, unlock the background image by double-clicking the lock and pressing OK in the window that pops up.
Next, select the object layer to which you want to create a drop shadow in Photoshop (on the right side of the "Layers" menu), copy it by pressing CTRL+J and turn it off by clicking on the eye icon and select the layer "Object" In the top Menu, select 3D then New 3D Extrusion from the selected layer.
Since our drawing was flat, Photoshop will automatically give it a 3D wireframe. Here you can align the plane to the terrain and set the depth behind the object, as well as set the light source. The process of changing the 3D image can change a lot, but we need only its shadow.
If there are no objects on the background image which to determine the location of the light source, we will be guided by the Photoshop shadows under the object.
On the right side of the 3D menu at the very bottom, we choose the "Infinite light" layer and we get a sphere that will imitate the light source. With the left mouse button, we set the and change the angle of the light.
Going back to the "Infinite Light" layer above it has a "Properties" panel where we can set the "intensity" and the gaussian blurring of the shadow. How to make drop shadow in Photoshop from splitting into a mosaic? You can do a "Rendering" of the image by clicking on the cube icon in the square.
- Go to the layers tab, select the "Object" layer, right-click and select Render 3D.
- On the selected "Object" layer, create a mask layer thumbnail by holding down the ALT key and clicking on the circle icon in the rectangle.
- After that, turn on the "Object copy" layer by clicking on the eye icon on the right side of the "Layers" menu. Ready? You are close to the answer to the question “how to create a shadow in Photoshop”.
- Take the brush from the toolbar or key B and select the size 25 (you can adjust it yourself) opacity 100%, and 100% pressure the main color is white, and the auxiliary is black. We don't recommend you use the blend mode.
- Choose the "Object" layer, namely the mask layer, and start to manifest the shadow area with the brush. If you overdo it, change the color from black to white - it will work the other way around.
We can add Photoshop shadows effect where they are needed manually on the layer "Object copy", to do this we choose a brush with parameter B and select size 5 (you can adjust yourself) with an opacity of 15%, Press 30% base color black. Start applying dark shades on the areas with the brush.
How to Add Shadows With Luminar Neo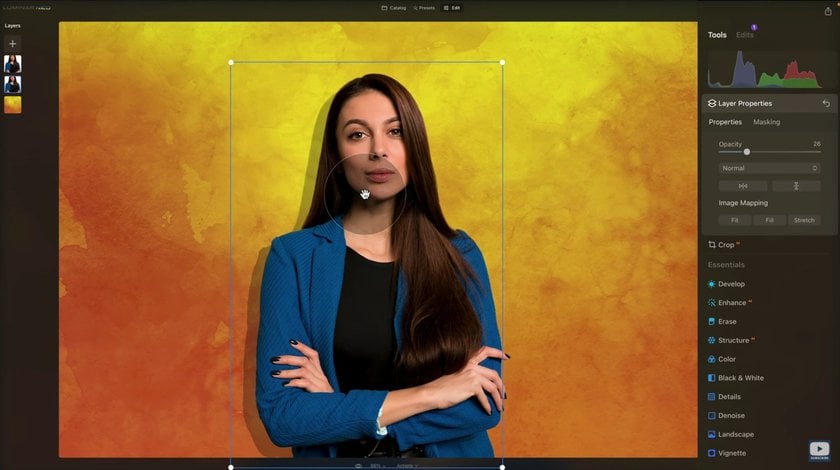

Now that you know how to drop a shadow in Photoshop, let's talk about how to do it with Luminar Neo!
This method is useful when there is an overabundance of shades of one color and will not always be necessary. You can skip this item if you don't have such a problem.
- Go to the top menu Image, then - Correction and Adjust Color.
- In the window that appears, click Neutralize in the dialogue box.
- On the left is the original, and on the right - is the modified version of the picture.
- Now move the picture with the object to the background image and call the new layer. Create a new layer by pressing CTRL+SHIFT+N and in the pop-up window press "OK", call the layer "Name's shadow" and drop it under the layer.
- Create a shadow manually, to do this we choose a brush with parameter B and select size 50 (you can adjust yourself) opacity of 15%, 25% Pressure, and the base color black. Start applying dark shades on the area with the brush.
- The shadow will be diffuse, emphasizing only the silhouette.
- We need to apply individual brightness/contrast to the layer. To do this, on the right bottom of the layers menu we click on the circle icon half of the shaded area and select the line "Brightness/Contrast", hold down the ALT key, move the cursor to the layer and get a down arrow.
- Select the "Brightness/Contrast" layer and tweak the necessary parameters above the Layers panel, so that the picture is combined with the background image.
- On this layer, we will make the darkening of the man himself. This method is convenient because, in case of errors, we can always delete the layer and recreate it without changing the basic image.
- Let's choose the "shadow" layer, B brush with the parameters size 30 (you can adjust it yourself), opacity 15%, Press 25%, and the base color black. Start applying dark shades behind the use global light area with the brush.
Conclusion
Now you know where is drop shadow in Photoshop. Don't underestimate the importance of shadow in an image. It is one of the most important aspects that sets the accent of the whole image. Now that you've read our guide you can apply it to the fullest extent and create your own photographic masterpieces!
FAQ
Why should I add shadows to my photos or designs?
Adding shadows creates depth and dimension, making objects or text appear more realistic and visually engaging.
How to add drop shadow in Photoshop?
Select the layer you want to add a shadow to.
Go to the Layers Panel and double-click the layer to open Layer Style.
In the Layer Style window, check Drop Shadow.
Adjust the Opacity, Angle, Distance, Spread, and Size to your preference.
Click OK to apply the drop shadow.
Is There an Easier Alternative to Adding Drop Shadows in Photoshop?
Yes, Luminar Neo is a simpler alternative. Its AI-powered tools make adding shadows easy, automating much of the process for professional results without complex steps, perfect for beginners.
 >
>
