Illuminate the Night: Mastering Astrophotography for Beginners
Last Updated on January 10, 2025

Taking pictures of the night sky is very exciting and with proper preparation the result can be simply stunning. Today in our astrophotography tutorial we are going to show you how to take stunning pictures even if you are a beginner.
If you've ever gazed in awe at the night sky and wondered how to capture its breathtaking beauty, you've come to the right place. This comprehensive guide will give beginners the knowledge, skills, and techniques they need to embark on an extraordinary journey into the world of astrophotography. With our step-by-step instructions, practical tips, and expert advice, you'll soon be taking stunning pictures of the stars, galaxies, and celestial phenomena that adorn our universe. So grab your camera, get ready to unlock the secrets of the night sky, and join us on this exciting adventure into the realm of astronomy photography.
Even if you take great astrophotos, you need an editing application that makes them really sparkle. You can try Luminar Neo, and you definitely won't regret it! This software is very easy to use and it has many features that will help you improve your pictures. In addition, Luminar Neo supports non-destructive editing, so you don't have to worry about ruining the original image.
1. Understanding Exposure: Mastering Light and Darkness
 This skill is essential in taking pictures of the night sky, as it directly impacts the quality of captured celestial images. Several factors come into play when defining the optimal camera settings for stars:
- Aperture. It determines how much light enters the camera. A wider one, indicated by a smaller f-number, produces more light and shorter exposure times.
- Shutter Speed. Adjusting the exposure time controls the duration of light hitting the camera sensor. Longer exposures capture more details but can result in star trails, while shorter ones freeze motion.
- Light sensitivity is determined by the ISO setting. Higher values increase the sensitivity of the sensor, allowing shorter exposures in low-light conditions, but may result in noise.
- Consider the level of light pollution in your area, as it can affect the visibility of stars and other celestial objects. Taking pictures from darker locations or using special filters can help minimize its impact.
- Dynamic Range. How to get into astrophotography? It often involves capturing scenes with a wide range of brightness levels, from glowing stars to dark nebulae. Balancing the exposure to retain details in both the highlights and shadows is crucial.
- Use a camera histogram that shows the distribution of brightness levels in the image. Aim for a well-balanced one that does not allow for significant underexposure or overexposure.
- Experiment with bracketing by capturing multiple images at different exposures. This technique provides flexibility during post-processing, allowing you to enhance image quality.
By understanding and managing these astrophotography tips, you can capture stunning images of the night sky while effectively controlling the brightness and clarity of your subjects.
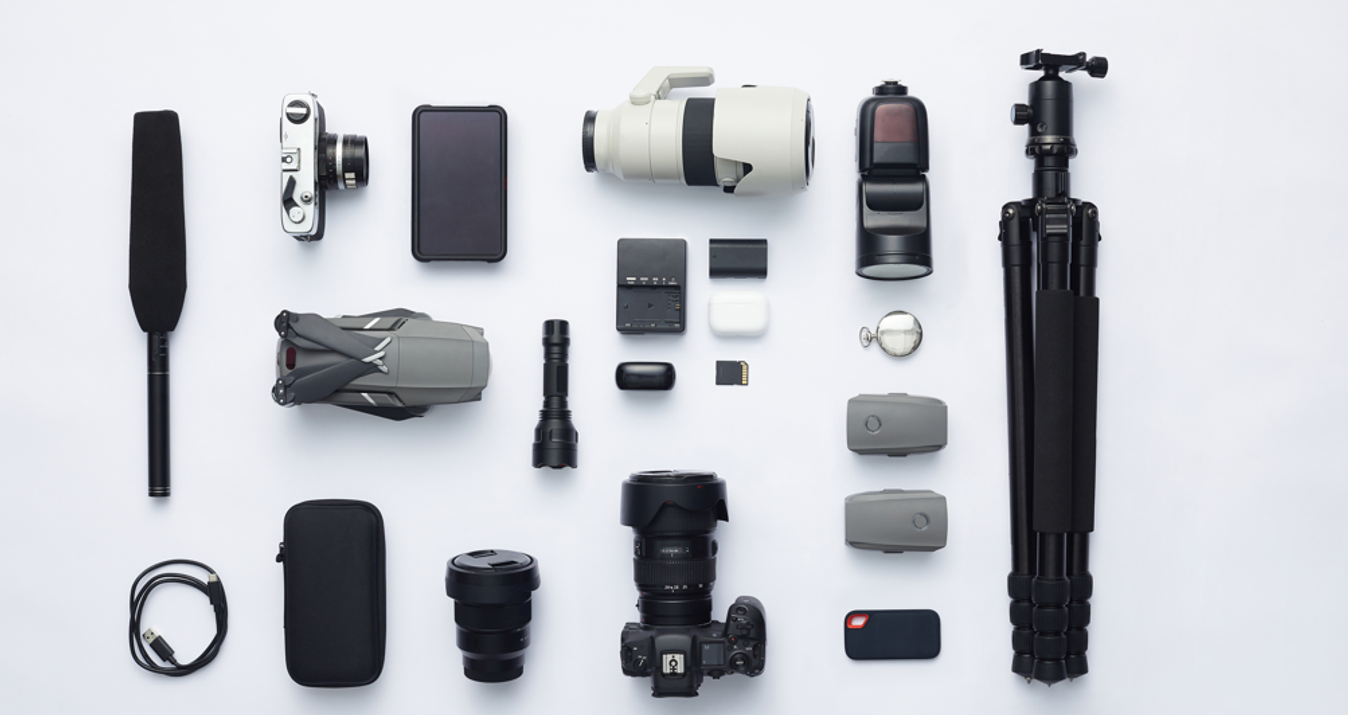
2. Essential Equipment: Gear Up for Stellar Shots
 When it comes to capturing stellar shots, having the right equipment is essential. Here's a list of astrophotography gear that you need:
- Invest in a DSLR or mirrorless camera with manual control capabilities and a large sensor for optimal image quality.
- Choose a wide-angle lens with a low focal length (around 14-35mm) to capture a broader field of view and include more of the night sky in your frame.
- Use a sturdy tripod to keep your camera stable during long exposures, preventing blurriness caused by shakes.
- A remote shutter release allows you to trigger the camera without touching it, minimizing the risk of vibration during exposures.
- Before getting started in astrophotography, be prepared with extra batteries and memory cards to ensure uninterrupted shooting and ample storage capacity.
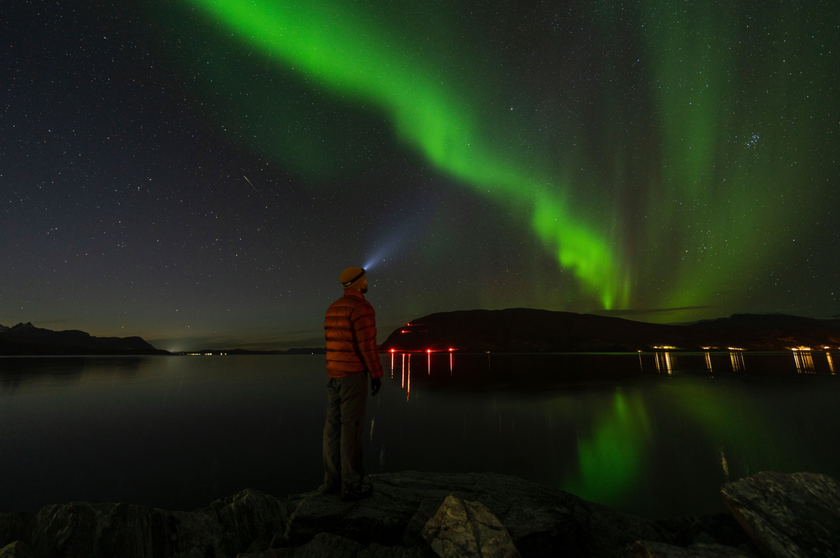
- A headlamp or flashlight with a red filter is useful for navigating in the dark without disturbing your night vision or affecting long exposures.
- Having a laptop or tablet on-site allows you to review and adjust your images, perform live stacking, and control camera settings remotely.
- Depending on the location and weather conditions, bring protective cases, lens wipes, and even hand warmers to protect your equipment and ensure a comfortable and safe working process.
Armed with the right equipment, you'll be well prepared to capture stunning images of any type of astrophotography.
3. Navigating the Night: Choosing the Right Shooting Locations
 If you are interested in astrophotography for beginners, you have to know that choosing the right location is crucial to obtaining spectacular images of the night sky. Keep the following factors in mind before taking nighttime photos:
- Avoid places with heavy light pollution, such as cities or urban centers, as it impairs the visibility of stars and celestial objects. Look for places with dark skies, away from artificial light.
- Watch the weather forecasts and aim for cloudless nights. If the sky is not clear, it can interfere with stargazing and degrade the quality of your images. Also, pay attention to atmospheric conditions such as humidity and haze, as these can affect the clarity of your pictures.
- Choose places to shoot astrophotography with interesting and unobstructed horizons. Mountains, coastlines, or open fields can provide stunning foreground elements that complement the night sky. Consider the composition and potential obstacles that could interfere with the desired framing.
- Ensure your chosen place for capturing images is accessible and safe, especially if you plan to take pictures during late hours or in remote areas. Check the terrain, potential hazards, and any necessary permits.
- Research upcoming astronomical events, such as meteor showers, eclipses, or planetary alignments, and plan your locations accordingly. It can add unique elements to your astrophotography compositions.
- Before taking pictures, use online tools or mobile apps that offer light pollution maps, celestial calendars, and star charts. These resources can help you determine the best places for capturing images and plan your composition in advance.
So, how to shoot astrophotography pictures? By carefully choosing the right locations, you can maximize your chances of capturing awe-inspiring images of the night sky and creating visually compelling photos. Following these tips will help you figure out how to take pictures of stars with an iPhone and a professional camera for astrophotography.
4. Focusing on the Stars: Techniques for Achieving Sharp Photos
 Achieving sharp focus is crucial in the question of how to take astrophotography pictures. Here are some techniques to help you focus on the stars effectively:
- Switch your camera to manual mode to have full control over the focusing process. Autofocus may struggle in low-light conditions.
- Use your camera's Live View function to zoom in on a bright star or moon on the LCD screen. Manually adjust the focus to make stars look as small and accurate as possible.
- If your camera supports it, enable focus peaking, which highlights in-focus areas with colored overlays. This feature can aid in achieving precise images.
- Take test photos at different focus points and review them on your camera's LCD screen. Zoom in to check the level of sharpness and adjust as needed.
- In cases where autofocus performs well, you can try it on a bright object in the distance, such as the moon or a distant light source. Once focused, switch to manual mode to lock it in place.
- If capturing a deep sky object with both foreground and background elements, consider focus stacking. Take multiple pictures, each with a slightly adjusted focus point, and combine them in post-processing for an overall sharp image. You can use Luminar Neo and its AI image enhancement features.
- If your camera and lens support this feature, use a remote focus device or software to make fine adjustments without physically touching the camera.
Be sure to periodically recheck your focus during your astrophotography session, as temperature changes or random corrections can affect the final image. Using these techniques, you can ensure that your photos show the stars in all their sharpness and breathtaking splendor.
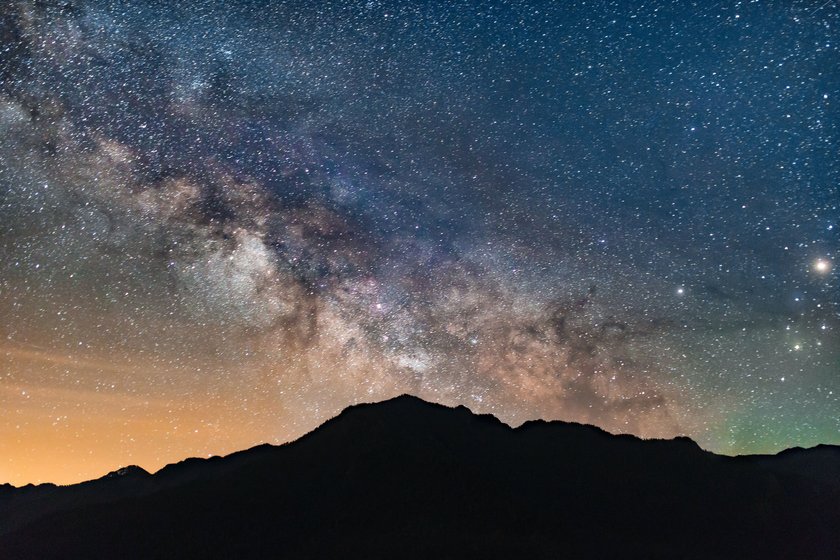
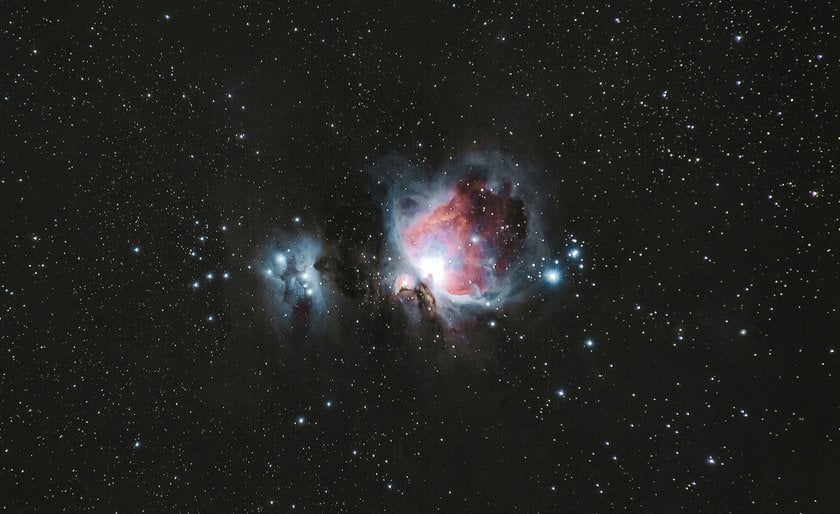
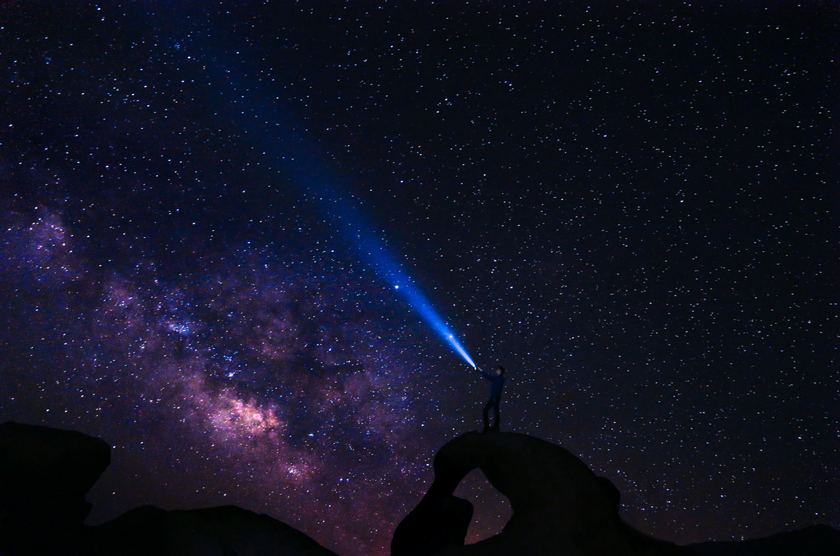
5. Capturing the Milky Way: Strategies for Astrophotography
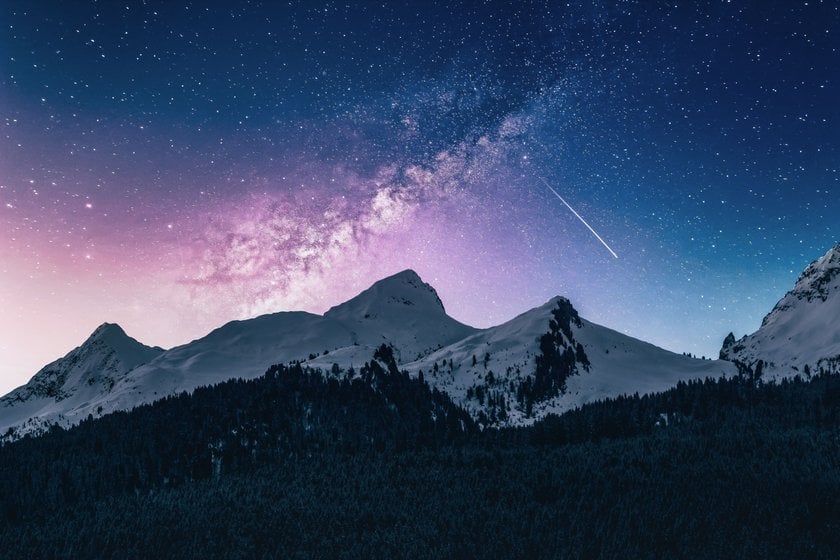 Taking pictures of our galaxy in all its splendor is a rewarding experience in astronomical photography. Here are some tips to help you understand how to photograph the Milky Way:
- Find a location with minimal light pollution to ensure maximum visibility. National parks, countryside, or remote areas often have optimal conditions.
- Plan to take pictures at the right time of year. The Milky Way is most visible in the night sky between spring and fall, depending on the hemisphere. Also, check the phase of the moon to avoid bright moonlight, which can blur the stars.
- Check the position of the Milky Way in the sky at your chosen time and location. Use smartphone apps or online tools to determine the direction and altitude of the Milky Way to plan your composition accordingly.
- Use a wide-angle lens with a low focal length (around 14-24mm) to capture most of the night sky. A lens with a wide aperture (low f-number) will allow more light to enter, enhancing the visibility of the Milky Way.
- Set your camera to manual mode to have complete control over exposure settings. Adjust the aperture, shutter speed, and ISO to achieve the desired balance between capturing enough light and avoiding overexposure.
- Use a longer exposure time (usually 15-30 seconds) to gather more light and bring out the complex details of the Milky Way. However, be careful not to exceed the maximum time at which a star trail becomes visible.
- For beginners in astrophotography, it is important to experiment with different ISO settings to find the optimal balance between capturing details and minimizing noise. Start with a moderate ISO (for example, 1600-3200) and adjust as needed based on your camera's noise performance.
- Incorporate interesting foreground elements into your composition, such as landscapes, trees, or structures. This adds depth and context to your image, creating a more captivating overall scene.
- Use a sturdy tripod to keep your camera stable during long exposures. This prevents blurriness and ensures sharp images of the Milky Way.
After taking pictures, use post-processing software to improve the detail, contrast, and colors of the Milky Way. Luminar Neo is ideal for such purposes. Thanks to innovative AI tools, you can easily turn any photo into a masterpiece. This software will be an indispensable assistant for astrophotography beginners thanks to its user-friendly and simple interface. With exposure adjustments, white balance, and noise reduction, you can improve your end result.
Try to experiment and be patient while capturing the Milky Way. It may take several attempts to achieve the desired outcome. By following these basic astrophotography tips, you can take breathtaking images of our galaxy and showcase its beauty in your photos.
6. Conquering Star Trails: Long Exposures and Creative Effects
 In our beginners' guide to astrophotography, we also want to talk about how to create stunning images with long shutter speeds and creative effects.
To get stunning images of star trails, it is important to put the camera into a manual mode that allows full control over the exposure parameters. Using a sturdy tripod is critical to ensuring camera stability during long exposures and producing clear, crisp scenes. Using a slow shutter speed or Bulb mode allows you to capture the gradual movement of the stars over time, creating beautiful and ethereal trails in your photos.
Including interesting foreground elements in the composition adds depth and visual interest to the scene. Consider including breathtaking landscapes, iconic structures, or unique elements that can enhance the picture and create a sense of scale and context. Juxtaposing a still foreground with the dynamic motion of the stars can lead to exciting and awe-inspiring visuals.
To simplify the process and create smooth and continuous star trails, you can utilize star trail apps or specialized stacking software. These tools automatically align and stack multiple images captured over shorter exposures, effectively creating longer trails and reducing noise in the final image. This technique allows for greater control and flexibility during the editing process, enabling you to achieve the desired effect.
7. Editing Magic: Enhancing and Processing Your Night Sky Pictures
 When it comes to the question of how to do astrophotography picture processing, there are several editing apps available that can help you. One notable software is Luminar Neo. It offers advanced editing capabilities specifically tailored for photographers. The app provides a range of tools and features designed to enhance night sky images and brighten a picture, such as AI-powered noise reduction, precise control over exposure and contrast adjustments. It also offers creative filters, overlays, and effects that allow you to add a unique touch to your images while maintaining a natural and realistic look. With its user-friendly interface and extensive editing capabilities, Luminar Neo is a valuable application for astrophotographers looking to take their night sky images to the next level.
Conclusion: Embarking on Your Journey Through the Cosmos
 When you step into astrophotography and how to take beautiful pictures of the night sky, you'll discover a world of endless wonder and breathtaking beauty. Armed with the right equipment, knowledge, and techniques, you can take stunning pictures of the night sky and celestial objects. Understanding exposure, choosing the right location, and mastering focusing techniques are essential skills for capturing clear and breathtaking images.
Whether you're photographing the Milky Way, conquering star trails, or enhancing your images with post-processing, the key is to experiment, be patient, and let your creativity flow. With every click of the shutter, you have the opportunity to unlock the secrets of the cosmos and share the amazing wonders of the universe with others. So, use our beginner's guide to astrophotography, dive into the night, look up at the stars, and let your journey through the cosmos begin.
FAQ
What Camera Settings Should I Use for Astrophotography?
Talking about beginner astrophotography setup for the camera, use a wide aperture, a high ISO setting, and a long shutter speed. Start with an aperture around f/2.8 to f/4, ISO between 1600 and 3200, and a shutter speed of 15-30 seconds. Adjust these settings based on your specific conditions and desired effect.
Do I Need a Telescope for Astrophotography?
While a telescope can enhance your capabilities, it is not a requirement. You can capture stunning images of the night sky using a regular camera and the right lenses. Telescopes offer more magnification and are ideal for capturing detailed images of specific celestial objects.
How Can I Reduce Noise in My Astrophotography Images?
Lowering the ISO reduces the sensitivity of your camera sensor to light, resulting in less noise. Taking multiple exposures and stacking them can also help you. In post-processing, use special tools or software like Luminar Neo to selectively reduce noise while preserving the other details.