How To Make Panorama Photography Pop: 5 Ways
July 06, 2023

Have you ever wondered how to use panorama mode to create truly stunning photos? If so, these five tips on how to make your panorama photography pop will transform your images!
Panoramic photography allows you to capture more of a scene within the singular frame, making it ideal for shooting landscapes, city skylines, and even giant group photos. Yet, knowing how to take panoramic pictures does not always translate into great results. Panoramic shots can look quite flat or distorted when handled incorrectly, which is where mastering some specific techniques comes in.
Some essential things to bring out your panoramic images are the keenness of composition, lighting, and stability of the camera. Place yourself strategically to ensure your panorama includes dynamic parts of the scene without too much distraction.
In this article, we explore some creative ways to use panorama in photography.
What Is a Panoramic Picture
 Panorama, or pano for short, photography, refers to a specialized photographic technique that offers an expanded field of view. It could be used to capture photographs of expansively wide vistas that are normally beyond the typical 120-degree field of view accommodated by human eyes.
What makes panorama photography so magnificent is the concept of flexibility and its perspective. Panorama photography allows any photographer to present a scene that is not bound by the traditional camera frame. Such a technique can easily turn ordinary scenes into extraordinary viewing experiences, providing greater context and depth. If you are a professional or an amateur, pano photography opens new horizons to creativity and expression.
Your Go-To for Seamless Panorama Captures
Explore in Luminar NeoHow to Take a Panoramic Photo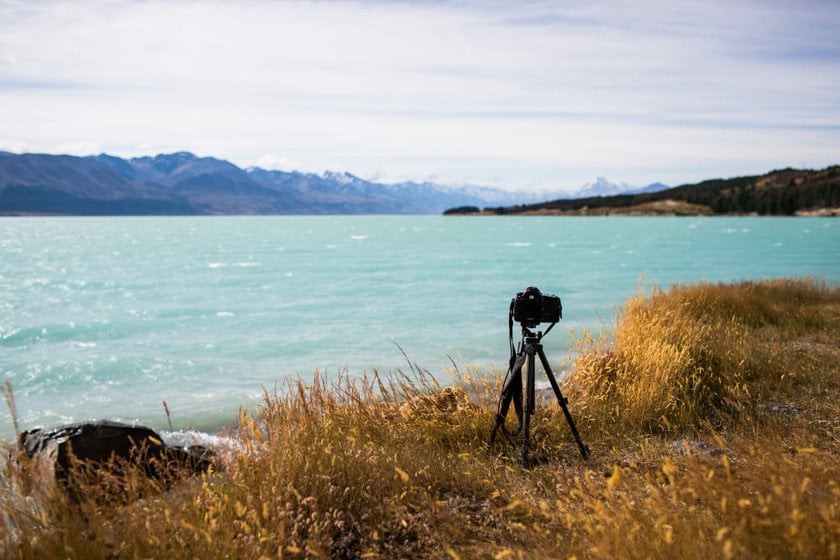

Stabilize your camera. It involves placing your camera on a tripod to hold it firm during the panorama shoot. This prevents image distortion and helps each frame to fall perfectly in place during stitching, which in turn leads to a seamless final image.
Get the composition right. Choose a strong focal point and frame the scene, considering balance. Keep the horizon level and avoid placing key elements near the edges where distortion is greater.
Use manual settings. Keep the camera on manual so are no flickering lights in every frame due to changes in exposure and focus. You should avoid any jarring change in lighting or focus that will destroy the smoothness of the panorama.
Shoot in the overlap. Take each shot with an overlap of about 30-50% as you pan across the view. It gives plenty of room for the stitching software to merge images seamlessly into a panoramic photo.
Edit for precision. Once shots are taken, edit your final panorama using some photo editing software to ensure brightness, contrast, and colors are consistent across the image so the stitched picture looks coherent and polished.
5 Exciting Techniques in Pano Photography
1. Seasonal Panoramas
 Seasonal panoramas allow photographers to tell a richer, more nuanced story about a location. This dynamic narrative can promote a deeper connection between the viewer and the image, taking them on a visual journey through time.
Time to elevate those seasonal panoramas? Take your photography to the next level with Luminar Neo, a cutting-edge editing tool that can help you get the best out of your shots. From the bracing colors of autumn through to the serene whites of winter, post-processing with intuitive AI-powered features in Luminar Neo couldn't be simpler. Try it today and see your seasonal panoramas come alive as ever, with depth, sharpness, and improved colors.
2. Vertical Panoramas
 Vertical panorama effect is a striking photographic technique. Instead of the horizontal panning of the camera, as it is with panorama photography, the camera moves vertically. This effect works by capturing a series of images in a vertical sweep that are then stitched together into one tall composition.
That effect is achieved in a couple of steps. Check that your camera or phone has a panorama function. Also, there are plenty of apps and software that can help you achieve this effect. Positioning is everything if you want to stand at a distance from where you can capture the full height of your subject.
When you are ready to shoot, turn this panorama function on your device on and, unlike with a normal panorama photo, move the camera from bottom to top. It is important that you keep it as smooth and as steady as possible to capture consistently.
3. Panorama Portraits
 The camera frames the subject and everything in its view in a panorama portrait. Еhis technique presents a bigger picture, adding depth to the portrait. Examples of a panorama portrait are a person amidst the workplace, a sports team on their home field, or a musician in his favorite venue.
When setting out to create a panorama portrait, there are a few crucial steps to follow. Firstly, it is essential to lock in the focal point and exposure settings before shooting. This ensures consistency across the range of images you'll be capturing, preventing variations in focus and light exposure, which could disrupt the cohesiveness of your final stitched image.
Finally, capture your images with enough overlap, about 30-50%, between each shot. This allows for a seamless panoramic view example when merging the images together into one cohesive panorama portrait.
4. Astro Panoramas
 Astro panorama excels at capturing celestial bodies, constellations, the Milky Way, or even phenomena like meteor showers. Shooting astro panoramas involves some planning. Because the Earth is rotating, the visibility of the stars adds one more time variable in the night and year that makes all the difference in capturing your subject. You will want to find a location with minimal light pollution to ensure a clear star-filled sky.
Usually, wide-angle lenses with large apertures are used to be able to take in as much light as possible. Exposure time has to be long to catch the faint light of the stars, but it should not be too long that the result would be trailing stars unless it is intended to capture star trails.
Start off with an initial exposure of about 20–30 seconds at maximum aperture and an ISO of about 1600 to 3200. Adjust accordingly as needed. Long exposures invite the camera to shake into the mix, so having a sturdy tripod and remote shutter release can be beneficial. Once the series of shots across the sky has been captured, the software stitches them into one panoramic image.
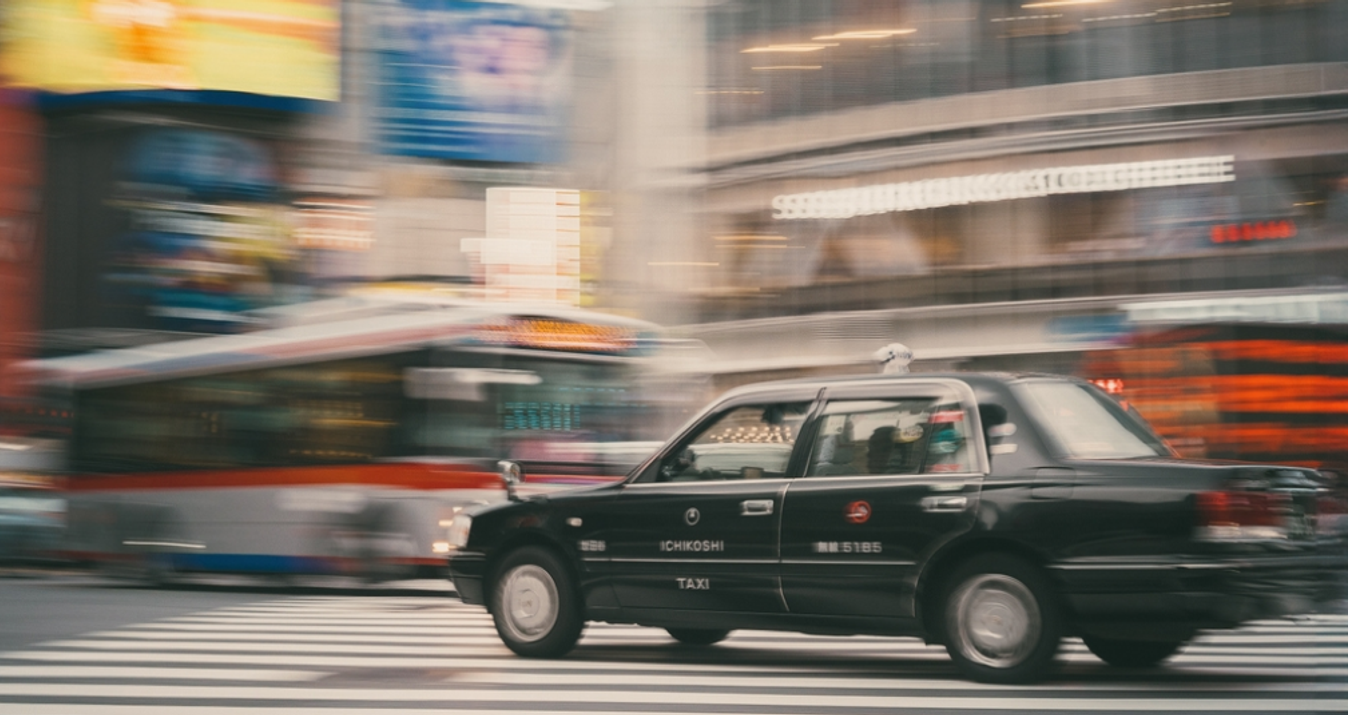
5. Freeze the Motion
 This technique works very well when the action is moving over a wide field of view, such as a sports event, a busy street scene, or a flock of birds taking flight. To shoot an action panorama, select a fast shutter speed to freeze the action and take a few shots, panning your camera across the scene in the same direction as the action. It's all about keeping the camera smooth and maintaining the speed and level that you plan for a smooth final image.
Using software, once you have captured a series of shots, you can combine them into one panoramic image. If done properly, you'll have a unique, dynamic panorama capturing the entire sweep of action.
Now, you have guidelines on how to take a panoramic photo in several ways. As with all techniques, practice is key. Don't be afraid to experiment with different scenes, movements, and shutter speeds. These experiments can inspire all sorts of new panoramic photo ideas.
How to Enhance Your Panorama Photos
Capturing a panoramic photo is only half the process. The other half lies in the mastery of panorama photography tricks during the post-production phase. It's important to enhance your photos so they look their best. Post-processing allows you to refine and polish your panorama photos, ensuring they make the strongest possible impact.
Exclusive Tools of Endless Possibilities in One AI Editor
Explore Now!1. Use an App to Stitch Your Panoramic Photos Together
While taking panoramic photos might be relatively straightforward, stitching them together to create a seamless image can sometimes be challenging. This process can be particularly tricky if the lighting conditions change across your shots or if objects or people move. Achieving the desired panorama effects might require some technical support.
Using Luminar Neo's Panorama Stitching can help you overcome these challenges. This innovative AI-powered software effortlessly combines frames and adjusts for lighting variations and moving subjects, making panorama creation simpler and more efficient.
2. Crop
Effective cropping involves remembering the rule of thirds. The rule means that a photo should be visually divided into nine equal parts with two horizontal and two vertical lines equidistant. Those intersections give you very interesting points of focus. Place your subject or important elements along them to get a balance and create an effective composition.
3. Adjust Exposure
Adjusting the exposure in post-processing can help balance the lighting differences. It’s often beneficial to shoot your panorama slightly underexposed. This helps retain details in the brightest areas of your scene. You can then brighten the darker regions during post-processing without losing highlights. We also recommend setting your camera to shoot in RAW mode, giving you greater flexibility during editing.
In cases of significant light variance, HDR editing comes into play. It involves taking multiple shots at different exposures and putting them into one image, retaining the detail in both very light and dark parts of an image. The technique is available to be done manually or through automatic HDR modes on digital cameras and smartphones.
4. Correct Color
First, use the white balance for color correction. This can make quite a difference, especially when shooting early in the morning or late in the afternoon, as light color can greatly affect your scene. We recommend shooting in RAW mode for this reason.
Once you have colors right, you can even go further and play with saturation and vibrancy to make those colors pop. Just be careful not to overdo it, as generally, colors that are too saturated tend to be unnatural.
Remember, applying more panorama photography editing techniques and creating various effects on a single image will enhance your final output. The time you invest in post-processing perfecting your image is when the real magic happens, elevating your panorama photography to a higher level and ensuring your images look absolutely amazing and interesting.
Conclusion
The panoramic shot definition offers photographers an exciting way to capture the world in its wide, grand splendor. The true beauty of pano photography is in experimentation and personal expression. So, take these techniques and make them your own. Play around with different cropping options and color adjustments to see what works best for your images.
Photography is a journey, and each new technique you learn brings you another step on your adventure. So grab a camera and see where panorama photography can take you. Happy shooting!