What Is HDR Photography
May 31, 2024
The high dynamic range technique can create fantastic images, but what is it best for? In this article, we delve into HDR photography: learn how to take photos, merge them into one, and edit them effortlessly.
Let’s start with the basic question: What does HDR stand for in photography? Well, the answer is pretty simple.
HDR is an abbreviation for the high dynamic range between the darkest and the lightest parts of an image. An HDR photo displays maximum details for recreating all the memories and getting you back to the moments of shooting.
Luminar Neo is the Best HDR Software for Mac
Try Luminar Neo auto HD photo editor right nowHDR Photography is a science and an art. The scientific aspect involves taking bracketed shots at different exposures and merging them into one. The artistic aspect involves a wide range of effects, from natural to extreme and dramatic.
 Now, we are going to provide you with everything you need to know about the HDR process. You will also find a lot of other helpful info for both beginning and advanced photographers in our blog. For example, you can easily choose the perfect free photo editor for Mac from our wide selection. Or click on the button below to explore Luminar Neo's AI photo editor, which lets you edit your photos with ease.
High Dynamic Range in Photography
Photography became an important part of human life a long time ago. Today, every two minutes, people take as many pictures as taken throughout the entire 19th century!
The word “Photograph” is translated from Greek as drawing with light. It means we use the power of lighting to create magnificent shots and share them with others. Dynamic range is the amount of light and dark that a camera can capture and display. The more detail the photo contains, the more impressive the effect it provides. High dynamic range in photography means a greater amount of light and dark is captured to merge an image similar to what a human can perceive through the eyes.
What Is HDR Photography: Technical Aspects
You may have already done a search like "definition HDR photography" and you know what we're talking about now. However, we need to take a closer look at some important issues. A digital camera can make shots of objects that reflect or emit light through a timed exposure. These images are low-dynamic range photos because the amount of light that an average camera is able to capture is small.
To expand the dynamic range and make the photo look more natural and realistic, photographers take a series of shots at different exposure values. Each photo captures a specific range of scene details that you are going to use for building up an HDR photo. Once you have this series of brackets ready, you can proceed to their processing with HDR software.
 One issue that we have to figure out is what exposure values to set and how many photos we need. Most scenarios require three bracketed shots at -2 - 0 - +2 EV. Therefore, you can manually set your camera to these figures for bracketing. If you are lucky, your camera will do it automatically with the help of automatic auto bracketing.
If you take up to four photos, 2-value step increments will be just enough. If you shoot complicated scenes with up to ten shots, 1-value step will be enough. The most important task of any photographer is to capture as much detail of the surrounding objects as possible by any means possible.
Note that a tripod is essential when photographing high dynamic range scenes, as it provides stability that allows photographers to use longer shutter speeds and preserve a wide range of tonal detail in their images.
No camera? It doesn't matter because not only some cameras but also smartphones have an auto HDR mode. If you prefer to take pictures with your smartphone and want to get really impressive images, then we recommend you follow this link and read about HDR on iPhone.
When It’s the Best to Use HDR
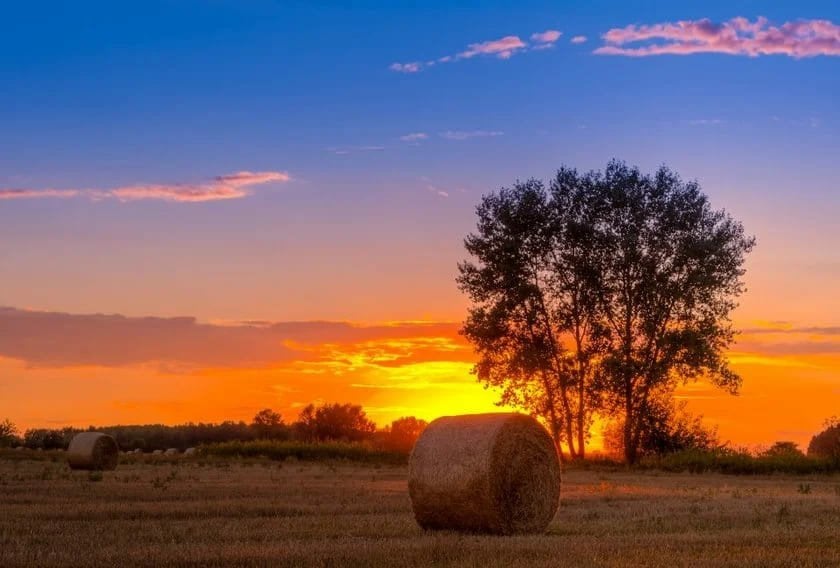
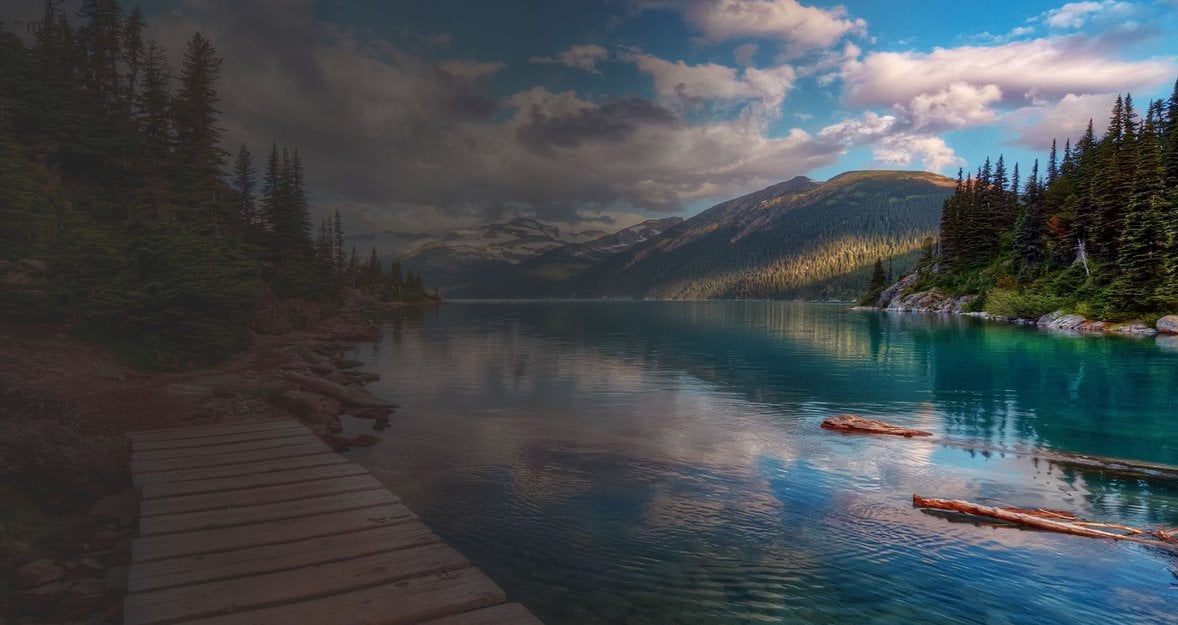
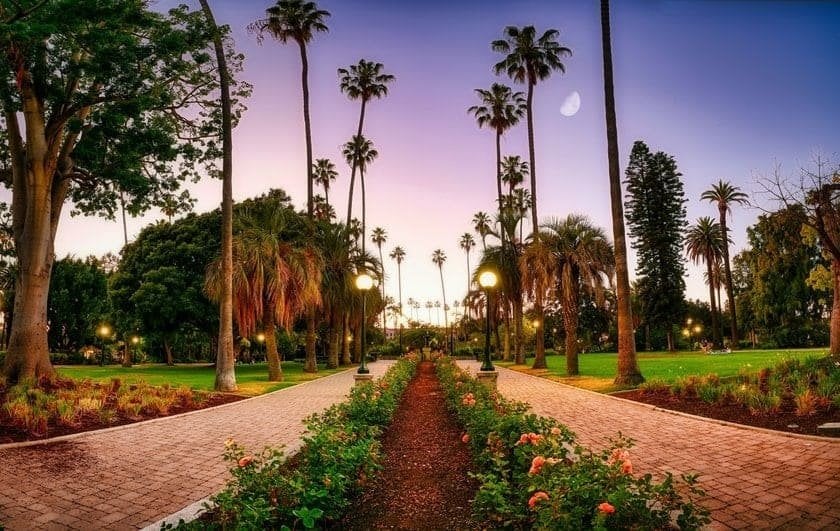
1. Landscape Photography
Landscapes in nearly every situation can benefit from HDR photography! Wide sweeping landscapes with a lot of contrast between the sky and the ground is a perfect situation for using HDR. It’s very difficult for a camera to capture the grounds detail without making the sky look blown out and overexposed and Vice Versa!
2. Portrait Photography
Portraits in bright sunlight is another situation when HDR can come in handy. Now I know what you’re thinking, “Why use HDR to shoot a portrait when there’s already “enough” light hitting the subject?” Well the reason is sometimes, too much lighting on a person's face, like hard/bright direct sunlight, can cause deep shadows and blown highlights when taking a single “balanced” frame. A quickly shot HDR can even out all those details and make a much more flattering exposure for your subject.
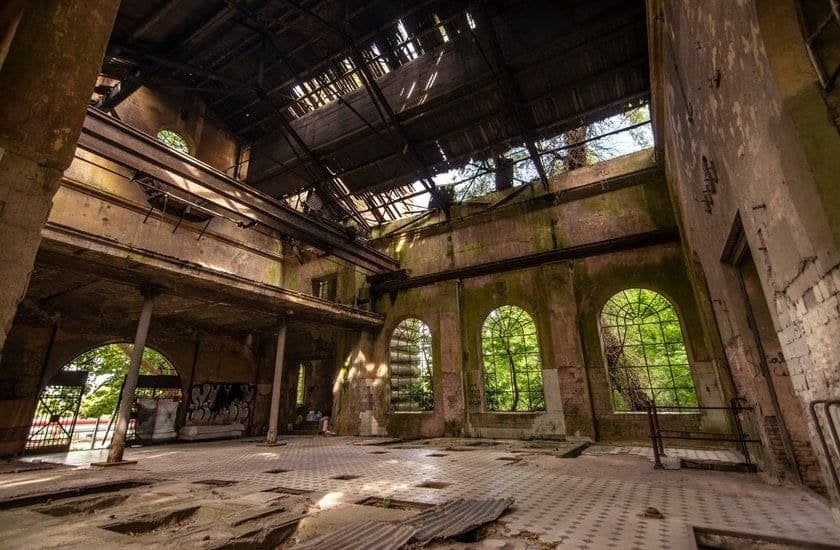
3. Interior Photography
Interior images such as Real estate photos where you want to show off a room’s awesome decor as well as the gorgeous views through the windows or doorways to give the viewer a real life perspective of the property. This also applies to Low-Light or Backlit Scenes where your images can be a little too dark when you’ve exposed for the bright lights (and vice versa). Using HDR can balance an image with an increased tonal range to select from. With proper tone mapping, you can create a more realistic representation of what your eye can see.
Enhance Your Photography with HDR Merge
Get Started NowWhen Not to Use HDR
Scenes with super high contrast may not be great for HDR. Sometimes, in these situations, the image will look much better with that stark contrast. This leaves you with a great dark shadow or silhouette that will be the focus of your image. HDR will make those shadows flatter and less interesting.

Photos with lots of motion will not look great with HDR. If your subjects are front and center of your frame, moving through your shot like a busy street with lots of people/cars, or even a landscape with REALLY active weather and winds (Think about leaves and grass blowing like mad in the wind). HDR will increase the chances of a blurry photo since we’re typically taking 3, (or more), images giving the people and objects in your frame opportunity to be in different positions from frame to frame. Thus, your final image may not look great.
Bright and vivid colors are another situation where HDR may not be the best choice. In scenarios where it’s too dark or too bright, HDR can work wonders for you and bring a lot of those lost colors back. However, if you’re in a well-lit area with colors that are already very vivid, HDR can possibly wash those out on you, leaving you with a dull or flatter image.
Best HDR Photography Software
Now you know what HDR photos are. Also, the best and the most expensive camera sensors cannot yet reach equal results that image processing software can provide for its users. If they could, we would never hear of product names like Photoshop, Luminar Neo, or other PC photo editors.
It is up to you to choose what features you want to include in your workflow and what goals you wish to achieve with your processing. HDR photography is impossible to make without the use of appropriate applications.
Create Your First HDR Photo with HDR Merge Tool in Luminar Neo
Ultimate performance is available for Luminar Neo users thanks to its state-of-the-art AI tools. Luminar Neo features an exceptional HDR Merge tool that serves as an all-in-one solution for professional photographers specializing in nature and architectural photography. This powerful option allows users to seamlessly merge high dynamic range photographs, enhancing the visual appeal of their images. As a result, Luminar Neo is one of the best software programs for achieving high-quality shots.
The editing scheme is quite simple. You select photos taken in different light ranges, upload them to Luminar Neo, and voila, the software merges the images for you and produces a really pleasing result. That’s it!
In addition, you can continue to edit your photo in Luminar Neo. For example, you can improve its overall look with Enhance AI in two clicks or edit the light with Relight AI. Whatever you like. Also, to get more creative, you can choose from a selection of presets and apply them to your photo. This is an ideal option when you need to work with a large series of images at once.
Conclusion
 Regardless of the capabilities of your camera sensor or the challenging lighting conditions you encounter, understanding the basic concept of HDR photography remains invaluable. It enables you to effectively exploit the full potential of dynamic range, whether you're faced with high or low-contrast scenes, to achieve remarkable results in any situation.
FAQ
What is the definition of HDR photography?
By definition, HDR stands for High Dynamic Range. What that essentially means is taking a series of images, each with a different exposure from Dark to Light in rapid succession. You then combine these HDR brackets to get the best parts from each.
Picking pieces from the overexposed, underexposed, and balanced shots to create a dramatic image with beautiful balanced shadows and highlights! Basically, HDR images enable you to capture and display more exposure information than any standard image sensor can capture on its own with a single image.
Is HDR better for photos?
Naturally, this technique is beneficial for capturing and displaying a wider range of tones and details in a photograph. It allows for increased dynamic range, ensuring that both bright highlights and deep shadows are well preserved, resulting in more visually appealing and balanced pictures.
Do professional photographers use HDR?
Yes, professional photographers often use these techniques in their work. HDR allows them to capture and display a wider range of tones and details, especially in challenging lighting situations. It enables them to create visually stunning images that accurately represent the scene's dynamic range and convey their artistic vision.
What type of HDR is best?
It depends on the specific photographic requirements and your artistic vision. Various methods, such as exposure bracketing, tone mapping, or manual blending, offer different levels of control and artistic interpretation. It's important to experiment and find the approach that best suits your desired result and creative style.
What is the highest level of HDR?
When it comes to monitors, DisplayHDR 1400 is indeed the top option. In photography, there's no universally accepted "highest level" of HDR because it can vary depending on many factors, including camera sensor capabilities, software processing, and artistic intent.