The Magic of RAW Photography: Unleash the Full Potential of Pictures
June 29, 2023
Do you want to unleash the full of photography in post-processing? Then shoot in RAW format. In our guide, we’ll share with you how to master editing such images using different styles.
In the digital world, a RAW format of photos is gaining momentum. Whether you’re an amateur or a professional photographer, you should switch from traditional JPEG to this type of file before capturing portraits, nature, urban jungles, food, and other scenes. It gives you more control and flexibility during processing images on your computer with a photo editor. By the way, if you're thinking about buying a software subscription, we recommend trying Luminar Neo. This application is able to pleasantly surprise you, so you will definitely not regret this choice.
In this guide, we’ll share tips and techniques that will help you to master the basics of RAW photo editing. You can unleash the full potential of images and get amazing results for your lifestyle blog or commercial project.
Photo RAW Format: Fundamentals
First, let’s look at what RAW file format is. Such files are not photographs in their purest form. You get all original data captured by the camera sensor. They give you more information for post-processing. Unlike photos in the good old JPEG format, you cannot immediately view and print images or apply various effects and styles to them until they are processed in an online photo editor to be turned into photos. After all, it’s an uncompressed format that cannot be processed automatically.
Main Reasons for Shooting in RAW

Most photographers prefer this format. Why? Now we’ll explain everything. JPEG and other common formats are compressed, so they lose some of their data after each time they are opened and saved. In addition, they involve applying certain settings such as sharpness, white balance, contrast, and saturation to the photo during shooting. The settings are permanent.
As for RAW photo files, they have all information that is saved even after the hundredth time you view the image. No special settings are applied when pressing the shutter button. You decide what aspect to correct and what information to leave or delete.
What are the other advantages of shooting in RAW? There are several of them:
- You get the best image quality. Even during the transfer of your photos to the computer and many manipulations with them in open source photo editor, they don’t lose their quality. At the same time, images are more saturated and detailed than photos of conventional formats, even after printing.
- Wider tonal range. An 8-bit file in JPEG format contains 256 levels of luminosity, which is equivalent to 16 million colors. At the same time, files in RAW format have from 4096 to 16 384 levels of luminosity. It’s about 4 trillion color shades! Just imagine the colors you can get in a finished photo!
- The RAW format picture allows you to adjust the white balance easily. And that’s because they have more data. In addition, most automatic photo editors, including Adobe Photoshop and Lightroom, work better with such files in this aspect of settings.
- You edit the file as much as you want without changing the original version. This is very convenient if you’re not satisfied with the result of processing and want to return to the image.
Although RAW takes up more memory space, requires longer to process, and doesn’t open in the photo viewing program before converging into a picture, you get the maximum control over each aspect and flexibility in post-production. This allows you to improve your photo editing skills significantly.
Taking Photos in This Format: A Short Tutorial
All you need to do is adjust the settings so that you end up with this particular format. For example, in Canon DSLR cameras setting up a RAW photo file has the following steps:
- Go to Menu or Settings in the camera dialog box.
- Find Image Quality or File Format.
- Among the various formats, select RAW from the drop-down menu.
- Press the Set or Ok button to fix the changes.
Other camera brands have similar settings. So, you can make adjustments simply. What else should you keep in mind before going to a shoot in this format? Since these files are quite large, make sure you have enough space in the camera’s memory. Also, put an extra memory card into your bag. Believe me, there will be a lot of photos, and you need to store them somewhere.
From Location to Post-Production: How to Edit RAW Photos
Now let’s move on to the most interesting part: editing photos in RAW. In order to unleash all potential of such images, use powerful software that supports it, as well as has tools for editing and preset styles that you can apply and adjust depending on your purpose and preference. Let’s take a closer look at them below.
Discover the Styles of Photography

Styles are preset settings that improve the overall look of photos and give them a certain aesthetic appeal. Desktop and iPad photo editors propose different styles: bright, melancholic, cinematic, and so on. You can choose the one that suits you best and use it for a single RAW photo or for a whole series of images, for example from a wedding shoot.
Develop Personal Style
Are you just strutting to work with photos? Preset styles are a great starting point and one of the best ways to edit RAW photos. But if you want to be more creative, experiment with different editing techniques, color corrections, and other parameters. This will help you to create your own signature that will stand out favorably among the works of other photographers.
Power of Styles in Different Genres
There are no limits to using styling. Having universality, they adapt well to any genre. You can add drama to a portrait or landscape shot or fill an image with an old cobblestone street with a vintage aesthetic.
Transform your Photos for Visual Pleasing Results: Effective Techniques
The RAW format gives you amazing opportunities during editing. There are some techniques that will help you to tell an interesting visual story in your photos:
- Take advantage of RAW profiles. If you use Camera RAW or Lightroom, you may notice several profiles on the main panel. Try each of them because all provide incredible results. Thus, Adobe Portrait gives the skin more natural tones, and Adobe Landscape improves textures and makes the sky and the grass colors more saturated.
- Use dynamic range on 100%. RAW photography has a wider dynamic range than JPEG, which is a big plus because you can make details visible in very dark or very light areas of photography. You can use Lightroom by clicking on the Auto button on the main panel and adjusting tone sliders to improve hues.
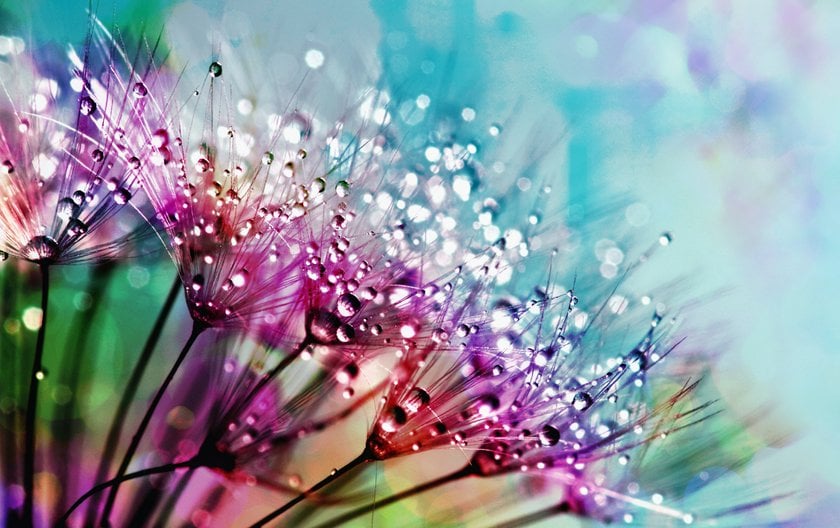
- Focus on details. If you want to show details such as water droplets while swimming in a pond, small incents against the evening sun, or anything else, open the RAW file and use the Enhance Details command. You can find it in Lightroom by right-clicking on the image and selecting Enhance. Along with the Super Resolution online tool, you get not only the desired details but also increased resolution.
- Get creative with white balance settings. The main advantage of this format is that it allows you to change the color temperature of the photo to the one you want. You can add a sense of warmth to the sunny landscape or dramatic coolness to the rainy city. The White Balance in the Develop module of Lightroom is your starting point because here you can easily achieve the desired effect by setting the Daylight preset or another. How to edit RAW photos in terms of white balance, else? Use the sliders to set the Brightness and Saturation to the maximum +100 value. After that, adjust Hue and Saturation and reset the Brightness and Saturation values by double-clicking on them.
- Correct the sky. As practice shows, the sky is quite bright. The advantage of the RAW files is that they allow you to adjust them locally and highlight clouds or other elements, or even replace them with more enchanting ones. For example, you can use the Sky mask in Lightroom by selecting Highlight Sky and adjusting Exposure, Highlight, Blur, Clarity, and Saturation. This will lighten the sky and bring out the clouds.
You can also achieve all desired results with AI photo editing using Luminar Neo. Having innovative tools, that are based on AI technologies, it copes with tasks related to RAW without much effort in a few minutes, whether it is transforming the sky or giving a photo a special mood.
Conclusion
The RAW format gives you endless opportunities. By understanding its nature, advantages, and processing with HDR photo editor or other programs that use different styles, you’ll unleash the full potential of your photos. Improve the processing of photos regularly, and you’ll express your creativity in the best way.
FAQ
A RAW and a JPEG: What Is the Difference Between Them?
The main difference lies in the amount of information captured by the camera during shooting. JPEG files are compressed and lose some of their information when different manipulated photos. At the same time, RAW files save all data, which makes them flexible in post-processing.
Which Software Is the Best for Editing RAW Files With Applying Styles?
There are several nice software, such as Adobe Lightroom, Capture One, and Luminar Neo. They have a wide range of tools and style presets to get amazing results.
How Can I Create My Own Styles for Consistent Results in My Photography?
In order to create your own style, first experiment with different techniques, including color adjustment, when you edit the RAW. By practicing regularly, you’ll certainly develop your own style that will become your signature and stand out among the works of other photographers.
Are There Any Challenges When Working With RAW Files?
Yes. It can be a challenge because such files take more place in the memory, involve a longer processing time, and are not always compatible with some photo processing software. So, you need to get used to them. But the full creative control and flexibility in editing completely override these disadvantages.


![Best Camera For Family Photography [Reviewed By Photographer]](http://media.macphun.com/img/uploads/macphun/blog/3921/xipo.png?q=75&w=1348&h=715&resize=cover)