June 04
12 min. to read
How To Blur Faces In A Photo: Click, Edit, Blur

Ever found yourself with a great photo that you'd like to share, but felt the need to keep someone's identity private? Whether it’s a candid shot from a gathering or a street capture, learning how to blur out faces in a picture can be incredibly useful!
In this post, we’ll explore simple, effective ways to do just that, using tools from your smartphone to advanced editing software. Join us as we dive into easy techniques that will keep your photos share-ready while respecting privacy!
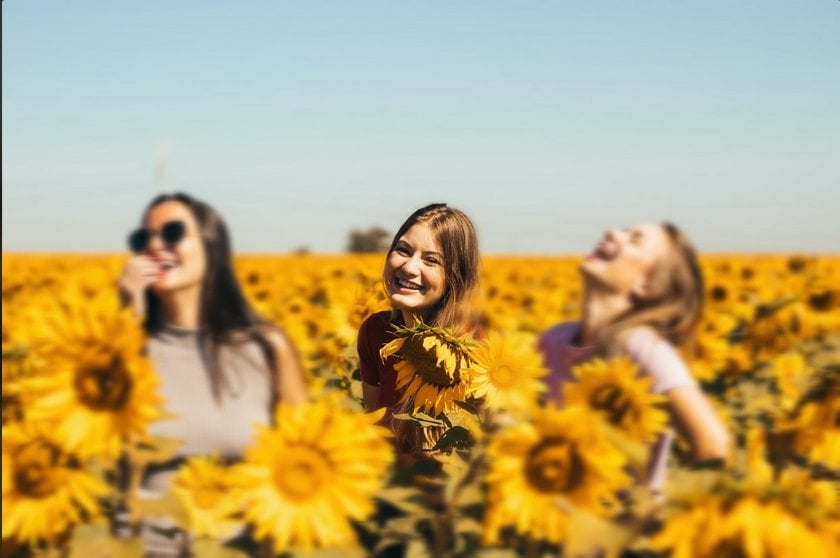
Blur Photos Smoothly for Creative or Privacy Purposes
Blur Your ImageWhy Blurring Faces in Photos Matters
Blurring faces in your photos isn’t just for artistic effect — it’s a practical way to keep personal information safe. With today’s technology, where facial recognition is common, blurring faces also prevents the wrong people from accessing personal information. It’s a simple step that can make a big difference in keeping you and others safe online.
It’s also a good legal move. Avoiding clear shots of copyrighted material in your photos means you won’t run into trouble when posting them.
Techniques For Smartphones
Blurring faces in photos directly from your smartphone is straightforward, whether you're using an iPhone or an Android device. Here’s how to do it!
For iPhone Users
Using the Markup Tools
Open the photo you want to edit and tap "Edit" in the top right corner.
Select the Markup tool, represented by a pencil tip icon.
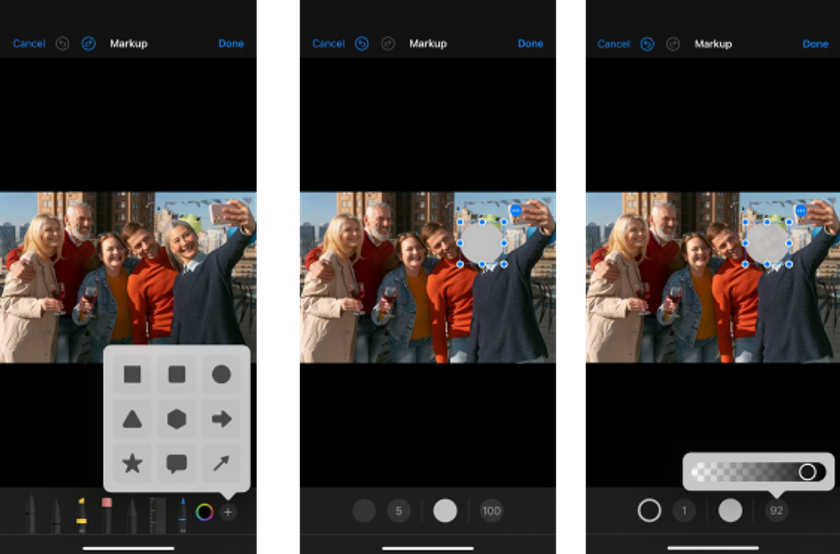
Tap the "+" icon at the bottom left, then "Add Shape" to choose a shape that covers the area you wish to blur.
Adjust the shape size by dragging its blue toggles to cover the specific part of the photo.
Use the menu at the bottom to customize the effect: adjust the border brightness, thickness, fill color and intensity.
Once satisfied, tap “Done” to save your changes.
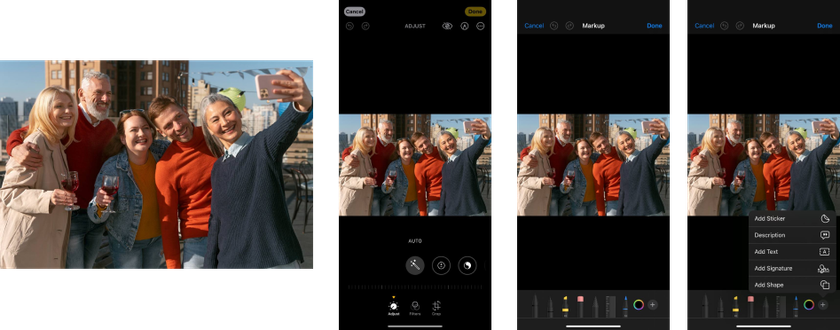
How to Blur Faces in Pictures Using the Markup Tools
Open the photo you want to edit and tap "Edit" in the top right corner.
Select the Markup tool, represented by a pencil tip icon.
Tap the "+" icon at the bottom left, then "Add Shape" to choose a shape that covers the area you wish to blur.
Adjust the shape size by dragging its blue toggles to cover the specific part of the photo.
Use the menu at the bottom to customize the effect: adjust the border brightness, thickness, fill color and intensity.
Once satisfied, tap “Done” to save your changes.
For Android Users
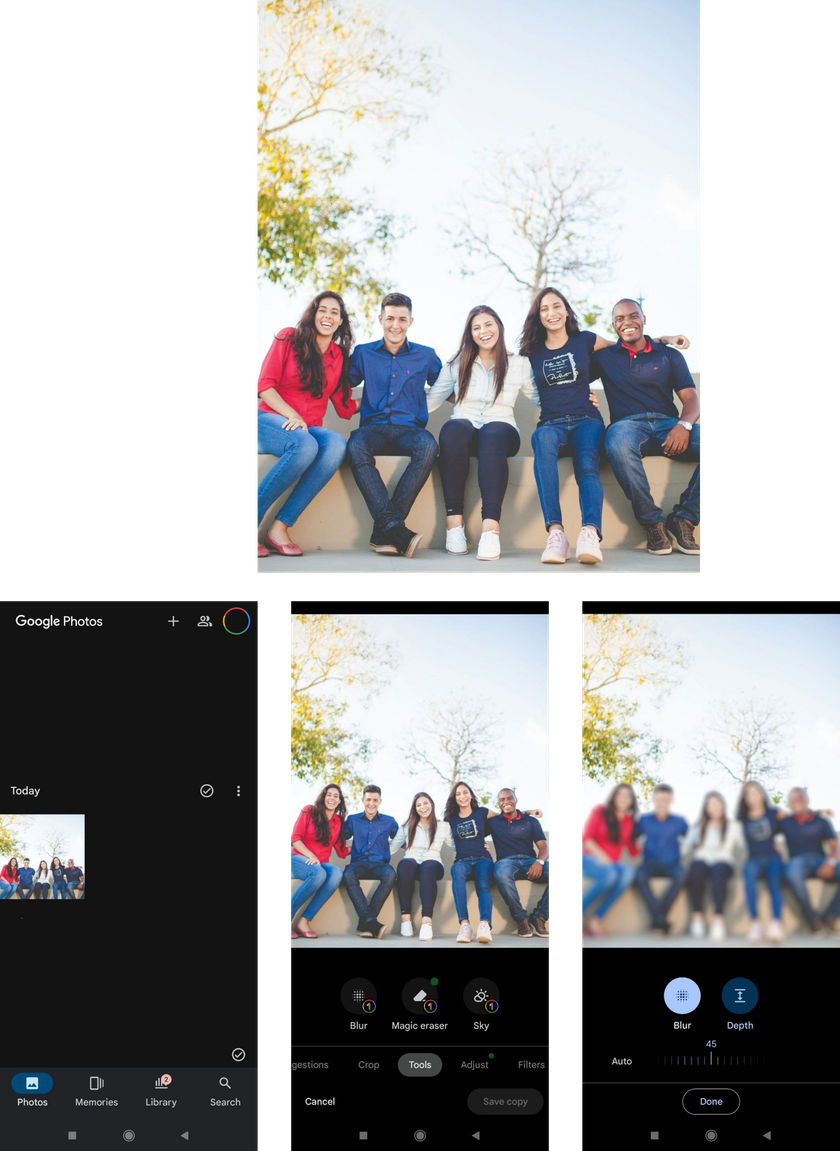
Using Google Photos
Open Google Photos (download from the Play Store if not installed).
Select the photo you want to edit and tap "Edit" at the bottom.
Swipe to the "Tools" section and select "Blur."
The app initially applies it to the whole photo. Move the white circle to the area you want to keep in focus.
Adjust the intensity and depth using sliders to achieve the desired effect, making it look natural or more dramatic.
Save your edited photo by tapping the save icon.
By following these steps, you can quickly learn how to blur people's faces in photos using your smartphone, ensuring privacy without needing complex software. Whether you're hiding background faces in a crowded scene or focusing on privacy, these tools make it easy and effective!
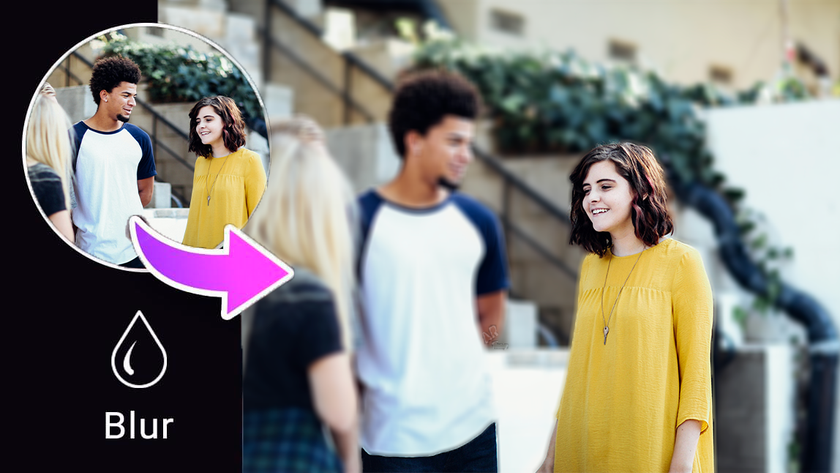
Blur Faces Quickly While Keeping Your Photos Natural
Try Face Blur ToolUsing Computer Software to Blur Faces
Luminar Neo
Luminar Neo offers a straightforward way to blur parts of your photos while keeping the important details crisp. Here’s a simple guide to using its tools!
Step 1: Open Your Photo
Click on the "Add Photos" button or drag and drop your photo into the workspace.
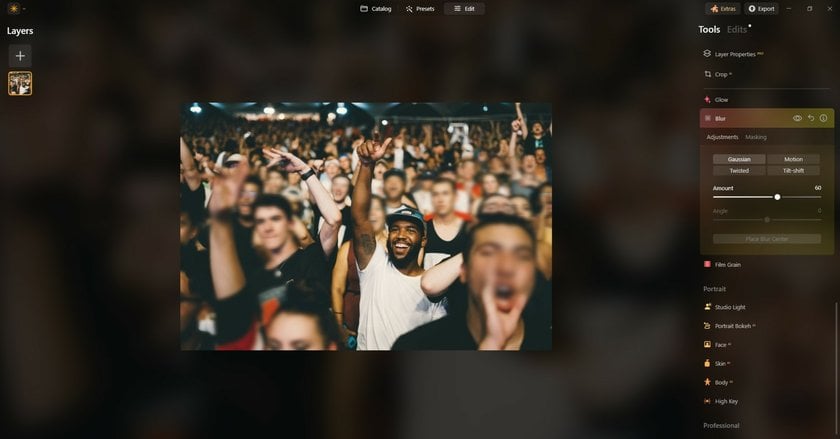
Step 2: Find the Creative Block
Here is the Blur Tool; click on it! The Blur tool lets you control how sharp or blurry your photo details are. To blur, just slide the controls to the left until you're happy with how it looks.
Step 3: Select Your Blur Effect
Choose from various blur types, including classic Gaussian blur, dynamic Motion blur, artistic Twisted blur, and miniature-creating Tilt-shift blur.
Step 4: Use Selective Editing
Want to blur the background of a photo or some specific areas? Use Luminar Neo's masking tools to apply blur exactly where you need it. This keeps your main subject sharp and draws attention right where you want it.
Step 5: Add Some Flair with Filters
Enhance your photo further by adjusting the Warmth slider under the Soft Glow filter for a bit of vibrance, or tweak the Tone filter to perfect the highlights and shadows. Don't hesitate to apply some Presets for more creative looks!
Luminar Neo makes it easy to focus on what's important in your photos by blurring distractions. Whether you’re working on portraits or landscape shots, this tool helps you achieve beautiful, professional-looking results without a steep learning curve!
Photoshop
Photoshop is a powerful tool for editing photos, including blurring specific areas like faces or even just the eyes. Here’s how to blur eyes in a photo using Photoshop, which can be particularly useful for enhancing privacy or artistic effect.
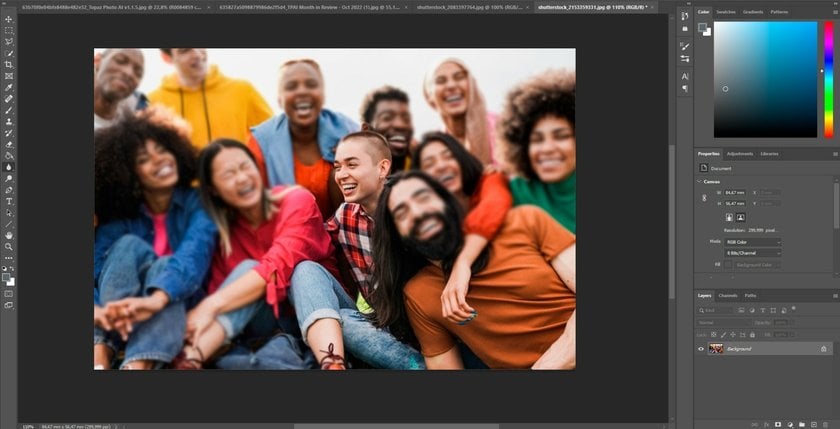
Step 1: Select the Area
Open your image in Photoshop.
Select the Lasso Tool from the toolbox on the left. For more precise selection, like around the eyes, you might prefer the Polygonal Lasso Tool which allows for point-to-point selection.
Carefully trace around the eyes or any other area you wish to obscure.
Step 2: Apply Blur Effect
Once you have your area selected, go to the top menu and click Filter, then hover over Blur and select Gaussian Blur.
A dialog box will appear, allowing you to adjust the radius. Slide the radius until you achieve the desired level. This controls how soft and dispersed the blur effect will be.
Preview the effect and adjust as necessary to ensure it looks natural and meets your needs.
Step 3: Finalize the Edit
Once satisfied with the result, click Apply to make the changes.
Save your edited image.
This method is straightforward and offers a high degree of control, making it ideal for both beginners and experienced users looking to manage how they blur parts of an image effectively. If you are interested in how to blur a whole image in Photoshop, read our detailed post on this technique!
Your AI-Powered Photo Editor for MacOS and Windows
DISCOVER NOW!Apps for Blurring Faces
YouCam Perfect
YouCam Perfect offers a straightforward way to obscure faces in your photos, ensuring privacy with just a few taps:
Navigate to the 'Blur' tool within the ‘Tools’ menu.
Use the 'Brush' to apply the blur. If you overdo it, simply use the eraser to fine-tune the areas you want to clear.
Once you're happy with the result, save your photo, and it’s ready to share.
Fotor

Fotor provides effective tools to blur faces or backgrounds in your images:
Access Fotor online, click on "Blur Face Now," and upload your photo.
Select the "Blur Background" tool from the Tools menu. If you only want to blur specific areas and not the background, use the "Retain/Erase" button to adjust the blur.
Edit until you're satisfied, and save the final image in your preferred format.
Both apps make it easy to adjust the level of blur, ensuring that you can maintain the focus on what's important in your photos while keeping personal details private. If you prefer not to download an app, you can also find numerous online websites that offer face blurring tools — just a quick Google search will show you plenty of options!
Wrapping Up
We’ve covered everything from quick smartphone tricks to sophisticated software solutions to help you blur faces in photos. This skill is crucial for protecting privacy and enhancing the artistic quality of your images. Whether you're using a smartphone, Photoshop, Luminar Neo, or apps like YouCam Perfect and Fotor, you now have the tools at your fingertips to edit photos with confidence.
Remember, this technique isn't just about hiding something; it's about focusing attention where you want it while safeguarding personal information. Thanks for joining us on this journey through the various ways to blur faces in photos. Start experimenting with these techniques, and see how they can improve both the impact and integrity of your photography!
 >
>
