April 14
19 min. to read
How to Blur a Picture
There are many reasons why you might want to learn how to blur in Photoshop. Whether you’re working with creative portraits, trying to add motion to your model, or emphasizing the subject to make it stand out from the background, a blur effect can help.
Photoshop is the go-to program to transform your photos. Want to know how to blur an image or a background in Photoshop? You’ll find out in this article. We will also tell you how to blur the edges of an image in Photoshop.
Another program that can help you is Luminar Neo by Skylum. Luminar Neo has some excellent tools that help you easily achieve a needed effect in your images. By combining them with layers, you’ll have complete control over blurring various elements of your photos during the editing process, delivering results that amaze you. Try Luminar Neo now for free and see the effect for yourself.
Blur Photos Smoothly for Creative or Privacy Purposes
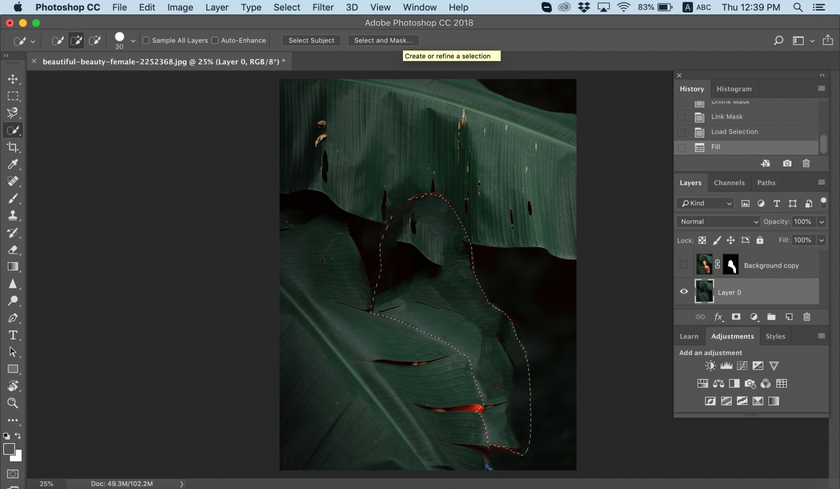
Blur Your ImageHow to blur an image in Photoshop
Photoshop is the leading software in the design industry. One reason why is its arsenal of tools that can help you create breathtaking effects. Adding blur to a whole image can enhance the mood of a romantic landscape, bring a sense of motion, or create a pretty bokeh effect. So, let's move on to how to blur something in Photoshop.
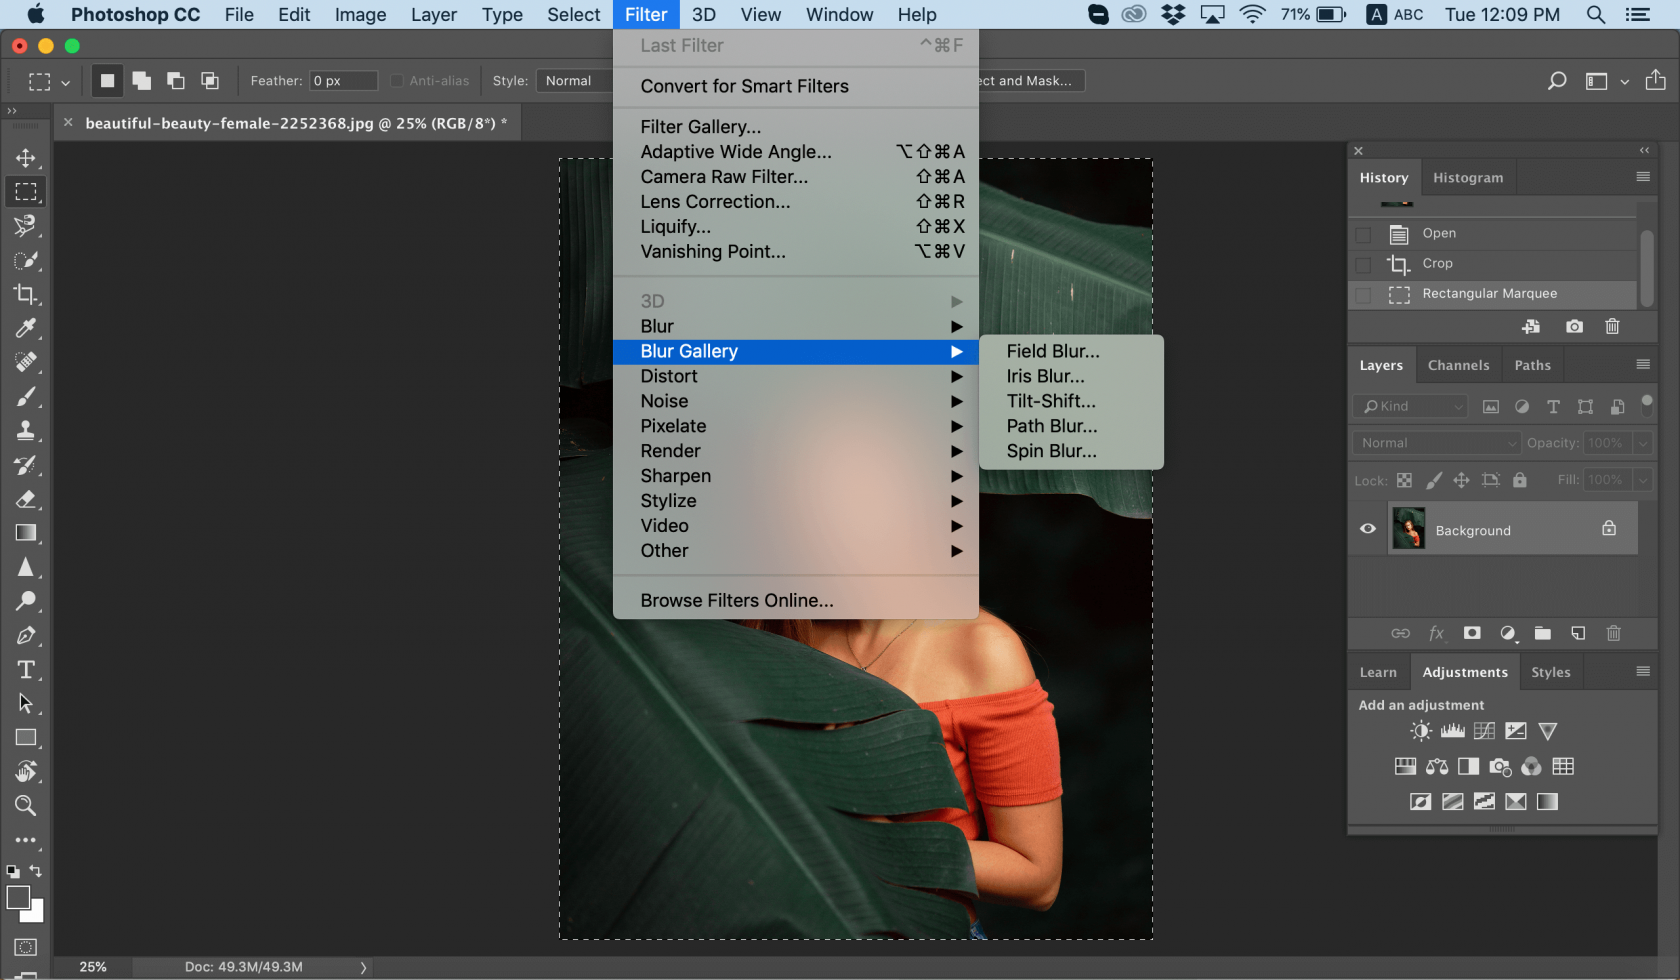
When you click on the Filter tab in the top panel in Photoshop, among the many options you’ll see Blur and Blur Gallery. Selecting either will reveal many types of blur effects. Each blur tool provides intuitive on-image controls to adjust the blur effect. Photoshop provides a full-size live preview when working with blur effects. You can easily experiment with each blur tool Photoshop provides.
Here’s the easiest way to blur your whole image in Photoshop:
1. Open your image.
2. Select the Rectangular Marquee tool, which is located near the top of the toolbar.
3. Drag it to cover all of your photo. A marching line will appear around your photo.
4. Go to the top of your screen and select Filter > Filter > Blur Gallery and choose the blur mode you like.
5. If you’re satisfied, save the blurred picture.
Don’t like the result? It’s easy to undo it using Photoshop’s undo button. Simply click Edit > Undo in the top panel. You can also learn how to make a blurry picture clear.
Types of blur effects in Photoshop
By navigating to Filter > Blur or Filter > Blur Gallery, you’ll see a lot of blur effects. How can you choose the right Photoshop blur tool for your job? Let’s overview the types of blur effects in Photoshop.
Average
This blur effect takes the average color inside a selected area and blurs it. The main advantage of this is that it creates smooth transitions.
Blur and Blur More
If you’re just learning how to blur in Photoshop, use the standard Blur to take components from inside your selection and carefully blur them. Blur More gives an even bigger effect.
Gaussian Blur
When you click on this Photoshop blur tool, a little pop-up box with a slider will appear. Use the slider to adjust the blurriness of the picture.

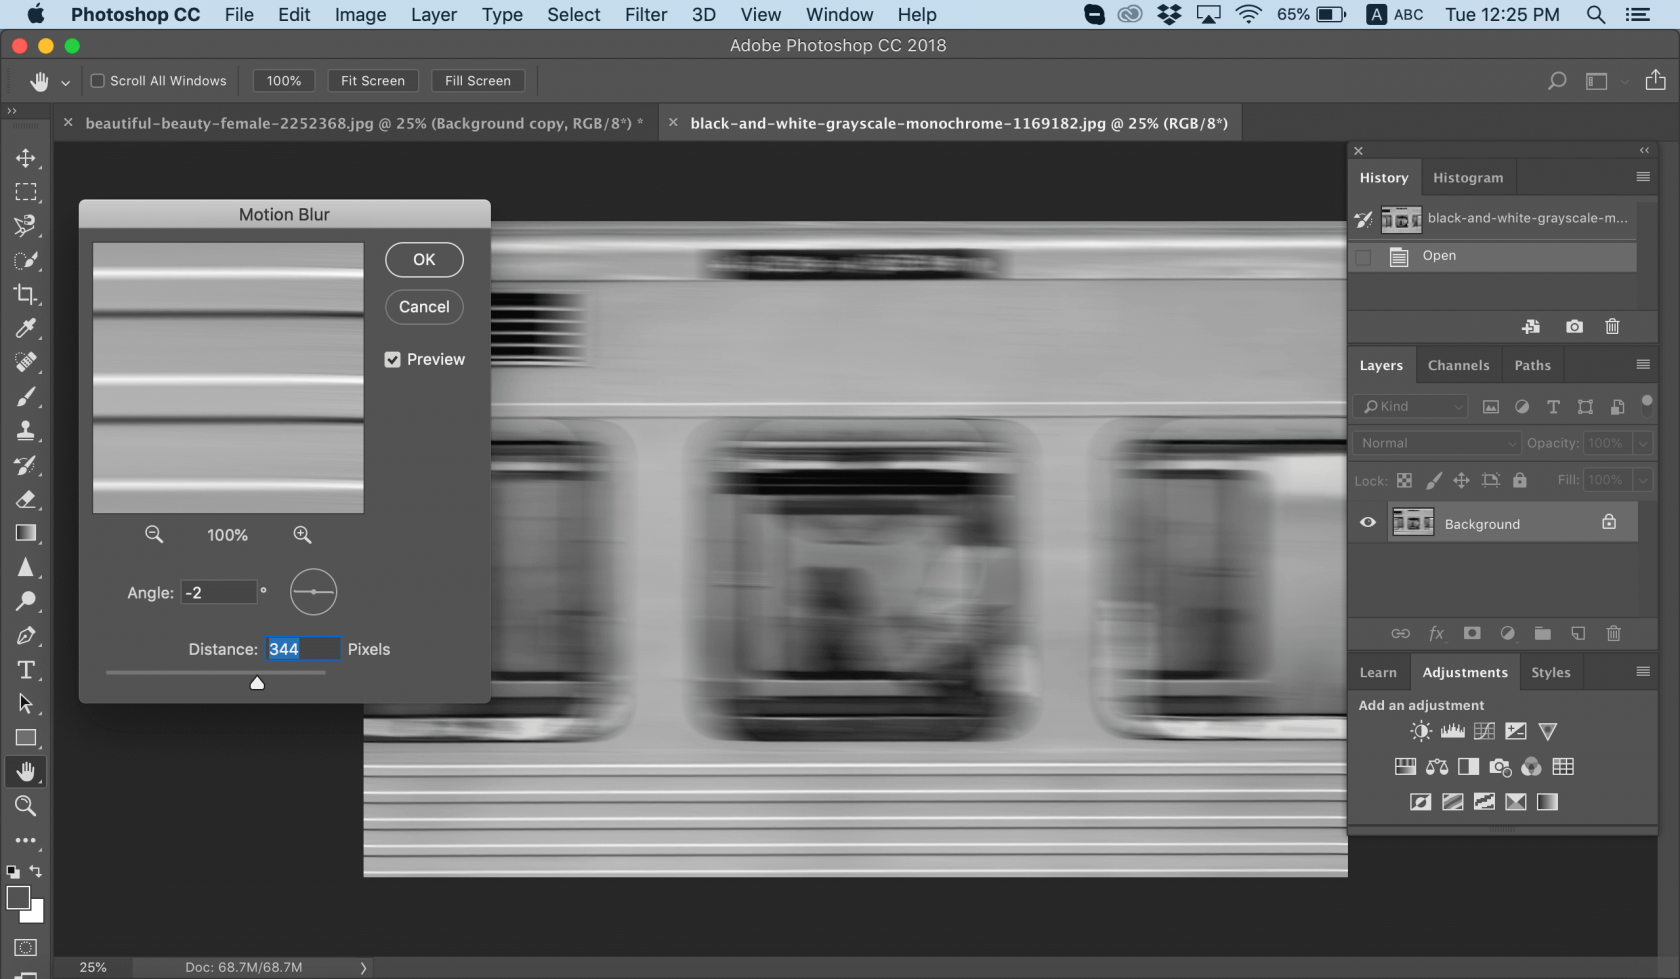
Motion Blur
Motion Blur can add a sense of movement to your photos. Whether your subject is an athlete running, a dancer, or a train in motion, this will allow you to adjust the direction and intensity of the background. Use this Photoshop blur tool for your images of cars, dancers, and racing horses.
Smart Blur
Using the Smart Blur tool, you can change the radius of the blur, blurring pixels a certain distance away from your main subject, to create a smooth effect. This is how to blur a background in Photoshop more smoothly.

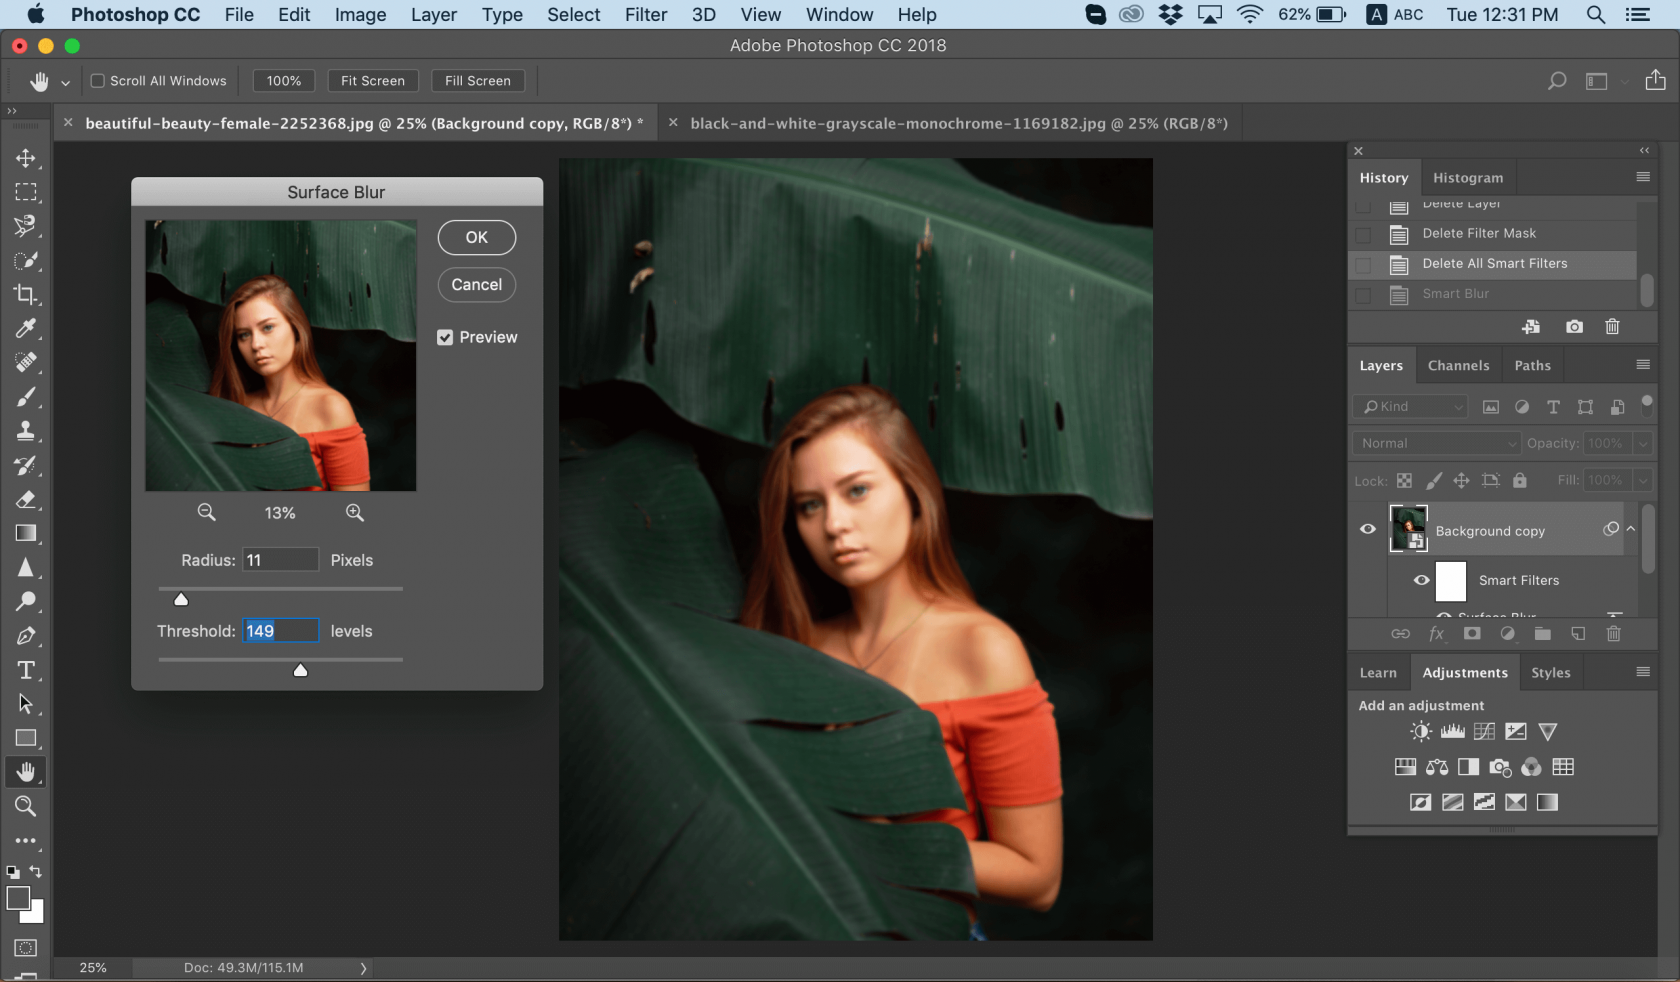
Surface Blur
Surface Blur adds image blur to the center but keeps the edges sharp. You can play with the radius of this Photoshop blur tool to get different effects.
Lens Blur
This Photoshop blur tool is perfect for when you want certain aspects of the background to stay in focus and others to be blurred. It lets you achieve the kind of depth of field you’re looking for when learning how to blur in Photoshop.
How to blur part of a picture
Now you know how to blur an entire image in Photoshop, but most of the time, you don’t want to apply image blur to the whole picture but rather keep an element of the image sharp and in focus. You can achieve this by blurring the background. You can easily learn how to do it with this guide.
Experiment with the different blur tools to see which one works to your advantage. For example, you can apply the Iris Blur effect if you want the resulting photo to be partly blurred with a distinctive focal point. Here’s how to blur only part of a picture in Photoshop:
1. Open a photo in Photoshop.
2. Navigate to Filter > Blur Gallery and select Iris Blur.
3. After opening Iris Blur, you’ll see a blur preview ring with a pin and several dots. The pin is the point where the image is sharp and clear; the further away you get, the blurrier the image becomes.
4. Click the center of the pin and drag it wherever you like.
5. Now you can adjust the area of your blur photo. Everything outside of the ring will have the maximum blur effect. You can drag the dots to modify the area: hover your mouse over a dot until the cursor changes to a curved double-ended arrow. Then you can rotate, drag, and adjust the shape to your liking.
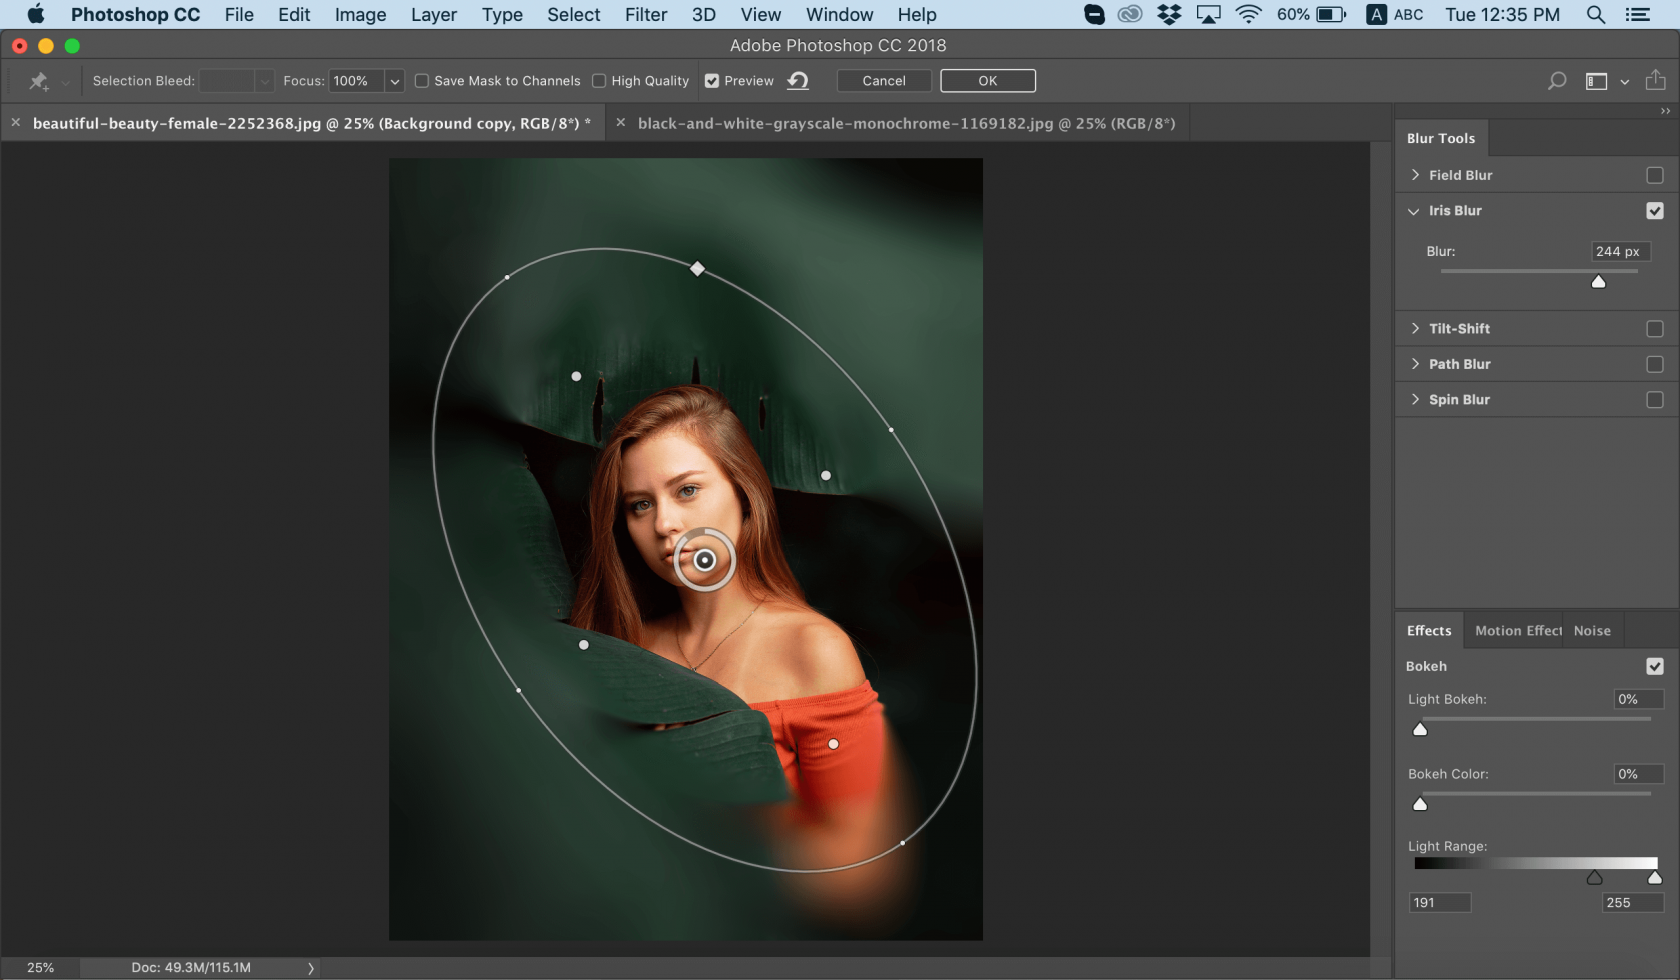
6. The four larger white dots near the ring define the blur transition area: between the dots and the outer ring, the blur effect increases. You can move them to make your picture blurrier or sharper.
7. Adjust the amount of blur using the slider in the tools panel on the right.
8. Don’t forget to click OK or press Enter at the top of the Blur Gallery window. Save your project or export your image.
Now you’ve learned how to blur part of a picture. Use this technique if you want to draw attention to a person’s face in the crowd or a flower in a field.
How to blur edges in Photoshop
How to blur the outline of an image in Photoshop? Sometimes, blurring just the edges is enough to achieve the effect you want. Your viewer will focus on the central part of the image, while the edges of the photo won’t be as sharp. Here’s how to do it:
1. Open your image in Photoshop.
2. Select the Elliptical Marquee Tool near the top of the toolbar. Use it to trace the shape of your choice.
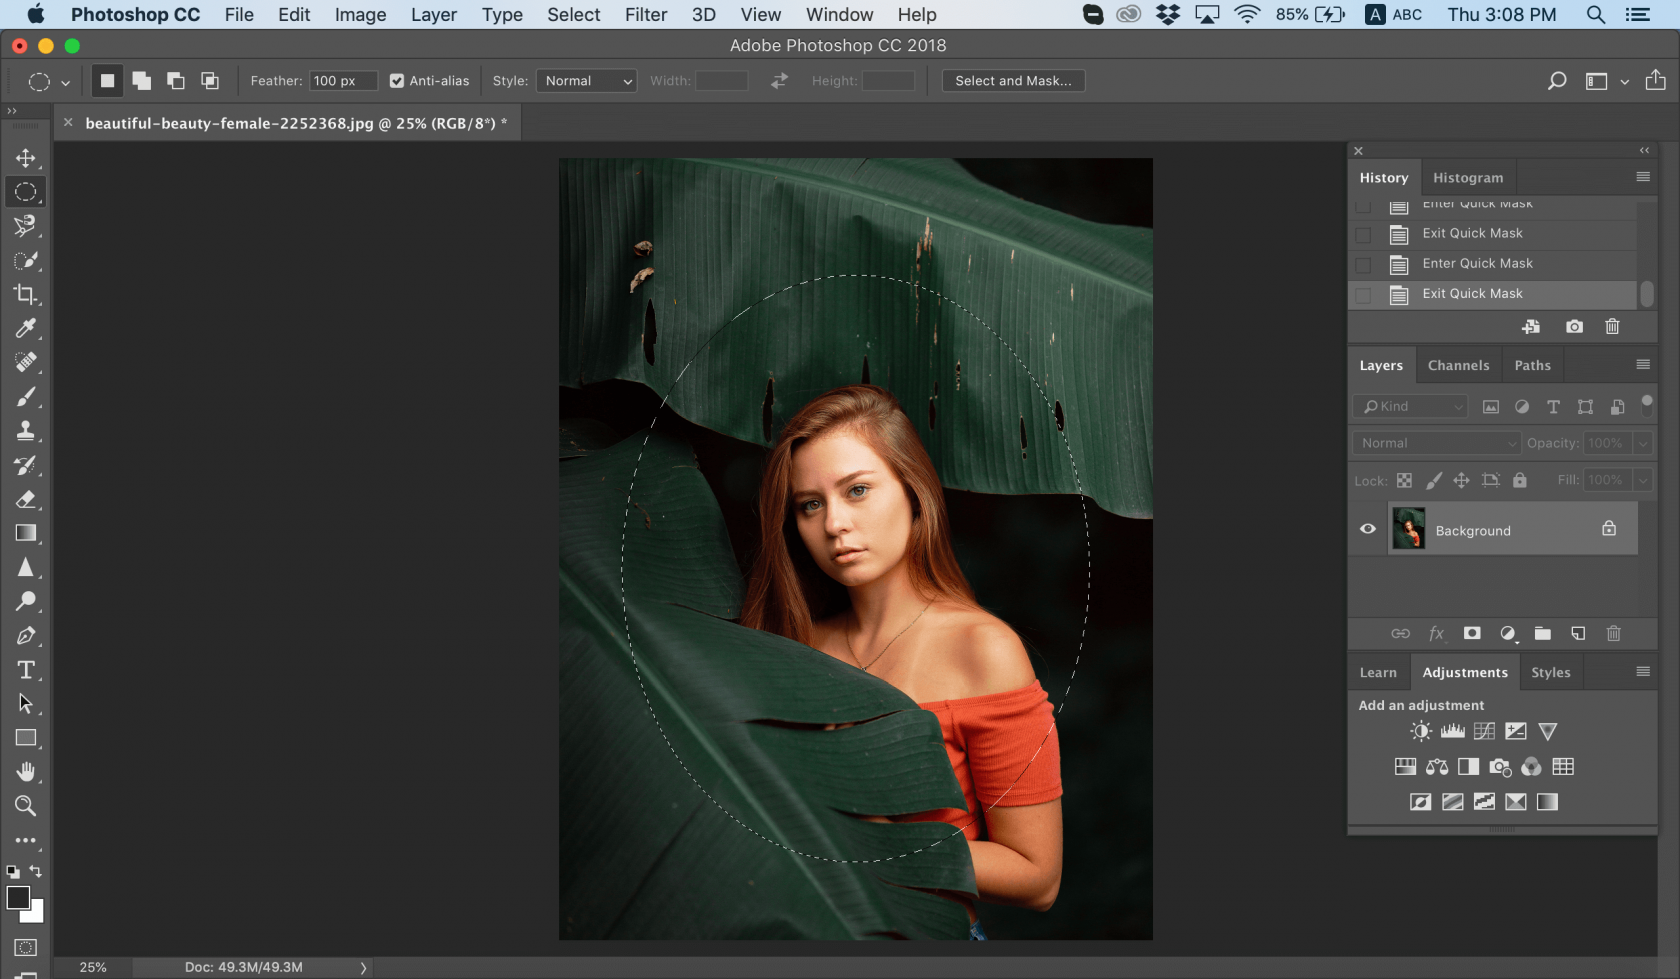
3. Go to Select > Modify > Feather and type in the value of your Feather Radius. Press the OK button to apply it.

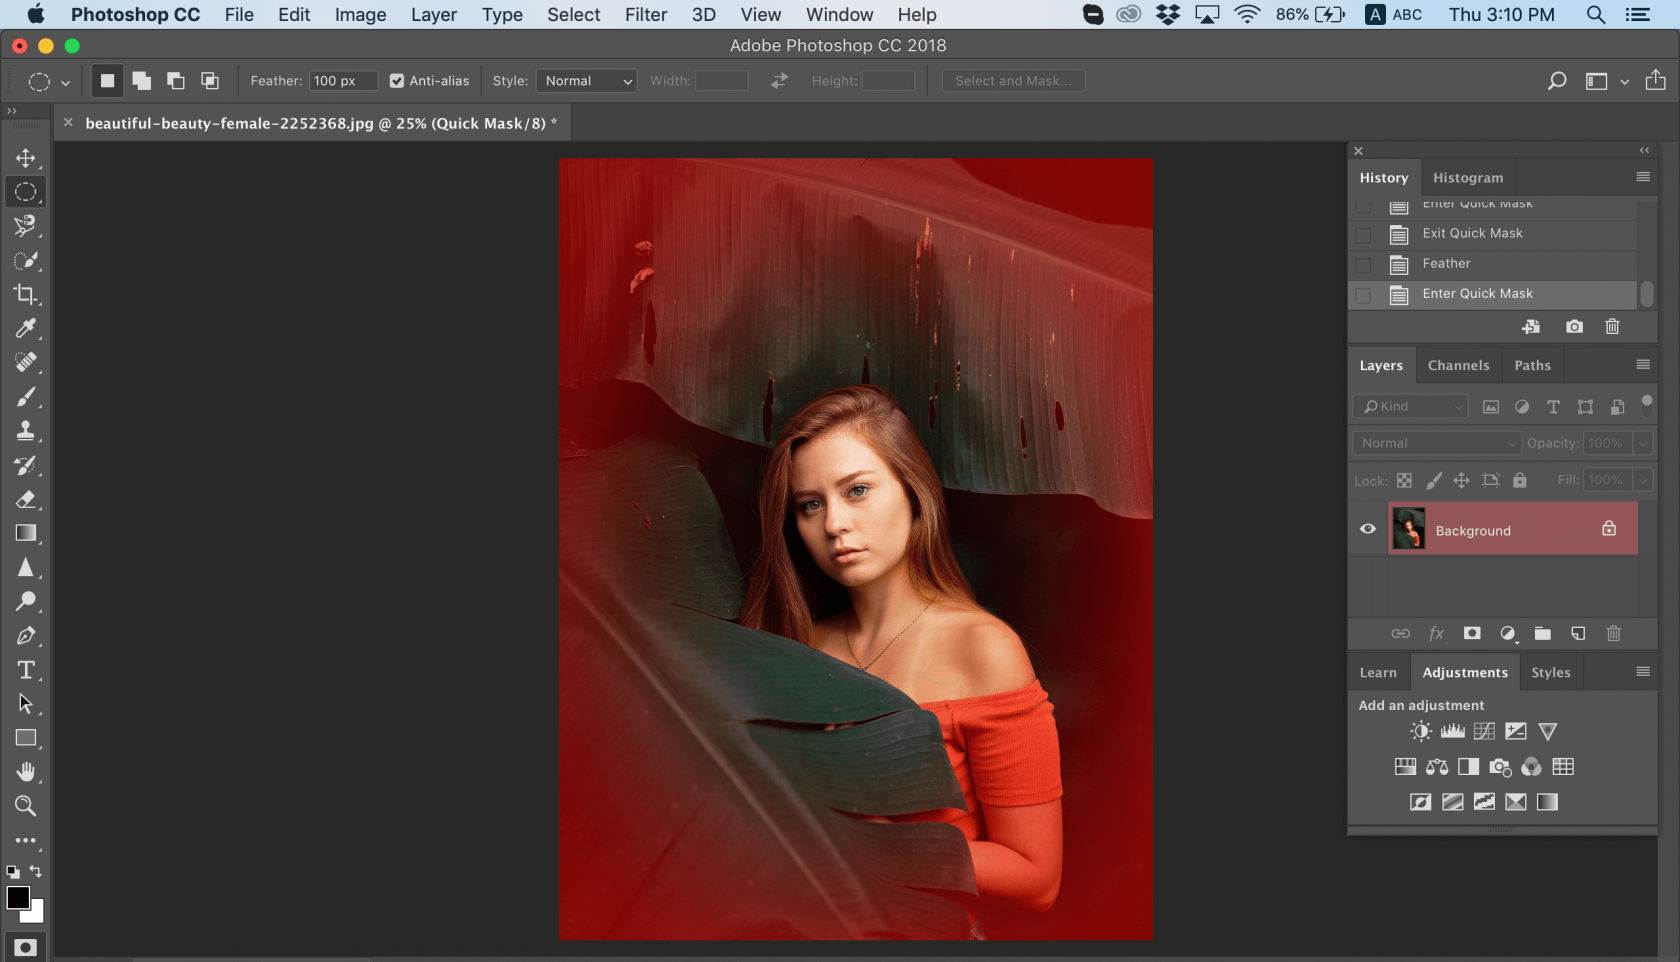
4. At this point, you can select the Quick Mask Mode on the left below the toolbar. Now you can see where the edges will be blurred.
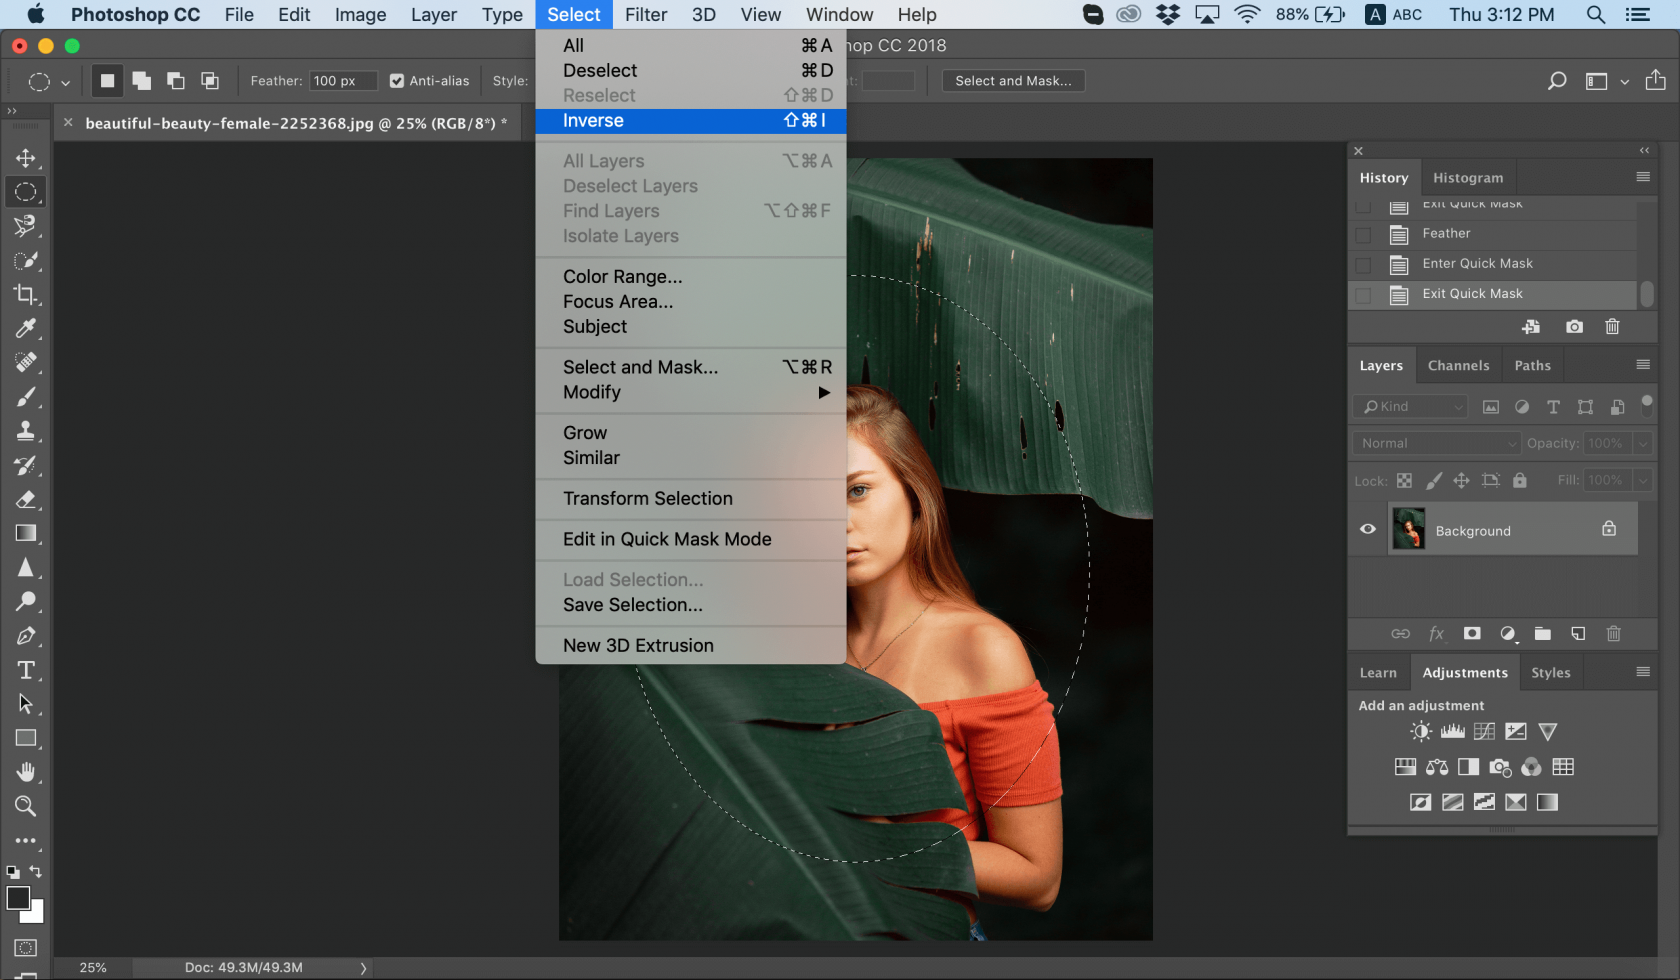
5. Next, click Select > Inverse, which will invert your selection.
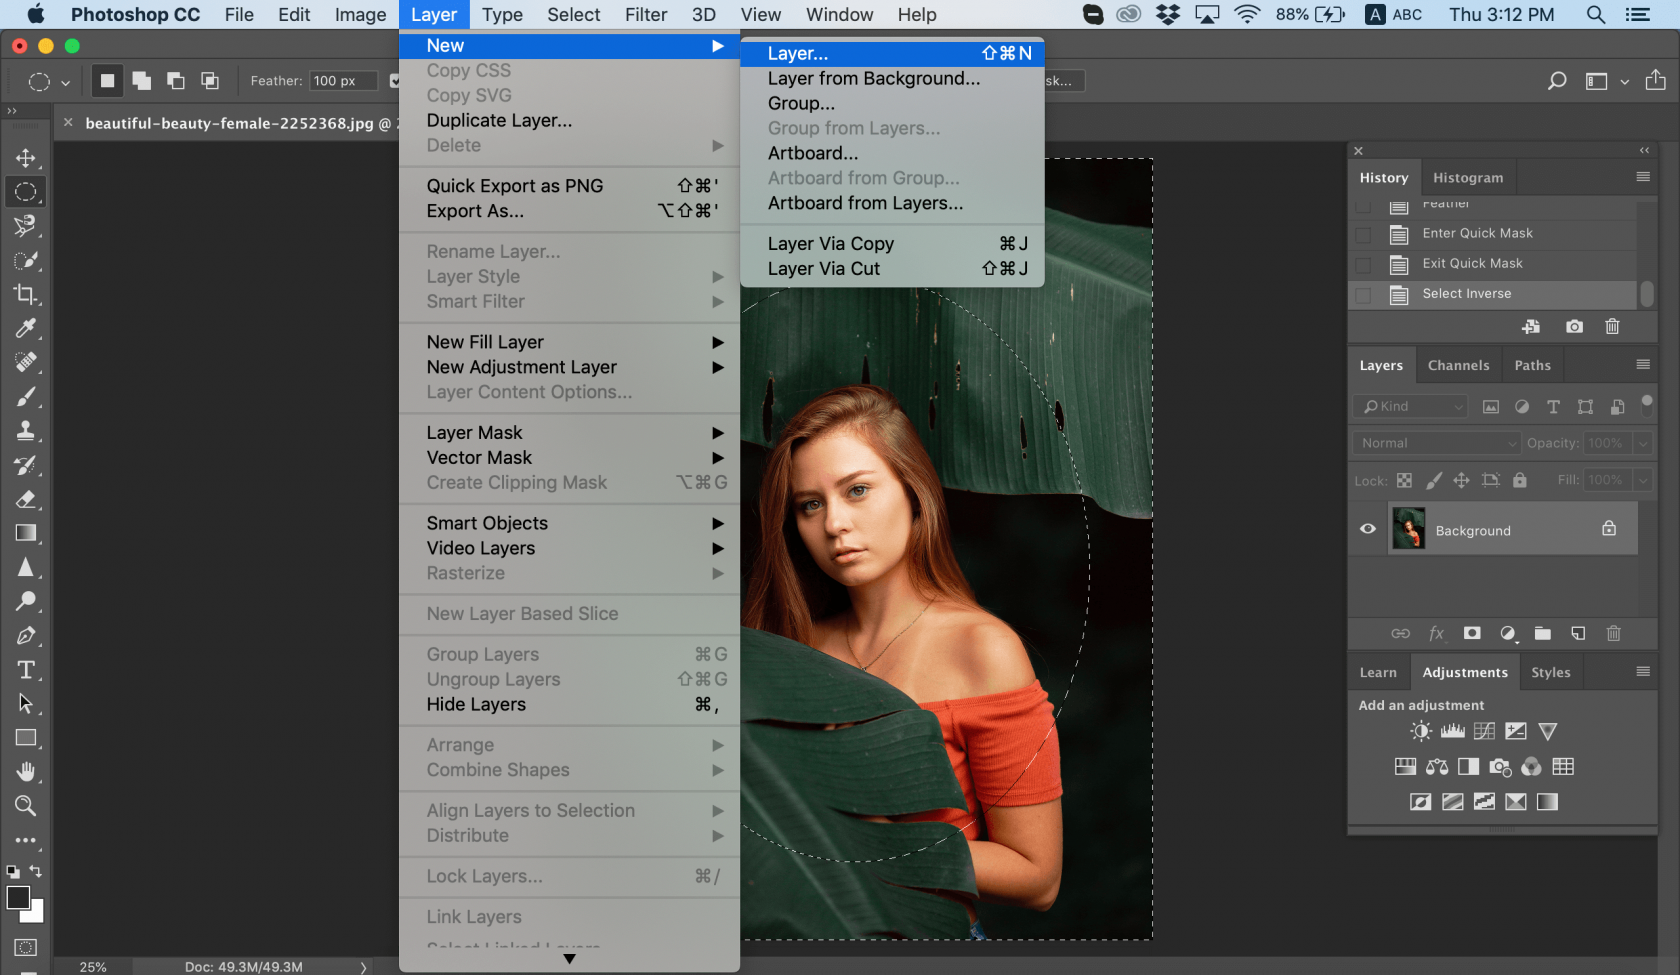
6. Go to the Layer menu and click New > Layer to add a new layer.
7. Fill this layer with color using the paint bucket tool. To remove the selection, Press Cmnd + D or Ctrl + D.
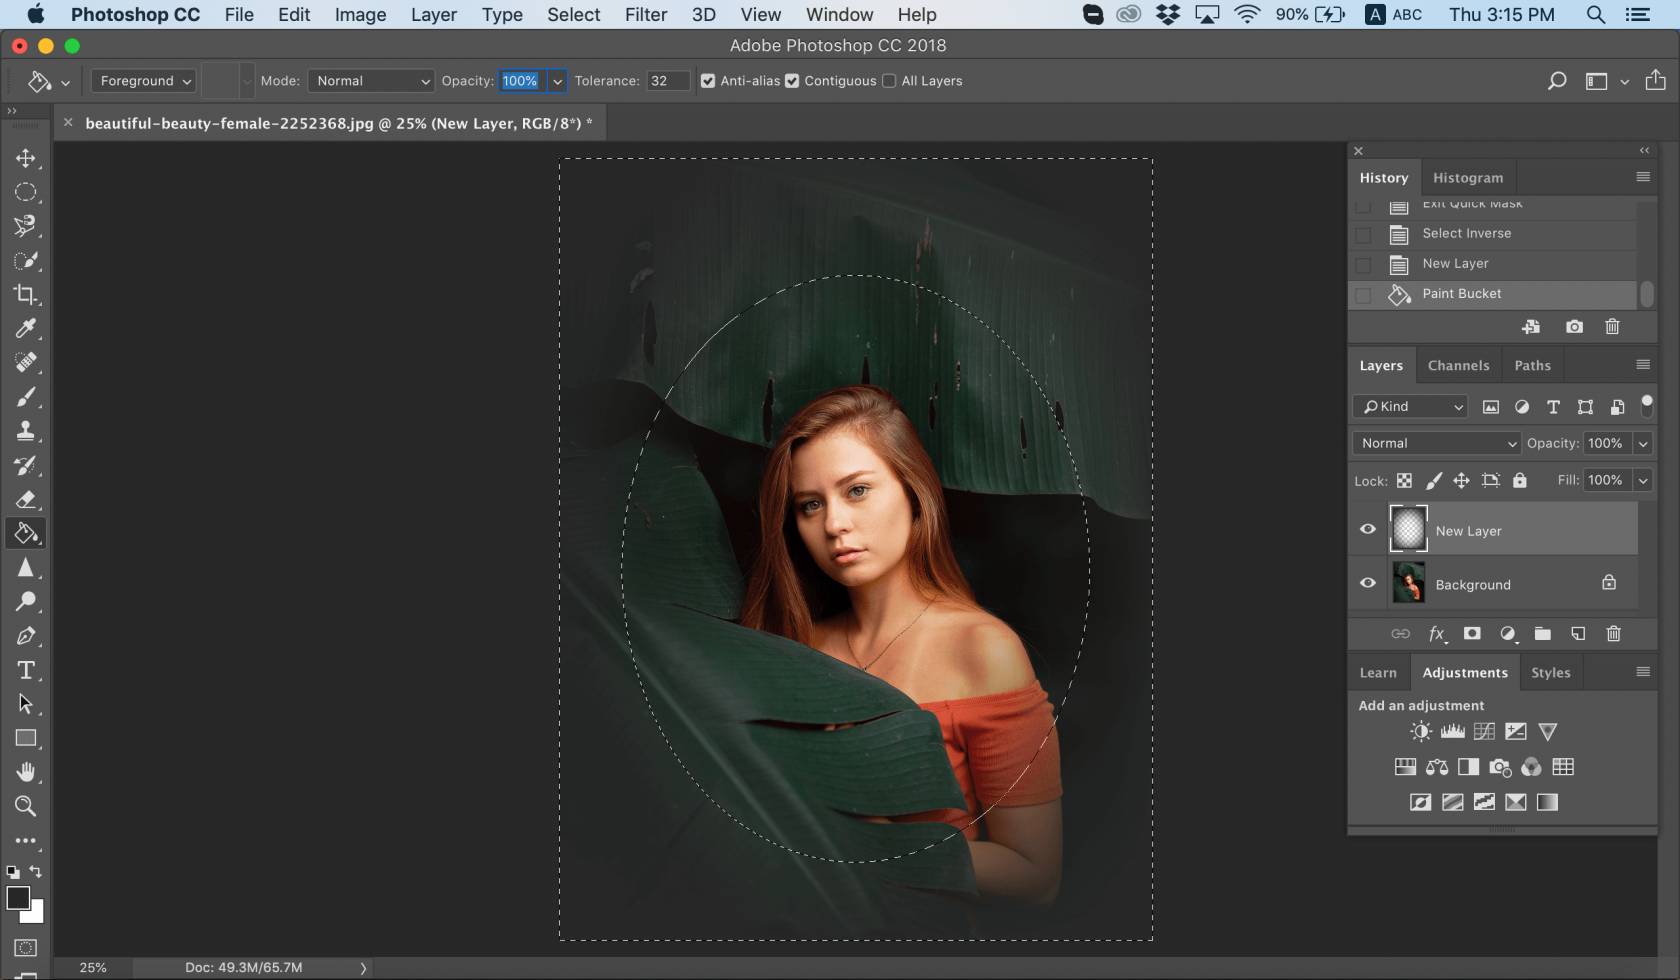
8. Save the result if you’re satisfied with it.
This is only one way how to blur images in Photoshop CS6. If you think your edges aren’t smooth enough, here’s a quick guide on how to smooth edges in Photoshop.
How to blur a background in Photoshop
Photoshop can help you do wonders in many different ways. Here’s how to blur a background in Photoshop.
1. Choose your photo with a subject in the foreground.
2. Cut out our subject. To do this, find the Quick Select Tool and make a rough selection around our subject. You can use the Alt or the Option key to make the selection more detailed.

3. Choose Select > Mask. By using the brush tool you can select some of the finer details, like hair or edges of clothes.
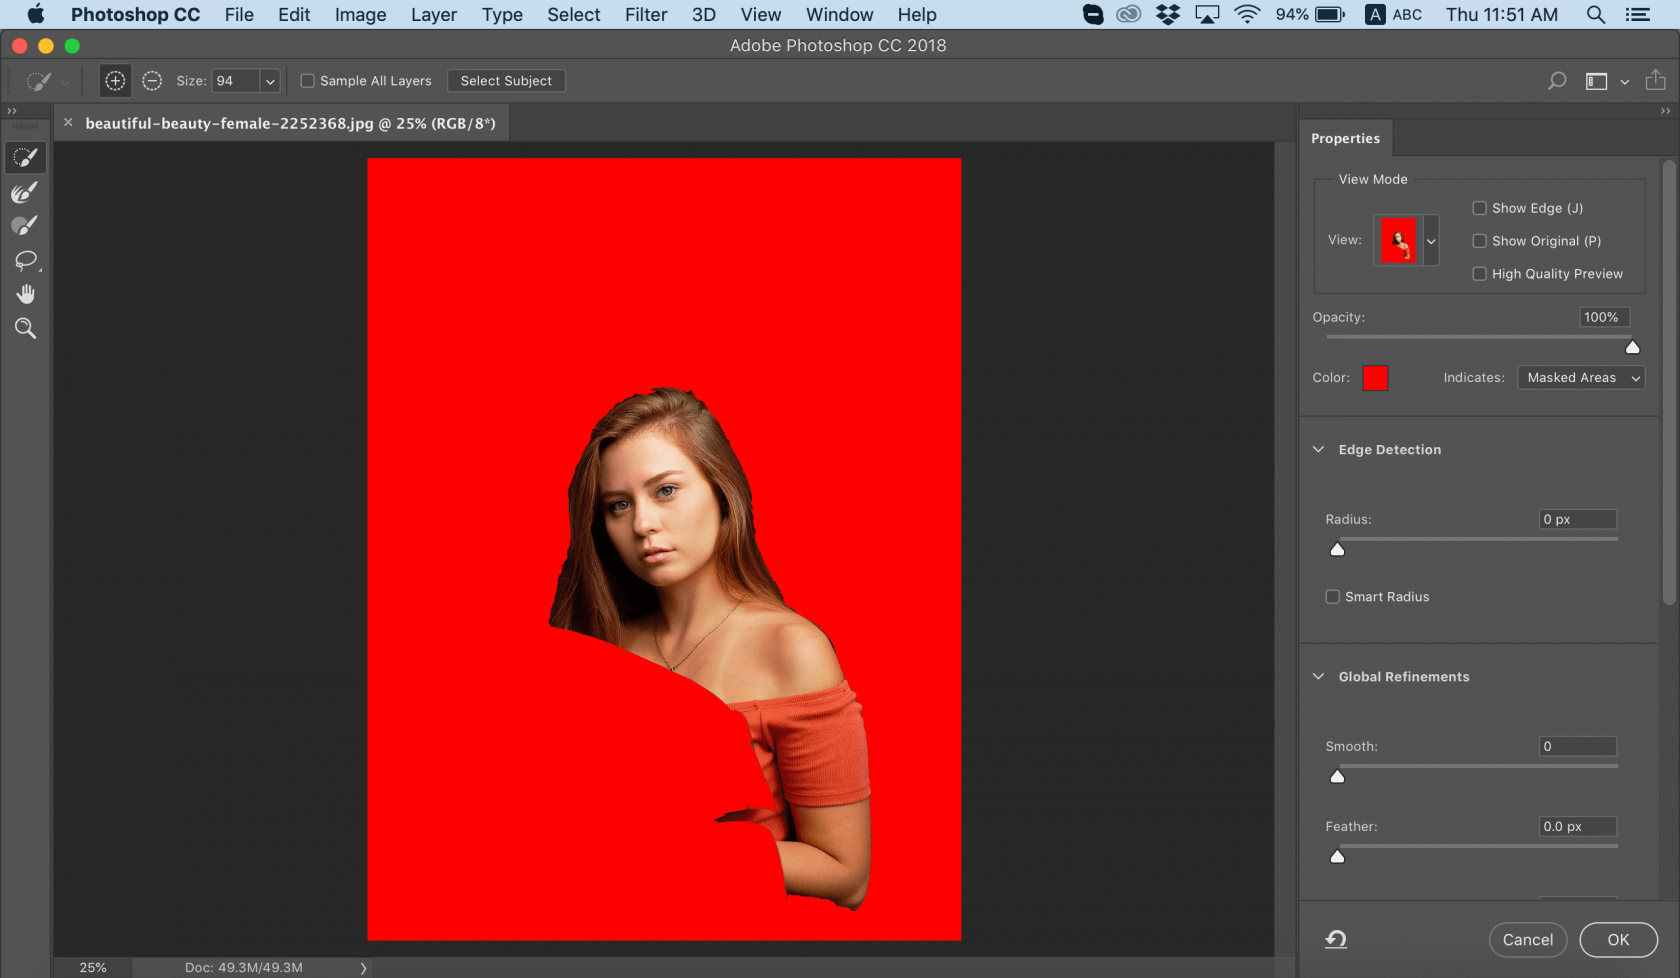
4. Click on Show Edge tool, increase the radius. You should start to see the edge of the photo. By turning off Show Edge, you can see that the selection has improved.

5. Choose New Layer with Layer Mask option and click OK.
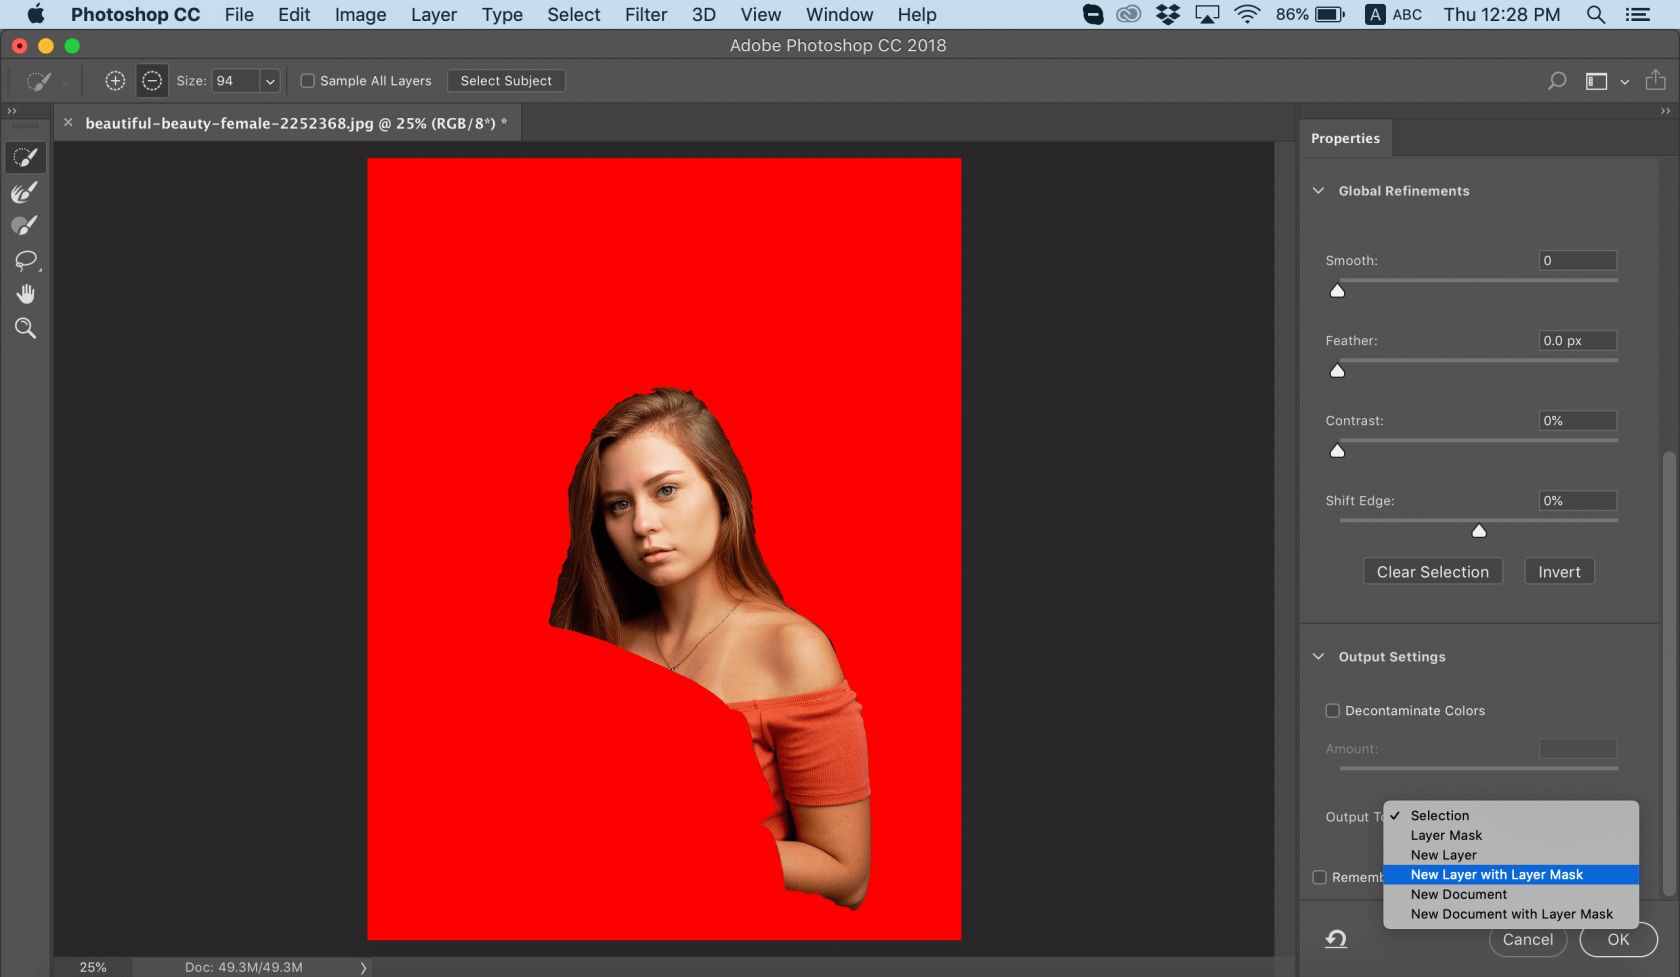
6. Hide the layer with the subject by clicking the little eye icon, and choose the background layer.
7. You’re working on the background now, but click Ctrl/Cmd-Click on the hidden layer mask to load its selection.
8. Click the Shift + Delete / Shift + Backspace and choose Content-Aware. Click OK. Hit Ctrl+D or Cmnd + D to deselect.
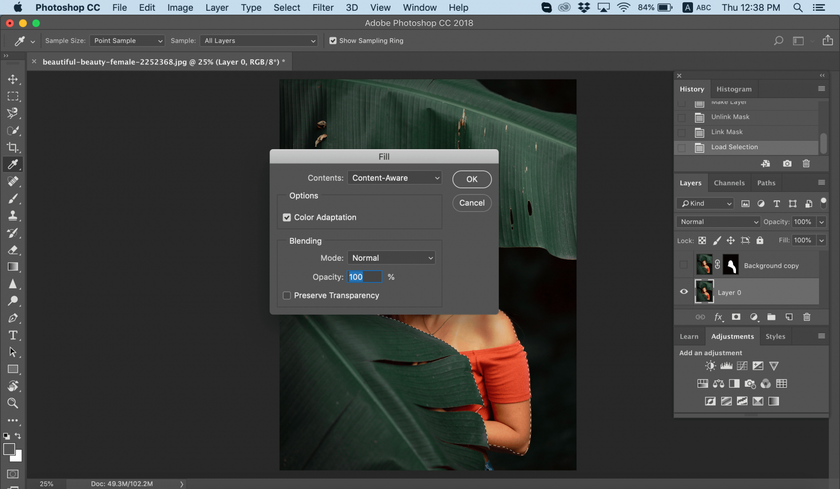
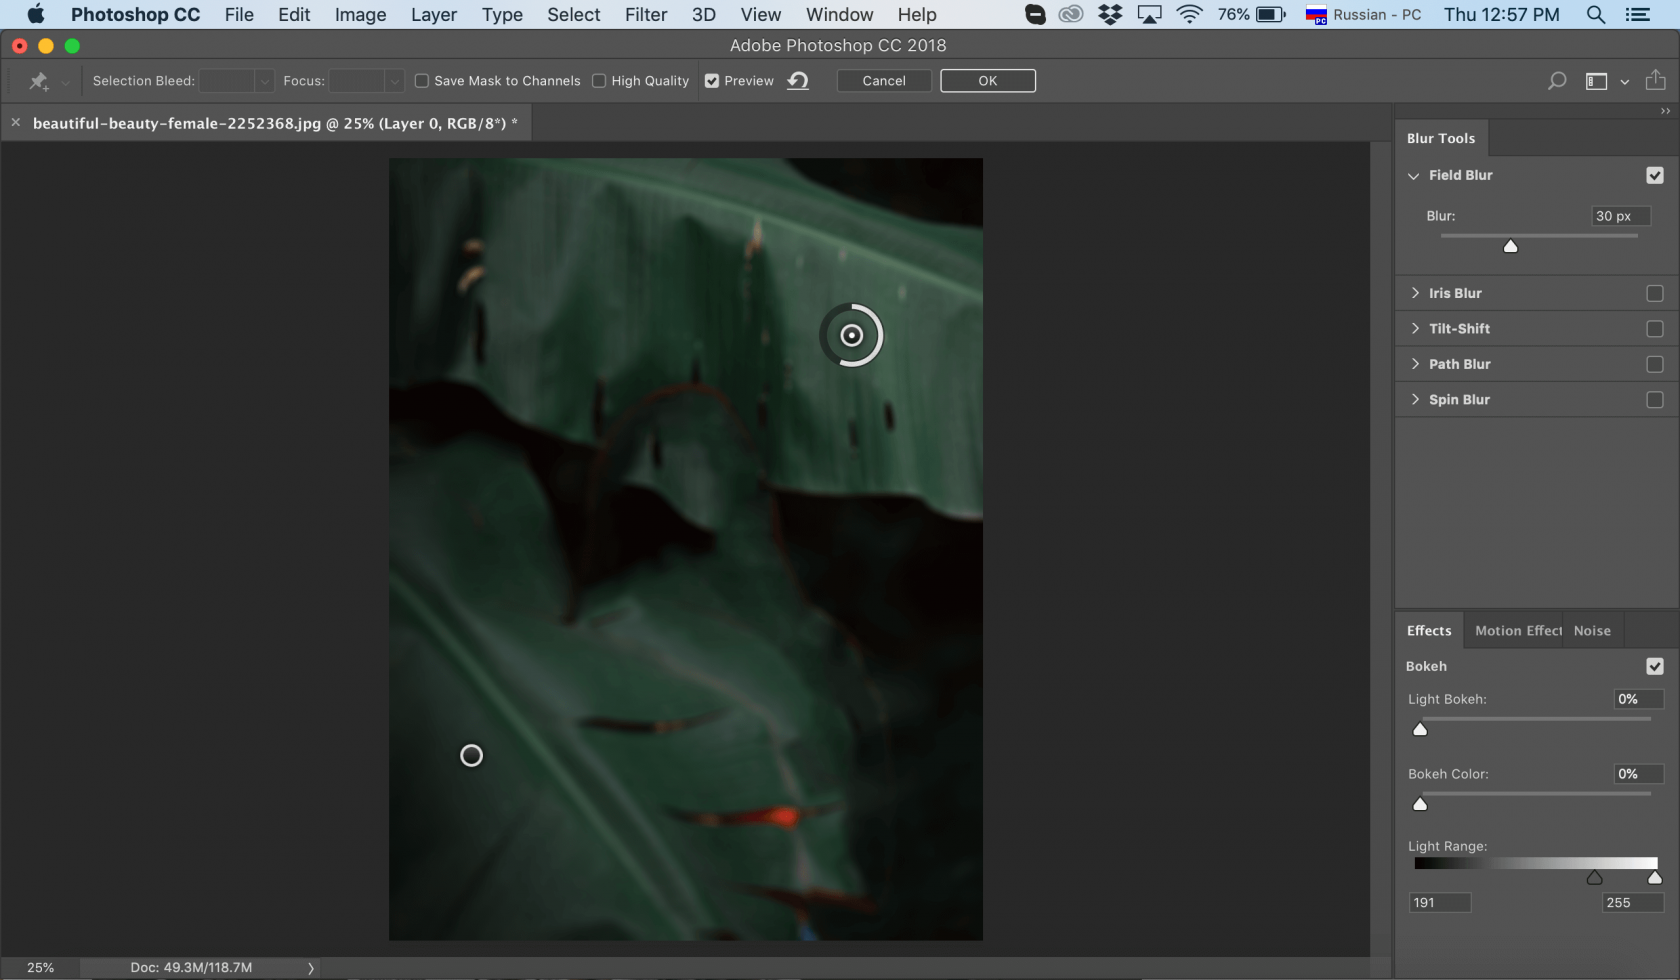
9. Make the subject layer visible again, but make sure the background layer is still the selected layer. Then go to Filter > Filter Gallery > Field Blur. Field is for depth of field.
10. A pin will appear. Point two pins on the photo to blur it evenly. Experiment with what you like. When you find that perfect blur just click OK to apply.
11. Shift+click the layer mask to see the before/after of the effect you have just created.

You can also learn how to remove a background completely. As you can see, there are many details that you have to keep in mind when working with Photoshop, and there are a lot of blur options in Photoshop.
How to blur in Luminar Neo
Although you now know how to add motion blur to an image in Photoshop, don't forget that this application can be hard to master. Even when learning how to blur an image in Photoshop, you can see that there are many different ways. If you’re looking for alternative software that can do the job quickly, Luminar Neo is a good choice. In Luminar Neo, you can achieve stunning effects and blur photos, edges, parts of a picture, backgrounds, and more. Let’s see how to blur a photo in Luminar Neo.
1. Open your photo in Luminar Neo.
2. Find the Details tool. You can use it to sharpen details as well as blur them.
3. You will see three panels: Small, Medium, and Large Details. Pull the slider to the left to make the value negative.
4. Move the slider to the left until you are happy with the result. Voila! It's very easy for experienced photographers and beginners alike.
If you only want to blur part of a picture, just use the different mask tools that Luminar Neo provides and apply the blur effect however you want to.
Adding a little warmth via the Warmth slider in the Soft Glow filter can breathe life into your subject. Other filters such as Tone can be helpful for tweaking highlights and shadows. Add stunning Presets to make your photos more creative and complete the picture.
As you can see, Luminar Neo lets you transform your photos in many ways. With its intuitive tools, you’ll learn how to blur a picture quickly and easily. If you’re not sure about buying Luminar Neo yet, you can give it a try for free by clicking the button below. We hope you enjoy the creative freedom of blurring your photos thanks to this article on how to blur in Photoshop and Luminar Neo!
FAQ
Which is the blur tool in Photoshop?
Iris Blur is a tool that helps you make certain areas of your photo blurry.
What is the shortcut key for Blur in Photoshop?
Simply press the "`" Grave key to turn the brushes on or off.
How to make a photo blurry?
Sometimes you may want to add blur to your photo for a creative or dreamy effect. Here are a few ways to do it:
Adjust Focus Before Taking a Photo: On your camera, manually adjust the focus by tapping on the background or a different area of the screen. This will create a soft, out-of-focus look.
Use Vaseline on a Lens Filter: For an old-school trick, apply a thin layer of Vaseline or plastic wrap to a cheap lens filter. This softens the entire photo and gives it a dream-like, vintage vibe.
Use the Blur Tool in Luminar Neo: Luminar Neo’s Bokeh AI makes it easy to add background blur for a soft, out-of-focus effect with adjustable strength. You can also simulate a Motion Blur effect to blur the entire image for dynamic results.
Why do people take blurry photos?
It's very trendy these days. If some of the details in the picture are blurred, you can tell at once that the person is in a hurry to live. After all, he's in a hurry to take a picture and share it!
If we are talking about blurring the background, then the reason is the desire to focus the viewer's attention on the object. This is most often done to get great portraits.
