Discovering the Secrets of Butterfly Light
April 12, 2023
Greetings, dear readers! If you're reading this, chances are you've only just begun to learn the secrets of studio lighting.
I am almost 100% sure of this, as Butterfly lighting is one of the first patterns to be mastered by aspiring photographers. There are several reasons for this:
- it is pretty cheap, which makes such light affordable for almost everyone;
- this is one of the most straightforward schemes, yet it works great and allows you to take incredible pictures;
- this type of lighting is suitable for almost all the ideas you can implement in the studio (although, most often, it is about portraits).
So, get comfortable! Today, I will tell you about the features of such lighting, under what circumstances it is better to use it, how to set the light correctly and what is needed, and also show several butterfly lighting examples.
What is butterfly lighting, and why master it?
Butterfly lighting definition in photography is a technique that is most often used in studio portraiture. Its main features are cheapness, versatility for almost all types of faces, and the fact that it is easy to set.
This type of lighting got its name due to the characteristic shadow under the nose, which looks like a butterfly. Such an attractive shape of the shadow appears because the light falls on a person from above. Depending on whether the photographer uses a reflector when shooting, these shadows can be more or less defined. However, the butterfly's shadow is not the only sign by which it can be determined that the portrait was made in this particular light. Another sure sign of butterfly light in photography is the reflection of the key light in the pupils of the person being portrayed.
Perhaps the main advantage is that it flatters almost any type of face, visually lengthening it, hiding flaws with shadows, and emphasizing cheekbones, chin, and other expressive lines. It also works excellently with wrinkles, which is why people of respectable age are often portrayed this way.
You might think that the popularity of this scheme makes it a bit of a cliché to avoid. However, even TOP portrait photographers use such a seemingly trivial way of setting the light. For example, the legendary Annie Leibovitz has repeatedly photographed celebrities with butterfly portrait lighting. In general, many Hollywood legends were captured with this particular light, so sometimes, it is also called glamour or paramount lighting.
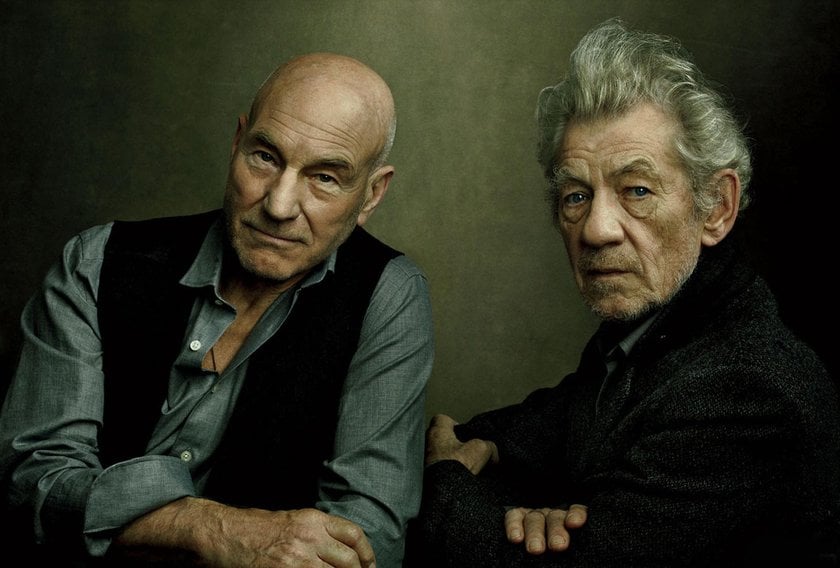
Sir Ian McKellen and Sir Patrick Stewart were captured by Annie Leibovitz
Stuff you'll need to butterfly setup
All you need for a butterfly lighting setup is the key light source, modifiers (optional), and some accessories.
Key light
The first one gives you a choice: it can be pulsed or continuous. That is, you can use different sources such as strobes, flashes, or even the sun.
I should note that most often for butterfly portrait photography, flashes are used, and not constant light. There are several reasons for this:
- flashes are much more powerful and make it easy to work with natural fill lighting without overexposure or loss of volume;
- for the same reason, they are used for photographing with a closed aperture (it is just cheaper than with constant light);
- The CRI of flashes is always one hundred percent; for LEDs, as of today, it is 85-90% (and these are very expensive models);
- it's very short, so it's easier for you to "freeze" motion without blurring, and you don't need the fastest shutter speeds like 1/4000;
- due to the difference in power, modifiers for continuous light are much more expensive: for example, a flash scatters photons in all directions, which allows you to use cheaper softboxes.
We’ll talk more about the intricacies of choosing a key light some other time, but for now, we move further down the shopping list.
Modifiers
Modifiers are a kit that allows you to achieve the effects you want. I'll give a few examples here, but my main recommendation is to rent equipment from the studio, so you know what kind of toys you need first. It all depends on your ideas, your particular style, and your vision, so do not rush to buy what someone advises you on the Internet. Try it first, okay?
Let's look at the most typical modifiers.
The Beauty Plate is a specialized lamp attachment that distributes the beams evenly, which creates excellent shooting conditions and allows you to show the face of the model in the best possible way. This device received such a specific name because of the shape resembling a plate, although, on the other hand, it looks like the inside of an umbrella. Usually, the Plate is faced with a white or silver coating. Silver will give you a harder and more directional light, while white makes it softer and more diffused. However, both make the beams softer and more artistic.
You can also use softboxes to diffuse the light. There are many varieties, such as strip boxes, octa boxes, parabolic softboxes, umbrellas, etc. All of them are designed to soften the flow, but they can distort the beams in different ways, making them more or less controllable or creating different types of light (fill, modeling, drawing, etc.). It`s also a good choice, but you must experiment with different kinds to clarify what is best for you.
The reflector (also "screen" or "light disk") is a mobile structure made of a frame and a reflective material stretched over it. There are different sizes and shapes. The reflector is usually used when shooting butterfly photography lighting to “illuminate” the shadowed details with the light reflected from the main source (sun, flash, etc.). Simply put, the reflector is a very effective tool for hiding unwanted shadows. It also can be a modeling (drawing) light source if the model is in the shade or the lighting is less of hard light-and-shadow transitions.
If you want a hard and contrasty image, leave your key light untouched.
Accessories
You may also need accessories to make working with the butterfly lighting in photography easier. These can be tripods or monopods, a stand or boom arm for flash, and a trigger to combine your camera and flash.
There is a lot to be said about this, but I said at the beginning that the advantages are cheapness, versatility, and simplicity. So I expect that what I have listed will be more than enough for you. And if you want to know more about this, I will write a more detailed article over time.
I will also say nothing about the camera itself or the lenses because this makes no sense. If you're talented enough, you can make a masterpiece with a coffee tin (yes, it exists, it's called a pinhole).
Paramount lighting setup: the guide for newbies
Briefly, there are four steps to set your equipment right:
- your model should be between the backdrop and the light source;
- the flash should be on top and illuminate the object at an angle;
- the reflector is most often placed just below the model's face (but you can experiment any way you'd like);
- the photographer is in front of the subject.
For clarity, take a look at this butterfly lighting diagram, and then we will discuss it in more detail:
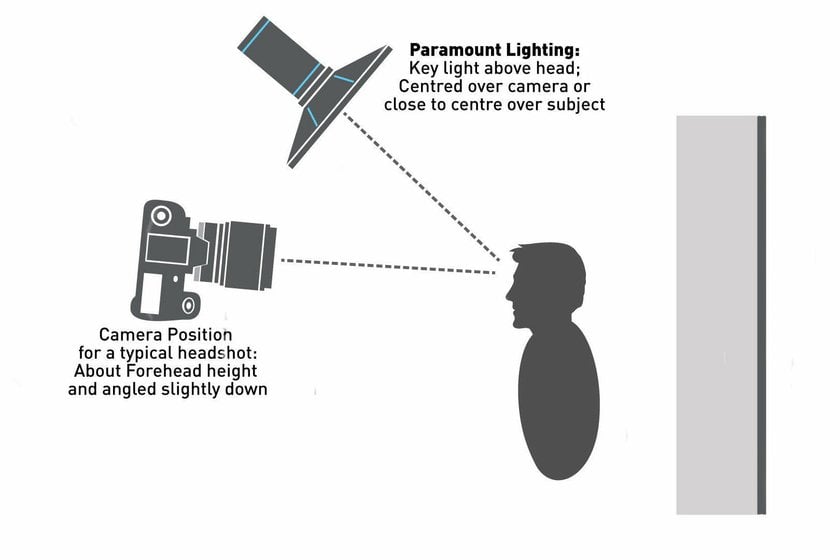
Butterfly light setup (diagram)
Just take a look! As you can see, it's very simple. There is not even a reflector on the diagram since it is not required. However, I recommend using this as it gives you many more options.
By the way, there is a nice bonus here. Having mastered the butterfly, you will also be able to work with loop lighting. It's almost the same, but you need to move the light source a little lower and closer to your subject. If you shoot a portrait, the shadow under the nose is in the shape of a loop. The figure above is almost the same as the loop lighting diagram.
You always set up the main lamp first. You can use any body kit you'd like to get the light you want.
Tip: use an external exposure meter because it measures more accurately. If you don't have one, take more test shots.
When the base is done, you'll need a reflector to subdue the shadows. The surest way is to start at the model's waist and lift it until you get the desired result.
It is not necessary to place the reflector at the bottom. Experiment with different positions to get what you want. You can also use reflectors of different colors. My favorite is golden. It gives an effect similar to the Perpetua filter on Instagram.
Don't forget that the model's face should be facing the light to get the butterfly's shadow under the nose.
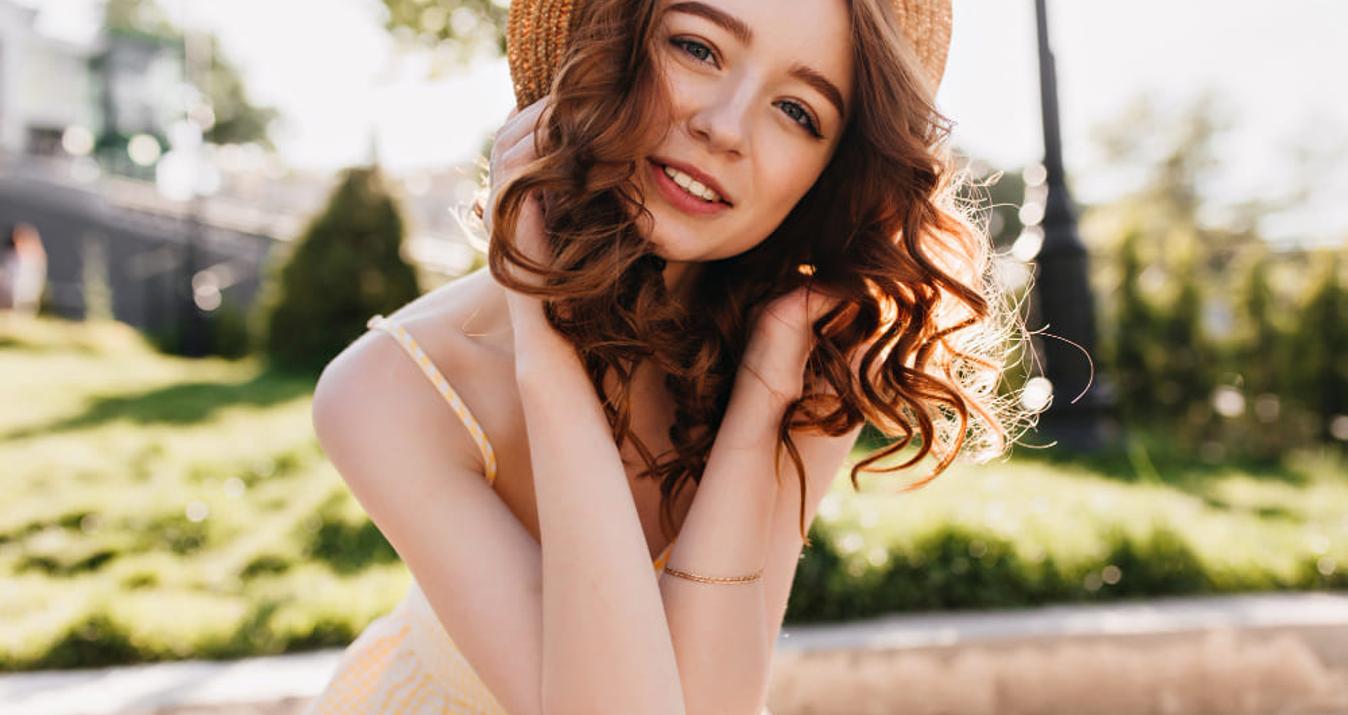
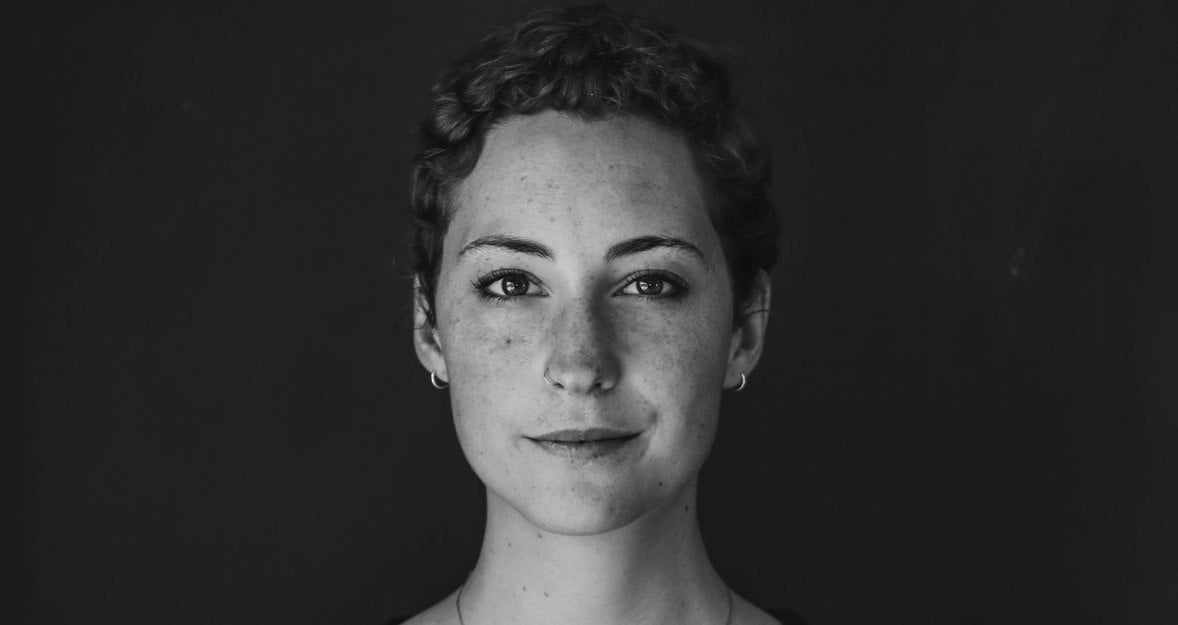
The best examples
Let's look at a few examples of butterfly-lighting portraits:
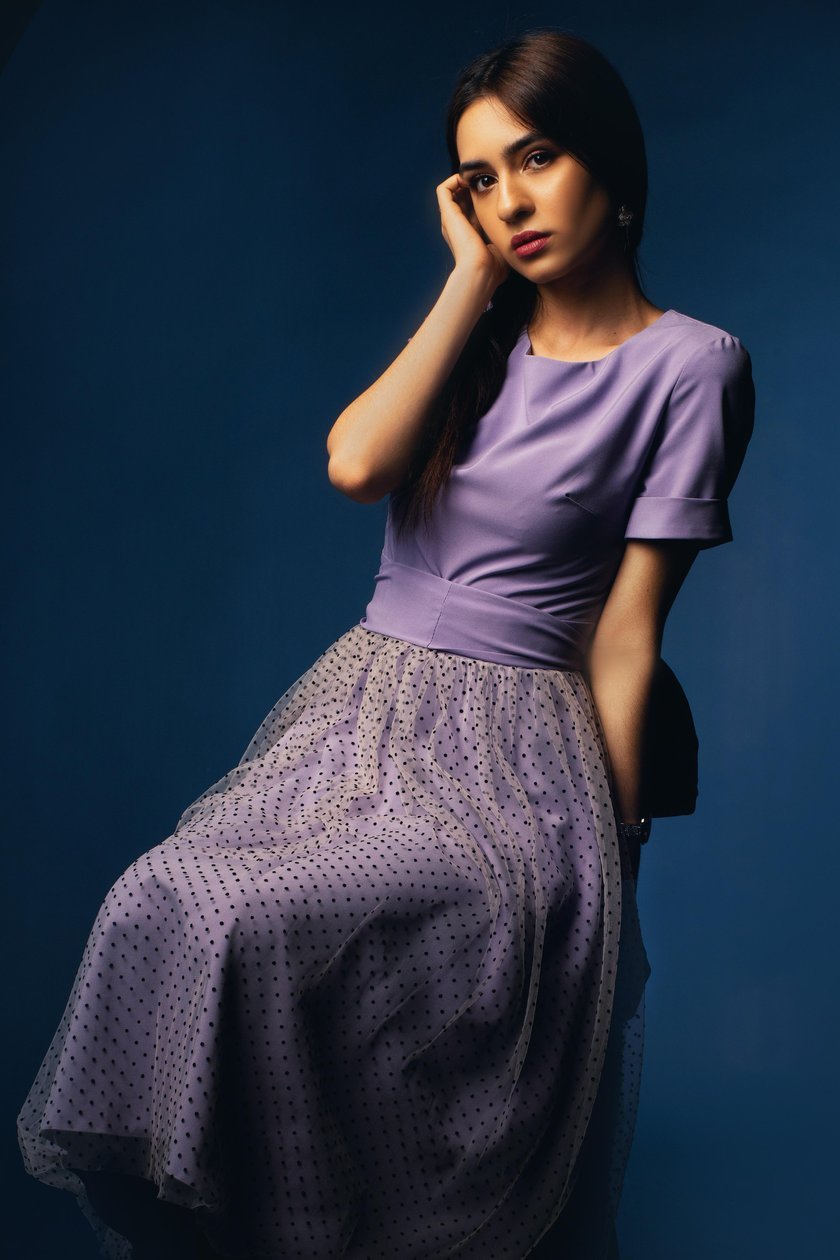
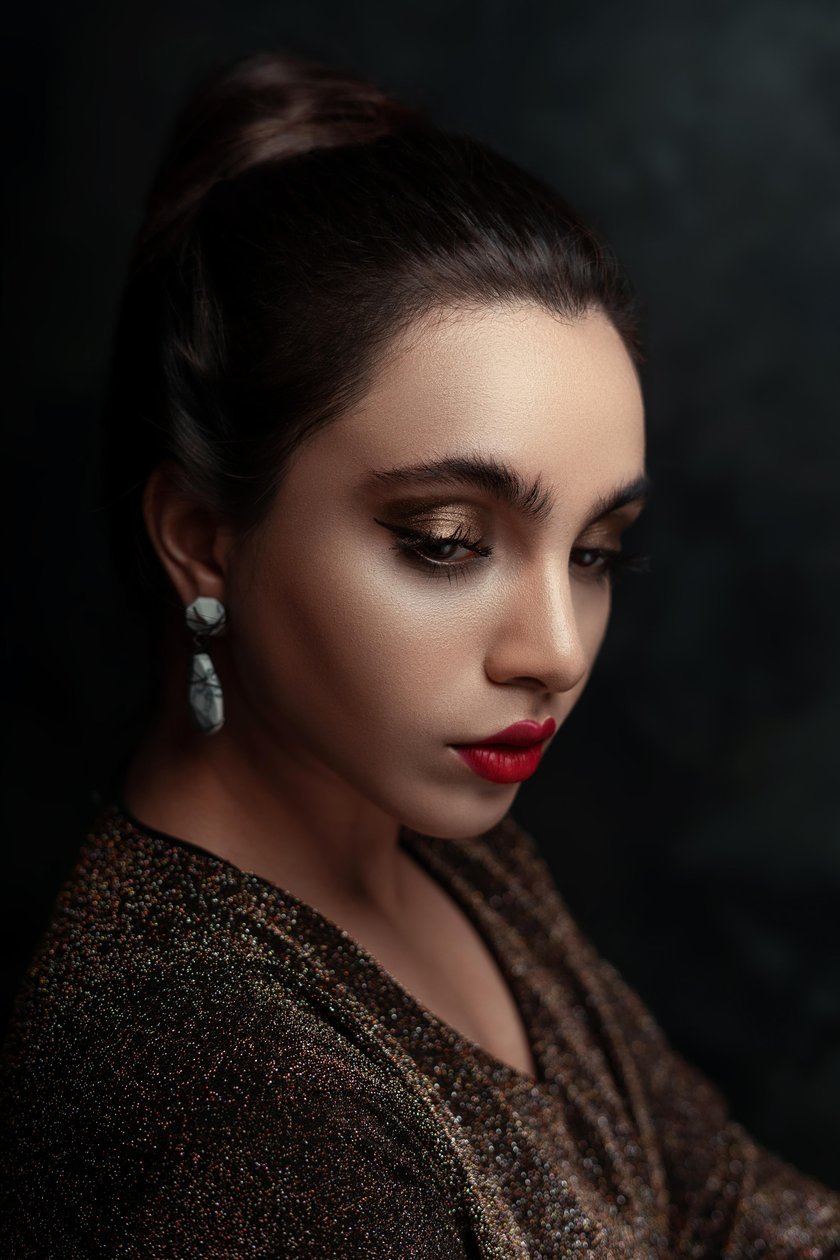

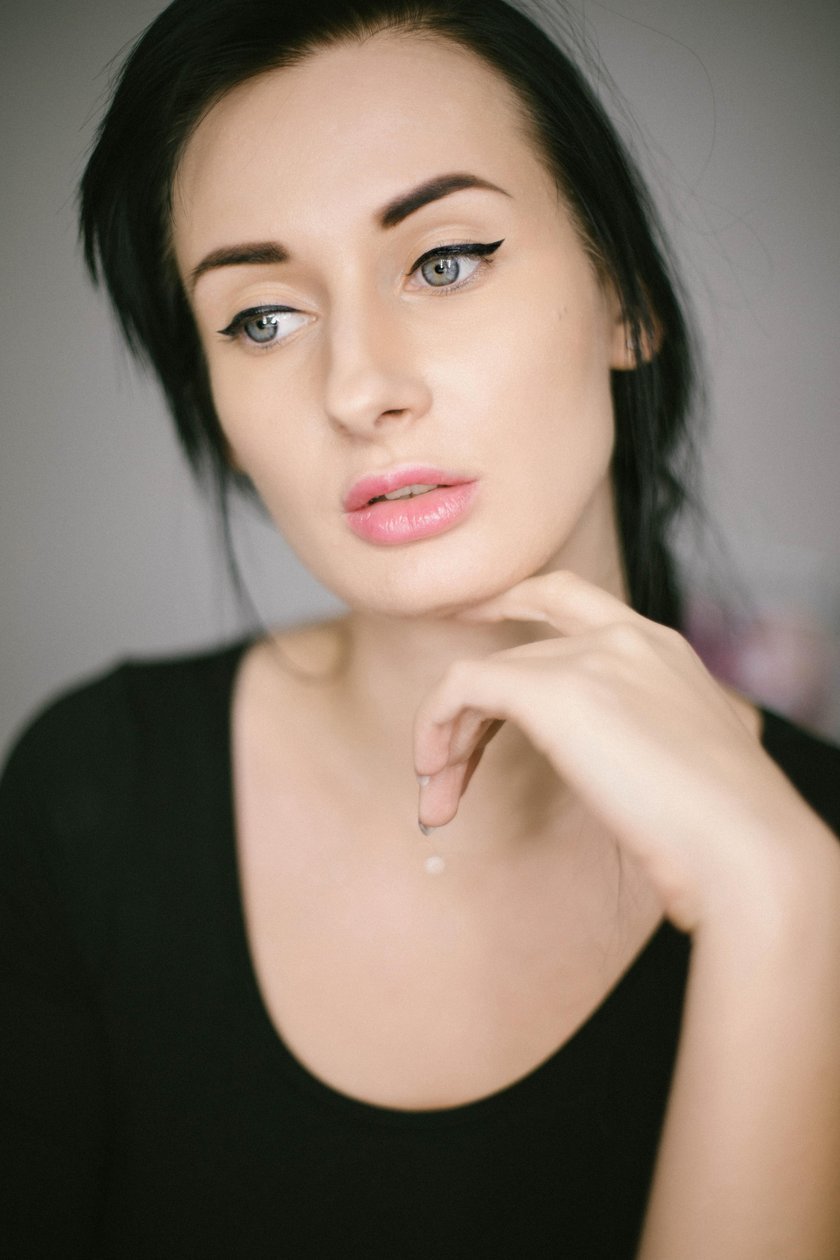
Of course, all these photos have already been processed, but you can easily see common signs: a butterfly shadow, a lamp shine in the pupils, a characteristic light-shadow pattern, etc. By setting the equipment as I described above, you can create shots no worse and even better!
And if you want to reach a genuinely masterful level, I recommend mastering the Luminar Neo program for post-processing your photos. With this software, you can do everything like with other popular tools, but much faster, since most of the manual processes are done automatically thanks to artificial intelligence.
The tool allows you to clean your face of blemishes or wrinkles, correct shadows, even out tone, and adjust image brightness and contrast in just a few clicks. It also makes it very easy to add all sorts of effects like fog or realistic sunbeams and create cool collages that impress your friends and followers.
Let's sum it up!
Butterfly lighting is an excellent start for anyone just getting into studio photography. It's cheap and easy, and you're taking virtually no risk because this technique suits just about any face. No wonder many legendary photographers use it to show movie stars at their best. However, you still have a lot of room for experimentation, so this does not limit you in any way. Try different body kits for lamps, and use a reflector in various positions. You can even add a few additional lights to create a beautiful modeling light or highlight details (hair, outfits, props, etc.)
As you can see, butterfly lighting photography is not that difficult, so anyone can master it. Don't forget that before you buy your equipment, it's best to try a few rented ones to see what's right for you. Of course, there will always be a buyer for used unnecessary stuff, but why these extra gestures, right? Also, keep in mind what I said about Luminar Neo. This will give you maximum control over the image to create real masterpieces and help you reach the global level of photography.
I hope this article was interesting and useful for you. Good luck, and may inspiration never leaves you.