Neon Lights Photography: Illuminate Your Creativity
Last Updated on January 16, 2025

Explore the art of neon lights photography and capture vibrant, glowing scenes. Learn techniques to enhance your creativity and make your photos pop.
Neon images have become a staple of modern cinema and photography. It is a test of the operator's expertise as well as the contrast between artworks. The stunning intro to the series "American Gods" or Liam Wong's Tokyo performance raises chills. How to edit neon light photos on an iPhone? This guide is for you!
Basic Knowledge of Neon Photography
Glow-in-the-dark photography is more than taking images. What's remarkable is the way this style works well in practically every type of photography art, from beginner photo sessions to advertising. That's why it became a trend in the world of snapping pictures, resulting in a revolution that fundamentally altered the art form.
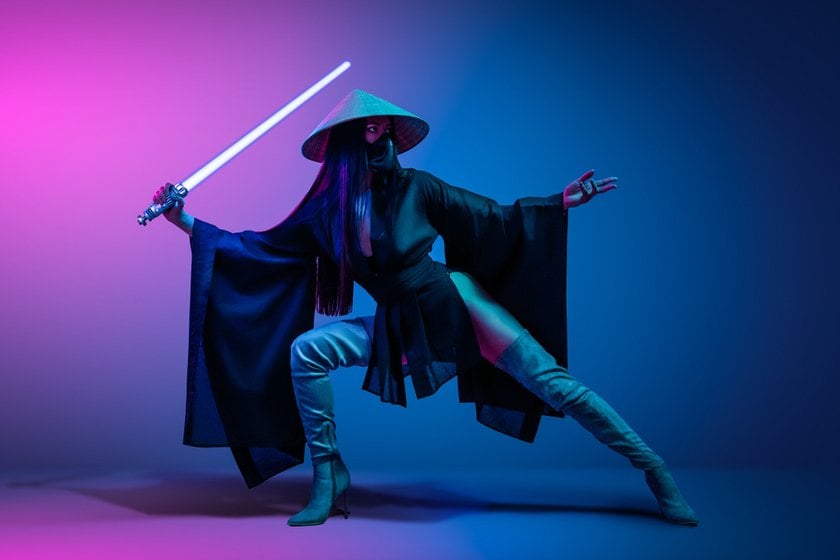
Light Up Your Photos with the Neon & Glow Feature
Try in Luminar NeoThis art form first appeared in the early twentieth century and gained popularity in the 1950s and 1960s due to vivid indicators. Neon settings have grown to become an internationally respected art form, with painters using neon lamps to create intricate and original works, directors establishing an atmosphere of tension and futurism, and photographers developing a distinct portrait and landscape picture style. With Luminar Neo, your artistic efforts will shine in new ways. Grab your camera and fulfill the craziest neon photo ideas!
Glow In The Dark Photography: The Art Of Seeing
With its distinctive use of the color spectrum and bold ideas, the development of the mid-era of plastic and polymer materials created a new visual language that was striking and memorable. The main characteristics of the glow-in-the-dark photoshoot are:
bright, vibrant colors that create a sense of movement and energy;
use to create 2D and 3D works of art;
combination with other materials to create mixed media pieces;
primary associations with popular culture and the urban environment.
Remember the Akihabara streets, the red light district, and Jinx's craziness from the Arcane series? Will they look the same after regular color corrections? The solution is simple.
You may also like: Neon Colors: Capture Attention With Confidence
Tips for Great Neon Shots
To begin your adventure toward neon photography, consider the following imperative factors:
Frame Aesthetics
Pay attention to the frame's composition. When multiple colors overlap, an uneven tone is created, which disrupts the photo's ambiance. First and foremost, this encompasses portrait photography. For example, you could use neon blue as the background and emphasize the model's face with red. This method reduces landscape inaccuracies and focuses attention on a single object.
Camera and Light Combination
Street photography in neon is generally terrible, with the exception of a few signs and cities. As a result, you should choose a good lens, such as a 35 mm, and open the camera aperture to its full potential. ISO should be set to 200 to avoid noise, while on more professional cameras, you can go higher since the functionality affords more options.
Find out more: Photography Cheat Sheet: Camera Manual Settings (Infographic)
Observe the Play of Light and Shadow
Neon lights cast captivating patterns of light and shadow. Embrace these contrasts in your glow-in-the-dark photography. Let the interplay of light and shadow add depth and intrigue to your images.
Neon Pictures Settings: Technical Aspects
Let's discuss the notable equipment and accessories required for glowing photography and learn to work with them.
Camera and Lens: Selection and Settings
A good artist can be identified by the first stroke, a musician by the first sounds, and a photographer by preparation. The selection of equipment is as paramount as hard skills. The following table summarizes the major attributes of cameras for your neon photo ideas.
Tools and lenses | Description |
DRLS | Possessing a camera with manual settings could allow you a greater grasp of your photos. |
Slow shutter speed | Capture neon light trails to achieve a neo-scientific, unearthly look. Begin with shutter speeds ranging from a few seconds to several minutes, depending on the intended effect and the surrounding brightness. |
Color balance | The Daylight or Incandescent balance settings are appropriate for most scenarios. Nevertheless, all settings should be tested to capture the real colors of neon lights. |
ISO | A prime lens with a wide aperture (e.g., f/1.4 or f/1.8) is suitable for shooting the stunning and low-light characteristics that neon photography requires. |
Regardless of your vision, proper settings and preparation will drastically streamline the glow-in-the-dark photoshoot while maintaining the color correction of the entire image.
Focus and Stability
Focus acquisition in low light is one of this camera's most challenging tasks. If your device has that function, you should use Peaking. This highlights regions that are in focus, making it easier to get accurate aim. A tripod is required to prevent vibrations because neon photography requires photos with a somewhat long exposure period. However, choose a strong one that can handle the weight of your camera and lens to reduce photo blur.
This is particularly relevant when taking images with a long exposure. Using a remote shutter release or cable release helps to reduce camera movement. This gadget allows you to draw the shutter as a signal to begin shooting while avoiding any contact with the camera, ensuring clarity on all photos.
Lens Cleaning Kit
Dust and dirt, especially from city lights, can readily settle on the lens during neon lighting photography. Cleaning accessories continually guarantee that light-accumulated images do not contain extra aberrations that could prevent you from obtaining great shots of neon-burned structures.
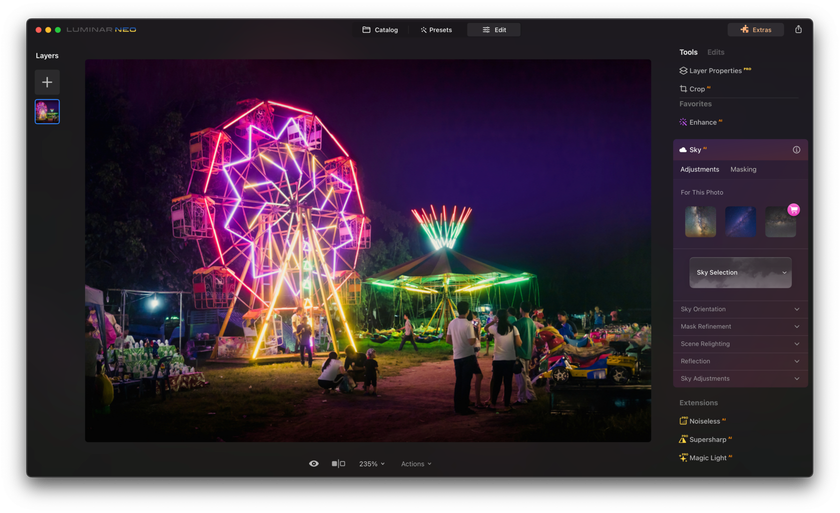
Step-by-Step Neon Photo Editing With Luminar Neo
Step 1: Import Your Neon Photos
Open Luminar Neo and create a new project. Import your neon photos by selecting the 'Import' option.
Organize your images within the software to make managing and editing your neon light shots easier.
Step 2: Basic Adjustments
Start with the 'AI Enhance' tool. This powerful feature automatically analyzes and enhances your image for a more vibrant and captivating look. Adjust the intensity to your liking.
Fine-tune the overall exposure, contrast, and color temperature to ensure your neon lights pop while maintaining the ambiance of your original scene.
Step 3: Neon Light Enhancement
Use the 'Color Harmony' tool to emphasize the neon lights. Adjust the saturation, vibrancy, and luminance of specific colors to make the signs and lighting stand out.
The 'AI Structure' tool can enhance the fine details of your neon lights without compromising the overall image. Use it to highlight the neon signs' intricate details and capture their essence.
Step 4: Sky Enhancement (If Applicable)
If your neon photos feature dynamic skies in the background, use 'Sky AI' to enhance or replace the sky to create a more dramatic and visually appealing backdrop.
Step 5: Presets and Custom Styles
Explore Luminar Neo's extensive library of presets and looks. These are a fantastic starting point for creating a consistent style in your neon photos. You can apply a preset and fine-tune it to suit your image and vision.
Step 6: Export and Save
Once you're satisfied with your edits, it's time to export your neon masterpiece. Select the 'Export' option, choose the file format and quality settings, and save your edited image.
Remember to keep a copy of your original image for reference or future edits so you can track your progress and further refine your skills.
Bonus Tip: Use Neon & Glow to Enhance Your Photos
If your photo lacks the neon light you're aiming for, Luminar Neo's Neon & Glow feature is just what you need. This tool lets you add neon effects to your photos in just a couple of clicks, creating a more atmospheric look.
Watch the video to learn how it works, or download Luminar Neo now to upgrade your photographs instantly.
Find out more: Night Photography: Exploring the Neon Dreamscape with Steve Roe
Bottom Line
In the given article, we have learned how to find the extraordinary in the ordinary, master the technical intricacies of the camera and other equipment, and enhance your neon light photos with the powerful capabilities of Luminar Neo. With these skills and the right equipment, you will be completely ready to create masterpieces that stand out in neon sign photography.
So, put on your combat suits, take in the neon-lit world, and let your ideas flow. Neon light photography allows you to unleash your imagination and leave your mark on the history of this spectacular, luminous realm of photography. The future is bright, and your neon images are how you can keep the world captivated by your perspective and inventiveness!