5 Secrets to Travel Photography Only Travel Photographers Know
May 16, 2023
Looking for some travel photography ideas and tips to improve your skills? Then this article is exactly what you need! Five photographers share their best travel photography tips.
Travel photography is more popular now than ever before, but that doesn’t mean it is easier to create compelling travel images. This can be especially true if you struggle to find inspiration. You've probably seen the work of professional travel photographers and want to get the same great shots.
Despite the fact that travel photography is now a highly popular genre, compounded by social media envy, it still takes a great deal of time, planning, and effort. In fact, to truly get compelling travel photos that stand out from the rest, you must now work twice as hard. But don't worry, our tips will help you, especially if you are a beginner.
 So how can you get beautiful images, especially in places where so many others have tried to do the same? In this post, we teamed up with some of the best travel photographers around the world to find out what their secrets are to getting great shots no matter where they go. Their travel photography tips might just change how you approach travel photography.
1. Look for an Interesting, Unique Foreground for Traveling Photography
 As more people travel and document those travels, it can now be a real challenge to find places that are truly unique. Photographer Oleg Rest points out that “nowadays, it is hard to find a place on the Earth where a photographer has never set foot.” Therein lies the challenge: to photograph a place that’s been photographed a thousand times and make it look exceptional.
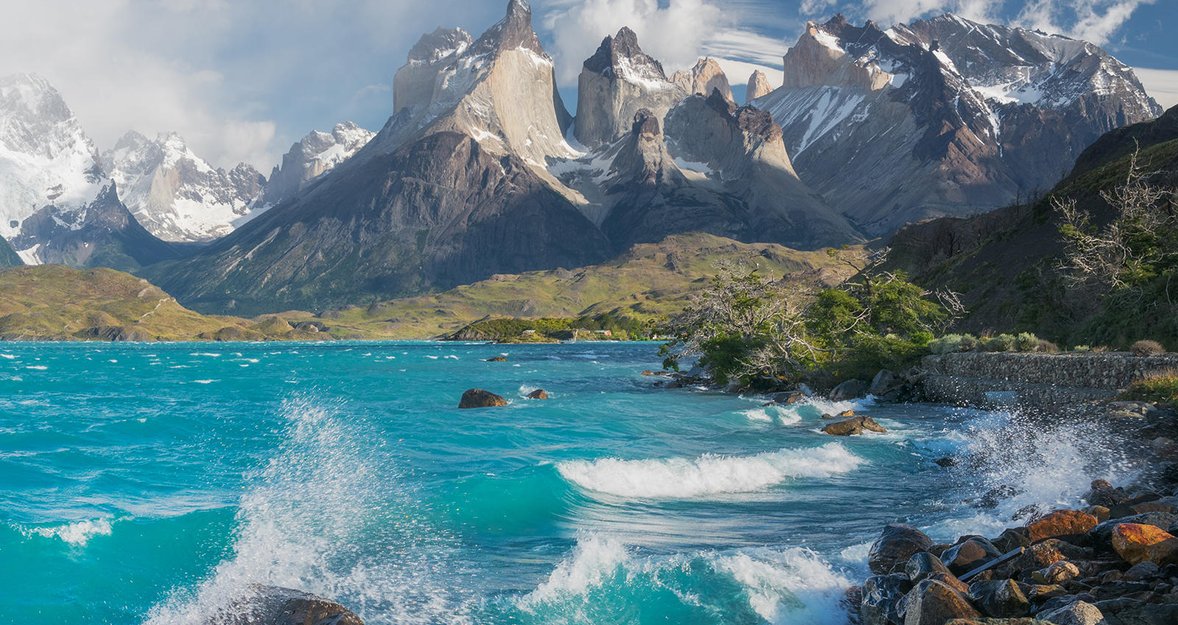
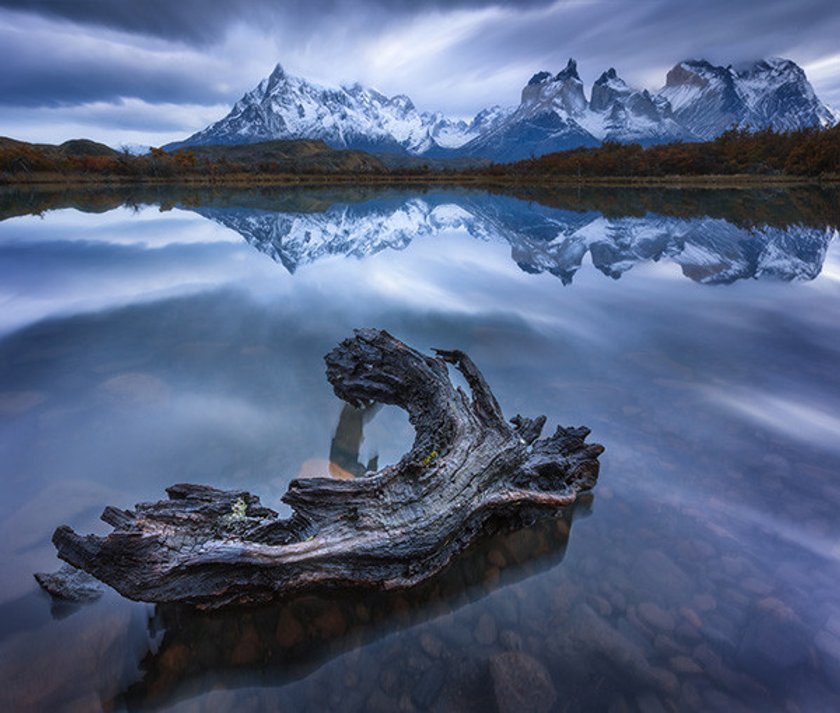
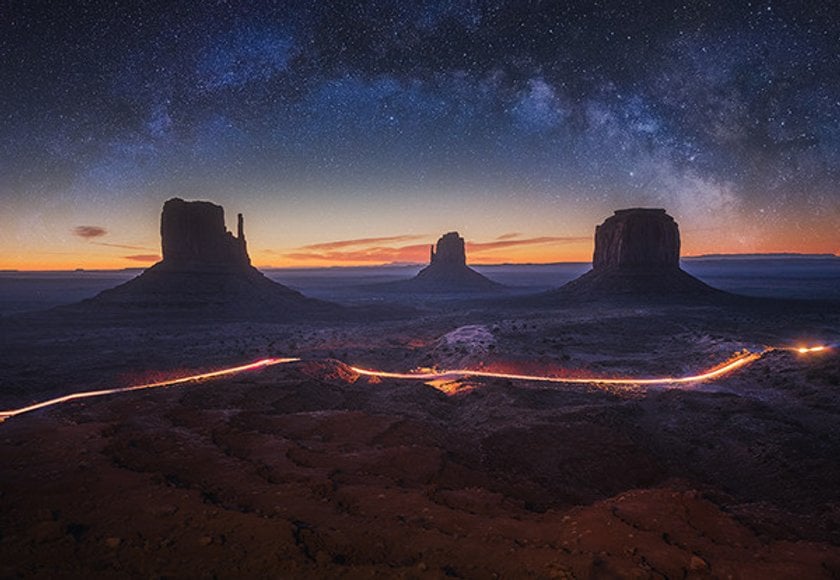
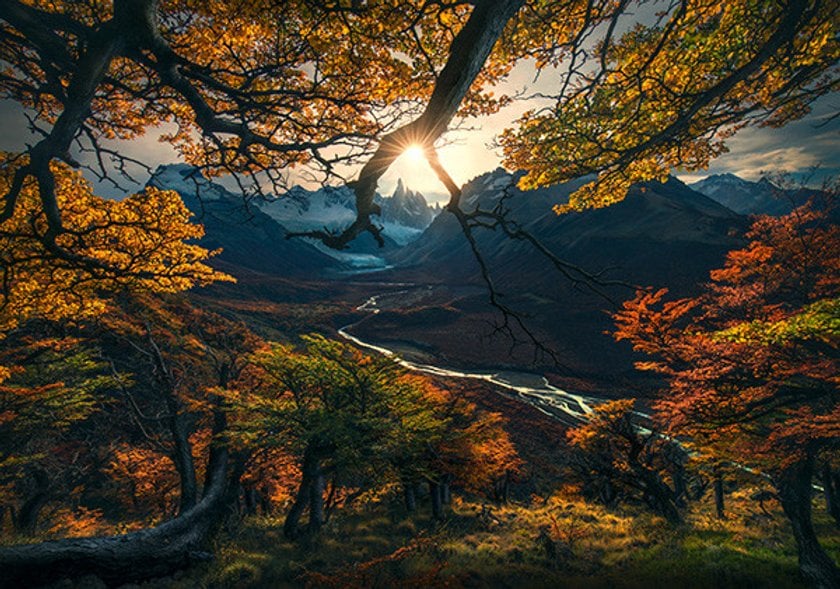
An important part of travel photography is seeing and presenting the world in new ways, even places that have been photographed by thousands of others before. Oleg notes that “one of my secrets to landscape and travel photography is to look for interesting, unique foreground—flowers in Tuscany, stones on a beach, pieces of ice in Lofotens, crooked trees in Patagonia. Interesting foreground allows you to capture a well-known location in a new way.”
To do so, you must explore and experiment and try AI photo editing. There’s always a new perspective that’s never been done before, whether you're taking photos of epic landscapes or architectural wonders. Plus, trying new ways of seeing the world is “a great chance to see how diverse and amazing the nature of our planet is, and to meet new people.” And remember, creativity in photography and traveling can make all the difference between an average photo and an excellent one.
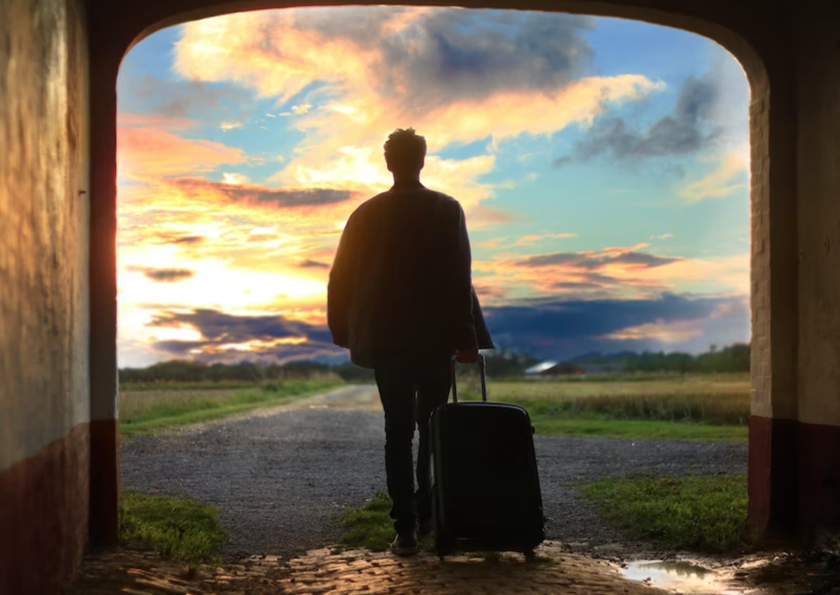
2. Take Experiences as They Come — Stay Out of Tourist Paths for Travel Photo Ideas
 Echoing Daniel Kordan’s advice, Evgeny Tchebotarev recommends avoiding touristy areas and going deep for more authentic experiences and places. As he explains, “More often than not, tourist locations are crowded, noisy, and overrated.”
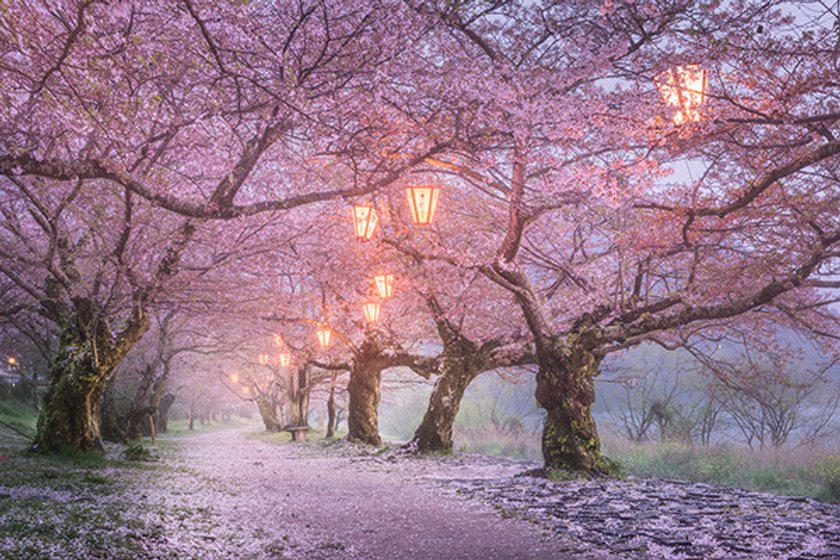
He’s definitely got a point. Much of travel photography is not just seeking out new ways of capturing famous places, but also experiencing the not-so-famous ones. Though never-been-explored places for traveling and photography are now few and far between, there are still many that are firmly off the beaten trail. “So instead of seeing landmarks as tourists see them, go wander around the city, find your spots, and let chance guide you to your own, personal and unique, experiences.”
When it comes to travel photography, taking a risk can have big rewards. Asking a local, doing proper research, or simply going in the opposite direction of tour groups can give you new, unique perspectives to photograph.
You may have already had a thought in your head: ”How can I improve my photography?” The secret to an unbeatable shot often lies in post-processing, and it's truly amazing. Just find the best easy photo editing software that you feel confident working with. For example, Luminar Neo can help you make all travel picture ideas come to life.
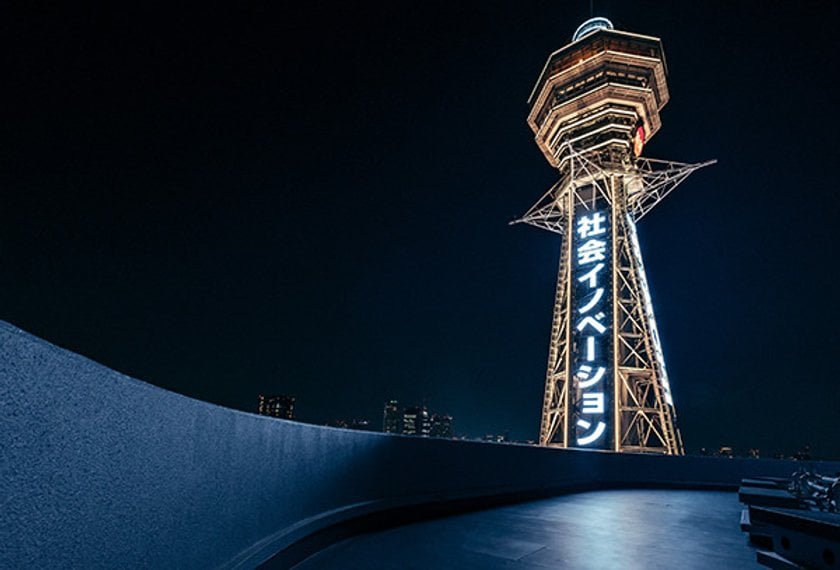
3. Be on Location Early to Get Travel Pictures Ideas
 As far as travel photography tips, this one might be a no-brainer, it can be hard to follow. Jumping out of bed, especially when you’re not an early riser, can be a tall order. So is arriving at your location an hour or so before, especially when you’re pressed for time. However, these can have a huge payoff that definitely makes up for your momentary discomfort.
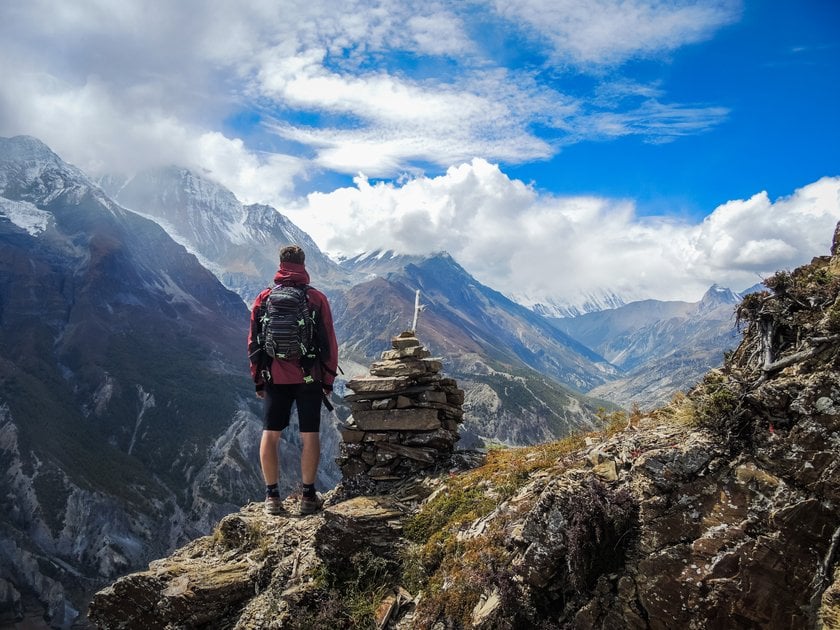
“By being at your location early, you have enough time to scout, get to know the place, and find the best composition before the magic moment happens,” says Sherwin Magsino. You need to give yourself some time to find the best vantage points and experiment with the best perspectives, as well as to set up before the golden hour or before it gets dark. This can make all the difference.
Trust us, you’ll be patting yourself on the back when you see the results. By the way, to make a great shot simply unbeatable, you can use photo editing presets for Luminar Neo or Lightroom.
4. Plan Your Traveling Photography Thoroughly, Explore Unique Unknown Destinations, and Bring Them to the World
 This is one of the best travel tips from professionals in landscape and wildlife photography. Of course, if you have the chance and time to discover the less explored corners of the world, then you will need to spend more time making sure everything is in order to get the best photos. Daniel Kordan advises “sitting with a map, understanding light and seasons, and looking at logistics. It takes a lot of time, but I really enjoy this part of the process.”
Visiting and photographing places that are off the beaten path or are not quite tourist destinations offer plenty of opportunities for you to bring back images that stand out from the crowd. It only makes sense to spend a good amount of time doing research before a trip, especially if your locations are particularly remote or difficult to reach. Why? Because you want to make sure that you are getting the most out of it. As Daniel points out, “We've sailed from the Arctic to Antarctica to find unique locations. These expeditions are extremely hard to organize, but they can have a big impact.”
So, photography and travel may be two inseparable concepts. Even if you aren’t voyaging through the Arctic, however, taking some time to consider the times of day, weather, locations, and even timing can greatly impact your images. Make it a habit, no matter where you go!
But what about editing your photos? Sometimes, even if you choose your camera settings perfectly, you may not be able to capture all the beauty of nature at sunset, people, or animals. If you're taking photos while traveling, make sure you have the right post-processing tools to get the most beautiful shots. Believe us, there are a lot of good options! Find the best software for photo editing in our blog.
5. Find the Right Travel Photography Gear
 When it comes to travel photography gear, it's important to strike a balance between portability, functionality, and image quality. First and foremost, you need to travel light and a good bag or backpack is essential to protect your equipment on the road. This is one of the best tips to help you get started with traveling photography.
Then, look for a travel camera that is lightweight, and easy to use. For example, a mirrorless or compact point-and-shoot may be a good choice. When it comes to lenses, think about the type of photography you'll be doing. A versatile zoom option allows you to capture a wide range of subjects. Alternatively, a prime lens may offer better image quality and low-light performance but may limit your travel photo ideas.
A tripod can be essential in your camera gear for taking sharp images, especially in low light or when shooting long exposures. Look for a lightweight, compact model that is easy to carry. And don't forget to pack a battery charger and extra batteries, since you'll probably be taking a lot of shots while you're traveling. Also, Make sure you have enough memory cards to store all your travel photos!
One of the best tips is to learn how to organize your footage properly. Of course, you can't do this without additional tools. You may also read about the best photo organization software in our blog.
How to Enhance Your Travel Shots
Conclusion: Don’t Plan Too Much
But how much planning is too much? Max Rive admits that while you do have to plan for a few things, “a big part of travel photography should come from the unexpected.” Too much preparation can mean missing out on the magic of discovery, stumbling on a street market, finding a festival, or discovering a tucked-away viewpoint the guidebooks didn’t write about is what both travel and travel photography are about.
 Max says that “to connect with the mood, landscapes, and your subjects, you really have to be at the location. That is why you should only limit your trip planning to the essentials and allow your itinerary to be flexible.” That ability to be flexible is key, as weather and other forces outside of your control can mean that a rigid schedule leaves you without room to adapt and adjust. One way to be flexible is to simply do as Max does: “I try to discover what is unique about a certain area, and once I have discovered that, I concentrate on capturing that unique element of the place.”
The best part about being flexible, however, is you’re opening yourself up to unique experiences and offbeat places you probably wouldn’t have stumbled into otherwise.
FAQ
What Makes a Good Travel Photograph?
The main thing is to catch the viewer's eye. A compelling travel photograph, like any other extraordinary image, tells a story and creates a connection between the audience and the scene depicted in the composition. It has the power to capture the viewer's imagination, hold their attention, and create an irresistible pull that draws them into the frame. And don't forget about the rule of thirds!
How Much Do You Get Paid to Be a Traveling Photographer?
Photographers working full-time can expect to earn between $30,000 and $75,000 per year, with some earning even more. To test the financial viability of pursuing photography as a career, many people prefer to start part-time and gradually transition to full-time work.
What Is the Best Aperture for Travel Photography?
A wide aperture such as f/1.8 or f/2.8 is ideal for creating a shallow depth of field. On the other hand, a narrow option like f/8 or f/11 is better for landscapes and cityscapes because it allows you to capture sharp details from the foreground to the horizon. Also, experimenting with different combinations of shutter speed and aperture can help you achieve your desired effect.
How Should I Pose for Pictures While Traveling?
Remember, the most important thing is to have fun and enjoy your journey. Just relax and be yourself! If you're nervous or self-conscious, it will show in your photos, so take a deep breath and focus on enjoying the moment. Experiment with different angles to find your most flattering pose and don't be afraid to show some personality.


