Seascapes Photography: Techniques for Breathtaking Coastal Photos
June 21, 2023
The incredible beauty and changeability of the water element – this and much more makes photographers take pictures of seascapes. Wanna to get the perfect photo shot? We can help you with that!
The sea is a favorite subject for many photographers around the world. Depending on the weather and time of year, it can be completely different and convey different emotions and feelings. Seascape photography can be very time-consuming because often the photographer has to wait a long time for an interesting scene, the right lighting, and a certain mood in the frame.
To achieve a perfect result, desire alone is not enough. You’ll definitely benefit from preparing thoroughly for taking pictures, as well as pay proper attention to post-processing. Luminar Neo, one of the best AI photo editors can help you with that. It’s ideal for retouching any kind of image thanks to its unique and easy-to-use tools. Let your photos shine and take them to a whole new level!
Let’s discuss what to pay attention to when taking stunning seashore photos!
Understanding Seascapes Photography
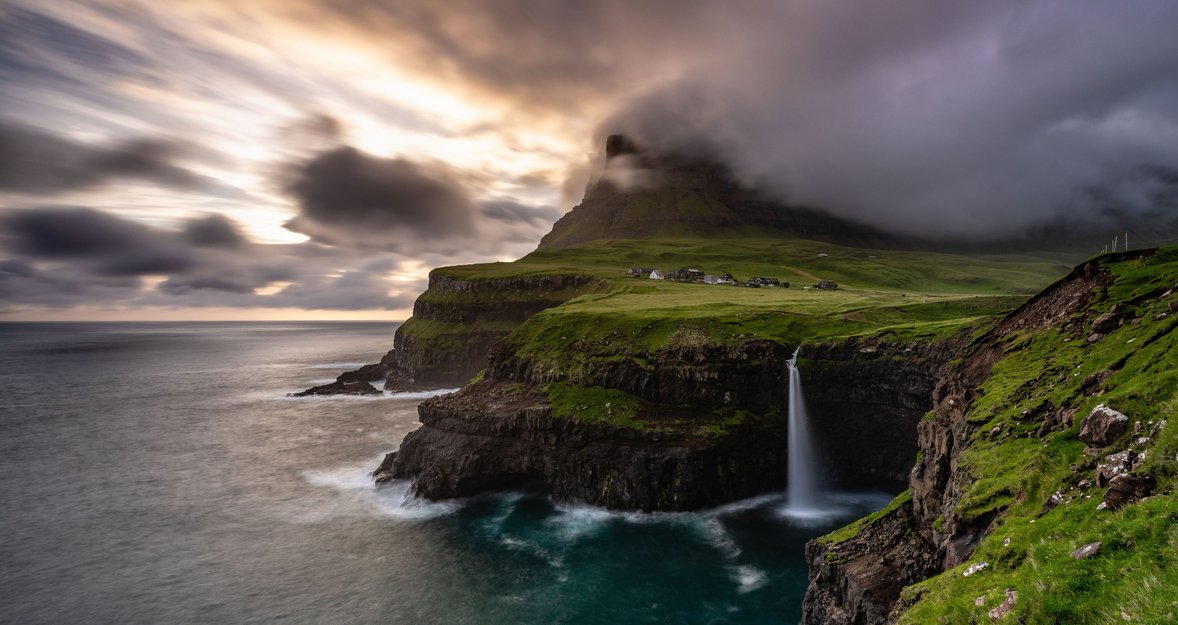
So how to take a perfect picture of the sea? Although it is a kind of landscape photography, it has its own peculiarities. Mastering the ever-changing elements that shape the coastal landscape is the key to success. The interplay of lighting, wind, and tide can transform the same seascape into a variety of mesmerizing compositions at different times of the day. From the gentle hues of dawn casting warm light on the sand and rocks to the dramatic interplay of shadows and crashing waves during sunset, photographers need to patiently observe the ocean's tides, waiting for the perfect moment to capture its timeless beauty.
Choosing the Right Equipment
When it comes to taking pictures of the sea, choosing the right equipment is crucial to conveying the beauty of the coastal environment. We have prepared for you a list of the essentials for seascape photographers:
- Choose a high-resolution digital camera with good low-light performance to capture fine details and handle different lighting conditions;
- Invest in a wide-angle lens to capture expansive views of the sea and coastline;
- Neutral density filters help to control exposure and achieve the right shutter speeds, capturing the smooth motion of waves or creating dreamy effects, and graduated neutral density filters can balance the exposure between the bright sky and darker foreground;
- A sturdy tripod is essential for keeping your camera stable during long exposures, especially in windy or low-light conditions;
- Using a remote shutter release minimizes camera shake, ensuring sharp images during long exposures without physically touching the camera;
- Consider using waterproof cases or protective covers to shield your equipment from the splashing and moisture present in coastal environments.
In addition to photography equipment, don’t forget that post-processing is an integral part of the process of getting the perfect picture. The best solution is a photo editor with AI tools that will help you retouch any image with ease. We recommend you use Luminar Neo as it is also one of the best photo organizers. Enjoy all the benefits of this software and turn every picture into a work of art!
Composing Dynamic Coastal Shots
Making your seascape photos successful takes a lot of practice and patience. Use the rule of thirds to create visual interest and balance in your frame by placing key elements appropriately. The position of the sun plays a crucial role as it determines the quality and direction of light, which will help emphasize the textures in the photo.
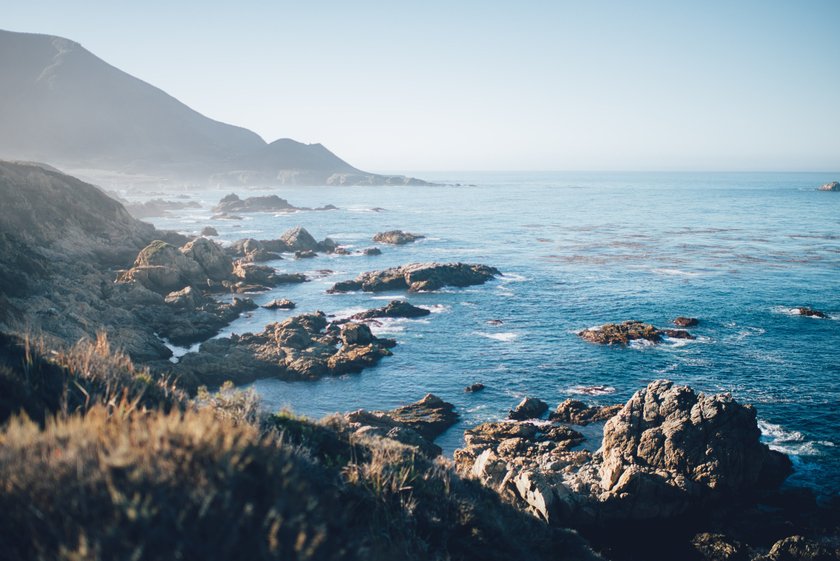
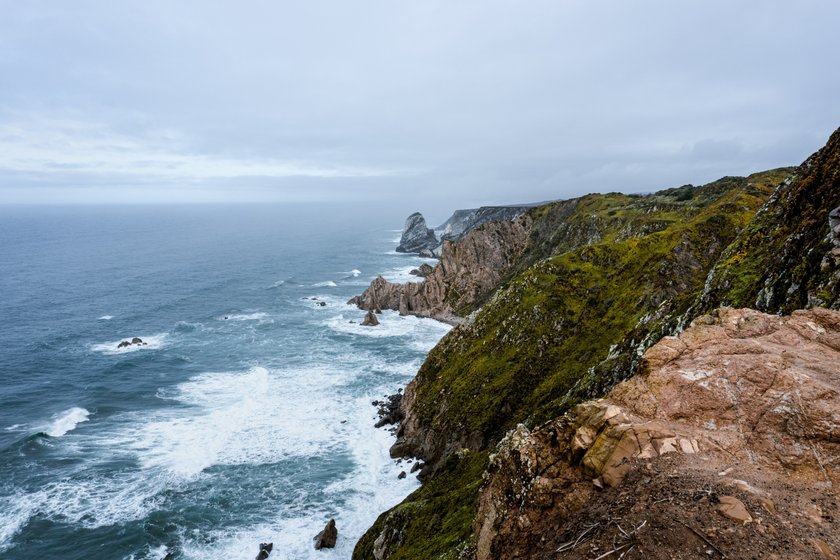
The right choice of location is also very important. It can both ruin your entire work as well as help you achieve the results you want. Remember that your goal is to bring out the beauty of the landscape, such as cliffs, rock formations, or pristine beaches that can give your composition depth and character.
To make your pictures more creative, you can use photo overlays for edits to introduce artistic elements, such as adding reflections or subtle textures, so that seascapes really stand out as unique works of art.
Harnessing the Power of Lighting

Using the power of light is an essential skill in seascape photography because it can turn a simple scene into breathtaking artwork. Here are the basic techniques to consider when working with lighting:
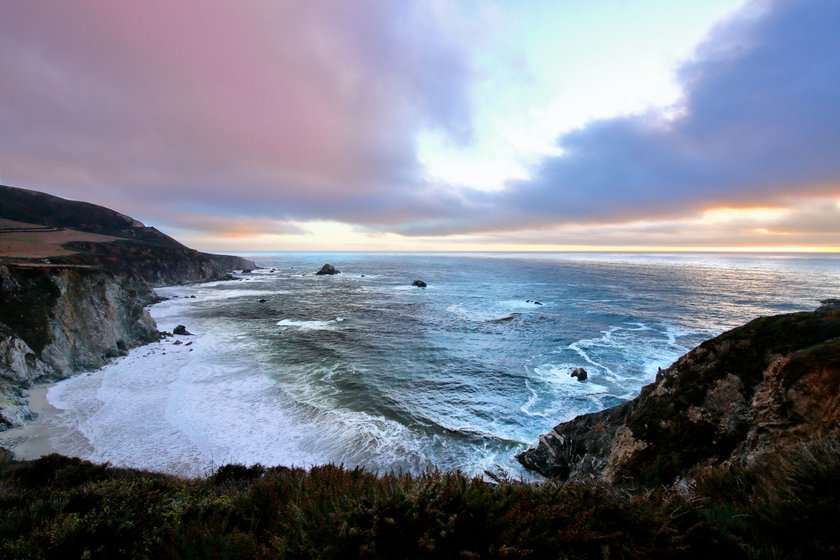
- Take advantage of the warm, soft light during the golden hour, which comes shortly after sunrise and before sunset. This soft lighting brings out the colors and textures of the coastal landscape, creating a magical atmosphere.
- Clouds can add drama and depth to your seascapes. Look for interesting cloud formations, such as during a thunderstorm or swirling clouds, that can be a dynamic backdrop for your composition.
- Experiment with backlighting by positioning the sun behind elements such as rocks or crashing waves. This technique can create stunning silhouettes and add a sense of mystery and depth to the scene.
- Using longer exposures allows you to capture the movement of the sea, resulting in smooth, ethereal waves or misty waterfalls. This way you can make your photos memorable and eye-catching.
- Pay attention to the interplay between light and shadow on the coastal landscape. This contrast can add dimension and visual interest to your composition, emphasizing textures and shapes.
- Consider using light painting techniques to selectively illuminate certain areas of the scene during long exposures. This can be done by using a flashlight or a dedicated light painting tool in online photo editors to accentuate specific details. For example, with Luminar Neo's Accent AI tool, you can enhance the overall lighting and detail of your photo with just one slider.
By mastering the art of lighting, seascape photographers can create breathtaking images that evoke a sense of awe and demonstrate the beauty of nature.
Capturing Motion in Coastal Elements
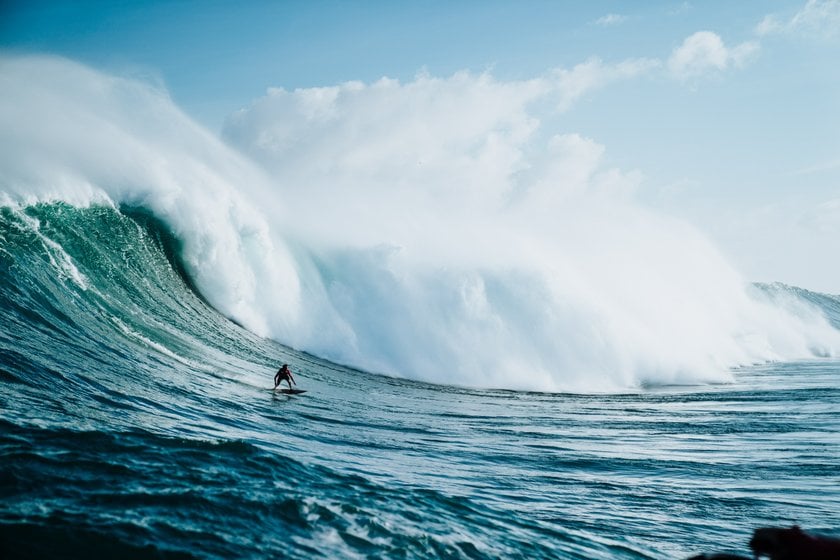
Photographing the motion of coastal elements adds dynamism and vibrancy to your seascapes. Here are a few techniques that can help you:
- Adjust your shutter speed to take photos of fast-moving elements like crashing waves or seagulls in flight. Create a sense of motion, capturing the flow of water or the movement of clouds.
- Use a sturdy tripod to provide sharpness for static composition elements and longer exposures to capture motion without the camera shaking.
- Use the panning technique to track moving objects, such as boats or surfers, keeping them sharp, blurring the background, and conveying a sense of speed.
- Neutral density filters can be used to reduce the amount of light entering the camera, allowing for longer exposures even in bright lighting conditions. This allows you to capture the smooth and dreamy movement of water or clouds.
- Use continuous or burst mode on your camera to take a series of photos in quick succession, increasing the chance of capturing the perfect moment of motion.
- Consider using photography presets to give your images an even stronger sense of movement. Styles can be applied to adjust colors, contrasts, and tones, adding artistic flair. You can use the best open-source picture editors for this purpose.
By applying these tricks and using the right equipment, such as tripods, filters, and flashes, seascape photographers can capture the dynamic and exciting movement of coastal elements, resulting in stunning images that convey the energy and beauty of the sea.
Final Thoughts
Marine photography offers a breathtaking look at the beauty and power of the ocean. By understanding the technical aspects of choosing the right equipment, using the interplay of lighting, and capturing the movement of coastal elements, photographers can create stunning images that take viewers into an awe-inspiring world where land meets the sea. So, let's take a journey through the mesmerizing world of seascape photos, where rhythmic tides, golden light, and breathtaking landscapes await us. Don't be afraid to experiment and capture the magic of the sea, you're sure to succeed!
FAQ
What Camera Settings Are Ideal for Capturing Coastal Scenes?
When capturing coastal scenes, camera settings typically include a low ISO for maximum image quality, a small aperture for greater depth of field, and a faster shutter speed to freeze motion. Additionally, using manual focus and taking photos in RAW format allows for more control and flexibility during post-processing.
How Can I Achieve Sharp Focus in My Coastal Photographs?
To achieve sharp focus during taking seascapes pictures, use manual focus, a narrow aperture (high f-stop), and a sturdy tripod to minimize camera shake. Also, you can use focus stacking techniques for intricate details and foreground-background sharpness.
What Are the Best Times of Day for Shooting Seascapes?
The best time of day to take pictures of seascapes is the golden hour, shortly after sunrise and before sunset, when warm, soft light brings out colors and textures.
How Do I Capture the Essence of Coastal Landscapes Beyond the Beach?
Go beyond the shoreline and look for unique places to take seascape pictures. Experiment with different angles, perspectives, and focal lengths to emphasize the beauty and subtlety of the coastal landscape.