How to Edit Dramatic Drone Images using Luminar Neo
June 27, 2024
Master the art of drone photography with Eric Deseyve's expert advice and enhance your shots using Luminar Neo AI Photo Editor. Start capturing stunning aerial images today!
Drone photography has opened up the skies for amateur and hobbyist photographers, but getting professional-quality images remains a challenge. With a photo editor like Luminar Neo, perfecting aerial photos is simple and straightforward. In a recent Instagram post, expert travel and nature photographer Eric Deseyve goes over his tips for achieving dramatic results with drone images using Luminar Neo.
Advanced yet easy-to-use photo editor
Get Luminar Neo Now1. Basic Adjustments
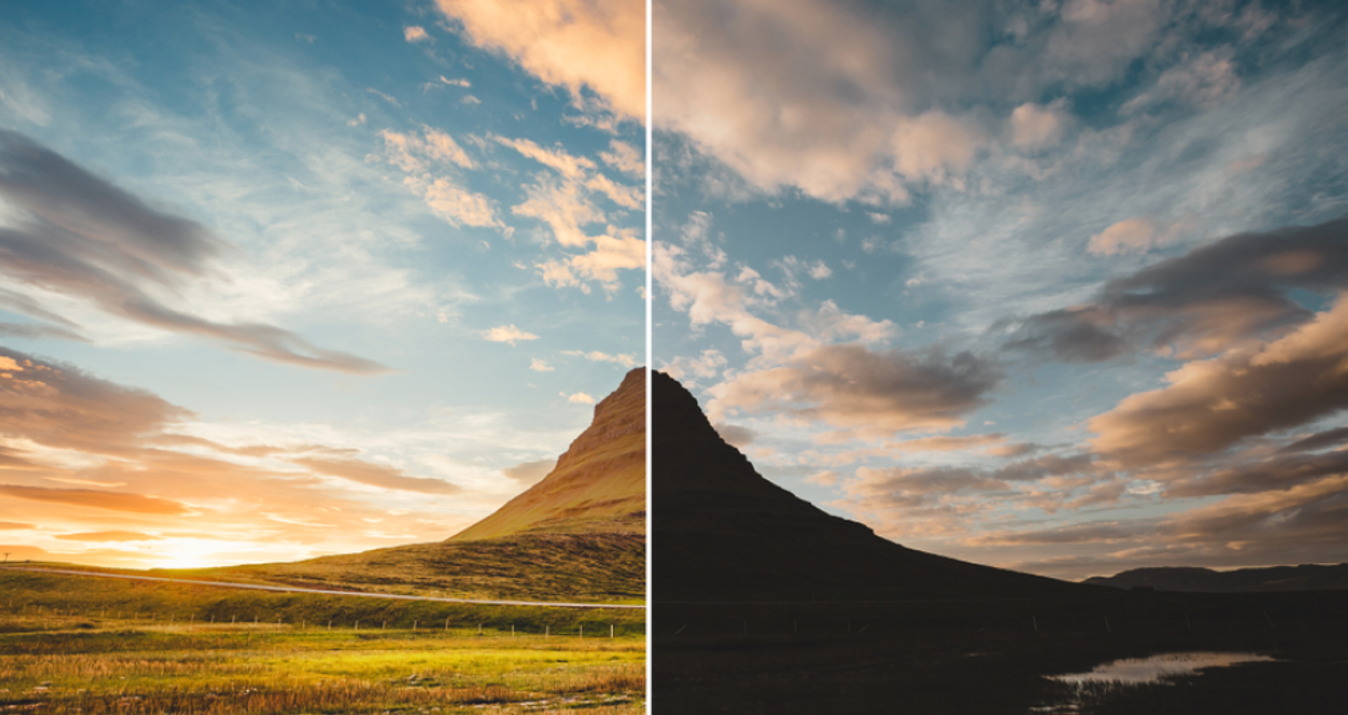
“I used Luminar Neo’s intuitive sliders and controls to fine-tune the exposure, contrast, and tonal balance for basic adjustments,” Eric says. “Using tools like the exposure and contrast sliders, I carefully reduced the exposure while increasing the contrast to add depth and dimension to the image.”
Eric also uses white and black sliders to strengthen the overall tonal range, ensuring a balanced and dynamic result in the photo.
2. Color Grading
“In terms of color grading, I shifted the greens toward yellows and the yellows toward oranges, creating a cohesive and uniform color palette with a warm and inviting vibe,” Eric says. “I then increased the saturation of reds, oranges, and yellows while dialing down the saturation of greens, cyans, and blues, further enhancing the warmth and moodiness of the scene.”
In order to add depth and dimension, Eric decreases the luminance of yellows and oranges, enhancing their richness and intensity.
3. Landscape Tool
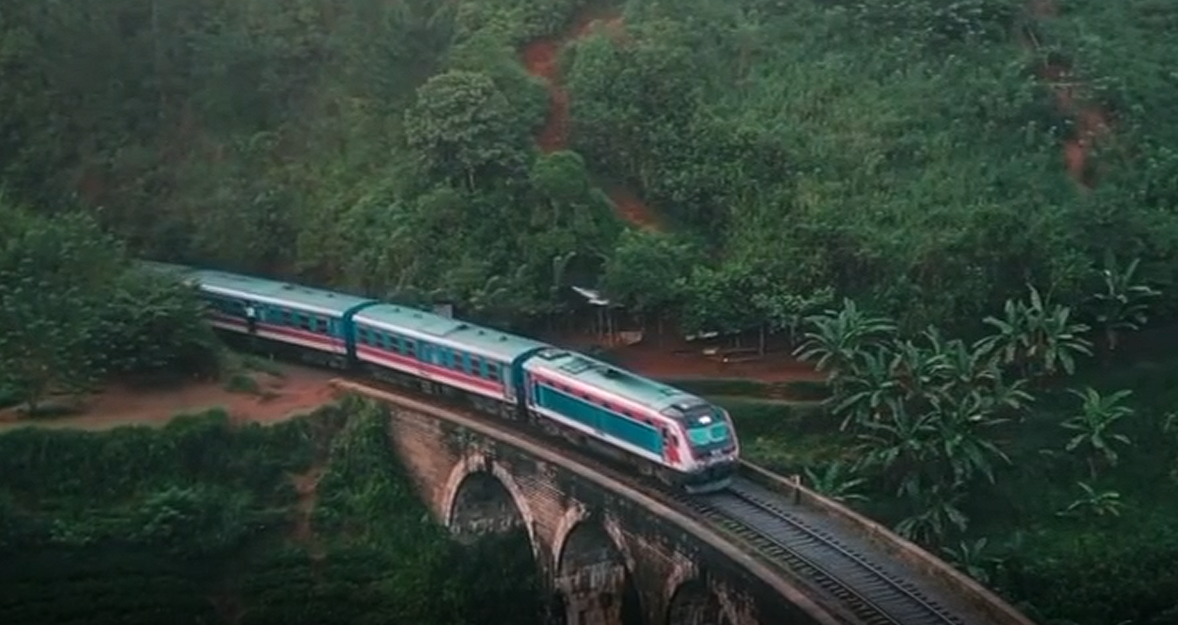
“When it came to landscape enhancement, I tried boosting the light and colors during the golden hour to accentuate the glow and light of the scenery in the early morning during sunrise,” Eric explains.
The Landscape tool in Luminar Neo has a control specifically designed for golden hour lighting in photos, allowing you to enhance existing light. It is located in the Landscape tools section.
4. Vignette Tool
“I employed the Vignette tool to draw the viewer’s focus to the main subject,” Eric says. “By subtly darkening the edges of the image, I created a subtle framing effect that directed attention towards the central element, in this case, the train driving through the Sri Lankan jungle.”
The Vignette tool is located under the Essentials tools section.
5. Atmosphere AI
“I utilized the Atmosphere AI tool to amplify the morning mist’s atmospheric effects,” Eric says. “This powerful feature allowed me to enhance the misty atmosphere, adding depth and atmosphere to the scene and further immersing the viewer in the tranquil vibe of this calm moment.”
The Atmosphere AI tool is located under the Landscape tools section.
6. Toning
“Finally, using the advanced toning controls, I further enhanced the warmth and richness of the colors, adding a more moody vibe to the scenery,” Eric explains.
The advanced toning controls are located under the Creative tools section.
Need More Inspiration?
Don't miss out on Eric Deseyve's latest creations — follow him on Instagram.