Landscape Astrophotography Editing Tips with Luminar
July 15, 2019
Who hasn’t been amazed at least once by the starry night sky? How can you capture its mystery in a photo? Mathew Browne, a photographer from Wales specializing in travel and cityscape photography and one of our Skylum Brand Ambassadors, reveals his Luminar astrophotography editing tips.
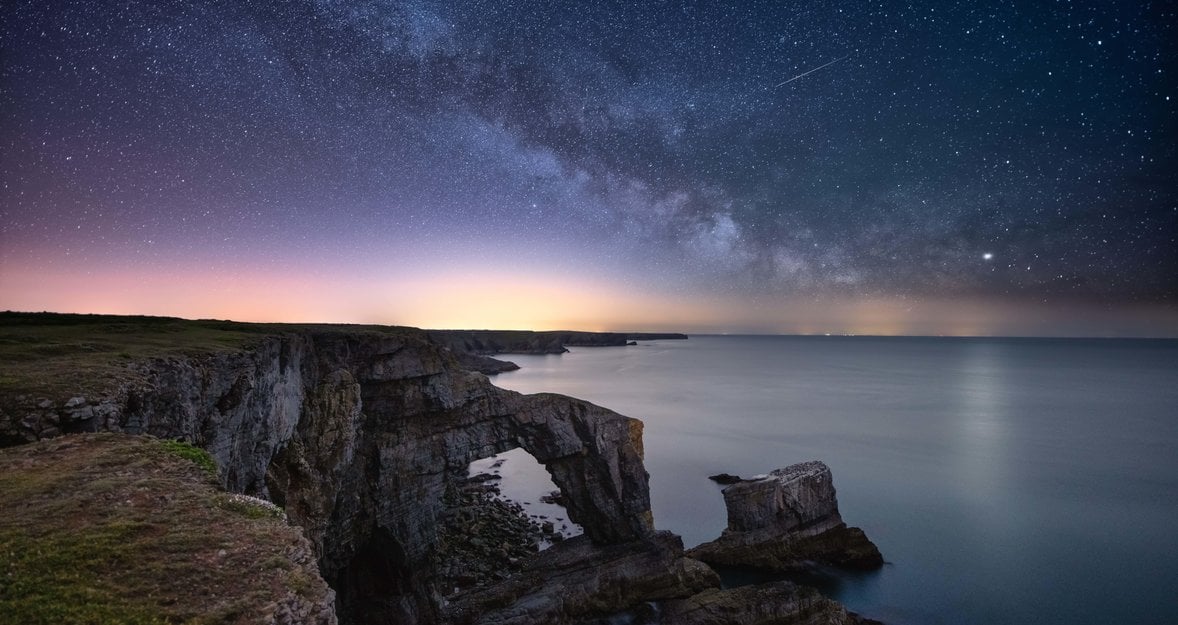
Captured on a starry night on the Pembrokeshire coast, this image combines the rugged scenery with the Milky Way and a small meteor to the top right of the frame. Though it is in focus and composed pleasingly, there’s still some work to do. There’s quite a strong colour cast to the image, a very dark foreground with a lot of lost detail, and the Milky Way is very faint.
With a little time and Luminar, we can take process this shot into a portfolio quality image with punchier colours and properly show off the astronomical detail in the sky.

Step 1 – Foreground
Start with some AI Accent magic
My first step in most image edits is to use Luminar’s amazing AI Accent filter, a content-aware filter which analyses the image and automatically enhances it. Instantly, highlights are calmed down, details are brought out of the darkness, and colour tones are instantly improved.

If the colour tone is still not quite right, a subtle adjustment with Luminar’s Color Temperature filter will do the trick.

A subtle adjustment of the Foliage Enhancer will gently increase the luminosity and saturation of green tones in your image, instantly making the grass and moss become more visible.

Remove Color Cast
There’s still quite a strong purple tone to the foreground – if you examine the foliage you’ll notice that green grass and moss is just a little off-colour. Here, I use the Remove Color Cast filter to adjust this automatically. In doing so, we lose some brightness, but we can continue working on this.

Correct the horizon colours
Some lights can be seen on the horizon as we look east, which creates some interesting illumination but introduces some unwelcome colours to the frame. I use the Split Color Warmth filter to add just a touch of colour to this – brilliant white colours now appear golden, and some pink is added to the horizon’s glow.

Correcting the exposure manually
Our foreground is still quite dark, so I combine several filters to improve this. Turning up the brightness and slightly lowering the contrast in the Brightness / Contrast filter adjusts the whole image. Next, the Top & Bottom Lighting filter which does exactly as you’d expect – I add some lighting to the bottom of the image. Finally, boosting the whites and slightly darkening the blacks in Whites / Blacks to manually adjust the contrast.


Sharpening
Finally, a touch of sharpening, to add some definition between edges.

Foreground editing complete. Let’s review where we are so far.


Step 2 – Sky
Masking
Create a new Adjustment Layer, then add a new Gradient Mask. This allows you to select which area of the image is affected by the filters on this adjustment layer. You’ll notice there is a band of glow near the horizon. Creating a gentle vertical gradient across this, ending at the horizon line, ensures all the brightest stars are affected. If you find your mask is adding too much, or not doing enough, you can always edit this mask later.

Accent AI
As before, a touch of Accent AI filter which will analyse and improve the sky detail, plus any manual colour correction using the Color Temperature filter. In this case, I chose to reintroduce just a touch of magenta as there are some subtle green tones in the darker areas of sky.

Turn up the lights
The Microstructure and Dramatic filters are superb choices to ramp up the night sky detail.

Correcting the tone and colours manually
Turning up the warms and bringing down the cools using the Split Color Warmth filter gives us rich purple and blue tones in the sky. Next, I manually adjust the overall contrast and tone using the Highlights / Shadows and Whites / Blacks filters – my goal here to create more separation between the highlights of the stars and the darks of the surrounding sky.

Make the stars glow
To instantly add a magical glow and exposure to the stars, use the Soft Focus filter.

Subtly improve the colours
Just a touch of added Color Contrast to improve the colour tones in the sky.

Highlight the Milky Way
The High Key and Clarity filters are used together to improve the visibility of the Milky Way.

Add contrast
Luminar’s excellent Advanced Contrast filter allows you to control the contrast in great detail. Here are the settings I’ve used to give the sky a bit more punch.

Calm down the blues
At this point, I find that the blues in the sky are a touch oversaturated. Therefore I’ve used the HSL filter to desaturate the blues slightly. Just a light touch is needed here..

Brush in the details
As a finishing touch, use the Dodge & Burn filter to brush some detail into the Milky Way. If the effect is too strong, simply reduce the amount slider. I like to brush the detail in using maximum strength so I can easily see the areas I’m affecting, then move the slider back down so the effect is more subtle.

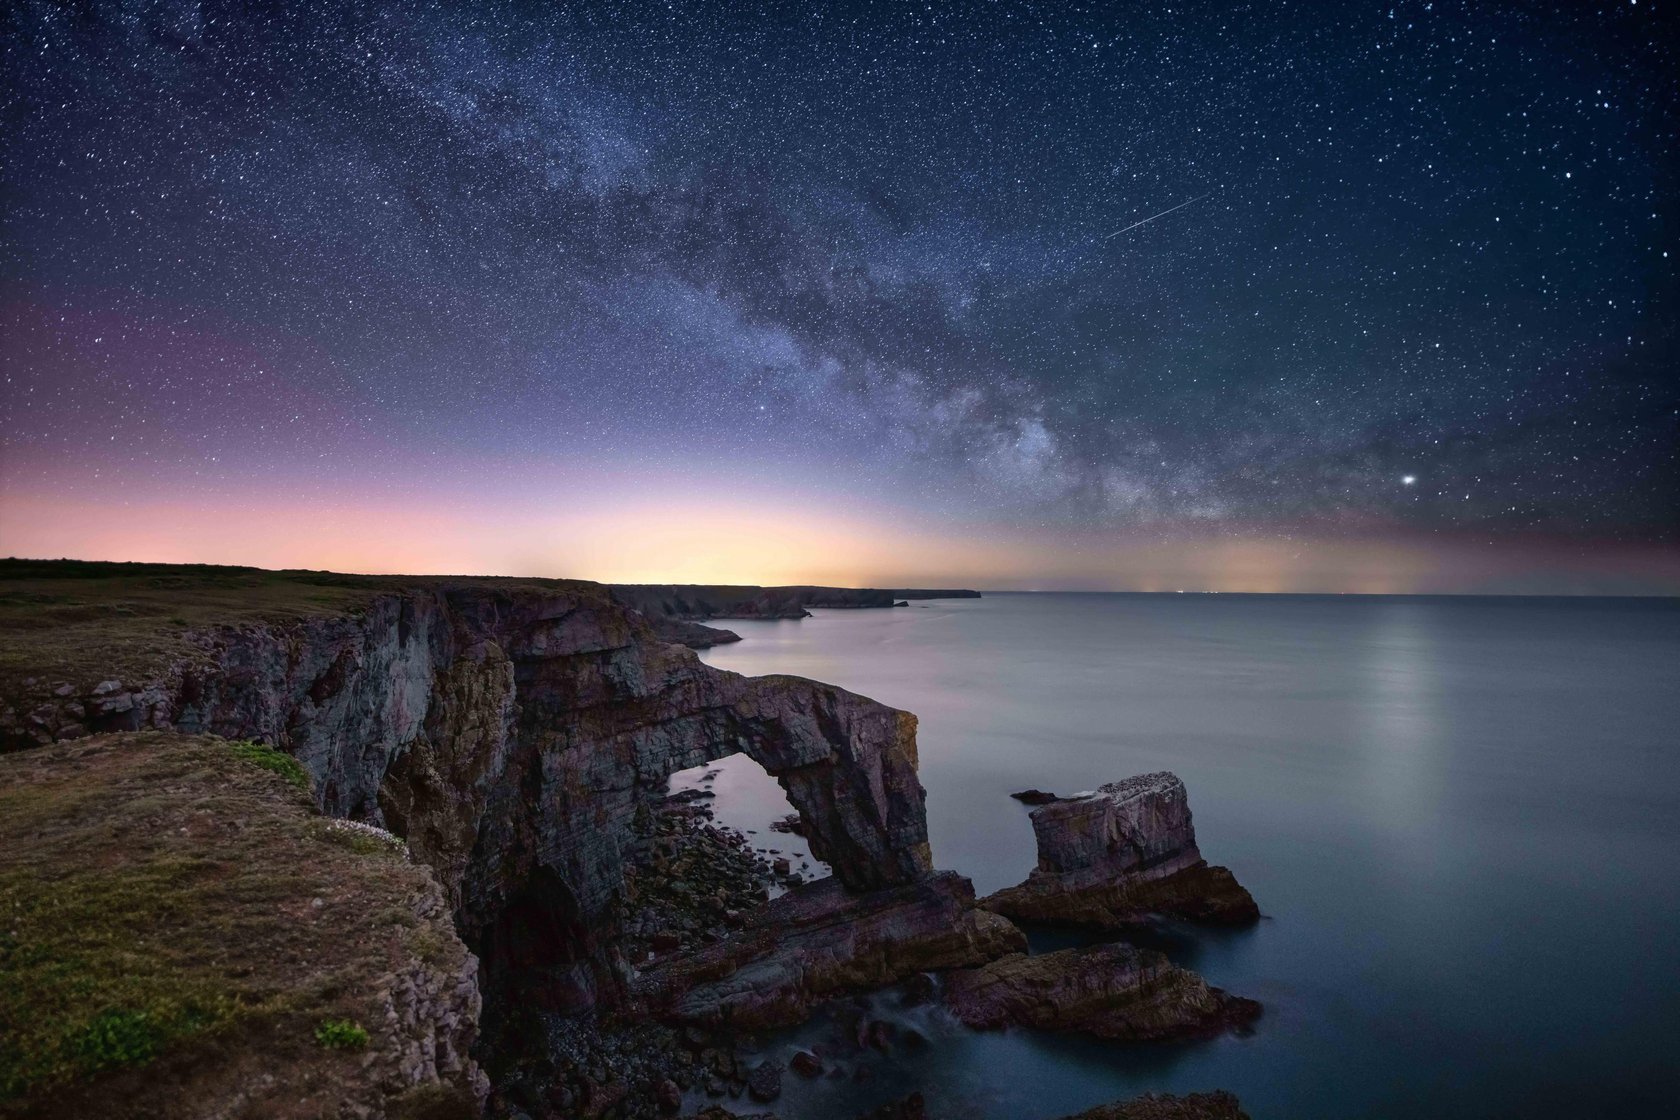
All done!
Below, you can see the final result. With a series of adjustments using Luminar’s powerful filters, it’s possible to create a striking astrophotography look in a matter of moments.
Follow Mathew Browne on social media: Instagram, Facebook, 500px, Flickr, Twitter.

![10 Best AI Image Upscalers Of 2025 [Free & Paid]](http://media.macphun.com/img/uploads/macphun/blog/2451/1_10BestAIImageUpscalersFreePaidISkylum.jpg?q=75&w=1348&h=715&resize=cover)