Best Drone for Photography in 2024
June 20, 2024

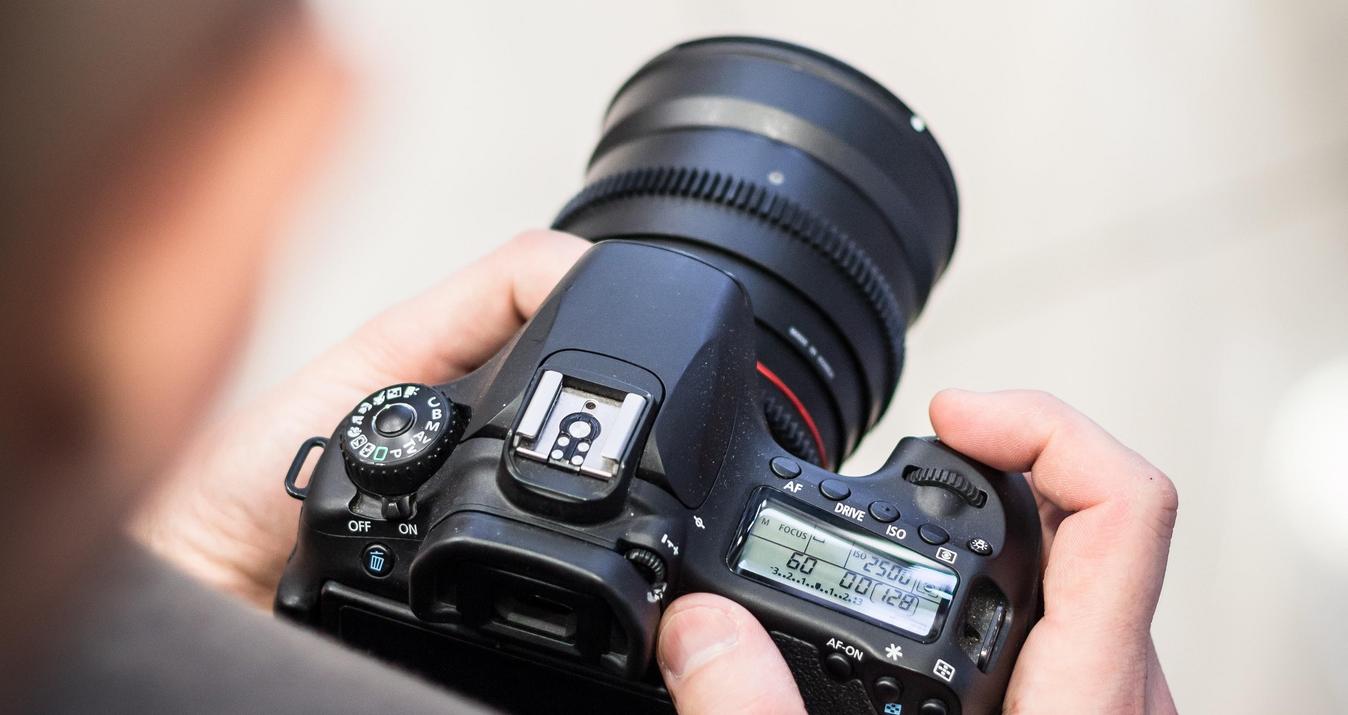
If you are a fan of aerial photography, wait a minute! We have something interesting for you! Today, on our blog, we will discuss choosing the best photo drone. Stay tuned to reveal all the secrets!
You may have noticed that the world of drones is incredibly large. These gadgets have become integral to our lives so quickly. You can choose any device that fits your needs. From the best drones for kids to professional devices with the best cameras for drone photography and videography. To make it easier for you to understand how to choose the best drone for pictures, we will look at specific models of the most popular drones of 2024. In this article, you will also learn how to turn aerial photos into a work of art using the Luminar Neo photo editor. No more words. Let's start!
Boost Your Drone Photography Automatically
DOWNLOAD NOWTo Begin with…

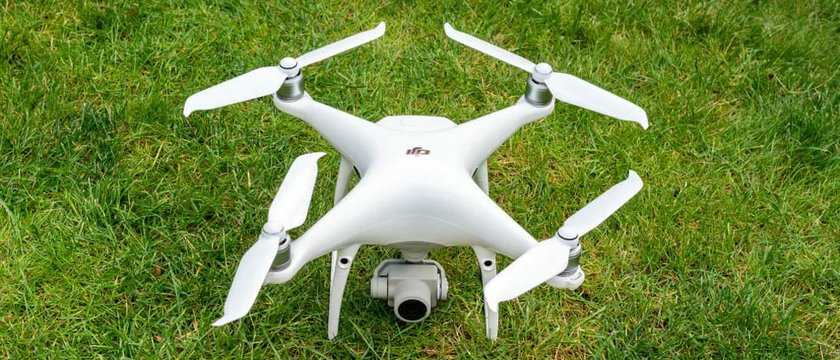
The Evolution of Drone Photography
Drone photography has quickly gone from a niche hobby to a mainstream phenomenon. New technologies and mass production have significantly reduced the prices of these devices. Now, practically anyone can afford to buy a copter. Moreover, drones with high-resolution cameras and intelligent flight modes are now available. So, even if you are a beginner and unsure if this type of shooting suits you, you can still afford to try it.
Technological progress makes it possible to fly and contemplate the scenery from the air and shoot exciting shots in excellent quality. Most modern drones have GPS stabilization, obstacle avoidance, and automated flight paths. This makes it easy to create professional-quality images and videos. Drones handle the complexities of flight on their own with intelligent flight modes such as follow-me, orbit, and waypoint navigation. So you can fully concentrate on shooting without thinking about the flight itself.
Why Trust Our Recommendations
As we strive to provide reliable and unbiased information, we have conducted research based on expert opinions and user feedback. Unlike some sources, we do not intend to promote any specific drone manufacturer. We aim to share our observations and ideas based on comprehensive evaluations and hands-on testing. The drone technology and photography field is constantly evolving, so to stay ahead of these changes, you need to keep up-to-date on new products as they hit the market.
Our information will be useful if you choose the best photography drone or look for quality software for editing ready-made aerial photos. We are committed to helping you make informed decisions and improve your creative endeavors.
Top Drones for Exceptional Photography and Videography
You should consider several factors when choosing a copter for photo and video shooting. Above all, look for drones with high-resolution cameras and adjustable shooting settings. Pay attention to battery life and battery capacity. Longer flight time allows for longer shooting without frequent recharging. The next important factor is the price. Find a balance between your budget and the features you need to get the best possible product for the money. The last important criterion that should be considered is the advanced control options. These include autonomous flight modes and obstacle avoidance. They increase the drone's ease of use and safety, simplifying the processes for you.
In 2024, there is a wide range of professional products on the market that compete well with each other. Let's look closer at the top models we singled out as the best drones for aerial photography.
Best Drone for Professional Photography: DJI Mavic 3 Pro
 The DJI Mavic 3 Pro is an improved version of the Air 3. It improves the quality of shooting thanks to a system with three cameras. It features Hasselblad's improved 24 mm-equivalent wide-angle lens paired with a Micro Four Thirds sensor. It also includes a 70 mm equivalent lens and a 166 mm equivalent lens. All this provides users with unparalleled versatility for zooming and wide-angle shots. Its advanced features include a detailed three-camera setup and long battery life thanks to a larger battery. These give you ample opportunities to capture stunning aerial photos and videos. It has the best camera for drone photography.
Specifications and Features
Weight: 958g / 963g
Dimensions (folded): 221x98x95mm
Dimensions (unfolded): 348x291x108mm
Controller: Yes
Video resolution: 5.1K HDR / 50fps
Camera resolution: 20MP + 12 MP
Battery life: 46 minutes (5,000mAh)
Max range: 15 km / 8 miles
Max speed: 68 kph / 42.5mph
Pros and Cons
Reasons to Buy:
Triple camera system for zoom and wide capabilities
The main camera features a Micro Four Thirds sensor
Excellent 60fps live video feedback
Reasons to Avoid:
Telephoto lenses produce average-quality images
ProRes video is recorded onto non-swappable memory
Creative Possibilities with Luminar Neo
DJI Mavic 3 Pro can expand your creative possibilities with its robust camera system and exceptional sensor capabilities. However, there is a way to create even more unique pictures. To do this, you need quality software to work with photos. The drone captures detailed images and vivid videos at up to 5.1K resolution, making it ideal for professional photography and cinematography. However, photos may be of different quality due to shooting conditions such as lighting, camera shake, etc. The best photo editing software that will help you correct any flaws and improve the picture in terms of colors and composition is Luminar Neo. You can make manual adjustments or use AI to create more stunning images.
Best Overall Photography Drone: DJI Air 3
 The DJI Air 3 is a user-friendly drone with an impressive 46-minute battery life and dual cameras, offering flexibility for capturing diverse and dynamic shots. Opting for the Fly More combo is recommended to access the DJI RC 2 controller, featuring a built-in screen that enhances live view capabilities over standard smartphone controllers. DJI Air 3 is a great choice if you are a drone photography enthusiast looking for a balance between affordability, performance, and ease of use. This drone is a favorite among aerial photography professionals and amateurs alike. After all, its space, in combination with the quality of the shooting, makes the process pleasant and effective.
Specifications and Features
Weight: 720g
Dimensions (folded): 207x101x91 mm
Dimensions (unfolded): 259x326x106 mm
Controller: Yes
Video resolution: 4K/ 60fps
Camera resolution: 48MP
Battery life: 46 minutes
Max range: 20 km / 12.5 miles
Max speed: 75 kph / 45mph
Pros and Cons
Reasons to Buy:
Dual cameras offer versatility
Comprehensive collision sensors ensure safety
Supports 4K 100fps slow-motion recording
Long battery life and impressive range
Reasons to Avoid:
Limited output options for HLG and D-Log M 4:2:0
Smaller sensor compared to Air 2S
Enhancing Images with Luminar Neo
The DJI Air 3 gives you good shots thanks to its dual camera that combines a 24mm wide-angle lens and a 70mm medium telephoto lens. You can even quickly and easily improve footage from your drone with the help of an online photo editor, Luminar Neo. You don't need to download and install software for this. You can quickly and easily work with photos and immediately share the result with your audience. All the necessary tools for landscape photography are at your fingertips.
Best Budget Drone for Photography: DJI Mini 3
 The DJI Mini 3 is perfect for beginners. It is compact and often available at a budget price. As a product of the revolutionary Mavic series, the Mini 3 inherits the convenient technology of drones, with the addition of a small size, while maintaining its functionality. Its affordability makes it an attractive option for entry-level hobbyists. If you are learning aerial photography, take a look at this model. You will get a real drone experience without spending a lot of money. This model lacks some of the advanced features of its more expensive counterparts but still delivers solid performance and image quality. The absence of collision sensors makes it essential for users to exercise caution during flight, although GPS and downward vision sensors aid in safe navigation and landing. This combination of economy and functionality makes it an attractive choice for those who venture into drone photography for the first time and those looking for a reliable backup drone for travel.
Specifications and Features
Weight: 248g
Dimensions (folded): 148x90x62mm
Dimensions (unfolded): 251x362x72mm
Video resolution: 4K / 30fps, 1080p / 60fps
Camera resolution: 48MP
Battery life: 31 minutes (2,250mAh)
Max range: 10 km / 6.2 miles
Max speed: 57 kph / 35.7mph
Pros and Cons
Reasons to Buy:
Extremely portable and lightweight
Registration-free in the USA, China, and more regions
Easy to fly, suitable for beginners
Captures RAW photos
Reasons to Avoid:
Limited tracking features
Enthusiasts may prefer the Mini 4 Pro for additional features
Lacks collision sensors
Leveraging Luminar Neo for Budget Photography
The DJI Mini 3 is a commendable choice for budget-conscious photographers. Its camera is weaker than most more expensive drones, but this can be compensated for in post-processing. When choosing a photo editor, consider the best photo editing software for beginners. Such programs like Luminar Neo are practical, easy to use, provide a professional result, and not expensive. You can choose the most convenient form and package to use only those functions you need. The combination of DJI Mini 3 and Luminar Neo will allow you to take professional images for a minimal price.
Best Drone for Aerial Photography: Autel Robotics Evo Lite+
 A viable alternative to DJI, the Autel Robotics Evo Lite+ stands out with its user-friendly design and impressive features. If you're avoiding DJI or interested in a 6K camera, the Autel Robotics Evo Lite+ is a solid choice. It's user-friendly like DJI drones, with the Autel Sky app offering autonomous flight modes on both Apple and Google stores, unlike DJI's limited Fly app. Its 40-minute battery life is sufficient for most photography needs. While it lacks some collision sensors compared to our top choice, it navigates obstacles well in tests. The ergonomic controller has a phone clamp that keeps the screen visible above the controller. Plus, it operates more quietly than competitors like the Air 3, making it less conspicuous during use.
Specifications and Features
Camera Resolution: 6K
Flight Time: Up to 40 minutes
Autonomous Options: Similar to DJI drones
App Compatibility: Autel Sky app (direct download from Google Play store)
Pros and Cons
Reasons to Buy:
Easy to fly with autonomous features
Extended flight time of 40 minutes
No known security concerns compared to DJI
Available with a 6K camera resolution
Reasons to Avoid:
The video quality may not match the crispness and vibrancy of DJI drones
DJI drones offer better overall value and superior image quality
Aerial Imagery with Luminar Neo
Use quality software to enhance aerial photos taken by Autel Robotics Evo Lite+. As an example, Luminar Neo is one of the recommended drone apps that benefit photographers. It provides reliable tools for enhancing photos. Easily adjust colors, enhance details, and apply creative effects. Luminar Neo offers intuitive features to improve your drone photography.
Advanced yet easy-to-use photo editor
Get Luminar Neo NowSpecialized Photography Drones
We offer a list of specialized drones for photography. These gadgets have advanced features and excellent image quality, and their parameters are adjusted according to the requirements of professional photographers and videographers. With these gadgets, you can easily and comfortably shoot aerial landscapes, commercial projects, and cinematic masterpieces.
Best Drone for Still Photography: DJI Phantom 4 Pro V2.0
The DJI Phantom 4 Pro V2.0 stands out prominently among still photography drones. It was specifically designed to meet the demanding requirements of professional aerial imaging. At its core, it boasts a powerful 1-inch CMOS sensor with 20 megapixels, delivering exceptional clarity, detail, and color fidelity in every shot. This sensor is pivotal for capturing stunning photographs with a wide dynamic range, ensuring that both highlights and shadows are effectively managed for balanced, lifelike images.
Regarding optics, the Phantom 4 Pro V2.0 features a precise lens with a field of view (FOV) of 84 degrees and a fixed focal length equivalent to 24mm in the 35mm format. This setup, coupled with an adjustable aperture ranging from f/2.8 to f/11, allows photographers to control depth of field and achieve sharp, detailed images across various lighting conditions.
Moreover, the drone offers an array of advanced shooting modes, including single shot, burst mode for capturing multiple frames in rapid succession, and Auto Exposure Bracketing (AEB) for precise exposure adjustments. It also supports interval shooting for time-lapse photography, enabling creative freedom in capturing dynamic scenes over extended periods.
Specifications and Features
Weight: 1375g
Dimensions (Diagonal Size): 350mm
Max Ascent Speed: 6 m/s (Sport mode)
Max Descent Speed: 4 m/s (Sport mode)
Max Speed: 72 kph (45 mph) in Sport mode
Max Service Ceiling Above Sea Level: 6000m
Max Flight Time: Approximately 30 minutes
Operating Temperature Range: 0°C to 40°C
Sensor: 1-inch CMOS, 20MP
Lens: FOV 84°, 8.8mm/24mm (35mm format equivalent), f/2.8 - f/11, autofocus
Photo Modes: Single shot, Burst shooting: 3/5/7/10/14 frames, Auto Exposure Bracketing (AEB): 3/5 bracketed frames at 0.7 EV Bias, Interval: 2/3/5/7/10/15/20/30/60s
Pros and Cons
Reasons to Buy:
Excellent image quality with the 1-inch CMOS sensor and wide dynamic range.
Versatile shooting modes, including burst, AEB, and interval, for varied photographic needs.
Robust build quality suitable for professional use in various environmental conditions.
Advanced obstacle avoidance system with front, rear, and side sensors for enhanced safety.
Long flight time of up to 30 minutes allows for extended shooting sessions.
Reasons to Avoid:
Pricey compared to consumer-level drones, aimed primarily at professionals or enthusiasts with specific needs.
Small drone model sizes are more portable than large and bulky designs.
Some users may find the complexity of features and settings daunting without prior experience with DJI drones.
Best Drone for Landscape Photography: DJI Mavic 2 Pro
 The DJI Mavic 2 Pro stands out for its Hasselblad L1D-20c camera, featuring a 1-inch CMOS sensor and 10-bit color profile. This setup delivers impressive 20-megapixel aerial photos with excellent detail and color precision. Its adjustable aperture from f/2.8 to f/11 allows photographers to control the depth of field and adapt to different lighting conditions seamlessly.
Elevate Your Photography with Our Advanced Software
DISCOVER PRICINGCompact and foldable, the drone is highly portable for outdoor photography. It offers up to 31 minutes of flight time and can transmit HD video up to 8 kilometers (approximately 5 miles), which is ideal for capturing expansive landscapes. Key features include Hyperlapse for creating stunning time-lapse videos with minimal effort and Advanced Pilot Assistance Systems (APAS) for obstacle avoidance during flight. The Mavic 2 Pro also uses DJI's OcuSync 2.0 technology for stable HD video transmission.
Specifications and Features
Camera: Hasselblad L1D-20c with a 1-inch CMOS sensor
Resolution: 20 megapixels for detailed stills
Aperture Range: Adjustable from f/2.8 to f/11 for versatile lighting control
Video Capabilities: 4K video at 30fps and Full HD at 120fps for cinematic footage
Flight Time: Up to 31 minutes per battery charge
Transmission Range: Maximum of 8 kilometers (approximately 5 miles) with OcuSync 2.0
Portability: Foldable design for easy transport and storage
Intelligent Modes: Includes Hyperlapse for time-lapse videos and Advanced Pilot Assistance Systems (APAS) for obstacle avoidance
Transmission Technology: Uses DJI's OcuSync 2.0 for stable HD video transmission
Pros and Cons
Reasons to Buy:
High-quality Hasselblad camera with a 1-inch sensor for detailed images.
Adjustable aperture for flexible control over depth of field.
Compact, foldable design for portability.
Long flight time and transmission range.
Intelligent shooting modes like Hyperlapse and APAS.
Reasons to Avoid:
Higher price points compared to entry-level drones.
It may not have the zoom capabilities of other models for close-up shots.
Best Compact Drone for Travel Photography: DJI Mini 4 Pro
 If you prioritize portability and compliance, the DJI Mini 4 Pro is your perfect choice. It is great for travel. Despite its small size, it offers impressive image quality comparable to higher-end models. It also has a 360-degree automatic obstacle avoidance feature similar to the Air 3 and Mavic 3 Pro. All this at a weight of less than 250 grams pleases users. Its portability allows it to fit easily in a bag or coat pocket, exempting FAA registration requirements.
Specifications and Features
Portability: Weighs under 250 grams, and easily fits in a bag or pocket
Regulation Compliance: No FAA registration is required
Image Quality: 4K video resolution at up to 100 fps HDR or 60fps, 48MP camera resolution
Flight Time: Up to 34 minutes
Max Range: 20km (12.4 miles)
Max Speed: 58 kph (36mph)
All-round collision sensors
AI capabilities for orbiting and other smart functions
Optical portrait mode
Supports 4K 60fps and up to 200 fps slow-mo
Pros and Cons
Reasons to Buy:
Extremely portable and lightweight
High-quality imaging capabilities
Advanced AI and obstacle avoidance
Reasons to Avoid:
Susceptible to wind gusts due to lightweight
Priced similarly to higher-tier drones
Fly More kit lacks essential filters
How to Choose the Best Drone for Photography
 More is needed to rely on the flight's speed, smoothness, and duration. Let's take a look at a few key factors you should consider when choosing a copter:
Camera Quality and Specifications
You need a copter with a high-quality camera to capture clear, detailed images and smooth video. Consider sensor size, megapixel count, lens quality, and video resolution (4K).
Flight Performance and Stability
The best choice will be drones with advanced flight control systems, intelligent flight modes, and GPS stabilization. These will ensure smoothness and stability. Features such as obstacle detection, avoidance, and automatic return to home will enhance safety.
Intelligent Shooting Modes
Automatic flight path, panorama, and follow-me modes will help you easily take creative and dynamic aerial shots.
Battery Life and Range
Consider the drone's battery life and range. Choose maximum settings to maximize your time in the air and take more photos and videos in one session.
Price vs. Quality
More expensive drones offer better camera quality, flight performance, and advanced features, but cheaper options on the market provide excellent value for money. Consider your photography needs and preferences to find the best drone within your budget.
Enhancing Your Drone Photography with Luminar Neo
Why Choose Luminar Neo for Drone Photography
Luminar Neo is a great choice for photographers of all levels and disciplines. Its advanced editing tools, AI-powered features, and accessibility empower users to achieve stunning results. Choosing this particular photo editor offers you several convincing advantages:
Advanced Editing Tools
You get a full set of advanced editing tools that unlock your creative potential and deliver professional results. With precise adjustment sliders and advanced masking and layering capabilities, you can edit your aerial photos as precisely as possible.
AI-Assisted Enhancements
Using the latest technology, you can greatly optimize your editing workflow and achieve stunning results with minimal effort. AI-powered tools like Enhance AI, Structure AI, and Sky Replacement automatically analyze and improve different aspects of your images, easily transforming great photos into extraordinary ones.
Easy Integration and Workflow
Luminar Neo easily integrates into your workflow. Even if you are starting in photo editing, you will quickly master the tools of this photo editor. Its intuitive interface and user-friendly design make it easy to navigate and use.
Luminar Neo's Unique Features for Drone Photographers
 Luminar Neo has powerful tools to help you improve your aerial photography. You can easily transform the sky and enhance the detail and quality of the image. With the help of intuitive and powerful tools, it will be easy for you to realize your creative vision. Creating stunning aerial photos is easier than you think. The main thing is to choose good hardware and the right software. Here are some unique features of Luminar Neo that you may find useful:
Sky Replacement and Augmented Sky
The Luminar Neo Sky Replacement and Augmented Sky tools allow you to easily transform the sky in any image where it is present. You can replace a dull or gloomy sky with a bright one with the replace function. You can also add impact and drama to your aerial photos with the help of such a transformation. The Augmented Sky feature allows users to add realistic elements such as clouds, sunsets, or celestial bodies to enhance the mood and atmosphere further. With these two functions, you can completely change the atmosphere of your photos and show your creative vision.
Structure AI and Enhance AI
These powerful tools in Luminar Neo improve detail and overall image quality. Structure AI enhances the textures and details of your images, bringing out complex patterns and fine details in landscapes or cityscapes shot from above. Enhance AI automatically analyzes and improves various aspects of your photos, such as exposure, color, and tone.
Noise Reduction and Sharpness
Advanced noise reduction and sharpness tools will fix shooting flaws and poor camera quality. With this feature, you can effectively reduce grain and noise in images. This is especially helpful if your shots are in low light or high ISOs. This tool allows you to increase the sharpness and detail of images without compromising quality.
Tips for Capturing Stunning Drone Photographs
 1. Plan Your Shots
 1. Plan Your Shots
Research the area before starting the flight and plan your shots. Come up with a composition and consider the lighting conditions. It will help you save time and make more successful shots.
2. Avoid Harsh Light
Midday sunlight can create unpleasant shadows and blurry reflections. Choose softer lighting conditions or use ND filters to control exposure.
3. Play with Shadows
Add shadows from buildings or natural objects and experiment with different times of day to capture fascinating shadow patterns.
4. Edit with Care
Aim for a natural-looking edit that enhances, not overwhelms, your photos.
5. Practice and Experiment
Explore different locations, objects, and techniques. It will help you develop your unique style and vision as a drone photographer.
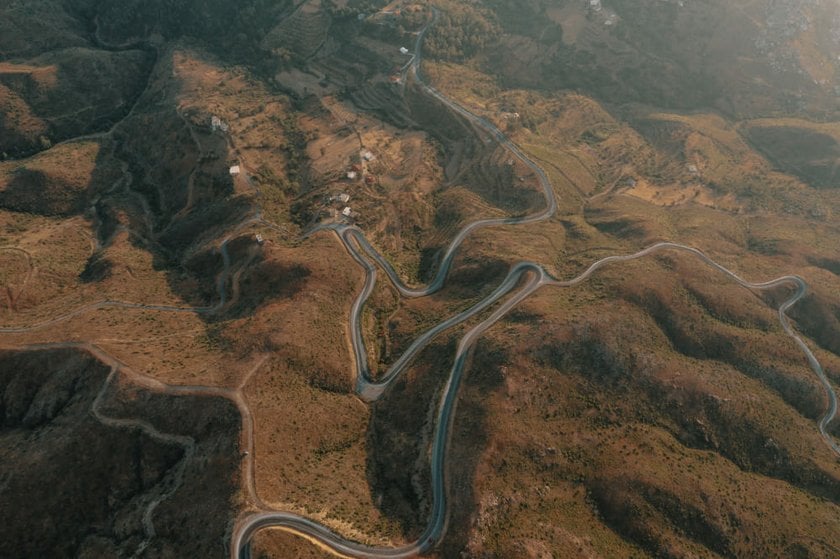
Best Times and Conditions for Drone Photography
1. Golden Hour
Shortly after sunrise or before sunset, the light is soft and warm. It enhances colors and textures.
2. Clear Skies
Sunny days with minimal cloud cover provide optimal lighting conditions for drone photography. You will get bright colors and clear shadows without glare.
3. Low Wind
Strong winds make flying impossible. The risk of the drone falling increases, and the photos are blurry due to destabilization. Calm conditions make driving easier and provide clear images.
4. Mild Temperatures
Avoid flying in extreme heat or cold, as temperature fluctuations can affect battery life and drone performance.
5. Quiet Times
Consider flying at a quiet time of day when there are fewer people and distractions in your chosen area.
6. Dynamic Weather
While clear skies are ideal for most photos, weather conditions such as fog, light rain, or storm clouds can add drama and atmosphere to your photos.
Composition and Perspective
 1. Rule of Thirds
 1. Rule of Thirds
Place the main elements along the grid lines or intersections. It adds depth and visual interest.
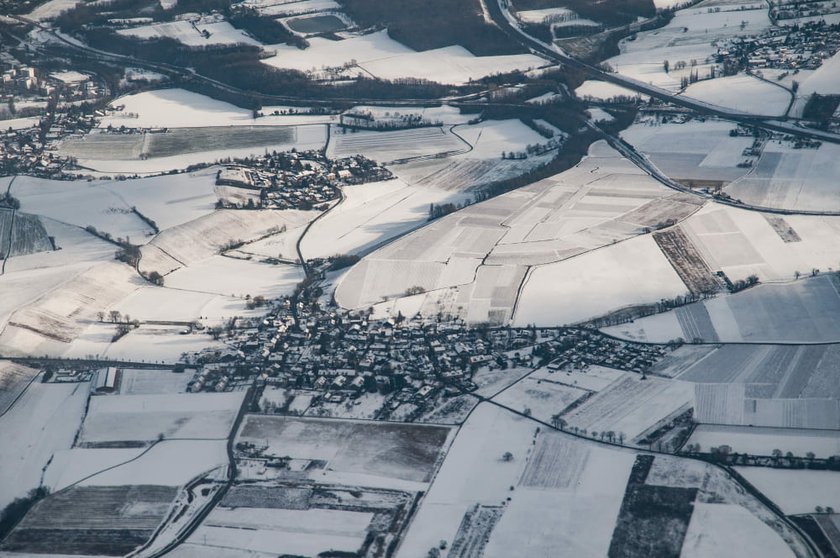
2. Leading Lines
Add linear features like roads, rivers, or coastlines to your composition. They lead the viewer's eye through the image and create a sense of movement. Use foreground lines to draw attention to the main subject.
3. Foreground Elements
Trees, rocks, or buildings in the foreground will add depth and dimension to your photos. Foreground elements help frame the scene and create a sense of scale.
4. Negative Space
Leave empty areas in your composition to draw attention to your main subject and add space to your shots.
5. Change Perspectives
Fly low for details or soar high for panoramic views. Don't be afraid to tilt or turn the camera to create dynamic compositions.
6. Vertical vs. Horizontal
Consider the orientation of your photos based on your subject and desired aesthetic. Vertical compositions work well for tall subjects or scenes with strong vertical elements, while horizontal compositions work well for wide landscapes or panoramic views.
7. Symmetry and Patterns
Look for symmetrical patterns or repeating shapes in the landscape. Symmetry can add balance and harmony to your photos, and patterns can add texture.
Post-Processing Techniques
1. Adjust Exposure
Adjust exposure to balance brightness and contrast in images to reveal more detail and improve overall tonal balance.
2. Correct White Balance
Use presets or manual settings to correct color casts caused by daylight.
3. Enhance Contrast
Higher contrast will add depth and clarity to photos. However, a too high level can lead to a loss of detail in light and shadow areas.
4. Sharpening
Sharpening tools, including AI-driven ones, sharpen edges and textures. Avoid over-sharpening, as this can lead to artifacts and noise.
5. Noise Reduction
Noise reduction tools, including AI-based ones, smooth out grainy areas while preserving detail and sharpness.
6. Lens Correction
Use lens correction tools to automatically or manually adjust lens aberrations to ensure straight lines and even lighting in your frame.
7. Crop and Straighten
Use the cropping tools to adjust the composition, remove unwanted objects, and improve the symmetry of your photos.
8. Cut out Unnecessary Objects
If you know how to cut out an image in Photoshop, you can do it to remove unnecessary elements and make your image more attractive. You can also do this with other software, like Luminar Neo. This photo editor has AI-powered tools for even better and faster results.
9. Creative Effects
Experiment with creative effects like black-and-white conversion, spot color, or artistic filters to add visual interest and create a certain mood or atmosphere in your images. Apply AI tools to unleash your creativity.
Conclusion
 We hope this article has made it easier for you to navigate the issue of the best drones for aerial photography. Remember the advice we've given you on choosing a drone for your shoot and the importance of post-processing your shots. After all, it is at this stage that you can correct the flaws, improve the quality of the image, and make it more exciting.
The Future of Drone Photography
Technologies will certainly continue to develop. Therefore, feel free to use the unlimited possibilities of shooting with the help of copters. They will become even more compact and powerful. In addition, the new models will be equipped with functions based on artificial intelligence and will have better cameras. A deeper integration of augmented reality (AR) and virtual reality (VR) technologies should also be expected. All these improvements will bring aerial photography to a new level of detail and sharpness. So, be on time to enter this field and expand your creativity.
We look forward to advances in battery technology and flight endurance. Improvements will also be made to obstacle detection and collision prevention systems. With increased security, aerial photography and videography will become more accessible and exciting. Soon, drones will undoubtedly play an increasingly important role in shaping our bird' s-eye view of the world.
Final Thoughts on the Best Drones for Photography and Videography
Choosing the best photography drone depends on various factors. We have selected the best drone models that are currently receiving favorable reviews. Their image quality, performance, and versatility are top-notch. So, when choosing a gadget for yourself, consider your budget, intended use, and desired features.
For hobbyists and professionals who demand the ultimate performance, drones like the DJI Air 3, DJI Phantom 4 Pro, and DJI Mavic 2 Pro offer unparalleled image quality, advanced features, and long flight times. These models excel at capturing stunning aerial photos, making them popular with photographers worldwide.
If you are on a tight budget or looking for a more portable option, drones like the DJI Mini 2 and Autel Robotics EVO Lite+ are good choices. They all offer impressive performance and image quality at a more affordable price. These compact drones are ideal for filming adventures on the go and exploring creative perspectives from the air.
Choose a drone to help you grow in this field and learn how to take stunning aerial photos. Even if you are new to piloting, bring all your creative ideas to life, no matter how bold and complex!
FAQs
Do You Need a License for Drone Photography?
Yes, you may need a license or certificate in many countries to use a drone commercially for photography.
How to Maintain Your Drone for Longevity?
Check it regularly for damage, clean it after flights and store it properly, update the firmware, calibrate the sensors if necessary, and avoid overcharging the batteries.
Can Drones Fly in Rainy or Windy Conditions?
Some drones can withstand light rain and wind, but flying in rainy or windy conditions is not recommended for most copters.
Can Beginners Use Professional Photography Drones Effectively?
Yes, if you practice and have patience. Start with the simpler flight modes and gradually learn to use the advanced features. Practicing flying in different environments will help you gradually improve your skills.
What are the Legal Requirements for Flying Drones for Photography in Urban Areas?
They differ depending on the country. Altitude and airspace restrictions, no-fly zones, and privacy issues are possible. It is important to familiarize yourself with local laws and regulations before using copters.
What Accessories are Essential for Improving Drone Photography Sessions?
Main accessories include:
Spare batteries for extended flight time.
ND filters for exposure control.
Memory cards with sufficient capacity.
Quality case for transportation and protection.
In addition, propeller guards, landing pads, and sunshades can improve flight safety and comfort.