What is a Lookup Table (LUT)?
June 12, 2023
Luminar Neo 2023 Feature of the Month: What is a Lookup Table (LUT) and how to use it? Today we will talk about LUT color grading in more detail, so be sure to read this article to the end. So, how can you apply a calibration LUT?
The latest version of Luminar Neo adds support for lookup tables or LUTs. But what exactly does that mean to a creative photographer? Turns out a LOT! You can use a lookup table to change the appearance of your photo quickly. This information will be very helpful not only for beginners but also for people with considerable experience in photography.
What is a Lookup Table (LUT)
So, how can you get color-corrected photos and color-grade your footage very easily? What is the LUT definition? This is a table of input and output RGB values. To put it simply, a Lookup Table (LUT) is a preset that changes the color, contrast, and tones of an image in one click.
By comparison, you can do color correction on any file with a standard photographer's set of brightness, contrast, and curve sliders, and then apply a LUT and do the same. The result will be visible to the eye, like in specific color presets. But how can you use LUTs? Since the video is usually 8-bit, in the first case you will only get tone loss when editing and boosting contrast. And if you do the same through the right LUT, tones will not be lost at all.
It's also worth talking about LOG footage with its flat image profile. The LOG looks not so pretty, but the other footage doesn't give the same flexibility in color correction. LOG often produces the lowest contrast image, which is why it is often confused with RAW. So, we need the LOG to get as much as possible the original image from the camera, and then at the stage of color correction, we bring the resulting image to the final form.
What is a LUT?
A Look Up Table, or LUT, is essentially a digital file that transforms the color and tone of your image. It essential can convert colors and details in a source file to a new destination state. For example, you can use a LUT to convert a modern digital photo to the color and tone of an older film stock. Or perhaps to convert between a color image to an aged black and white treatment.
Also read: Full Frame vs Micro 4/3 Main Differences
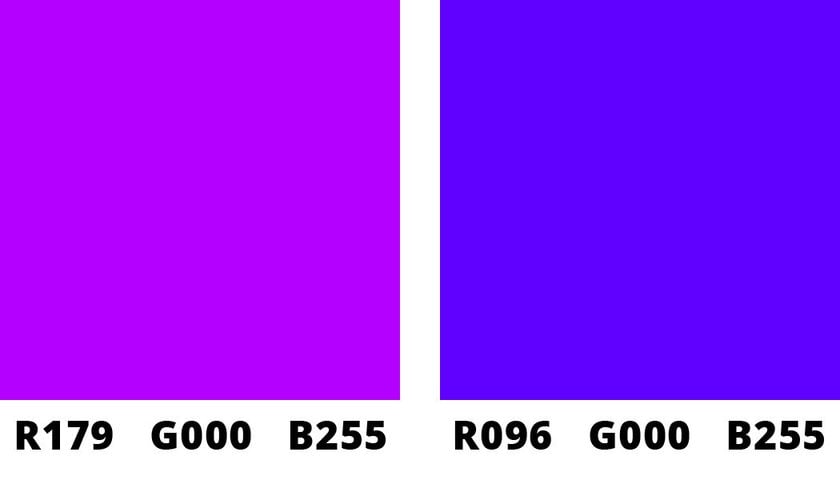
A LUT essentially transforms tone and color based upon settings chosen by the creator of the LUT. Each RGB combination of color has a new value assigned. For example this particulate shade of violet has been remapped to a darker purple.
As a result, LUTs are used for a variety of purposes, including creating an eye-catching look from scratch or converting footage from one color space to another. But they don’t just change one color value in an image… they change all.
Why Use LUTs On Footage And Photography
In this example, here’s a lookup table based upon an aged film stock from the early 1900’s. First let’s look at it applied to a color photo. The image on the left are the original colors and on the right are the newly remapped.
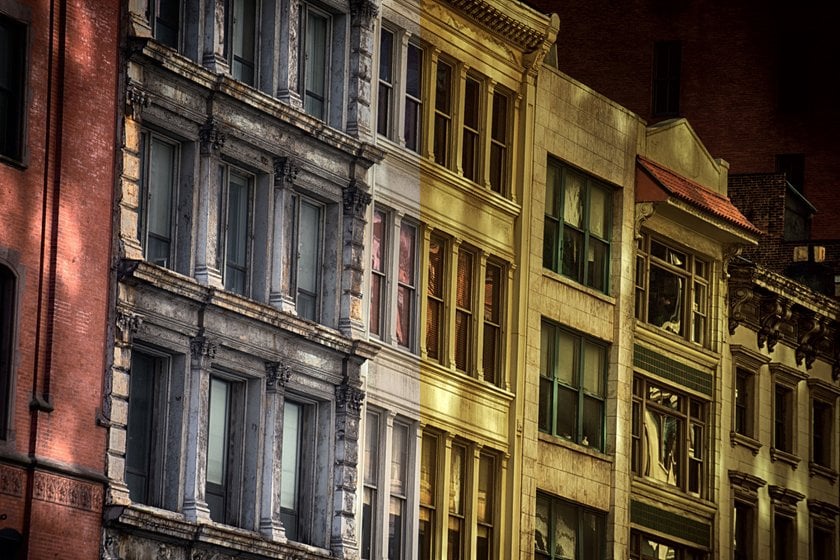
You can see that the colors shift relatively dramatically as do tonal values. Translating the LUT into a Curve looks a bit like this.
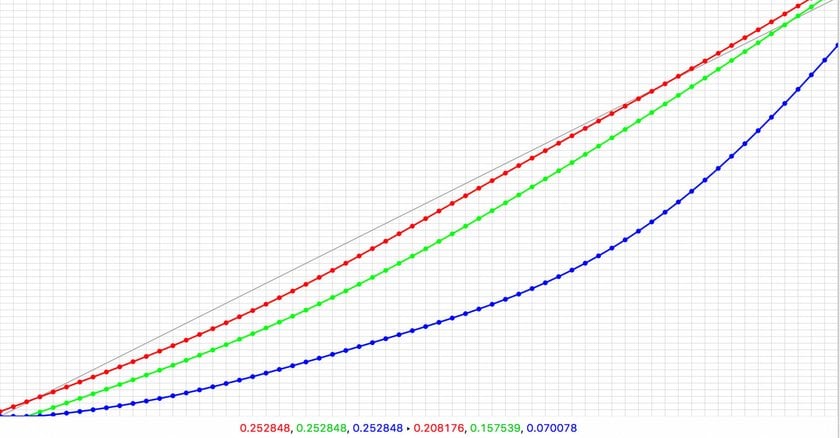
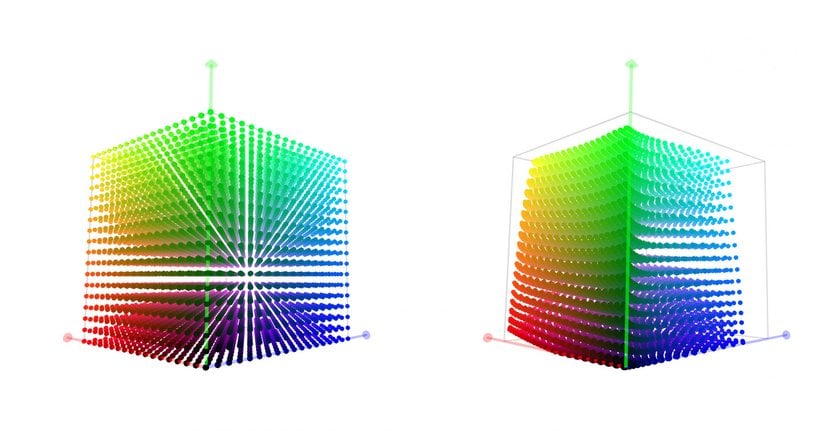
The Blue and Green channels of the image have been reduced and darkened, while the red channel has been more subtly shifted. You can also see this if we view the LUT as a cube model. The cube on the left is an unmodified image while the one on the right represent the changed RGB values.
Now, let’s look at the LUT when combined with a black and white adjustment. In this case I converted the image to black and white, and then applied the LUT. The split screen below makes it easy to see the three states.
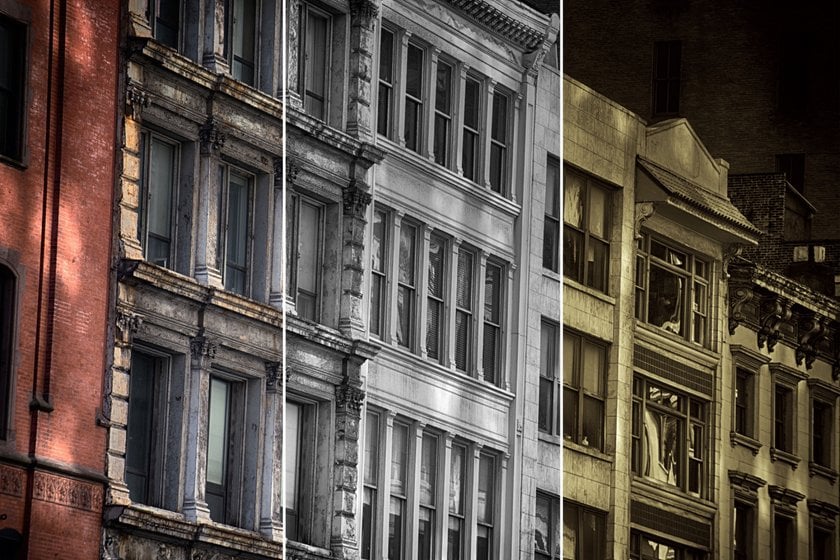
As you can see, a lookup table is similar to a Curves adjustment, in that it can transform the color and tone. Luminar Neo includes the ability to apply LUTs to an image easily.
Where Do LUTs Come From
Creative LUT was seen in movies, but now it is also used in photography around for years. For example, in the cinematic world, color correction refers to the manipulation of film and images to create consistent tones throughout the whole picture. Many directors use the color palette as part of their overall production design.
If the camera LUT cannot be adjusted, you can use Adobe Premiere Pro editing suite to look LUT. Color grading is one of the best tools that make your photo or video great. In post-production, there are two types of LUTs: 1D and 3D. The first controls only one value, hue, or color balance. On the other hand, the second manages lots of variables.
Using Mood Tool (LUT)
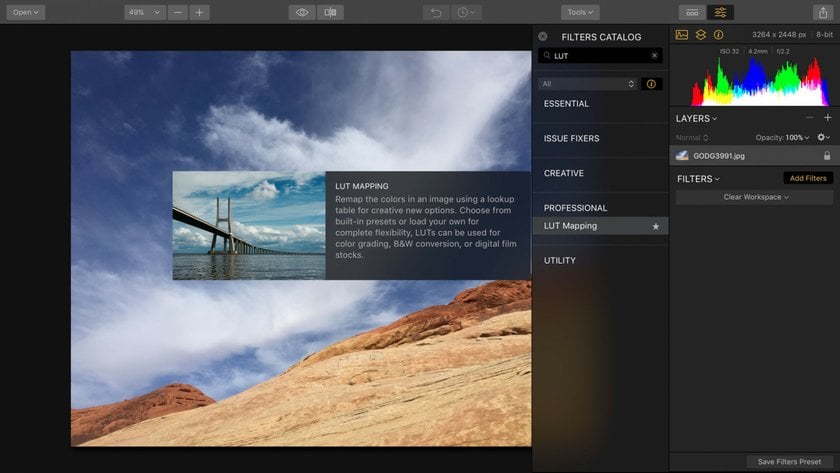
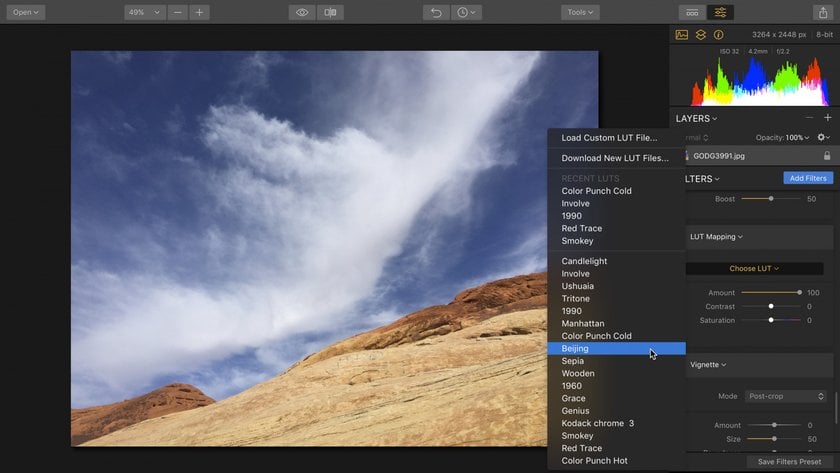
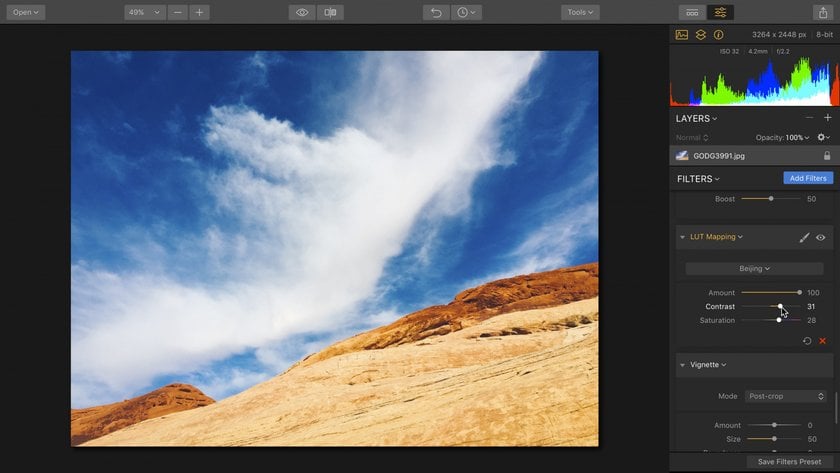
The Mood tool provides a convenient way to change the look of your photos using lookup tables (LUTs). With just a few clicks, you can apply a variety of looks, including film stock, black-and-white styles, and custom color grades. The tool comes with several built-in LUTs that can be selected from the Choose LUT menu.
In addition, if you have your own lookup tables in .cube format, you can easily load and apply them within the tool. This makes it easy to experiment with different styles and achieve a new aesthetic for your photos in seconds. Let's take a closer look at all the sliders in the Luminar Neo’s Mood (LUT) tool:
- The Choose LUT menu lets you pick from a variety of options, including built-in LUTs, recently used LUTs, or your own custom LUTs.
- Contrast. This slider can be used in conjunction with the Mood tool's built-in LUTs to fine-tune the look of your photo. By adjusting the Contrast, you can increase or decrease the difference between the brightest and darkest areas of your image.
- The Amount slider lets you adjust the level of intensity of a LUT applied to your image.
- The Saturation slider affects the overall saturation of the picture and can also be used to refine the appearance of a LUT.
Advanced yet easy-to-use photo editor
Get Luminar Neo NowAdvice for LUTs and Presets
Today, LUT profiles can be downloaded just like Lightroom presets, except that you never know what's in the LUT file. However, you can always create LUTs and apply them to videos or pictures.
For best results, choose a consistent place on your hard drive to store your LUT files. For example your documents folder or perhaps a dropbox folder that syncs to all your computers. This way you can always find any lookup tables you need. Plus you can then store them as part of any custom presets you make.
You can also try applying the LUT Mapping effect to an adjustment layer. This makes it easy to adjust the opacity and blending modes to unlock even more options. We’ll be posting all sorts of recipes and tips to the blog all month.


