What Is A Moiré Pattern And Why It Can Ruin Your Photo
October 28, 2024
Why do pictures of screens look weird, and how can they be fixed? And does it need to be fixed at all? Let's figure it out! Today, in our blog, we will talk about moiré lines.
The image in the photo always differs from what we see with our own eyes. It happens due to the specifics of the structure of photo and video cameras. We can often see strange lighting effects and optical illusions in the pictures. Today we want to talk about a phenomenon you have surely encountered at least once in your photos or images from the Internet.
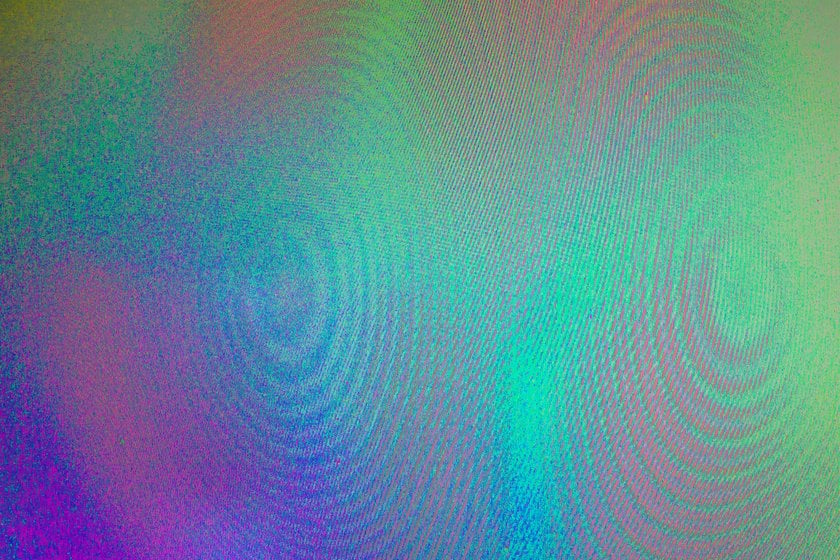
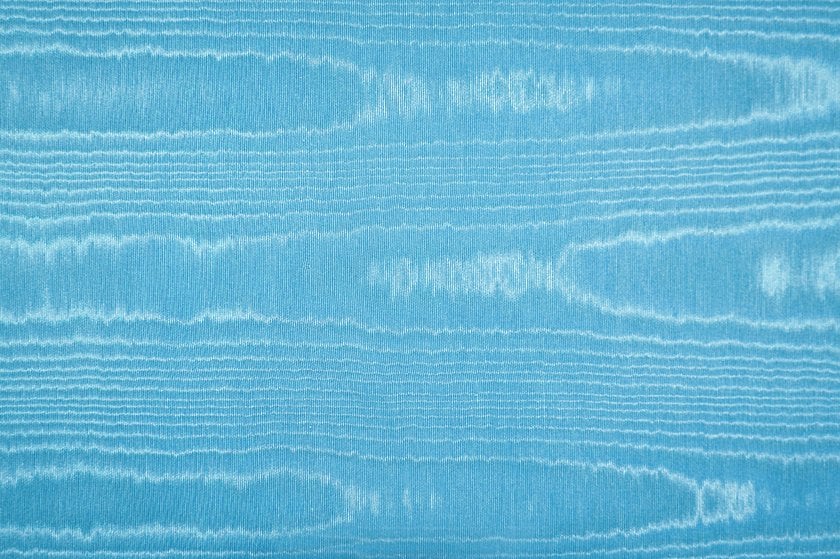
Rainbow lines and circles in photographs you see on some pictures have a name. Did you hear the word “moiré” (pronounced “more-ay”)? Sometimes they make a special effect and make a photo unique, but mostly they are plenty of headaches for photographers.
This article will delve into the moiré effect and common ways to avoid it in your photos. Plus, you’ll learn some ways to fix the problem if it occurs and reduce it both in camera settings and using software like Luminar Neo, Adobe Lightroom, and Photoshop. Let’s begin with breaking down what moiré is and how to spot the issue.
Moiré Definition
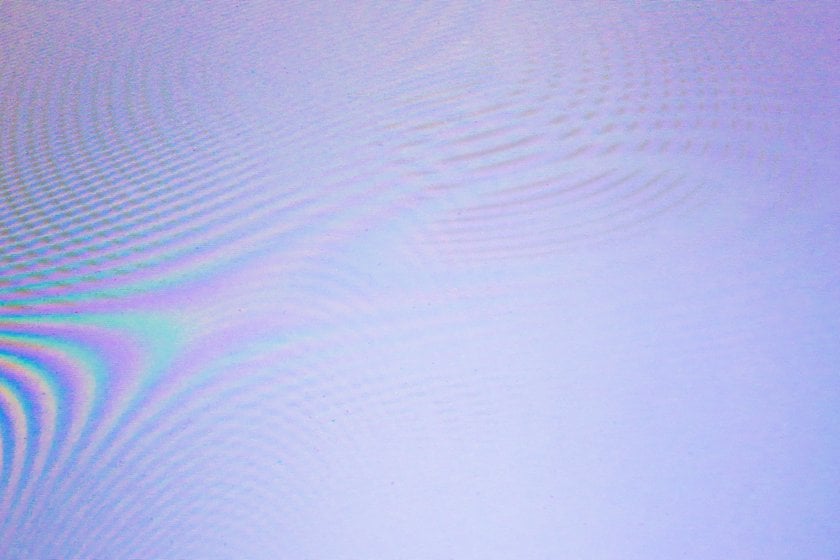
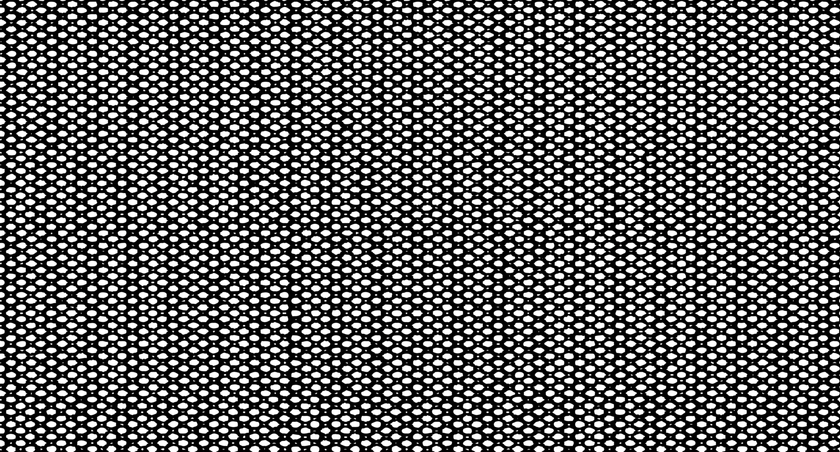
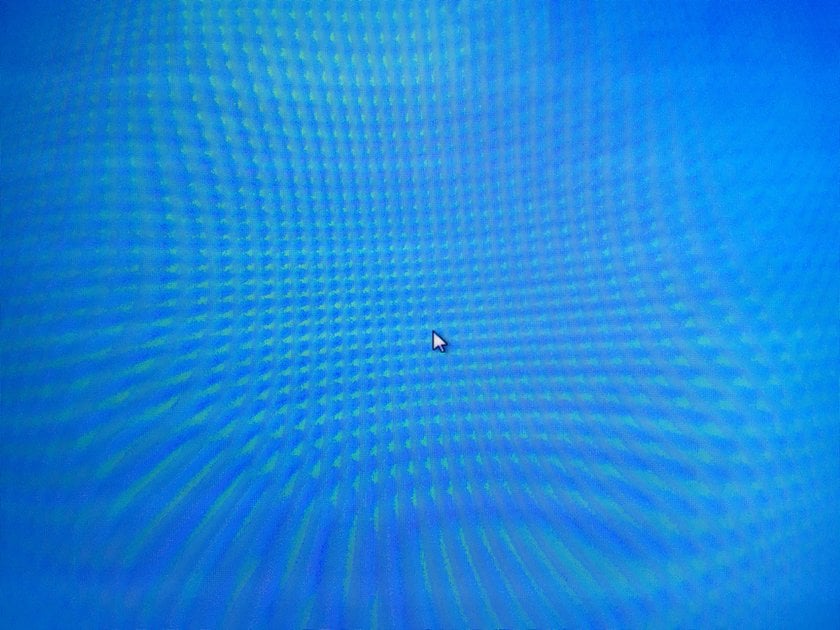
Moiré is a visual effect that happens when two similar patterns overlap, creating new, wavy, or unwanted stripes of color that go across a photo that wasn’t originally there. It can occur in various situations, like photographing subjects with fine repetitive patterns or printing images with intricate designs. Moiré effect also happens on computer screens or electronic displays when certain patterns clash. It can make photos look distorted or grainy, and it’s generally considered an unwanted artifact.
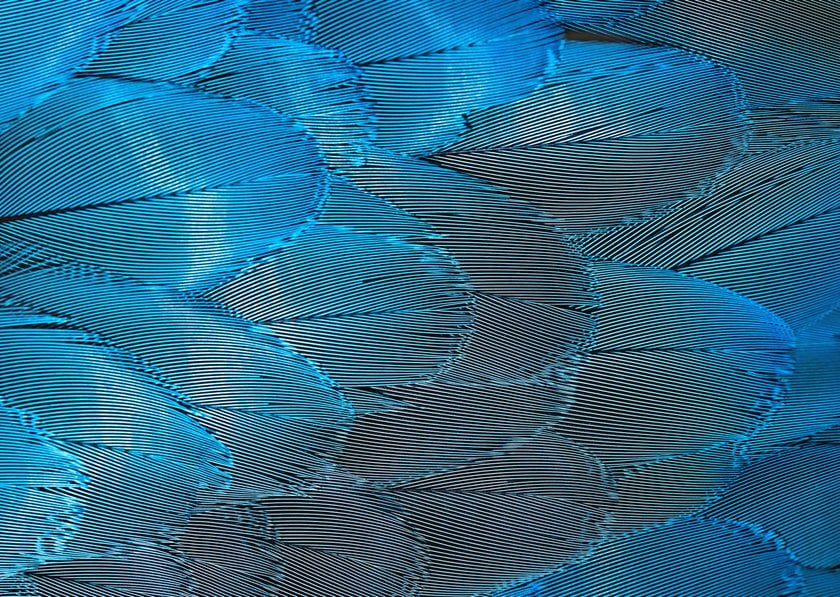
For example, when you try to take a picture of a striped shirt or print a photo with fine lines, moiré can appear, making the image look weird or distorted. It’s like an unexpected optical illusion that is distracting or unwanted. Photographers and designers try to avoid moiré by using special techniques and filters to minimize its impact and maintain the clarity and quality of images and patterns.
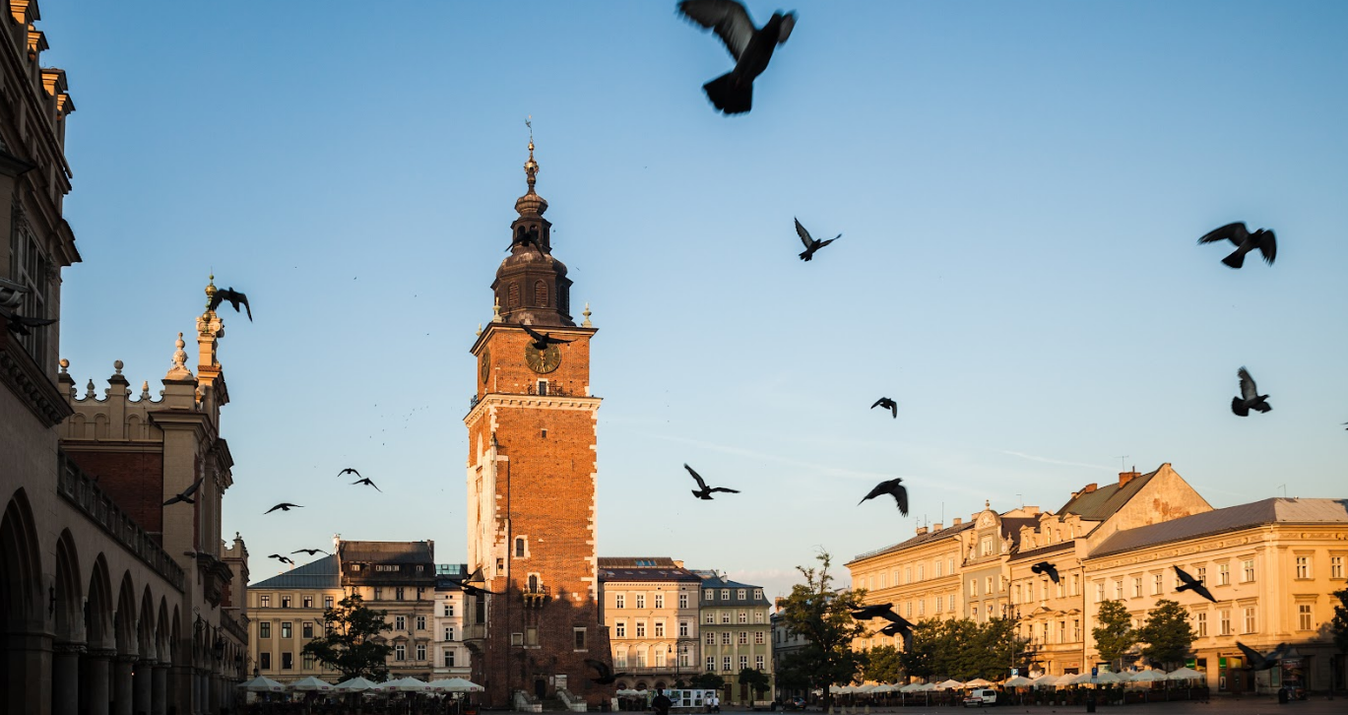
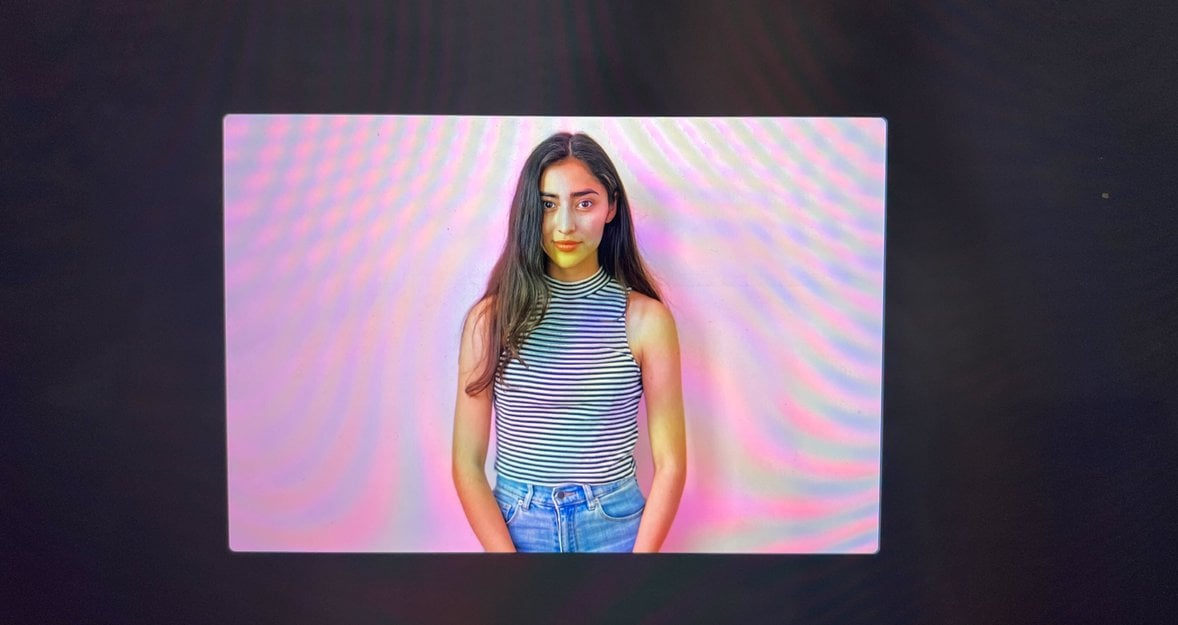
Did you ever think why computer screens look weird on camera? Moiré causes the rainbow effect we see. This phenomenon also happens on computer screens or electronic displays when certain patterns clash. That is why pictures of screens look weird.
"Some negative phenomenon," — you may think. And you will be right. Unwanted iridescent lines are very difficult to use in photography. For creating unique and extraordinary shots, photographers usually use Bokeh Photography Effect. The moiré and bokeh effects are two distinct and unrelated phenomena in photography.
In contrast to moiré, the bokeh effect refers to the aesthetic quality of the out-of-focus areas in an image. It is achieved by using a wide aperture in photography, creating a shallow depth of field. The out-of-focus background or foreground elements appear soft and blurry, enhancing the focus on the main subject. This creative technique can produce pleasing and artistic blur in certain areas of an image, not only in making shots step but on ready pictures in a photo editor. Today we can use AI technology to create unique art. With focus stack software from Luminar Neo, making a bokeh effect is possible in any picture you like.
Advanced yet easy-to-use photo editor
Get Luminar Neo NowPhoto Examples Of Moire Effect
Causes Of Moire Pattern Effect
Around us, many surfaces and terrains of different things evoke moiré artifacts when falling into the camera lens. This effect is caused by the interference patterns that arise when two regular textures with similar but slightly different frequencies or orientations overlap or interact. When these textures come together, they create new ones not present in the original images or real life.
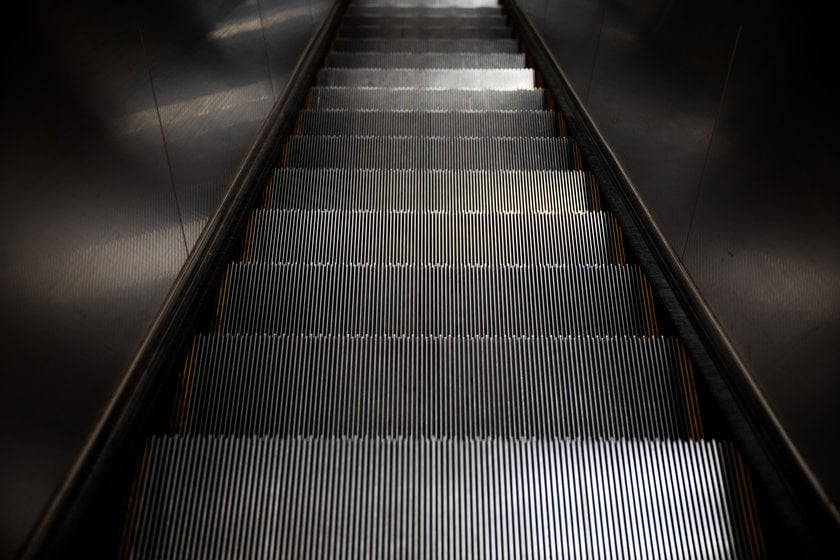
In photography and printing, moiré occurs when capturing or reproducing images of subjects with fine, repetitive patterns, such as grids, lines, or textiles. If the camera sensor or printing method aligns poorly with the subject's pattern, the interference between the two textures leads to moiré artifacts, appearing as wavy or rippled distortions.
In the digital realm, moiré can occur on computer screens or electronic displays when displaying images or textures with conflicting patterns. Moiré can happen due to the limited resolution of the screen or when superimposing images with similar textures, causing the moiré effect to be noticeable.
Professionals use techniques to reduce or avoid moiré, such as adjusting the patterns, using anti-aliasing filters, or employing specialized software to process the images and minimize interference.
Moiré Reduction Techniques
If it has already happened that you took a good picture but found an undesirable effect on it, this is not a reason to be upset. Let's talk about minimizing the rainbow effect when taking photos and removing the moiré pattern before using the picture.
There are some common moiré reduction techniques. Sometimes it is enough to use one; sometimes, you should try two or three to get better results.
Anti-Aliasing Filters
The offers of the photo equipment market are growing and improving every year. Almost all manufacturers load their hardware with built-in camera settings to facilitate moiré prevention. In addition, modern cameras have high-resolution sensors. A higher resolution means the sensor has more megapixels, allowing it to capture more detail in your imagery and reducing the likelihood of aliasing.
Anti-aliasing filters (also known as low-pass filters) are used in digital cameras to blur the image slightly, reducing the sharpness of patterns and preventing moiré from occurring. The anti-aliasing filter is placed in front of the camera sensor. It slightly blurs the incoming light before it reaches the sensor. This blurring reduces the sharpness of the high-frequency patterns, preventing them from causing aliasing.
When light enters the camera through the lens, it carries information about the subject's details and patterns. In digital imaging, the camera sensor comprises a grid of pixels. Each pixel captures a small portion of the incoming light to form the image. After capturing the image, some cameras may apply additional digital processing to reduce moiré further or sharpen the image.
While anti-aliasing filters effectively reduce moiré and aliasing, they also introduce a slight loss of image sharpness. To address this, some high-end cameras or specialized applications may offer the option to turn off the filter, allowing photographers to choose between reducing moiré and maximizing image sharpness, depending on the specific needs of their photography.
Test Photos
However, an update of the camera is optional to get the desired clean photos. Sometimes it is enough to take a few test shots to notice all the flaws in the picture. Enlarge the image and look closely at any distortions. Unwanted stripes of color that go across a photo or yellows, purples, or greens waves means you got moiré.
Changing camera angles or distances between the camera and the subject can help avoid the alignment issues that cause moiré. Change the shooting angle or adjust the distance between the camera and the subject to prevent precise alignment with the repetitive patterns. Dithering also plays its role. Adding random noise or designs to the image can help disperse the moiré effect or make it less noticeable.
With a little perseverance, you can take a perfect picture!
Adjust Image Capture Parameters
You can adjust several parameters and techniques to avoid moiré in image capture. Here are some tips:
- Adjust aperture settings: Using a larger aperture (smaller f-stop number) can reduce the sharpness of patterns and minimize moiré. When shooting at a small aperture (such as F16 or higher), diffraction softens the image, ultimately helping to reduce aliasing.
- Use a different lens: Experiment with different lenses, as some may be more prone to moiré than others. Consider using lenses with focal lengths that don't match the pattern frequency of the subject.
- Avoid high-contrast patterns: Choose subjects or backgrounds with less high-contrast patterns, as they are more likely to cause moiré.
- Shoot in RAW format: When capturing images in RAW, you have more flexibility during post-processing to reduce moire using specialized software.
By carefully adjusting these image capture parameters and employing suitable techniques, you can minimize the chances of moiré occurrence and ensure cleaner, more visually appealing photographs
Post-Processing Techniques
Now that we know the secret tricks to avoid the moiré pattern in the photo, what should we do if we still notice it in the finished picture? Let's figure out how to get rid of the moiré effect.
Photo editing services also do not stand still and improve the functions of working with unwanted rainbow effects. Programs like Luminar Neo can help you achieve the best photo-processing results. The large interface with many functions may scare you at first. Still, with a photo editor for beginners, you will quickly master the basics and be able to edit photos, enjoying the process and the result.
Post-processing techniques can effectively fix rainbow effects in images after they have been captured. Here are some common methods used to address moiré:
Blur or Smoothing: Apply a slight blur or smoothing filter to the affected areas of the image. Softening the sharp edges can help reduce the visibility of moiré patterns.
Frequency Separation: Separate the image into low-frequency and high-frequency layers. Target the high-frequency layer (where moiré is present) and apply selective adjustments to reduce the interference.
Clone or Heal: Manually clone or heal the moiré-affected areas using adjacent pattern-free regions as a reference. This method requires precision and patience but can be effective.
Desaturation or Color Adjustments: Sometimes, moiré may be more noticeable in certain color channels. Adjusting the color balance or desaturating specific colors can mitigate the effect.
Moiré Reduction Filters: Some image editing software includes specific moiré reduction filters or plugins that automatically detect and reduce moiré patterns.
Resampling or Downsampling: Resample the image at a lower resolution to change the pattern frequencies and reduce the moiré effect. This method may result in a loss of image detail.
Selective Sharpening: Carefully sharpen the image, but avoid applying sharpening to areas with noticeable moiré patterns.
Texture or Pattern Overlay: Overlay a subtle texture or pattern that matches the moiré area to blend with the rest of the image.
Dithering: Adding random noise or patterns to the image can help disperse the moiré effect or make it less noticeable.
It's important to note that while these techniques can help minimize moiré, they may not completely remove it in all cases. The effectiveness of each method depends on the severity and type of moiré present in the image. As with any post-processing, it's crucial to work with a copy of the original image to preserve the integrity of the original file. Experimenting with various approaches and adjusting settings will lead to the best results.
How to Remove the Moiré Effect in Luminar Neo


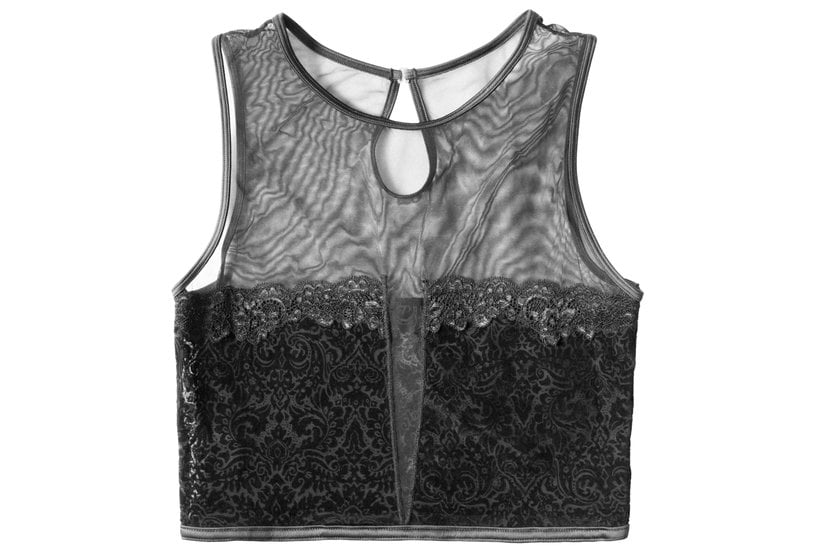
The effect which makes the object move in a pattern occurs due to overlapping repeating lines or grids (as on clothing or other textures). Using the Luminar Neo program, you can remove this effect using certain tools. Here is a step-by-step guide:
Step 1: Open the image
Start the program, and click Add Photos. Or drag the photo into the program directly.
Step 2: Find correction tools
Go to the Edit tab at the top and select the Essentials section. This section contains the basic image editing tools you need.
Step 3: Use the Denoise tool
Find the Denoise tool in the Essentials tab. It helps remove excess detail by reducing noise and unwanted artifacts in the image. Adjust the Luminosity and Color sliders until the effect is less noticeable.
Step 4: Using the Structure tool
Here, you can also find the Structure tool. Use the Amount slider to decrease the texture level and soften the image. Do not overdo it to avoid losing important image elements.
Step 5: Color correction (if needed)
If the effect has affected the colors in the image, find the Color tool → HSL (Hue, Saturation, Lightness). It allows you to adjust specific colors, reducing the saturation. “Remove Color Cast” can help smooth out color artifacts.
Step 6: Local correction (if necessary)
Use the Adjustment Brush to highlight needed areas in each tool. Then, apply the same noise or texture corrections to selected parts.
Tips
Be careful with the settings so you don't overdo the adjustments. An aggressive application can make the image too “soft” or deprive it of details.
Bottom line
Understanding concepts such as moiré can help you create images with improved clarity and reduced interference patterns. It is one of those phenomena that sounds complex but quite simple — once you know how it works. It can be frustrating to face it, but with a little knowledge and effort, it can be avoided entirely or removed in post-production fairly easily.
Hope there will be no discouragement if you notice aliasing in your photos. Photography rainbow effect is quite common, but it can be minimized or removed using the techniques discussed here. Preventing and correcting the aliasing effect is an essential step toward mastering photography. Now you are closer to creating compelling and visually engaging photographs. Good luck!