What Is Time Lapse Photography: Understanding Its Techniques
October 09, 2025
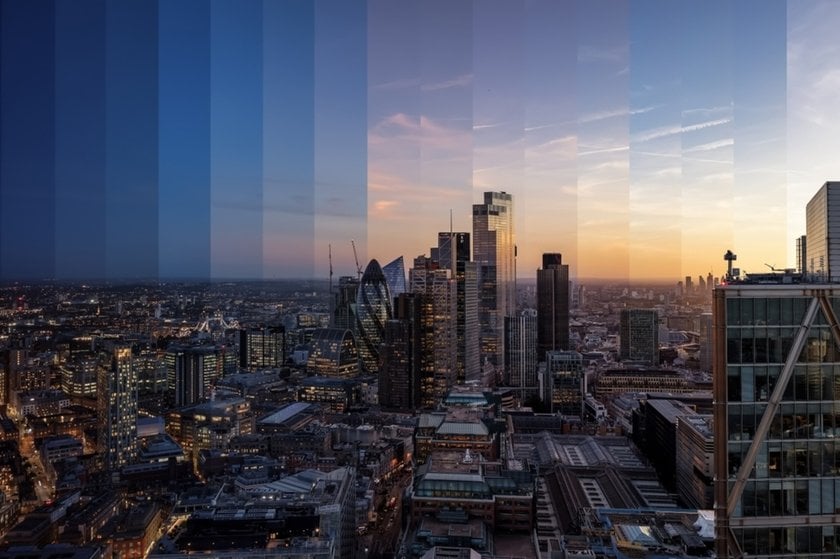
Time lapse turns hours into popcorn-sized moments. Watch the world hurry and breathe in the same clip.
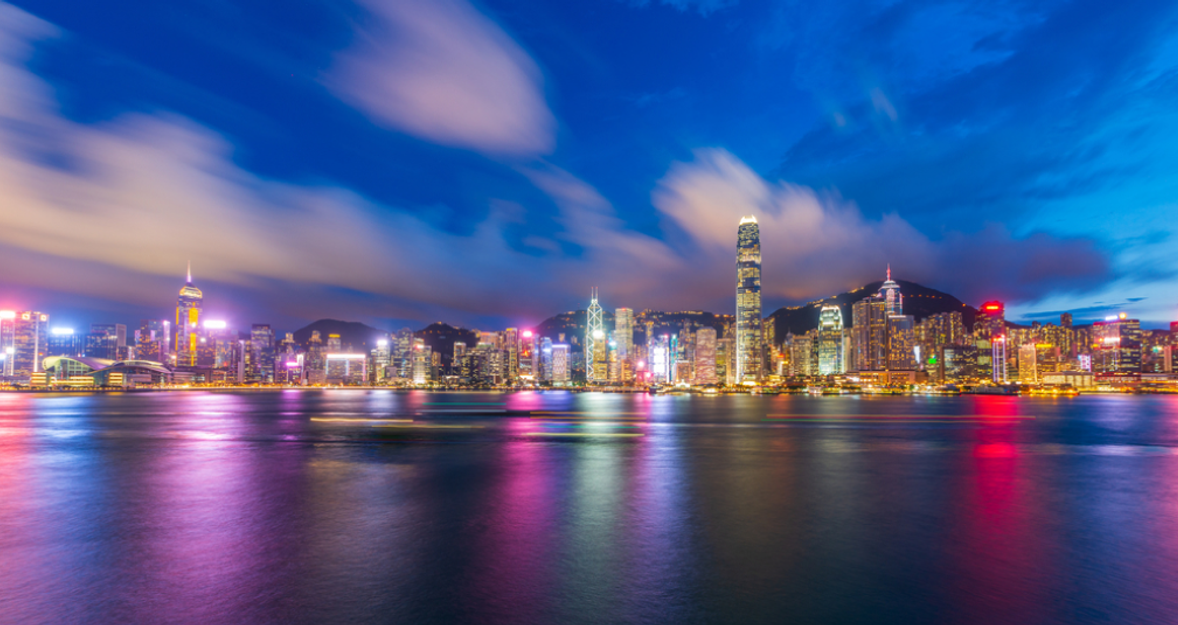
Have you ever looked up at the sky, wished you could see the clouds race by, or watched a flower bloom and wanted to speed up that quiet, methodical process? We all live by the clock, moving at the same steady pace. For us photographers, there’s a neat trick: time lapse. It squashes hours, days, or even years into a few mesmerizing seconds. I’m talking about time lapse photography definition, a powerful visual storytelling tool that reveals the hidden dynamics of the world around us. It’s not just a technical trick, it’s a way of seeing the invisible poetry of motion and change.
What Is Time Lapse Photography?
 At its heart, time lapse definition is the process of capturing a series of still photographs over an extended period and then playing them back in rapid succession. Think of it like a flipbook where each page is a photograph taken minutes apart. When you quickly flip the pages, the slow movement appears fluid and fast. This is essentially what time lapse means: taking something that happens slowly and accelerating it so that the change becomes visible, dramatic, and often beautiful.
It’s fundamentally different from a regular video because a video captures a continuous stream of motion (typically 24 to 30 frames per second), whereas a time lapse captures only moments separated by a set duration.
Your AI-Powered Photo Editor for MacOS and Windows
Discover Now!How Does Time Lapse Work?
 The basic mechanics of how to create a timelapse with photos revolve around the concept of frame rate and interval. Standard video playback might be 24 frames shown in one second. If you take 24 separate images, each one second apart, and play them back, you’re just getting a very choppy 24-second video. But if you take those 24 photos, each one ten minutes apart, you’ve condensed four hours of actual pace into a single second of footage.
The technique requires precision and patience. It’s a commitment to a location and a setup for a considerable duration. One of my favorite uses is capturing construction projects; watching a skyscraper rise from its foundation in a 30-second clip provides a completely new perspective on human effort and engineering.
Time Lapse Photography Common Terms
To successfully execute a time lapse, you must master a few key concepts. These terms are the nuts and bolts of the process, defining how you capture the still images and how they look when played back.
Interval
The interval is the single most critical decision you’ll make in the whole process. It is simply the duration that passes between each photograph your camera takes. Choosing the right Time Lapse Interval is crucial because it directly dictates the final speed and smoothness of your resulting video. Once you’ve chosen your subject, the interval is your way of defining what does time lapse mean for that specific scene, and how much time you’re going to squeeze into each single photograph.
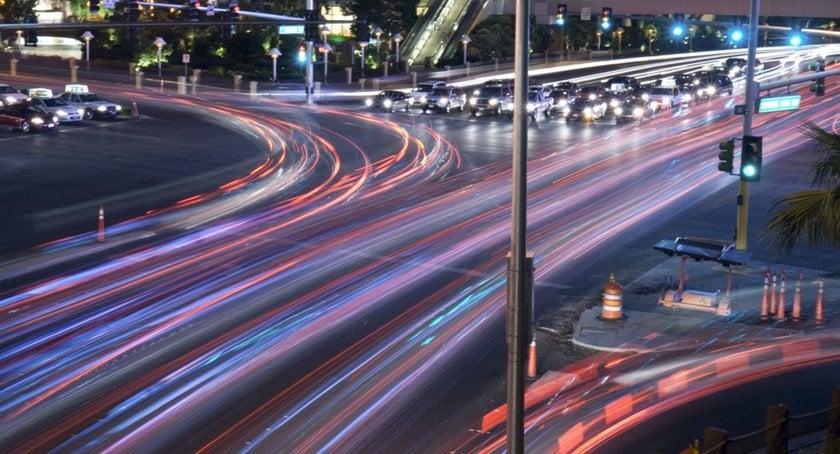
Fast-moving objects (like traffic, walking pedestrians, or fast cloud movement) will usually need a shorter interval, perhaps 1 to 3 seconds. This enables the movement to appear continuous, as opposed to jerky. For instance, capturing a busy city intersection where cars are flowing quickly.
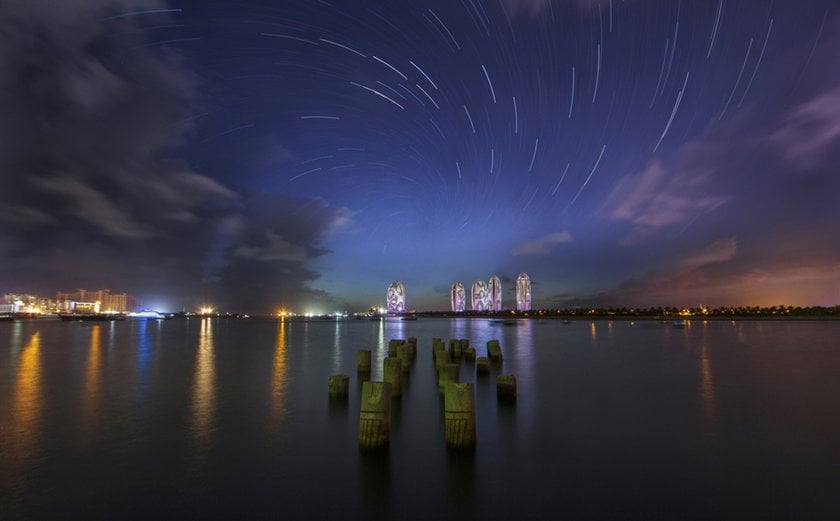
Slow-moving subjects (like a sunset, stars moving across the night sky, or a seed germinating) require a much longer interval, ranging from 10 seconds to several minutes, or even hours. A 30-second interval is perfect for a beautiful, stately sunset where the changes happen slowly and subtly.


The equation is simple: Frames needed×Interval=Total time of shoot. If I want a 10-second final video at 25 frames per second, I need 250 frames. If the action I’m shooting takes 5 hours (18,000 seconds), I take an interval of 18,000÷250=72 seconds.
Shutter speed
 While the interval determines how much span passes between frames, the shutter speed determines how motion within each frame is captured. A faster shutter speed (like 1/500th of a second) will freeze motion, giving your final time lapse a crisp, slightly staccato look like individual frames of a comic book. Using a slower shutter around one second or longer adds motion blur to each frame. That blur turns moving water into silky ribbons and car lights into long, glowing trails, so the final video feels smooth and animated instead of a jumpy flipbook of stills.
Framerate
 The framerate is the final video’s playback speed, measured in frames per second (fps). Standard film and TV are often 24, 25, or 30 fps. This is a post-production setting, but you must know your target when calculating your interval. If you have 500 photos, your final video will be 500÷fps=seconds long. The power to speed up the duration makes this technique a unique addition to all the different photography styles we use.
Methods for Capturing Time Lapses
The technique itself is versatile and accessible, regardless of the gear you own. You can achieve excellent results with equipment ranging from a simple phone to a professional setup. Understanding the pros and cons of each method will help you decide which is best for the project you have in mind.
Smartphones
 Modern smartphones have made time lapse everywhere. Many offer a dedicated “Time Lapse” or “Hyperlapse” mode. This is the simplest way how to do a timelapse for a casual project. The phone handles all the interval calculations and sequencing automatically, producing a video file instantly. Yet, you often have little to no control over the interval, exposure, or file type, which limits professional applications.
Action Cams
 GoPros and similar action cameras excel at tough, long-duration shoots where environmental factors are a concern. They usually offer a dedicated time-lapse photo mode, which saves high-resolution JPEGs that you can later assemble. This gives you much more control than a smartphone, allowing you to choose your interval and exposure settings.
DSLRs & Mirrorless
 This is the standard of quality and control for gold. If you want to achieve the best results, you need to be employing a DSLR, mirrorless, or a high-end point-and-shoot. You’ll also need a good tripod and, most importantly, an external intervalometer: a small device that gets inserted into your camera and tells it exactly when to fire the shutter.
Shooting with a DSLR in RAW gives you far more data than JPEGs, so you can tweak white balance, exposure, and shadows later without breaking the image. That’s a game-changer for a sunrise when the light shifts constantly. RAW lets you fix things in post instead of guessing on the spot. You can even use software to change the color of an image to add a stylistic look or correct a strange white balance shift caused by passing clouds.
Faux Time Lapses
 This is a creative post-production technique. You can take an existing regular video (let’s say 30 fps) and simply speed it up dramatically in editing software. You can speed up running or driving footage, and it looks flashy, but it’s not the same as a real interval-shot time lapse.
True time lapse is made from individual photos taken at set intervals, which gives you intentional compression and far better image quality. It’s a fun shortcut for quick effects, but it isn’t what photographers mean when they talk about the dedicated art of time-lapse. If you truly want to control what does time lapse do to deliver maximum compression and image quality, the DSLR method is the clear winner.
How to Use Time Lapse Photography for Your Projects
Time lapse isn’t just for nature documentaries; it has practical and powerful applications across many fields. Here are a few compelling uses that demonstrate the breadth of its potential.
Architecture and construction: Documenting the slow, methodical process of a building going up, a road being paved, or a historic building being renovated.


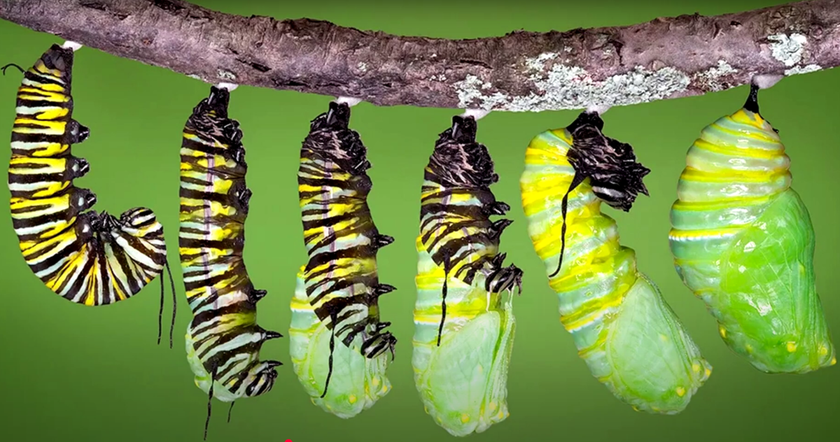
Scientific and educational: Capturing biological processes like a caterpillar turning into a butterfly, the decay of organic matter, or crystal growth.
Artistic and cinematic: Filmmakers use it to add drama and scope, often to establish a location or transition between day and night, known as the “Holy Grail” time lapse. It can also be used for creative effects, such as generating entirely new landscape elements.
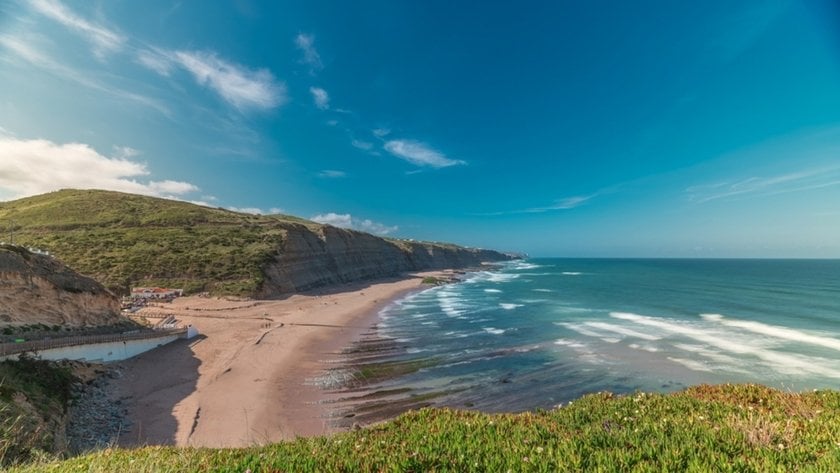
Travel and nature: Recording the massive, slow movement of tides, the erosion of cliffs, or the migration of wildlife.


Pro tip: Using AI outpainting in editing software, you can subtly expand the canvas of your time lapse stills to create a more immersive, panoramic final video if your initial framing was too tight.
Essential Time Lapse Photography Tools
 While the camera is the star, a few key accessories make the whole enterprise possible:
A sturdy tripod: Non-negotiable. Even the slightest wobble over a 10-hour shoot will ruin the entire sequence. Look for one with good weight and a robust head.
An intervalometer: For DSLR/Mirrorless cameras, this is the brain that dictates the timing. You’ll need one with a programmable timer to set your precise interval and number of shots.
Large capacity memory cards: Shooting hundreds or thousands of high-resolution RAW files demands significant storage. I always carry multiple 128GB or 256GB cards.
External power source: A battery grip or an AC adapter is crucial. A standard camera battery will never last long enough for a proper several-hour time lapse. Power management is one of the biggest challenges when you’re wondering how to do time lapse photography.
One of the more advanced techniques, often employed in shooting a fast-changing sky over a landscape, is HDR merge. This involves taking multiple bracketed exposures (one dark, one middle, one bright) at each interval, which are later combined in post-production. This keeps the bright clouds and dark shadows clear, making a lively final image that is great for dramatic skies.
The Takeaway
Time lapse meaning is simply filming a long stretch of time and squeezing it into a few memorable seconds. You get to see slow things happen fast, clouds drifting, blooms unfolding, a whole city coming alive that you’d never notice at the moment. Sure, it can mean hours of waiting for a few seconds of footage, but those seconds often feel worth every minute.