Forced Perspective: Best Tutorial
December 28, 2022
What is forced perspective in simple words? It is visual distortion when the subject of a picture appears smaller / bigger or closer to the camera / farther away from the object than it is.
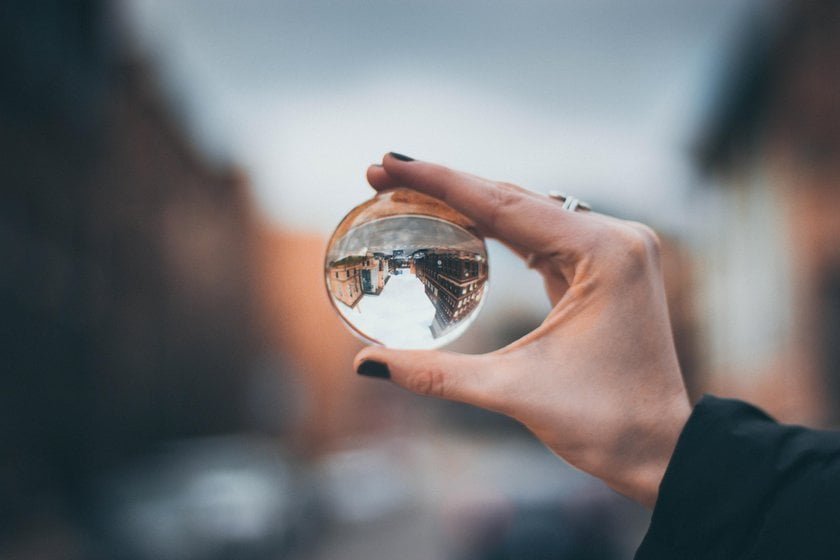 This visual distinction appears when the foreground and surroundings of the photograph seem to interact with the photograph's idea. Forced perspective photography is when the subject of an image looks smaller / bigger or closer / away than it is. Some professional photographers are so fascinated by the forced perspective that they use it to make an entire series of surrealistic pictures. Want to try this technique for yourself? Here are some tips and inspiration for your distinct perspective shots.
Understanding how forced perspective shots work
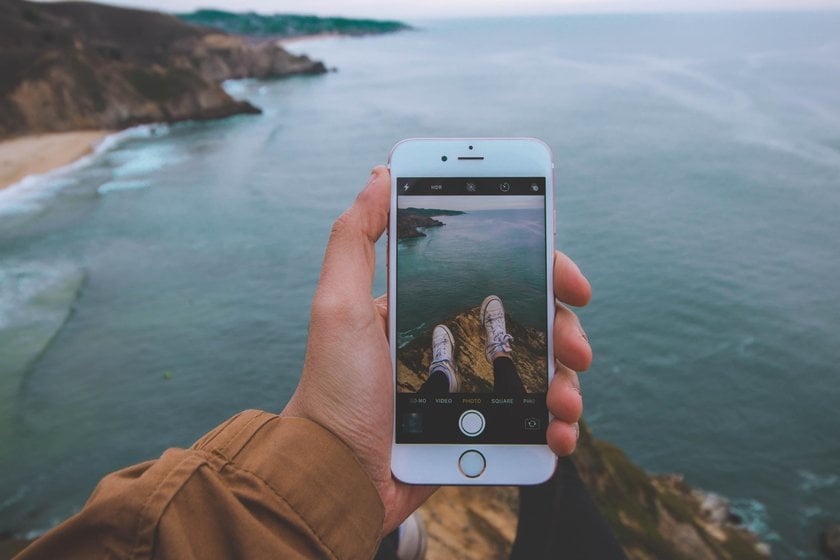
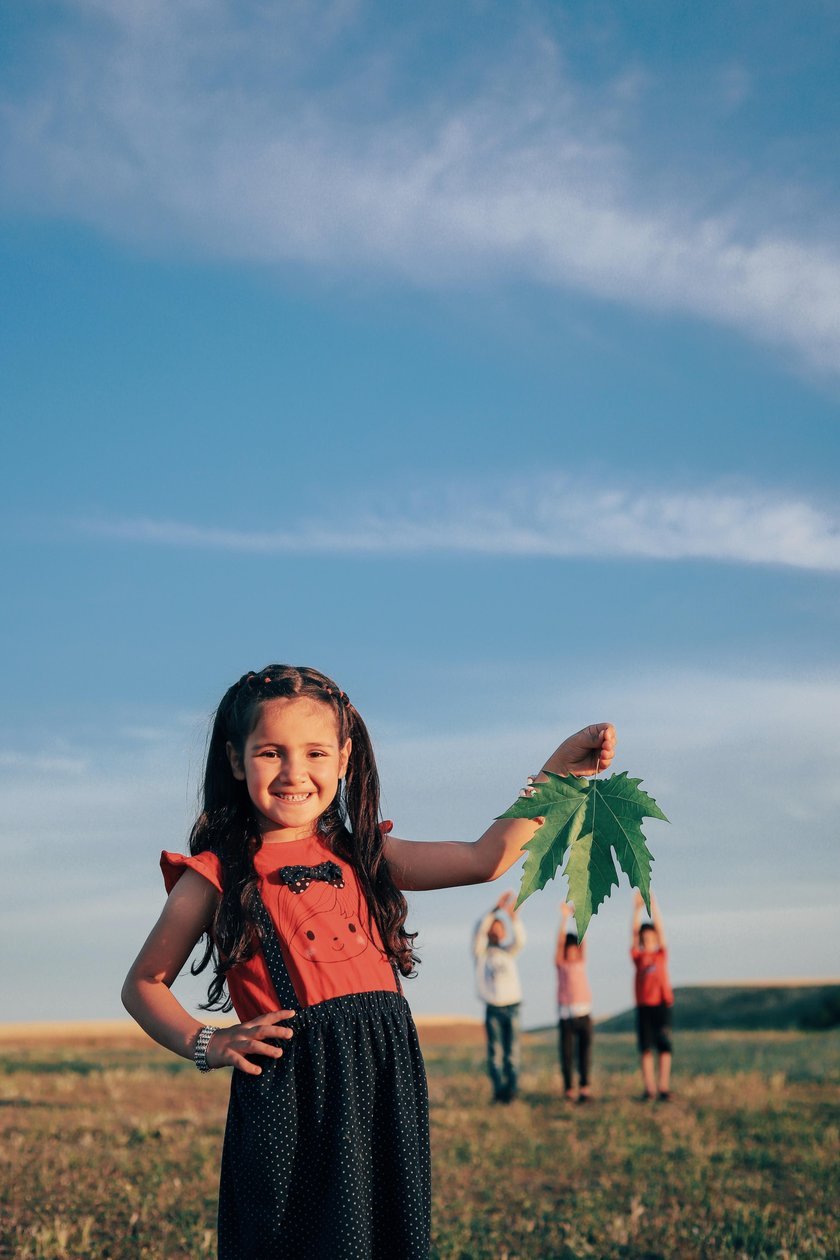 Forced perspective is the creation of visual illusions with a camera. Photographers often use this technique. Everyone has probably seen pictures with such illusions, the classic example is the bride standing on the palm of the groom's hand. In such photos we can, without using Photoshop, make big two objects look tiny, and vice versa make it look very little items look huge. This simple trick was used on the actor who played hobbits in the Lord of the Rings trilogy.
Forced perspective images are more about finding the right subject and the perfect angle for the right overlay of the item, rather than exploring the camera's capabilities. You'll probably have to crouch down, lie down on the ground, or capture what's going on from the top down to create a spectacular photo.
The simplest ideas to try are usually easier to pull off, so if you spot an opportunity, look for ways to exclude objects appear that don't complement the narrative from your composition. Try to change the size of the objects in the shoot with the scale: if you want a small object in the front plan to look larger than the details in the back plan, get close to it with a wide-angle lens or apply a zoom, if available to you. The photographer can even include himself in the composition - to do this, try reaching forward to get his hand in the frame, and somehow interact with the items in the distance.
How to create originally forced perspective shots: useful tips
 Before diving, you should know, that forced photography takes time to create. You may be able to accomplish a quick, impromptu shot, but you will probably need more time to set it up and capture it.
If you're feeling rushed, the following tips won't be as effective. Give yourself time, and you'll likely come home with a great photo. For starters, a few tips:
- Use a tripod;
- Use a wide-angle lens;
- Set the aperture to f/16-f/22 to keep all subjects in focus;
- Shoot in manual or aperture priority mode. Most of the time you have to wait for place your subjects to be where you want them to be, like the location of clouds, sunset, etc. It's easier with people, you're already telling them where and how to stand. When creating your composition, make sure the shot looks natural. When taking pictures, take several shoots. Then you will have a better chance of finding a pretty shoot among the other unsuccessful ones;
- Before shooting, imagine what you are trying to achieve in the photo. Imagine a photo where large buildings seem small and the person in the frame makes it looks like a giant. Or, imagine a man carrying the Sun, or touching the top of the Eiffel tower on his shoulders. Use creativity!
Forced perspective pictures can be taken in several ways, for example:
- Choose the right lens.
Choosing the right lens is the key to photographing forced perspective.
Camera angle and wide lens will make close objects large, and it will make objects in the background with little objects visually far away.
A telephoto lens, on the other hand, will bring distant objects closer and make them larger.
- Aperture
Using a closed aperture (F/8, F/11, F/16, etc.) when taking pictures will allow you to achieve the necessary depth of field so that both the front and back plans are sharp.
Avoid using open apertures (F/1.8, F/2, F/4, etc.), the background will look blurry and the forced perspective with object effect will be unnatural.
- Live View
Use Live View if your camera has this feature. Using the camera's LCD screen, you can easily compose objects into the desired composition and see the results right on the screen.
- The Perfect Moment
If you want to create a photo with a forced perspective, especially if your photo includes nature, clouds, sun, or moon, you will have to be patient while waiting for the right moment.
Always have your camera at the ready, because interesting moments appear larger randomly and unpredictably. Don't miss your shot. Now you know another method of how to do forced perspective photography.
The easiest method is to place a person (or a person's hand) in the foreground and a (fairly) tall building in the background. This is the right approach, and when you're just starting, it's a great way to get a lot of enjoyment out of a forced perspective.
Over time, you'll begin to notice more and more photo opportunities and be able to create more complex images that include unique front plans and background subjects. Use a small aperture to keep the entire scene in focus. Now you see another way how to take forced perspective photos. To create the most effective illusion of forced perspective, you must trick the vantage point into believing that your front and back plan objects exist on the same plane. This means that your front and back plan objects should look sharp.
After all, two objects on the same plane should have an identical level of sharpness. If you just point and shoot, you will often get a sharp object in front and a blurry background (or vice versa). Instead, you should switch the camera to manual or aperture priority mode and then set the aperture to a small aperture (such as f/8, f/11, or higher). Switch the lens to manual focus, and then adjust the focus ring until you are focused on about a third of the scene. A small aperture ensures that your picture will have a greater depth of field, and by focusing the lens carefully, you can keep the entire scene (from front to back plan) in focus.
Carefully position the object in the foreground. Don't place the object carelessly. Instead, pay particular attention to the effect you are trying to create and make sure that the object in the foreground matches the background perfectly. If your object "touches" the building with an outstretched finger, your finger should be right on the edge of the object. If your foreground subject is "holding" another person in the palm of their hand, the subject's shoes in the background should line up with the top of the foreground subject's hand. If you have difficulty positioning your subject, try leaving the subject behind instead and moving your father from the camera. Use a tripod; it will hold your camera in place while you adjust settings as needed. In Live View mode, it's easy to see how the scene looks.
When creating perception photography that involves natural phenomena, animals, passing vehicles, or passersby, it's important to choose the right moment. Keep it away from the camera, observe what is happening, and try to predict what will happen in the next moment. You can create a photo with forced perspective photo ideas not only by the camera settings but also in a graphic editor. In the next section, we'll give some easy forced perspective photography methods to do this.
Geometry tool
 These are the five grids by which the perspective is corrected:
- Auto. The program corrects the perspective by itself.
- Level. Corrects the perspective by horizontal guides.
- Vertical. Applies both level and vertical perspective corrections.
- Maximum. Corrects perspective photography both vertically and horizontally.
- Guides. You can draw your own vertical and horizontal lines for correction.
There are no universal recommendations for these modes, each particular photo may be suitable for its variant.
Sliders that you can use to correct your forced perspective ideas yourself.
You can apply them after the alignment modes or instead of them.
- Vertical Alignment;
- Horizontal Alignment;
- Rotate the canvas;
- Changing the aspect ratio;
- Scale. You can apply it if the image has shrunk as a result of the corrections and there are empty areas on the canvas;
- X shift and Y shift. The sliders allow you to move the image left and right, as well as up and down. You may also need these corrections if there are blank areas on the canvas.
Additional tool buttons:
- Undo all transformations;
- Grid. You create a frequent grid on which it is convenient to manually correct the perspective.
In this way, you can make forced perspective photography at home.
How to fix the perspective of a JPEG photo in ACR
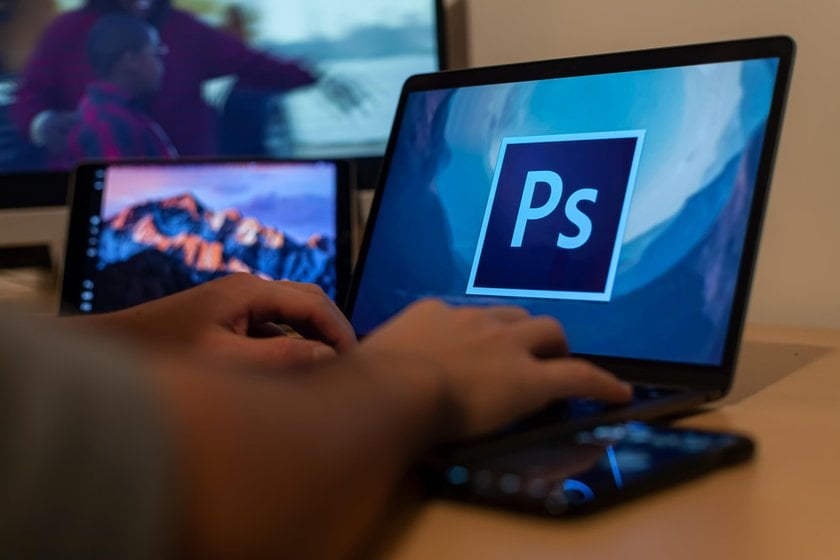 You can open any JPEG in ACR. Here's how to do it:
- Open the desired JPEG in Photoshop.
- Create a duplicate of the layer. To do this, right-click and choose the Layer Duplicate command or press the Ctrl + J hotkey.
- Click on the resulting copy with the mouse. After that, go to the Filter - Camera Raw Filter menu.
- Go to the Transform tool.
- After correcting the perspective, click Finish or Enter. ACR will close and the changes will be applied to the copy of the layer.
Be sure to keep track of which layer you are standing on. The original must always stay intact.
You can use the tool to correct and make simple forced perspective photography of an entire image or to correct individual layers if you're making a collage. The principles are the same in both cases.
- Open the file and duplicate the layer (Ctrl + J).
- Left-click on the created copy of the layer to select it.
- Go to the Edit / Edit - Free Transform menu.
- Press Ctrl + T to activate the Free Transform function without going to the program menu.
A frame will appear around the image. Now you can move the duplicate layer, stretch it, shrink it, and correct the perspective.
To use Photoshop's free transform to correct perspective, right-click. From the drop-down menu, find the Perspective button.
Experiment! In some situations, the Distort feature might be a good way to correct distortions.
Shift the image, picking it up with the left mouse button at the corners to correct the perspective.
It's perfectly normal that after you correct the perspective, the canvas changes so that the picture has to be cropped. It changes in size and makes the original layer visible. Now we will tell you another easy beginner-forced perspective photography method, but with another graphic redactor.
Luminar Neo– image editing solution for perspective photography
We discussed how to change perspective with Photoshop tools, but the same can also be done with the Luminar Neo photo editor! To do this you need to follow a few simple steps:
- Open Develop tab
- Go to Optics or Transform tool
- Shift perspective or fix Lens Distortion in a few slider moves
Now you are ready to realize your forced perspective photography ideas with Luminar Neo!
Final thoughts
With the above-mentioned photography tricks, tools, and props, you can create your surrealistic paintings or small but amusing create optical illusions. Don't be afraid to experiment and invent your techniques and tricks of creative perspective photography!