April 18
25 min. to read
How to Photograph the Moon
However, to capture such beauty, one needs technical know-how, and this guide is intended to show novice or even seasoned photographers how to get amazing lunar pictures using adequate equipment and a detailed comprehension of lunar phases. Come on, we’ll venture into those heavenly skies shoulder to shoulder!
Mastering Moon Photography
Capturing the moon's magnificent splendor is not as straightforward as simply pointing your camera towards the sky. Several factors and considerations make moon photography unique, requiring a certain set of techniques and an understanding of its various phases. Let's delve deeper into the intricacies of this celestial subject.
The Uniqueness of the Moon: Bright, Fast, and Far Away
At first glance, the moon might seem like a static and unchanging subject in the sky. However, it's deceivingly dynamic. Its brightness contrasts sharply with the night sky, it moves surprisingly fast across the horizon, and it's incredibly distant despite its apparent size to the naked eye. This combination presents both challenges and opportunities for photographers. Understanding these unique characteristics will equip you to capture the moon in all its glory.
Phases of the Moon: Which One is the Best for Photography?
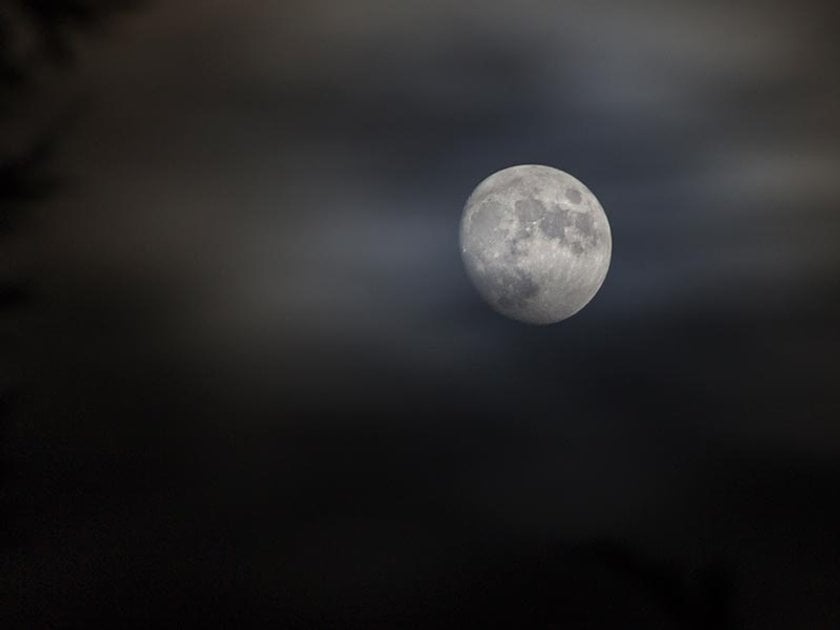
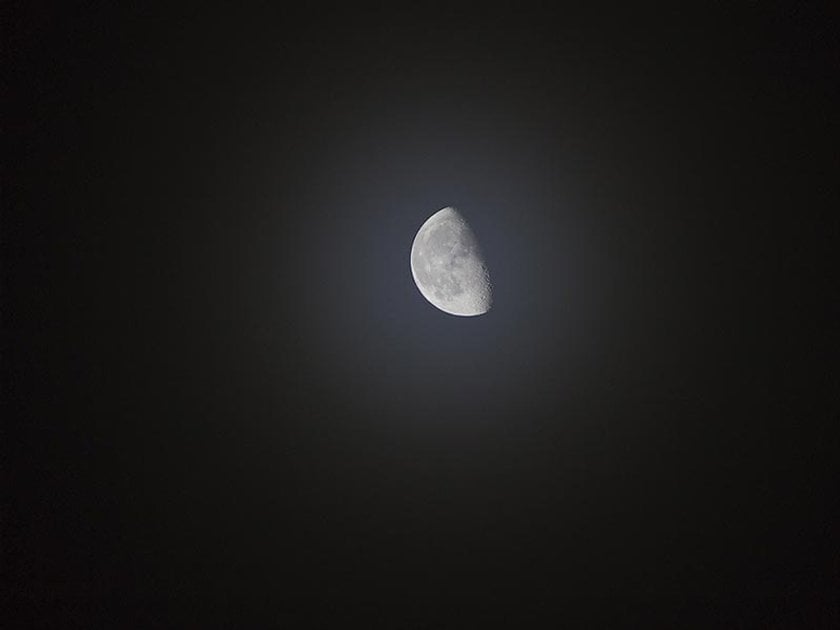
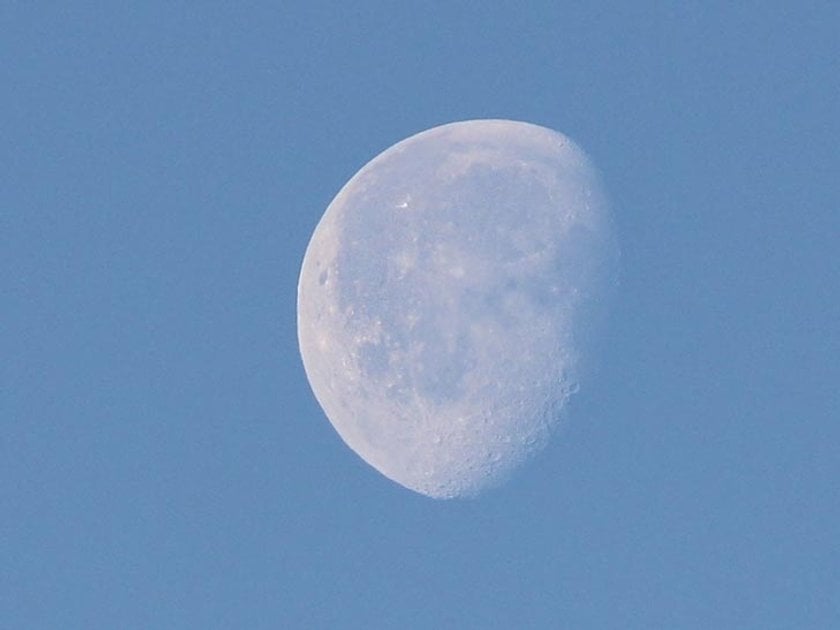
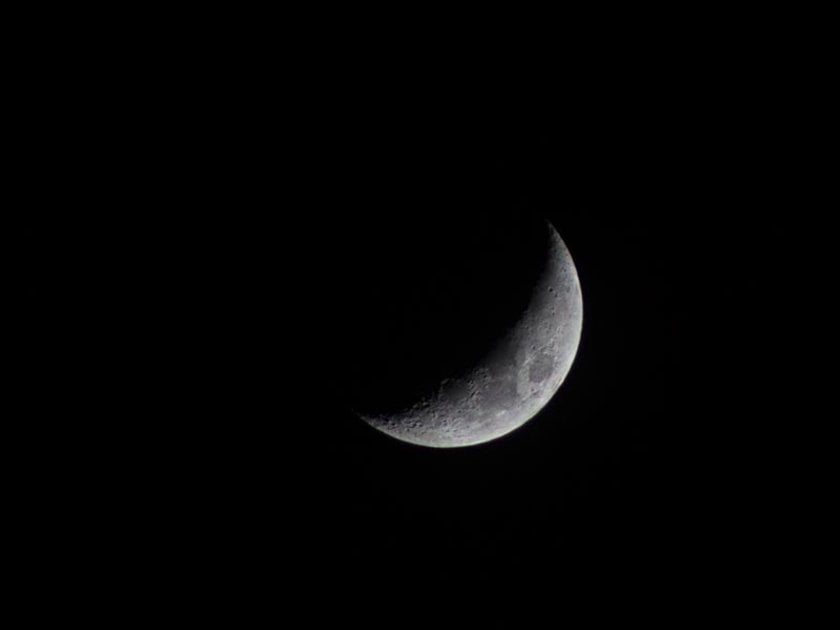
From the slender crescent of the new moon to the radiant disk of the full moon, our lunar neighbor goes through various phases each month. Each phase offers a different face, mood, and context for photographers. While the full moon is breathtaking, other phases can lend themselves to more nuanced and intricate shots. In this section, we'll explore the distinct beauty of each phase and offer insights on how to photograph them effectively.
Supermoon and Lunar Eclipse: What Makes Them Special?
Certain lunar events, like the supermoon and lunar eclipses, have a way of grabbing global attention—and for a good reason! A supermoon, with its enhanced size and brilliance, is a spectacular sight, while a lunar eclipse, with its dramatic shades of red and shadow, provides a rare and mesmerizing spectacle. But what causes these events, and how can photographers best capture them? We'll dive into the science and the strategies behind photographing these extraordinary lunar moments.
Planning Your Moon Photography Shoot
Moon photography involves more than spontaneity and luck; it involves meticulous planning and a deep understanding of celestial movements and earthly factors. The right preparation can make the difference between an average shot and an exceptional one. In this section, we'll guide you through the steps to ensure you're at the right place, at the right time, with the right equipment.
Choosing the Perfect Time and Location to Photograph the Moon
The moon's appearance changes depending on its phase, the time of day, and your location on Earth. Knowing where to set up and when can be the key to capturing the perfect shot. Whether it's moonrise over a cityscape or the crescent moon amidst a starlit backdrop, the time and place of your shoot play pivotal roles. Here, we'll discuss the nuances of timing and scouting locations to maximize your moon photography experience.
Utilizing Apps and Websites for Effective Planning: PhotoPills and The Photographer's Ephemeris
With advancements in technology, photographers now have access to powerful tools that help them precisely plan their shoots. Apps like PhotoPills and The Photographer's Ephemeris provide detailed information on the moon's movement, rise and set times, and its angle relative to your location. These tools can be game-changers, allowing photographers to visualize their shots before they head out. We'll guide you on how to make the most of these platforms to ensure you're always one step ahead.
Understanding Weather Conditions: How to Avoid the Unexpected
Mother Nature can sometimes be unpredictable. Clouds, fog, or unexpected weather conditions can throw a wrench into your moon photography plans. Understanding and anticipating these conditions is essential to adjust your plans accordingly. In this section, we'll provide tips on monitoring weather patterns and making real-time decisions to ensure your efforts aren't thwarted by unforeseen challenges.
Camera and Gear: The Essentials for Moon Photography
The quest to photograph the moon brings the challenge of capturing a distant, luminous object against the vast, dark canvas of the night sky. The right equipment is essential to portray the moon's intricate details and subtle features. In this section, we'll navigate the maze of camera gear options and delve deep into the technicalities to ensure you're equipped to bring out the best in your moon photography endeavors.
Choosing the Right Camera and Lens for Clear Moon Pictures
Not all cameras and lenses are equal, especially when photographing the moon. The moon's features require a combination of a high-resolution camera and a lens with significant focal length to be captured in detail. We'll explore the options available, from DSLRs to mirrorless systems and telephoto lenses to dedicated astro cameras, guiding you toward the ideal match for moon photography.
Stabilization: The Role of Tripods in Taking Sharp Moon Photos
The moon might seem stationary to our naked eyes, but in photography, it's a moving target. Any movement, even the slightest shake, can turn a potential masterpiece into a blurry mess. Tripods play an indispensable role in ensuring stability. We'll discuss how to choose a sturdy tripod, the mechanics of setting it up correctly, and some tips on minimizing vibrations to ensure tack-sharp images.
Essential Accessories: Shutter Release Cable and Equatorial Tracker
While the camera and lens are the show's stars, there are supporting actors in the form of accessories that can elevate your moon photography game. A shutter release cable helps minimize camera shake during longer exposures, and an equatorial tracker can compensate for the moon's movement, allowing for longer exposure times without blur. Here, we'll delve into these accessories, explaining their functions and guiding you on their effective usage.
Best Lens and Camera Settings for Moon Photography
Setting up your camera correctly can distinguish between a mediocre shot and a stunning photograph of the moon. From aperture and shutter speed to ISO and focus, each setting plays a crucial role in determining the outcome of your image. In this segment, we'll provide a comprehensive guide on the best settings, offering tips and tricks to optimize your camera's performance for capturing the moon in all its glory.
How to Photograph the Moon: Step-by-Step Guide
Capturing the ethereal beauty of the moon is a dream of many photographers. However, its luminosity, distance, and rapid movement pose distinct challenges. We've compiled a comprehensive step-by-step guide to aid you in this lunar photographic journey, from setting up your camera to mastering the final shot.
Setting up Your Camera: Exposure Metering, Focusing, and Stabilization
Exposure Metering: Set your camera to spot metering mode. This will help you measure the light just from the moon, avoiding the dark sky around it, which can skew your exposure readings.
Focusing: Use manual focus. Autofocus might struggle in low light conditions or might focus on the nearest object. When in manual, zoom in (either with a telephoto lens or by using your camera's digital zoom) and adjust the focus until the moon's details are sharp.
Stabilization: Ensure your camera is stabilized using a tripod. For additional stability, use a shutter release cable or your camera's timer function to avoid any shakes during the click.
Adjusting Camera Settings: ISO, Aperture, Shutter Speed, and White Balance
ISO: Start with a low ISO, preferably ISO 100 or 200, to avoid noise.
Aperture: A smaller aperture (higher f-number) like f/8 or f/11 will give you a deeper depth of field and sharper images.
Shutter Speed: Begin with a speed of 1/125th of a second and adjust based on the brightness of the moon and surrounding elements.
White Balance: Set it to daylight or custom white balance to avoid any color casting.
Utilizing the Looney 11 Rule for Perfect Exposure
The Looney 11 rule is a thumb rule specific to moon photography. It suggests setting your aperture to f/11 and then adjusting your shutter speed to the ISO setting. If you're using ISO 100, start with a shutter speed of 1/100th a second.
Your AI-Powered Photo Editor for MacOS and Windows
Discover Now!
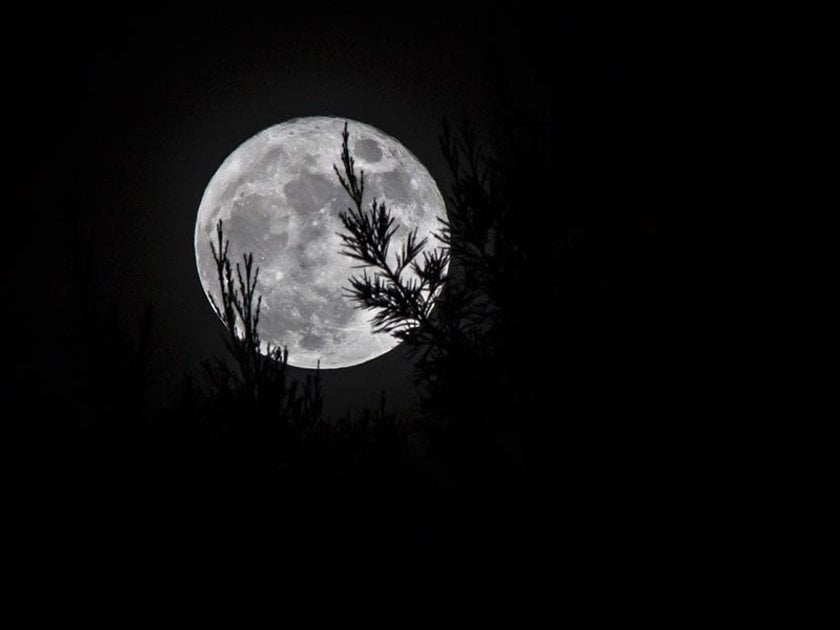
Capturing the Moon with Foreground Elements
Incorporating foreground elements like trees, buildings, or mountains can give your moon photo a sense of scale and interest. To do this:
Scout your location in advance.
Use a wider lens to capture both the moon and the foreground.
Adjust your focus and settings to ensure both the moon and the foreground are sharp.
Tips to Avoid Glare and Ensure Sharpness in Moon Photos
Lens Hood: Use a lens hood to reduce lens flare and unwanted glares.
Shoot during Moonrise or Moonset: At these times, the moon isn't as bright, reducing chances of overexposure.
Bracketing: Take multiple shots with varying exposures to ensure at least one with optimal sharpness and without glare.
Use Filters: A polarizing filter can help reduce reflections and glares.
Smartphone Moon Photography: Capturing the Moon on iPhone and Android
In recent years, smartphone cameras have witnessed incredible advancements, with some now rivaling dedicated cameras. While it's true that professional cameras have inherent advantages when capturing celestial bodies, modern smartphones are perfectly capable of capturing stunning shots of the moon. Let's dive into the essentials moon photography and ensure that your phone's potential is maximized.
Optimizing Smartphone Settings for Clear Moon Pictures
Manual Mode: If your smartphone has a pro or manual mode, use it. This allows for granular control over settings like ISO, shutter speed, and focus.
Low ISO: Like with DSLRs, a lower ISO will minimize noise. Start with the lowest possible and increase only if necessary.
Turn Off Auto-Focus: Manually adjust the focus until the moon's surface is sharp. Some phones allow you to tap on the moon to focus on it.
Shutter Speed: Since the moon is a bright object in a dark sky, you don't need long exposures. Start with 1/125th of a second and adjust if needed.
Stabilization: Use a smartphone tripod or rest your phone on a stable surface to avoid shake. The timer function can further ensure no shake when pressing the shutter.
Digital Zoom: While optical zoom is ideal, most smartphones offer digital zoom. Zoom in to fill the frame but be cautious of pixelation. Use the telephoto lens if your phone has multiple lenses with different focal lengths.
Read more about this in our article “How to take pictures of the night sky on your iPhone.”
Choosing the Best Apps for Enhancing Moon Photography on Phones
Camera Apps with Manual Controls: Apps like ProCam for iPhone or Camera FV-5 for Android allow manual adjustments similar to DSLR cameras.
Editing and Post-Processing: Snapseed and Adobe Lightroom Mobile are powerful, user-friendly apps for enhancing moon photos. They allow adjustments to exposure, contrast, clarity, and sharpness, among others. You can also use any online photo editor.
Dedicated Astronomy Apps: NightCap Camera for iPhone specializes in low light and astrophotography, making it a good choice for moon shots.
Planning Apps: While also available for other devices, PhotoPills and The Photographer's Ephemeris have mobile versions. These can guide you in finding the moon's phases, rise and set times, and optimal shooting locations.
Post-Processing Techniques: Editing Your Moon Pictures
The magic of moon photography often extends beyond the click of the shutter. In the digital age, post-processing plays a pivotal role in translating what you saw and felt into the final image. It allows photographers to enhance, correct, and even transform their lunar captures. Dive in as we explore the post-processing avenues available to make your moon photos truly shine.
Enhancing Your Lunar Photos with Software: Experience the Power of Luminar Neo
Luminar Neo, a free alternative to Photoshop offering a 7-day trial, is a recent addition to the suite of image editing tools. It includes features like an AI sky editor. Here’s how to optimize your moon photos with Luminar Neo:
Enhance AI: Use this tool to adjust brightness, contrast, and details automatically. While it’s AI-driven, you retain control over the intensity of the effect.
Relight AI: Adjust the highlights, shadows, and mid-tones to get your moon photo's desired depth and contrast.
Noiseless AI: Given the darkness of night shots, noise can be a challenge. The Denoise tool can help smooth out any graininess without compromising on detail.
AI Image Sharpening: This can reveal the details and textures on the moon's surface without introducing artifacts.
Layers & Masking: If you're blending images or want to apply effects to certain areas, the layers and masking features can be invaluable.
Discover the Magic of Automatic Editing
Try Enhance AICreative Processing Ideas for Unique Moon Photography
Once you've mastered basic editing, there's a world of creative possibilities to explore:
Composite Imagery: Combine shots of the moon with other elements – perhaps a cityscape or a silhouette of nature – to create compelling composites.
Monochromatic Edits: Turn your moon photo into a black and white masterpiece. This can emphasize texture, contrast, and mood.
Adding Stars: If the night was particularly cloudy or the ambient light washed out the stars, consider adding them in post for a more dramatic effect.
Glow Effects: Add a subtle glow around the moon to create a dreamy atmosphere, simulating a haze or halo.
Tonal Grading: Play with color toning to add warmth or coolness to the scene, evoking different emotions and moods.
Remember, while post-processing is a potent tool, the essence of a great photograph lies in its original capture. Use editing to enhance and not overshadow the inherent beauty of your moon shot. Always strive for a balance between what was captured and the story you wish to convey.
Tips, Tricks, and Takeaways for Successful Moon Photography
Moon photography is a captivating pursuit, blending the challenges of astrophotography with the art of landscape and portrait photography. Whether you're an experienced moon chaser or just starting out, some nuggets of wisdom can elevate your lunar captures. Read on as we decode the secrets of moon photography.
Composition Tips: How to Make the Moon Look Bigger in Your Photos
The moon, although a dominant night sky object, can appear quite small in photographs. Here's how to play with perception:
Foreground Elements: Use trees, buildings, or people in the foreground. This adds scale and makes the moon appear larger relative to them.
Telephoto Lenses: Longer focal lengths compress the scene, making the moon look more substantial than other elements.
Shoot During Moonrise or Moonset: When the moon is closer to the horizon, it can appear larger due to the "moon illusion".
Use Perspective: Position yourself further from foreground objects and use a telephoto lens to zoom in. This will magnify the moon.
Overcoming Challenges in Moon Photography: A Summary of Steps
Tackling Motion Blur: The moon moves! Use a fast shutter speed and a stable tripod.
Managing Brightness: The moon is bright against a dark sky. Employ the Looney 11 rule or bracketing techniques.
Achieving Sharp Focus: Manual focus is often more accurate than autofocus for moon shots.
Battling Atmospheric Distortions: Shoot on clear nights and avoid times when the moon is too low in the horizon.
Inspiring Moon Photography Examples
Immerse yourself in some iconic moon captures by photographers like Ansel Adams, Michael Kenna, or check out dedicated platforms like Instagram and 500px for contemporary moon artistry. These visuals not only inspire but also teach through observation.
Advanced yet easy-to-use photo editor
GET LUMINAR NEO NOWConclusion: Enjoying the Beauty of Lunar Photography
Moon photography is not just about capturing an astronomical body; it's about capturing a mood, a moment, and the mysteries of the universe. Embrace the challenges, for they lead to growth. Experiment with techniques, be patient, and most importantly, enjoy the process. Every shot, whether successful or not, adds to your journey as a photographer. The moon, with its phases, will always be there, waiting for your next adventure.
FAQ
What are the Best Settings for Different Phases of the Moon?
1. Full Moon
Because the moon is fully illuminated during this phase, it's quite bright.
ISO: 100
Aperture: f/8 – f/11
Shutter Speed: 1/125 to 1/250
2. Crescent and Half Moon
These phases are not as bright as the full moon, so you might need to use slower shutter speeds or wider apertures.
ISO: 100 or 200
Aperture: f/5.6 – f/8
Shutter Speed: 1/60 to 1/125
3. New Moon and Eclipse
These phases will be the darkest, so settings will vary especially during an eclipse.
ISO: 200-400 (to capture surrounding stars during new moon)
Aperture: f/4 – f/5.6
Shutter Speed: varies, depending on the desired exposure during an eclipse, might be longer.
How to photograph the moon with clouds?
When the moon is veiled by clouds, its brightness can still pierce through, creating a beautiful, moody scene. Here's a basic guide:
ISO: 200-400 (You may need higher sensitivity due to reduced moonlight.)
Aperture: f/5.6 – f/8 (A wider aperture can help capture cloud details.)
Shutter Speed: Varies, start with 1/60 and adjust according to the desired exposure of the clouds.
Tip: Try taking multiple exposures to capture details of both the moon and the clouds, then blend them in post-processing.
How to photograph the moon with a telescope?
Using a telescope can give you incredibly detailed shots of the moon's surface.
Mount your camera: Use a T-ring and T-adapter to attach your DSLR to the telescope.
Focus manually: Use your telescope's focus controls.
ISO: 100
Aperture: N/A (your telescope will effectively act as a fixed aperture lens)
Shutter Speed: Start with 1/125 and adjust as necessary.
Note: A motorized equatorial mount can help track the moon, ensuring sharp shots during long exposures.
How do you shoot the moon with a DSLR?
1. Stabilize your camera: Use a sturdy tripod.
2. Lens: A telephoto lens (300mm or greater) is recommended for detailed shots.
3. Manual Mode: This will give you control over all settings.
ISO: 100
Aperture: f/8 – f/11
Shutter Speed: 1/125 to 1/250
4. Focus: Set your lens to manual focus and adjust to infinity. Zoom in using your DSLR's live view for precise focusing.
5. Shoot: Use a shutter release cable or self-timer to minimize camera shake.
6. Post-Processing: Adjust contrast, sharpness, and clarity in software like Lightroom or Photoshop to bring out details.
 >
>
