Double Exposure Photography: Combine Creativity and Tech Skills
January 01, 2020
Learn how to shoot double-exposure photography with this in-depth guide. Transform your pictures like a magician for extraordinarily creative results.
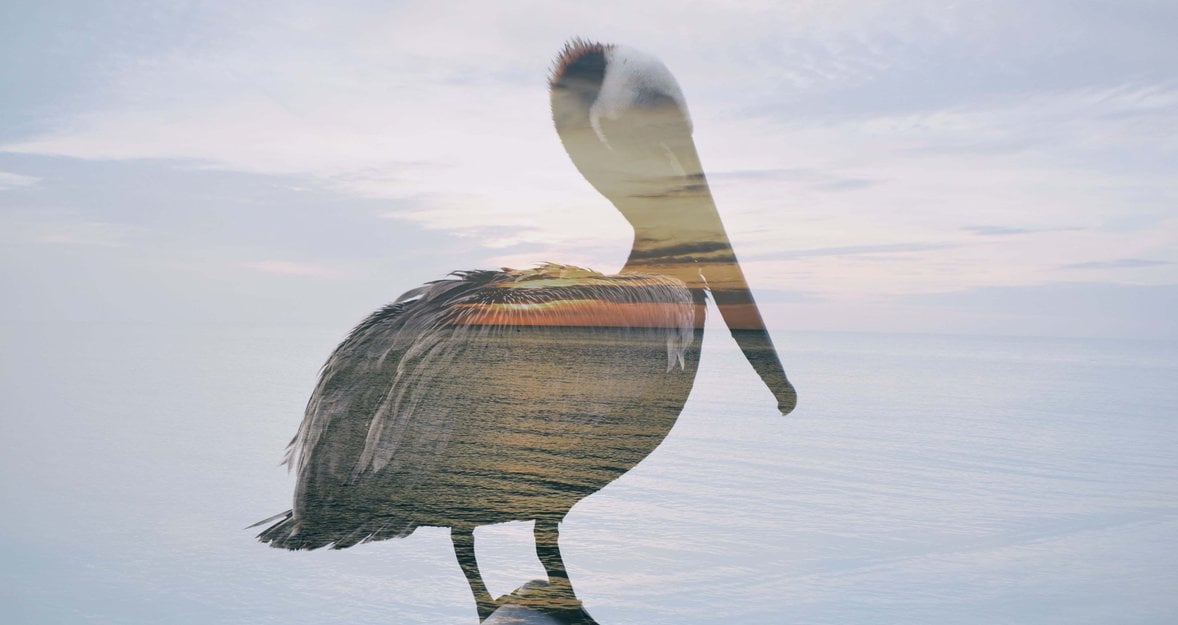
What is double exposure? Learning new photography skills can elevate your art to unbelievable creative heights. For example, with the help of double exposure photography, you can merge the sky and a human silhouette, a great textured background with an animal, or seashells with the surface of the moon. In technical terms, taking double exposures means overlaying or superimposing two exposures in one frame. This technique lets you add drama and creativity, set a certain mood, or even achieve an unexpected effect that can move your viewers. The possibilities are truly limitless.
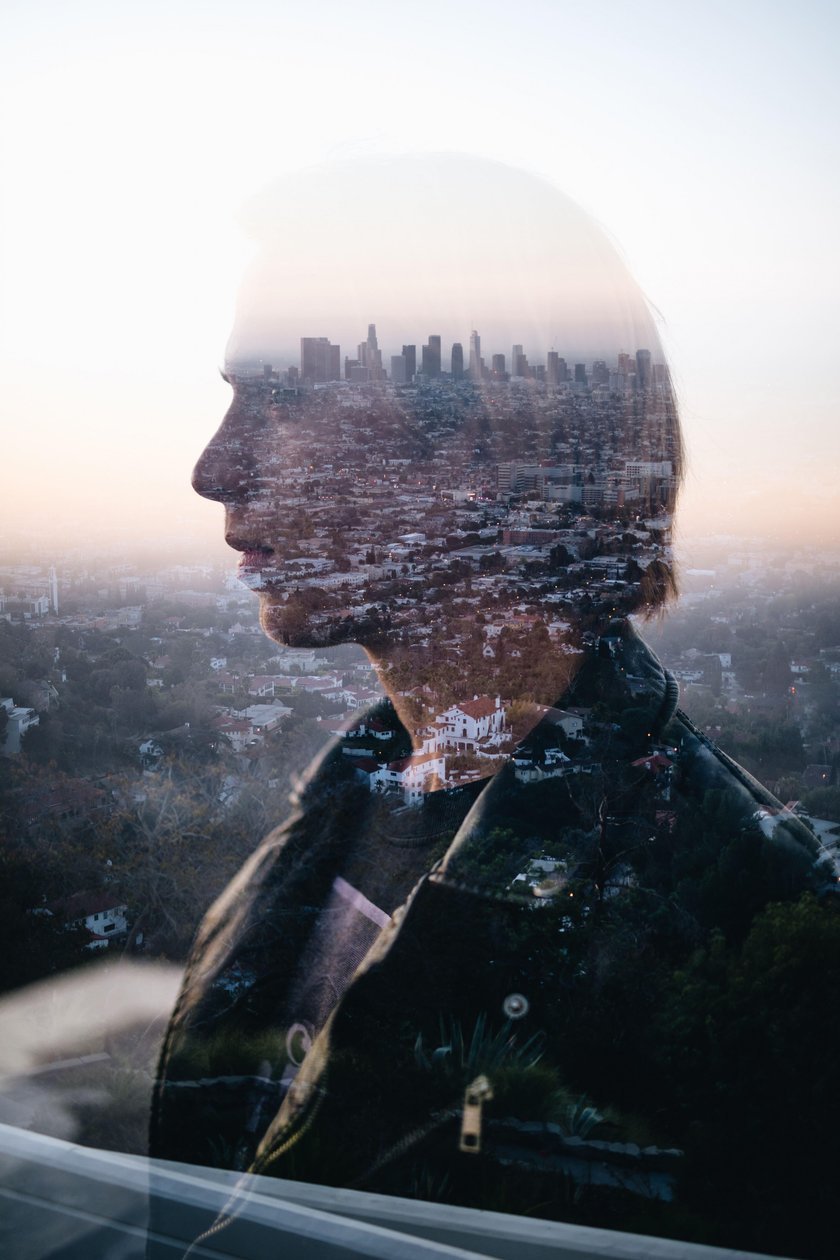
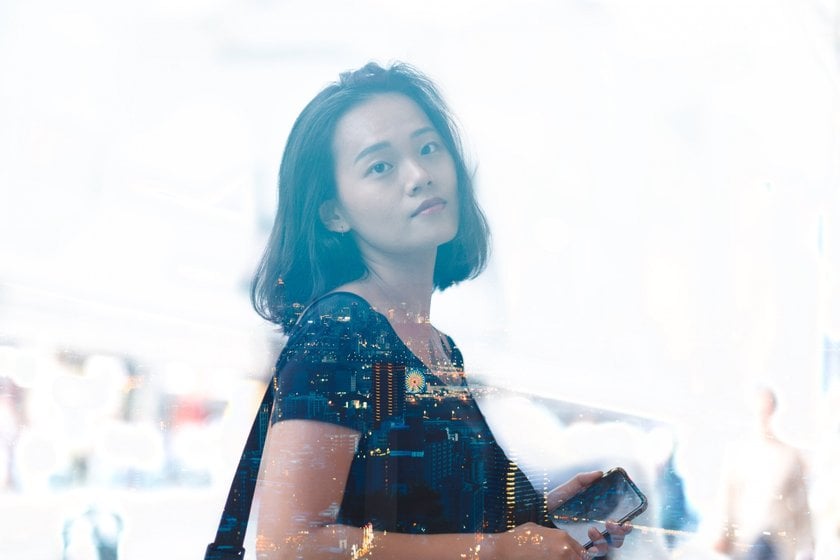 Photo by Evgeny Tchebotarev
 What is double exposure photography?
The double exposure definition is when two photos are combined into one. You can create stunning stylistic effects and wonderful looks when you apply the double exposure technique to your photos. How does it work? You can take double-exposure photos directly in your camera (if your equipment supports this feature) or apply this stunning effect in post-processing using Luminar Neo or another photo enhancer.
Luminar Neo lets you store, organize, and edit your photos to achieve stunning results with the help of layering and textures. And the best thing? You can try Luminar Neo for free right now. Just click the button below.
In-camera double exposure
In-camera double exposure isn’t always done in post-processing. Some digital cameras have built-in features to create the double exposure effect, so there’s no need to look for it elsewhere. Here are some models that include this feature:
- Canon EOS-1D X, EOS 5D Mark III, EOS 7D Mark II, EOS 6D, and EOS 70D
- Most Nikon DSLRs
- Olympus OM-D line
- Fujifilm X-Pro1/2, X-T1/2, and X100
- Sony A6X and A7
Apart from the camera, depending on your skills, you may also need:
- a shutter release cable
- a flash
- a tripod
- a black or white cloth to use as a backdrop.
Quick guide
Find out where your camera’s settings are. Familiarize yourself with how to do a double exposure in the camera. Make sure to read the user guide or do some research online. After that, experiment with taking two images in one frame. Some cameras allow you to choose the base image from the memory card. When practicing, try different angles, lighting conditions, and objects, and turn your photos into pieces of art.
Post-processing photos
If you don’t want to fuss with your camera’s user manual for too long but would rather learn a new skill on the computer and experiment with a wide variety of photos, select the best photo editing software for your workflow. You can practice double exposures in Photoshop, Luminar Neo, or another program that suits your workflow. It’s not hard to edit your photos to perfection with the right double-exposure tutorial. Apart from the multitude of effects that you can achieve, you can also experiment with colors, contrast, and saturation, and can undo your changes quickly if you don’t like the result. Photo editors allow you to refine your photos in a variety of ways.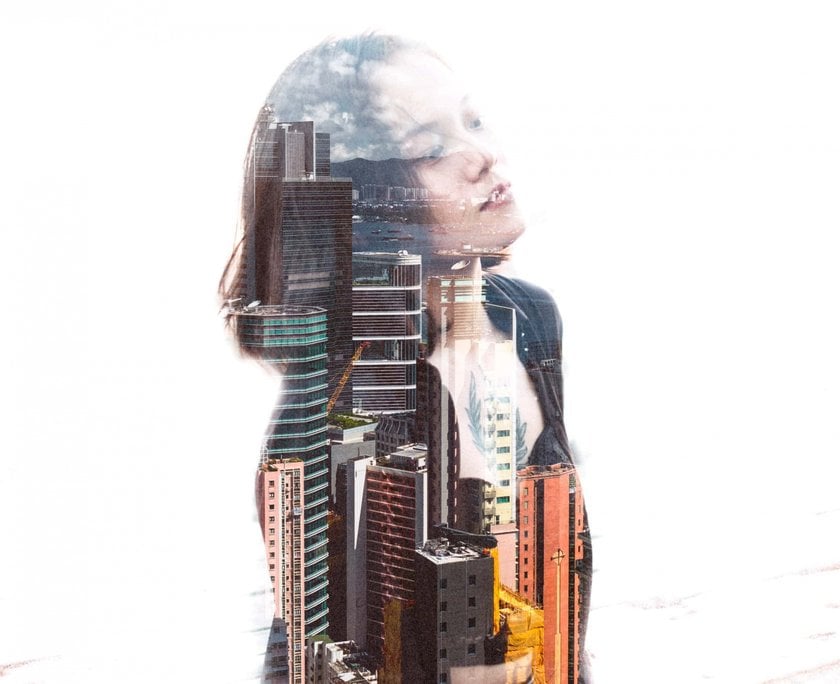 Photo by Evgeny Tchebotarev
Double exposure film photography
Double exposure photography can be done with an old-school camera on film. Indeed, it all started with film photography, where you could rewind a film, then shoot over the same frame again. A tip to remember for double-exposure film photography is that since you’ll be exposing the film twice, you should underexpose it by one stop. Once you’ve adjusted your camera’s settings, shoot one whole roll of base images. After finishing the roll, rewind it and reload. With actual film, it’s harder to make sure which base photo you’re using and adjust the settings so you completely love the results, so it’s great to take a pen and paper and describe each base photo on your double exposure film roll. Then take the second batch of images. Now you can carefully develop your film in a dark room. Even if it sounds troublesome, doing this yourself will be better, as commercial printing companies may be hesitant to print superimposed images. Take a look at this list of film cameras that allow you to bring your creative double-exposure photography ideas to life:
- Nikon FM/FE/FA FM series
- Canon AE-1
- Konica T3, T3N, and T4
- Contax 139 and 159MM
- Minolta XD, XE-1, and XE-7
In this article, however, we’ll focus on modern digital cameras. Unless you’re a huge photography geek, you’re more likely to shoot digital.
Techniques for double exposure portraits
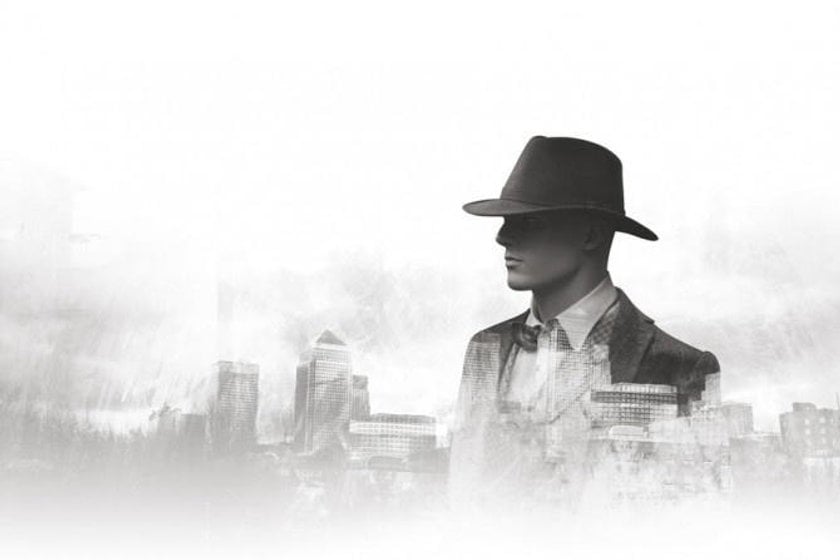
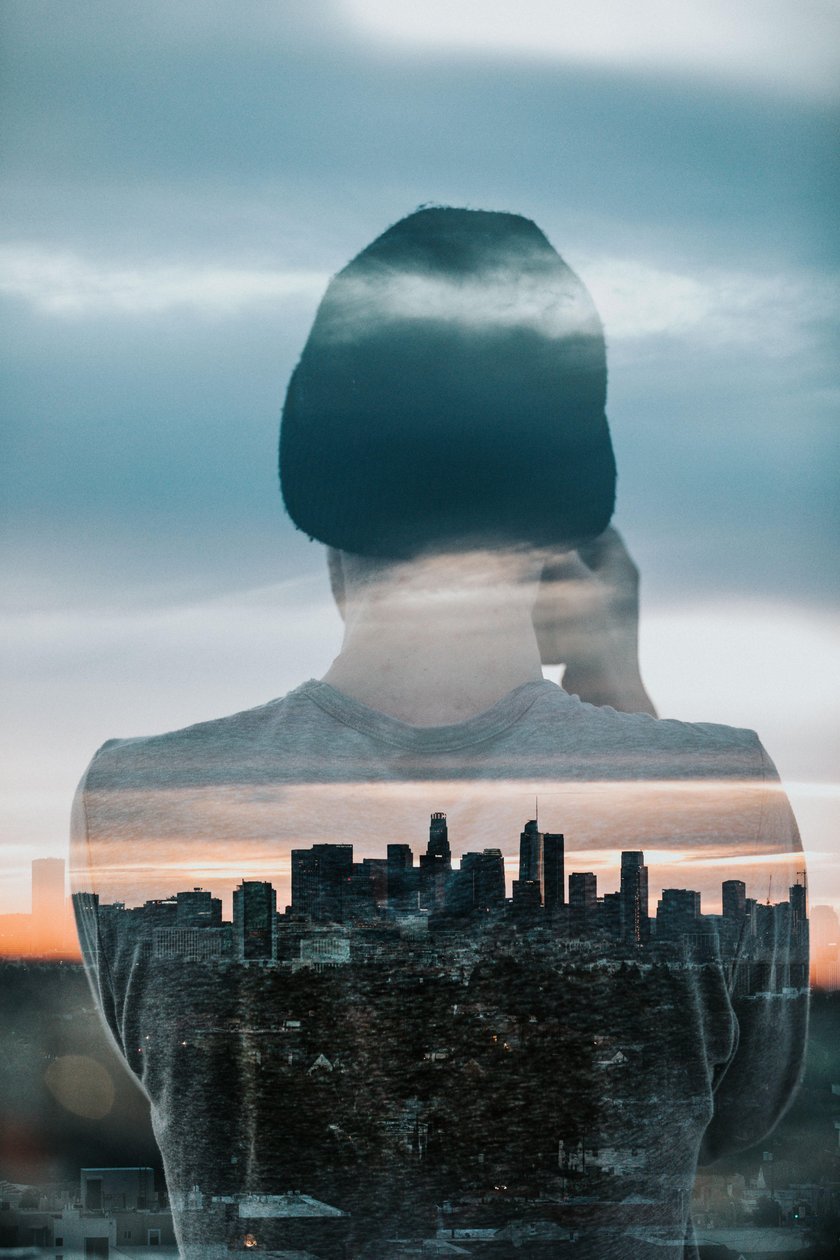
Silhouettes
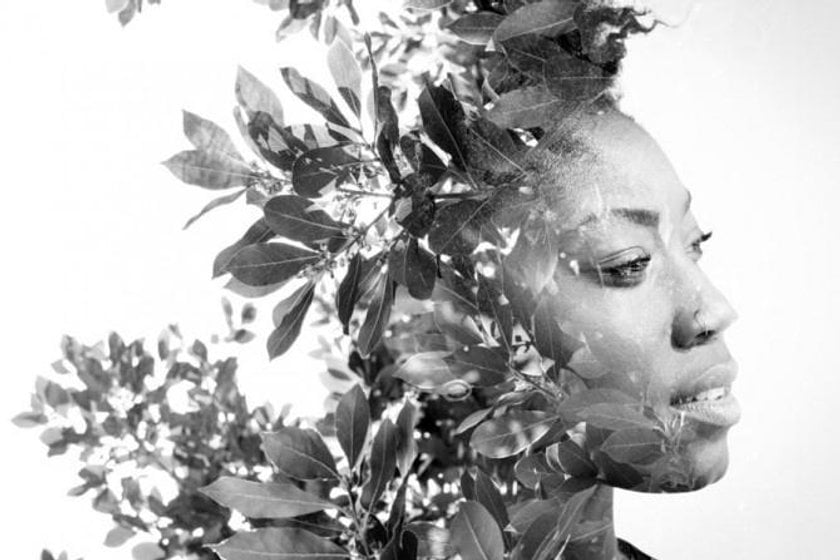
 To create some of the most popular types of double exposure portraits, just take a very underexposed photo of a person. For example, take a photo against a lit background or a white piece of cloth. Then you can add any background you want: a forest, an ocean, or even just a brick wall can work well for portrait backgrounds. By experimenting, you can find what kind of effect you like most: dramatic contrasts or a soft blurring (almost blending together) of images. You’ll see that the subjects in your photos look like subjects in creative portraits, which adds artistic value to your images.
Merge two faces
For stunning double exposure portraits, you can merge two people’s faces or even the same person’s face two times. By merging two photos of a person’s face with different expressions, you can create a visual that’s sensual and artistic, reminiscent of theater props. Merging two different people, on the other hand, can give you a range of effects, from comic to dramatic. An old woman’s face merged with a little girl’s can remind us of speeding time, while a scarred man’s face and an undamaged one can make us feel deeply about the tragedy of war. This is no longer two separate photos, but a single story. Make sure that the lighting and contrast in the two photos are similar so that the effect doesn’t look forced and your double exposure photo editing takes less time.
Puzzle pieces
Create unexpected results by blending different parts of photos. You can use your double exposure Photoshop skills to place two people back to back, as if they’re bound together. Double exposure portraits are a gateway to creativity. Give a young woman flowers for hair. Merging people with animals can also create a loud statement. For example, a picture of a puma and an athlete blended together will add drama and a sense of speed, creating an analogy that’s louder than words.
Multiple exposure effects
With the help of multiple exposures, you can combine photos in many different ways, guaranteeing an unusual result. Multiple-exposure photography is especially handy if you want to represent motion. Think of an Olympic diver jumping from a trampoline, a biker doing stunts, or a skier rushing down the mountain slope. Merging a lot of photos taken from the same angle with different exposures, you can see the trail left by the subject in motion. This makes the viewer play a movie in their mind, but by using only one static image made up of multiple exposures. If you’ve already mastered double-exposure portraits, multiple exposures can elevate your portfolio.
Experiment with double exposure
There are many ways to experiment with double exposure images. We’ll give you a quick list of ideas so that you can see the full range of potential.
- Different textures give you different possibilities. Luminar 3 has prepared a whole free pack of textures that you can easily apply to any photo.
- Take photos for double exposure up close, then from a distance. Merge them for a tunnel-like effect.
- Use complementary colors in your base image and layer image to make your photo pleasing to the eye.
- Experiment with multiple exposures to create “static movies” with multiple superimposed images of moving objects or people.
- Merge two photos of the same place before and after a major event.
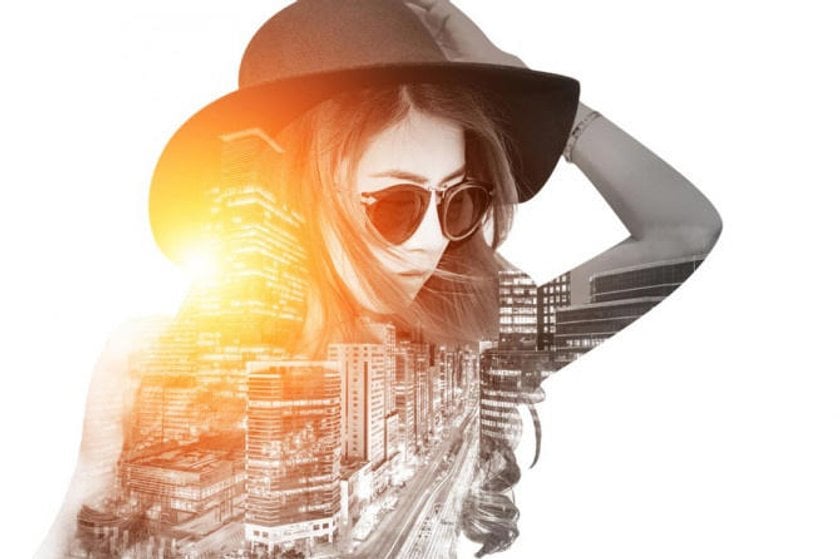
- Superimpose the natural and the technological: an insect with a gadget, the forest with a modern cityscape.
Your photos can simply have great aesthetic value, or they can also tell a wonderful story. It all depends on how you use the subjects, lighting, colors, and angles in your double exposure portraits.
Achieve double exposure in Photoshop
Double exposure in Photoshop can give you fantastic results as long as you know how to use it efficiently. To Photoshop double exposure photography, you’ll need two photos, one to be used as your base and one to be added as a layer above. Here’s a guide on how to Photoshop double exposures simply and quickly.
- Select your base photos for double exposure. Preferably, this image will have the subject that you want to keep in front and a bright, neutral background without too many details. Double exposure portraits work wonderfully for beginners.
- Take the Quick Selection tool or the Magic Wand Tool and click anywhere on the background to select it. Then go to Select > Inverse to select the main subject. This will let you get rid of the background.
- You can use Refine Edge to make sure your Magic Wand Tool has captured everything you wanted to capture.
- Now load your second image (preferably the one with the background) into a new layer. Place the image of the background above the image of your main subject. Keeping the second layer selected, press the Control key and click on the Layer Clipping Mask of the layer below. You’ll see the marching ants selection of your subject above the background layer.
- Use a Clipping mask to select the layer that contains the main subject. Make a copy by holding Control-J and drag and drop it above the forest layer.
- Right-click on the layer mask and click Apply Layer Mask in the dropdown menu. Change the Blending Mode of the main layer to Screen in the Layers panel.
- Adjust the opacity of the background layer until you’re satisfied.
- Refine your photo with all of the arsenal of tools that Photoshop has to offer.
To make double-exposed photos in Photoshop in 2 clicks, download a collection of 7 Advanced Double Exposure Photoshop Actions that will let you merge two photos fast and get a beautiful photo.
Use Luminar Neo for double exposures
If you don’t want to work on your double exposure photoshop skills, Luminar 3 is handy photo editing software that lets you easily achieve more. For example, in Luminar 3 you can create stunning double exposure photography effects with the help of layers. Upload multiple photos, then use brushes to select the amount of exposure you want each photo to have. You can do this with double exposure portraits or with landscapes, as shown below.
In short, you can create double exposures pictures with Luminar Neo in five simple steps:
1. Pick your base and layer images.
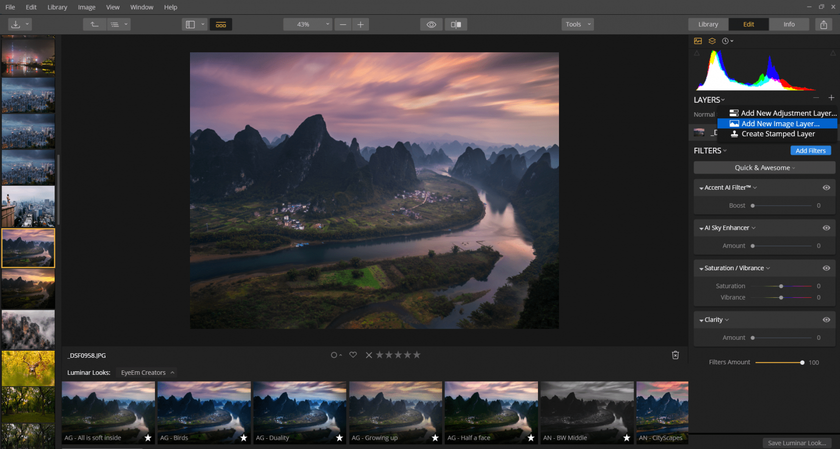
2. Open your base image and click Add New Image Layer, then select your layer image.
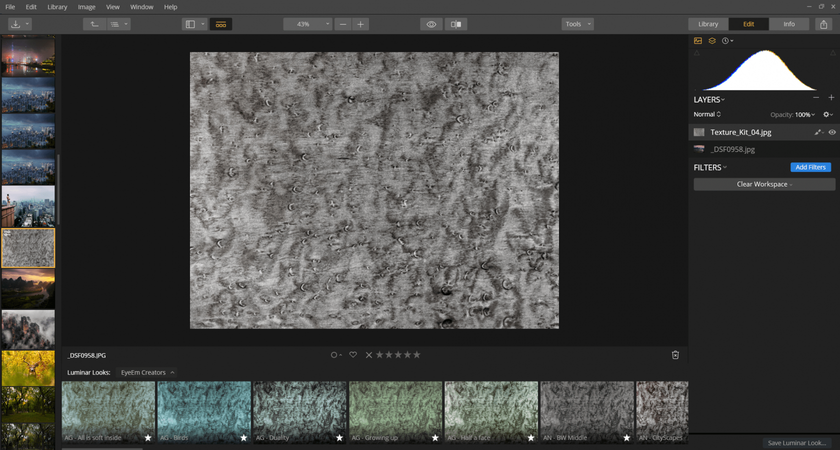 3. Choose the preferred opacity level so the two photos are superimposed.
 3. Choose the preferred opacity level so the two photos are superimposed.
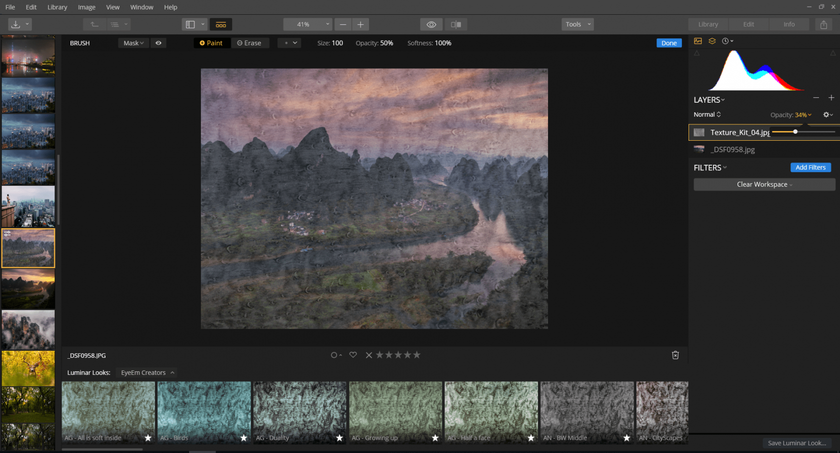 4. Fine-tune your photo using brushes until you achieve the desired effect.
 4. Fine-tune your photo using brushes until you achieve the desired effect.
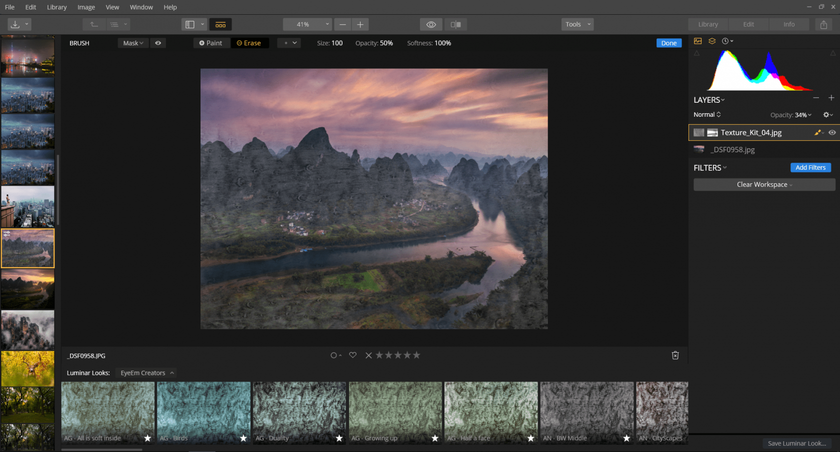
Isn’t that super simple? By adding more images, you can even create a multiple-exposure effect. Luminar Neo is accessible, user-friendly software that can help you create stunning double-exposure art in a few simple steps. It can be used both as standalone software and as a Photoshop plugin. If you’re not ready to buy, you can try Luminar Neo for free by downloading the free trial below. See how you like it.
Final words
While I was writing this text, I was listening to the album Master of Reality by Black Sabbath. In my opinion, the perfect soundtrack for such a topic because multiple exposures are such a trick that really allows you to control reality.
In the end, let's look at some famous double exposure photography examples:
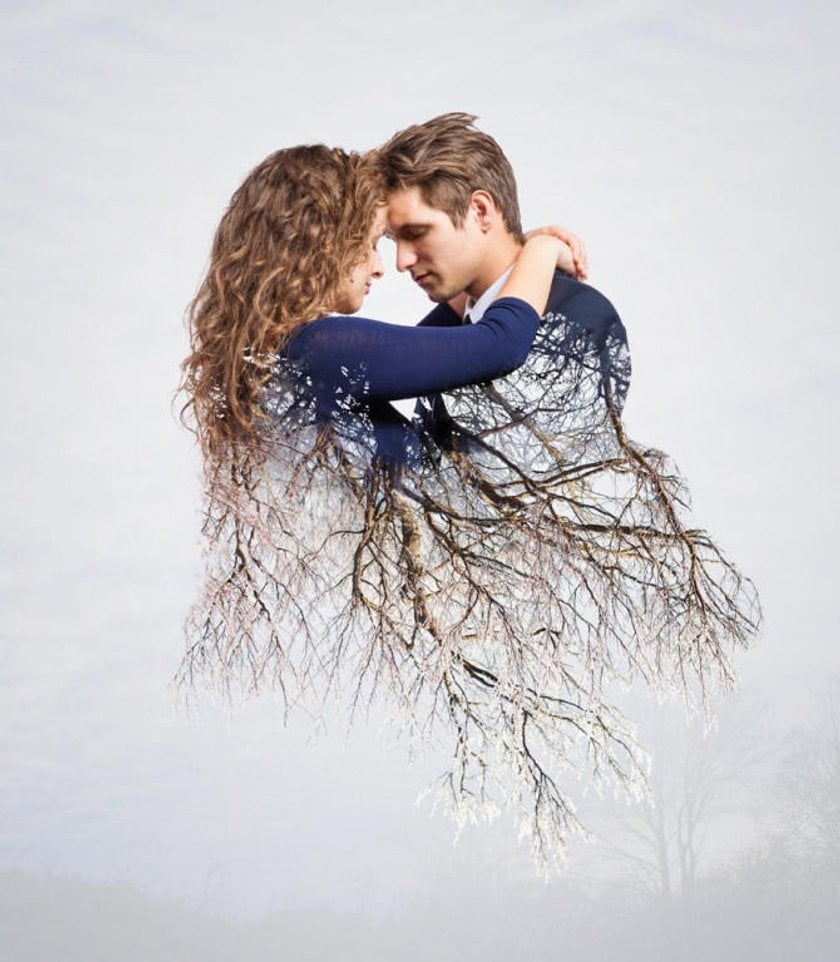
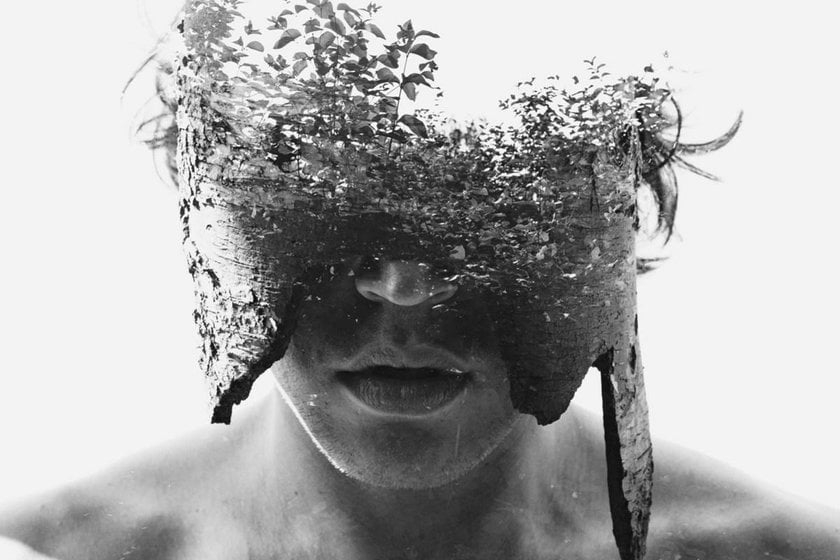 Photo by Christoffer Relander
 Photo by Christoffer Relander
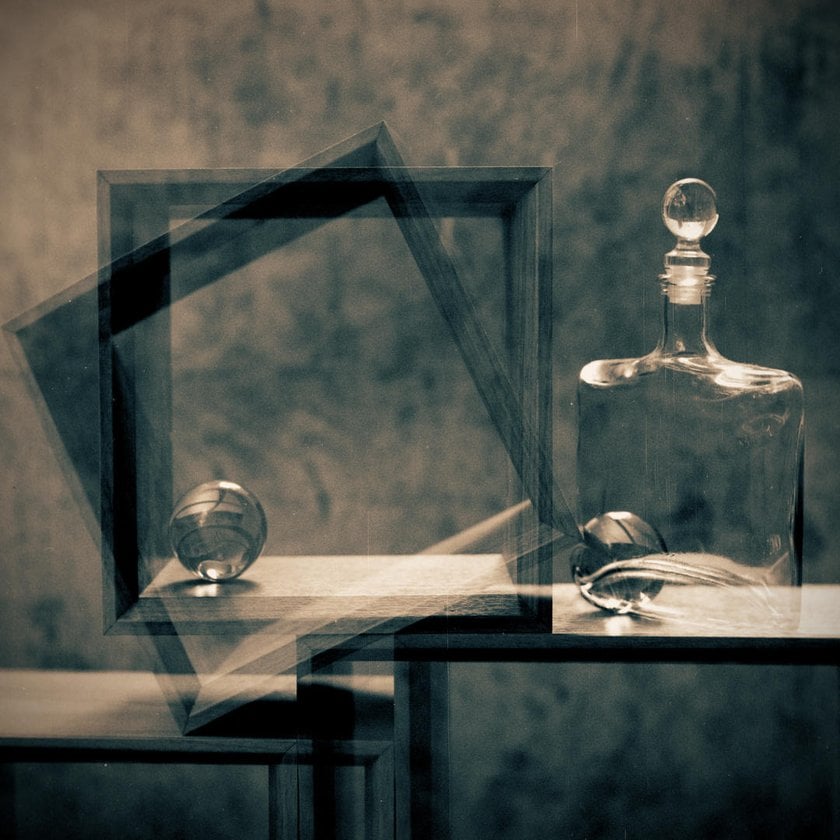 Photo by Nata Iva
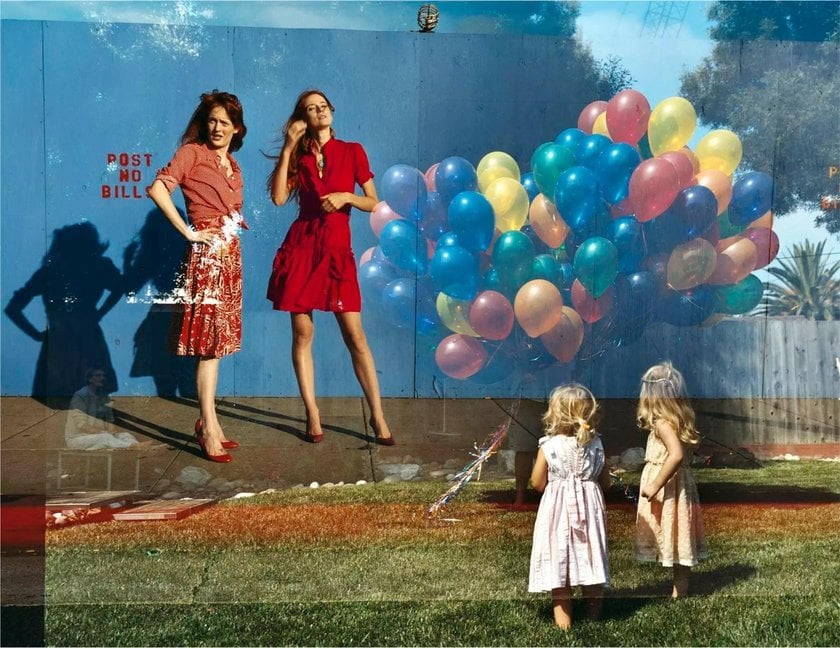 Photo by Tierney Gearon
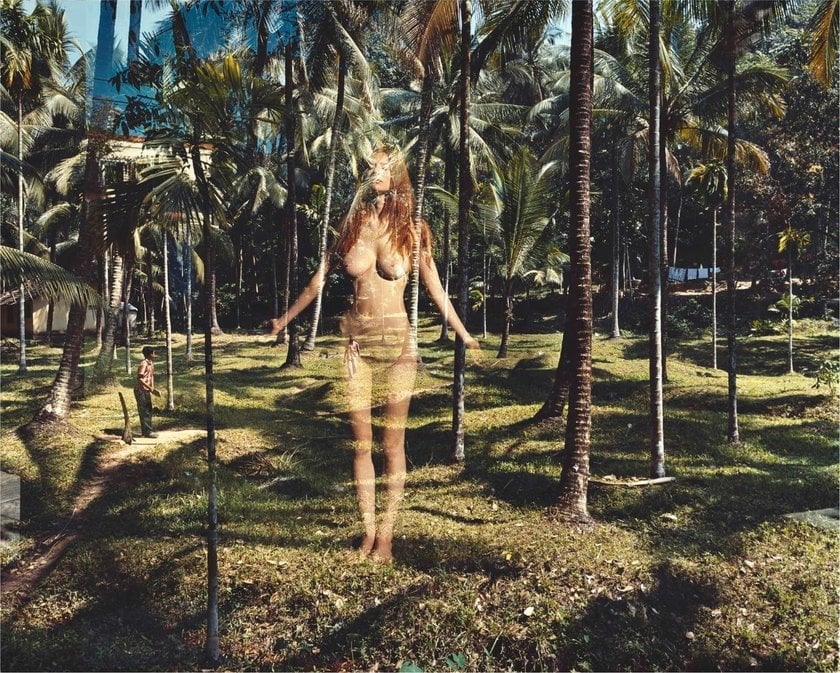 Photo by Tierney Gearon
Inspiring, isn't it? Well, now you know how to create double exposures, so grab your camera and do it yourself! I hope the tips in this article help you with that. Goodbye for now. See (write) you in the following article!